Flowers are in. Very in. Perhaps it’s merely the season, or the never-do-anything-truly-new-just-recycle-every-20-years laws of fashion. Or perhaps a world so full of little black and white iPhones is craving colour. Whatever the reason, I love this trend. Unlike neon leg warmers, it’s a good one. (Even Barbie never truly pulled those off.)
I’m going to show you a quick and easy way of making colourful flowers that have some volume and punch. Use them to decorate your hair, your clothes, your fingers, a wrapped gift, whatever you can think of. Please do leave the cat alone, though.
What You’ll Need:
- paper (of thickish, cardstock weight is best)
- a pen
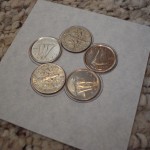
- 5 coins (all the same denomination. Such as 5 pennies, 5 quarters, etc.)
- felt in one or two colours. Maybe a bit of green for leaves, if you like.
- fabric scissors
- a needle
- thread – preferably that matches the colour of your felt
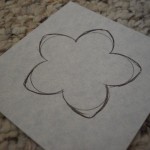
1) Place your 5 coins in a circle on your paper (there will be some space in the middle) and hold them in place while tracing around them. This is your flower template. Use different coins for different sizes of flower. You can draw the petals in to points, or leave them rounded.
2) Cut out your template.
3) Placing the template on your felt, trace four individual flowers and cut them out.
3.5) [optional] Cut one slightly larger flower from another colour of felt.
4) Thread your needle, knot the end of the thread, and set it aside.
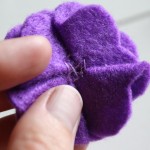
5) Take one of the four flowers and fold it in half, but NOT so that the sides match up. You want the petals on one half to line up roughly with the indents between petals on the other half.
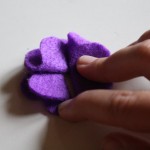
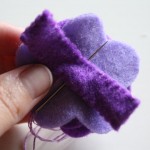
6) Take a second flower, fold it the same way, and place it perpendicular to the first flower, with half of it overlapping. The straight folded edges should face inward.
Basically, you’re going to overlap all four folded flowers the way you would a box lid if you wanted to close it flat without taping it down. If that helps.
7) Fold a third flower in half, place it parallel to the first flower, overlapping the second flower.
8) Fold the fourth flower in half and place one end overtop of the third flower, the other end underneath the first flower.
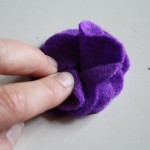
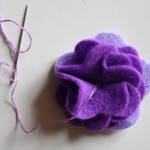
Make any sense at all? If not, my apologies, that’s what the pictures are for. It’s way clearer visually than verbally, but all and all it’s pretty straightforward.
9) Sew the four flowers together by stitching an X and then a square around the centre of the circle of flowers.
9.5 [optional] Take your other, slightly larger flower and sew it to the bottom of your four-sectioned flower.
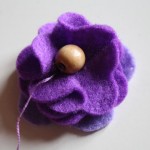
10) Sew a bead, a button, a felted ball, or whatever else you can think of to the center of the flower.
Voila, that’s it! No hemming and no fraying, since it’s felt. Also because it’s felt it will have more volume and oomph than other fabric flowers. A little more oomph is never a bad thing.
Add some green felt leaves if you like. Sew your flower onto a bobby pin, hair clip, barrette or elastic.
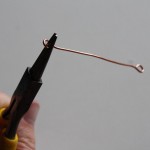
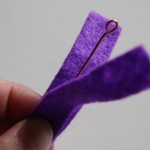
Or if you’re like me and have really short hair, make the flower into a ring and wear it on your hand. You can do this by getting some thick wire, putting a little loop in each end with some needlenose pliers (so it doesn’t poke through the felt), and sewing the wire into a long rectangular band of felt.
Then attach that to the base of your flower and you have one-size-fits-most flower bling.


