So my blog post is late this week. *GASP OF HORROR* Well, I’m pretty horrified, but I did have a good reason for not doing it yesterday: I was out in the woods climbing trees and swinging from bits of rope 45 feet in the air in celebration of a friend’s birthday. Seriously. And it was awesome. And my abs totally hurt now.
Not that I couldn’t have written this post earlier in the week. So really it comes down to me being lazy and unorganized. Plus I was busy making my friend’s birthday gift. And rescuing orphans from burning buildings, which went fine until I had to get their sweet little kitten down from a tree across the street, at which point I tore my cape on a branch, so I had to spend some time later mending it. There were some tree sap stains as well, and those are a bitch to get out.
In case you hadn’t noticed, today’s post is the third offering in my series of t-shirt modifications. I bought this shirt because how could I not?!?? And then my mom came for a visit and she helped me modify it. So today’s post is a team effort by myself and my endlessly creative, effortlessly talented and stupefyingly clever mother, and you will love it. <3
*This utterly awesome shirt is from Snorg Tees, and you can find it here.
What you will need:
- a t-shirt – either start with one that is already a good fit, or you can use this basic tutorial to make it more fitted
- fabric scissors
- pen or pencil
- straight pins
- sewing machine
- bias binding – in a colour that matches, compliments or contrasts appealingly with your t-shirt
Putting it all together:
1) Start by laying your t-shirt out flat, right side out. Notice how the cloth of the t-shirt is, essentially, folded in half right now. The back and front of the shirt make a double layer of fabric lying on the table.
2) Fold the t-shirt “in half” in this same manner, but so that the folds run down the middle of the front and the middle of the back. The sleeves should be in about the middle of either side of the shirt.
3) Pin both sides of the shirt together at the shoulder, in two or three places along the shirt’s collar, under the arm and in two or three places along the fold on the shirt’s front.
4) Decide how low a scoop you want to have in the front. In my case, this was largely determined by the printing on the t-shirt. Make a pencil mark at this point along the front fold of the shirt, and another mark at the shoulder. If you want to widen the neckline from side to side, as I did, make the shoulder mark out a few inches from the t-shirt’s collar.
5) Draw a curving line from one mark to the other.
6) Decide how low a scoop you want to have in the back. (It may be a good idea to decide this based on where your bra sits, and put the scoop just above that. Keep in mind that if you make the scoop too low you will have to put crisscross straps on the back in order to keep the shirt in place.) Now make a pencil mark at the desired low point of the scoop along the back fold, and another mark at the shoulder, matching up with the shoulder mark from the front of the shirt.
7) Draw a curving line from one mark to the other.
8) Cut along these lines on the front and the back.
At this point, depending on where exactly you drew and cut your lines, your shirt should look similar to this:
And the piece you’ve cut out of the shirt will look similar to this:
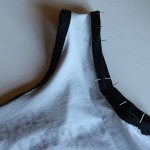
9) Make sure your shirt is still right side out. Take your bias binding and unfold it completely. Now fold over one end of the binding and pin it up against the edge of the new collar line.
Important notes:
- a) Notice how, when the bias binding is folded in half lengthwise, one side is slightly longer than the other. You will want this longer edge to be on the inside of the shirt. Therefor, the shorter edge is the one you want to pin along the collar’s edge in this step.
- b) Be sure the shirt is right side out, and that you are pinning the binding to the outside of the t-shirt – as in the side that has all the printing and such on it! This may seem a bit odd, but it will work out perfectly, trust me.
10) Pin the bias binding all the way around the collar in this manner, pinning frequently – every 1 1/2 to 2 inches. Be sure to pull the t-shirt fabric tight so the binding will sit evenly once sewn.
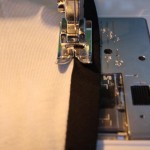
11) Sew the bias binding in place. See that first fold line on the binding? Sew along that, as precisely as you possibly can.
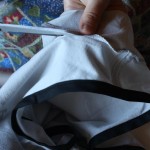
12) Fold the bias binding over to the inside of the shirt and pin it in place.
13) Keeping the shirt right side out, sew the now-folded bias binding in place. You will do this by sewing just inside the line where the bias binding and t-shirt fabric meet. Or, if you are able, sew exactly along that meeting line for the neatest possible finished look; the stitches will be nearly invisible.
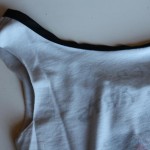
14) Iron your shirt’s new collar, getting the bias binding to sit as flat as you can. Depending on how tightly you did or didn’t pin it, it may curl outwards a bit. Some of this effect will wear off with washing.
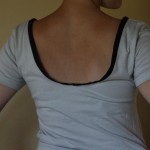
Your shirt should currently look something like this.
Now, at this point, you can stop. Leave the sleeves as they are and enjoy your new shirt. Or, especially with a shirt like this, a bit of bias binding sewn as trim around part of the sleeve may create a really neat look. Here are a couple of options:
If you’re like me and prefer to be sleeveless in the summer, follow these next steps:
15) Turn the shirt inside out and cut off the sleeves, cutting right along the inside of the seam. If you want, you can cut along this same curved line a little further in, to narrow your shirt straps. But I found that, since I’d widened the collar a fair bit on my shirt, this wasn’t necessary.
16) Follow steps 9-14, but putting the bias binding around the sleeve edges this time.
17) If (like me) you didn’t pin your bias binding tightly enough, it may bunch out a bit, especially under the arms. To fix this, just pinch the binding to the inside at one or two points under the arm and handstitch these little darts in place. And again, the binding should soften up a bit with washing and sit better.
That’s it! You now have a simple summer shirt that looks considerably more feminine and interesting than just your average t-shirt.
If you cut your scoop in the back quite low, or if you just want something more interesting back there, try putting some cute little criss-crossing straps back there. Here’s an example of this on a similar shirt my mom modified:
Notice she’s also done some insets in the waist area to help bring the shirt in while adding interest, and a fringe along the collar. I may have tutorials for these up later on. Or maybe she’ll write some for me…


