
Today’s post comes to you via special request from Twitterer thatlaurachick. Woot!

I love earrings the way some women (with more closet space) love shoes. The way some obscenely rich people love Prada bags and BMWs. The way – just to bring it down to earth a little – some people love fantasy novels and polyhedral dice; I collect them, and I have way too many.
But as with shoes, and as with fantasy novels, there are a lot of shitty, poorly made and just plain ugly earrings out there. As well as many that are over-the-top and outrageously priced. Unlike shoes and readable fantasy novels, however, it’s easy to make your own earrings.
Here’s one specific method for making incredibly lightweight, inexpensive earrings out of paper. Use whatever paper you have around the house – ticket stubs, greeting cards, invitations, flyers, little tiny leftover bits of scrapbooking paper too small for anything else but too pretty to throw away, etc. And if you don’t wear earrings, try putting these little paper circle pendants on a necklace or bracelet instead.

What you’ll need:
- pretty paper (scrapbooking paper, old book pages, atlas pages, sheet music, greeting cards, etc. It should be heavier weight than just printer paper, though. Things like wrapping paper will only work if you glue it to a sturdier base of cardstock or similar first.)
- a circle cutter or circle punch (or you can use other shapes)
- an old or cheap paintbrush
- varnish / sealant (easily obtained from any hardware store – get the water-based kind for easier cleanup)
- medium or large sewing needle
- earring hooks
- jump rings
- needlenosed pliers
- rounded needlenosed pliers

Putting it all together:
1) Start with your paper and your varnish. Put a light coat of varnish on one side of your paper and let it dry. The paper may curl up a bit – don’t worry about this. Once it’s dry, put a coat of varnish on the other side of the paper and let that dry. You can do two coats of varnish on each side, or just one – it’s up to you.

When everything is dry and you’re done with all your varnishing, flatten the paper by curling it gently in the opposite direction or leaving it under a heavy book for a while.
2) Take your circle cutter or circle punch and cut eight circles from your paper, whatever size you like. (Well, you probably don’t want to make them too big.)


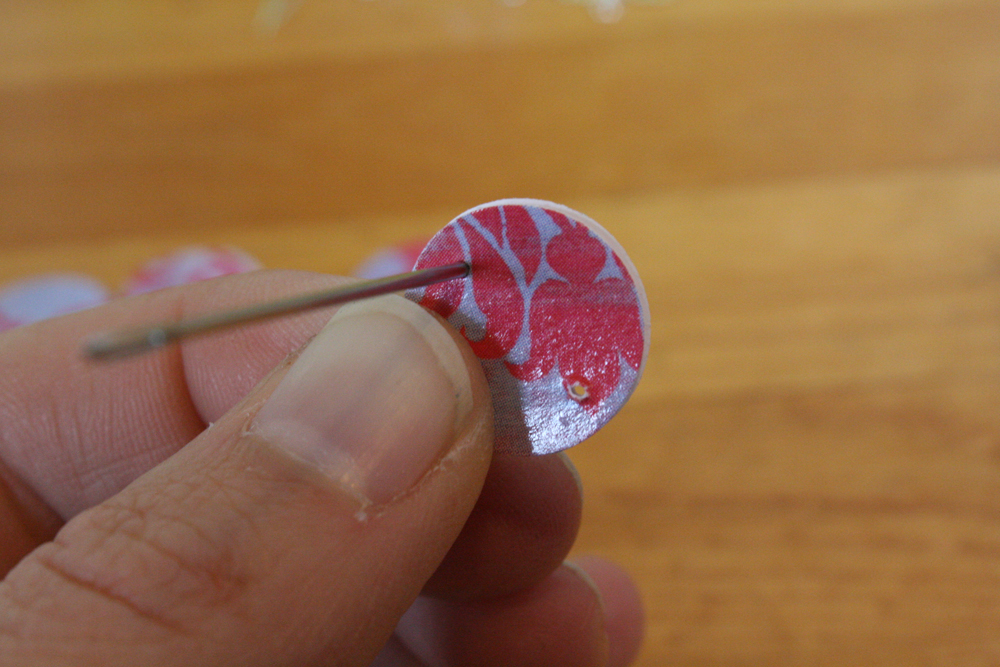
3) Determine which side of your paper is Side A (the pretty, want-it-to-be-seen side), and which is Side B. Using a needle, place two of your circles together, B sides touching, and poke a whole through them near the edge. Not too close or they may tear, but not too far in. Do this with all of your circles, in sets of two.
If you have any trouble getting the needle to go through, start with a smaller needle and then use the larger one. Like people do with gaugeing their ears – same principle. Minus the pain, of course, unless you also drive the needle through your finger, which is really not recommended.

This is the basic premise of the whole thing. From here on, I’ll explain how to make exactly the set of earrings in the first photo in this post. As you can see at the end of the post, though, there are plenty of other variations you can come up with using this basic varnished-paper-circle-with-hole-punched-in-it setup.
4) On four of your circles (that’s two sets of two) poke another hole on the opposite side from the first one. These are your top circles.

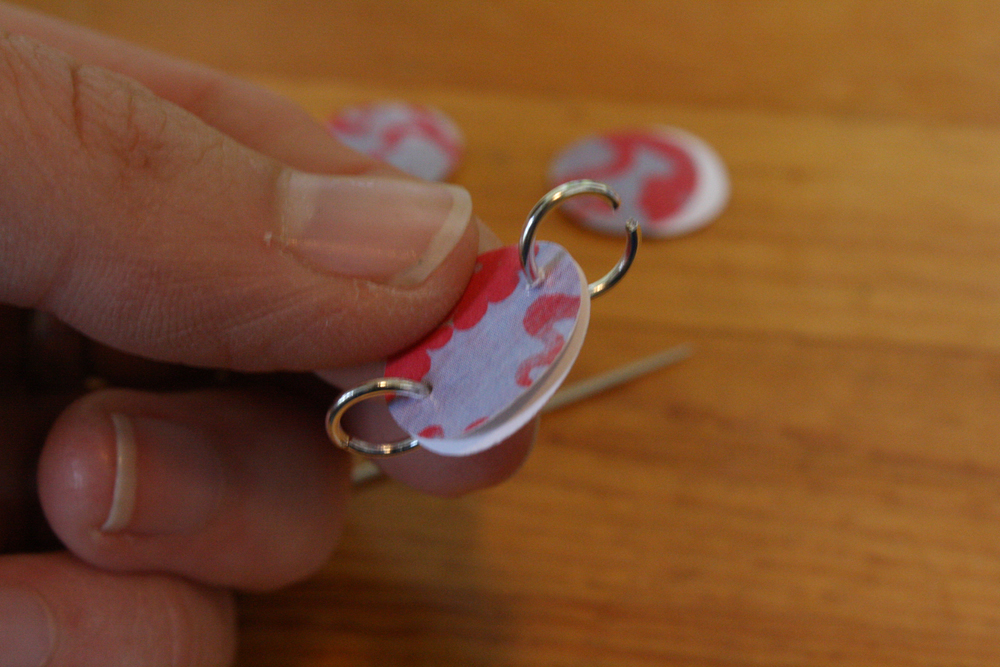
5) Open up a jump ring. Take your top circles and put the jump ring through one set of holes. Use your pliers to close up the jump ring, nice and tight so the paper can’t come off. Now put a jump ring through the second set of holes. Don’t close it yet.


Next, take your other circles, the ones with only one hole punched in them, and put them onto that same jump ring, then close the jump ring.

6) Attach more jump rings for extra dangliness if you wish, then affix your earring hooks. All done!

As I mentioned above, there are lots and lots of other designs that can be made with this basic method. Get creative and see what you can come up with!

Play around with different metals (colours) for your jewelry findings, and with different sizes and shapes of jump rings. You can get jump rings that are triangular or square, and probably some other funky shapes if you look around a bit. For the red and white patterned earrings shown at the top of this post, glue a couple pieces of thick paper together, varnish them, and poke some holes in the bottom to hang glass beads on jump rings from. Play around and see what you come up with!
