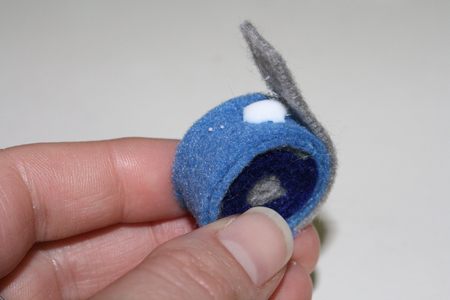
The internet, I’m sure you’ve noticed, seems to be largely made up of people who are creative in some unusual ways, and have a little too much time on their hands. This week I found an amazing example of this very person type, and decided to copy it.
While browsing around for craft ideas and general awesomeness, I found this: one Kristin St. Clair has made an entire doormat out of rolled and glued scraps of felt, and it looks super amazing. As my own collection of felt scraps grows ever larger, I thought this would be a great idea. And I thought, for a smaller, less one-more-thing-to-eat-up-hours-of-time-I-don’t-have project, that this technique might make some interesting jewelry and accessories.
This is another outrageously simple project, so get ready for a round of easy peasy crafting.
—————————————————————————
What you’ll need:
- scraps of felt
- a cutting board and rolling cutter (easiest) OR ruler, pen and scissors
- superglue OR white glue (this worked best for me) OR a hot glue gun
- scissors
- [optional] jewelry findings, barrettes, ring bases, chain or cotton cord, keychains, beads, needle and thread and/or other embellishments
—————————————————————————
Putting it all together:
1) Start by making a couple different piles of felt scraps, in colours you want to put together.
2) Cut your scraps into long thin lines – 1/2 inch wide is a good size to start with. I did some in 1/2 inch widths, and some in 1/8 inch widths. You’ll need them to be a variety of lengths, so don’t hesitate to use even very short scraps for this.
3) Take your glue and a thin piece of felt, and roll the felt tightly in on itself, gluing it in place.*
*A note about glue: I started out using superglue, which held really well but tended to be a bit messy. Any leftover bits of glue on the outside of the felt show very badly and are hard to get rid of. I don’t personally like or use glue guns, and I don’t know how well they’d hold the felt for this project, but I imagine it would work alright. In the end, I went with simple white Elmer’s glue – that stuff you used in elementary school. It took much longer to dry and the finished pieces were a bit softer and less firm, but it holds just fine, and is a bit less messy.
4) Now take another strip of felt of another colour, and apply glue to it. Starting where the first, coiled strip of felt ends, add this second strip to your coiled piece.

As the piece gets bigger, it may be easier to apply glue to the outside of the coiled felt, then lay the next strip down on top of it.
5) Continue doing this until your object is as large and colourful as you want it to be. As you’re gluing, you’ll want to be careful to bump each new strip right up against the previous one, so there are no gaps. When you get to the end, you can either glue the last piece down really really well and press on the end as it dries so it doesn’t bump up so much from the outside of the circle, or you could wrap a long piece of felt along the entire outside edge and join its two ends to make a little loop, like the yellow pendant in the photo below.
If you’re using the more flexible white glue, you can also squish your coiled felt to reshape it. I squeezed the piece below into a teardrop shape, then stuck the TV remote on top of it while it dried, so that it held that shape.
6) Add any embellishments you wish. You can turn your piece into a pendant or a ring or a barrette or earrings by adding the appropriate hardware. You may want to glue or sew a flat circle of felt onto the back. You may want to glue or sew beads onto it. You can also keep going, making larger circles to form coasters or hot pads or random colourful wall decorations.
To make a barrette, follow the instructions in step 8 of my monster-making tutorial.

To make a ring, I cut a couple felt leaves and glued them to the underside of my coiled felt flower. Then I cut a small circle of felt the same size as the coiled flower, sewed this to the ring base, and glued and stitched the flower in place on top of it.


