This week, I have a story for you.
It starts with a scritching noise in the wall behind my desk. Then come scrabbling, scampering and skittering sounds. I call the landlord, he sets a trap, we catch a mouse and that’s that.
Until I see a mouse scurry across the kitchen floor about a week later, which comes on the heels of an afternoon of noise from behind the fridge. Noise that puts one in mind of a large cat or possibly a badger trapped in the wall. The next day I watch a cheeky, whiskered fellow sit and munch on something beneath our coffee table, followed by three of his pals playing peekaboo under the kitchen cabinets. It’s really cute, until I begin seeing mice in every corner of the apartment, every few minutes.
I phone the landlord (who is a really good guy) again, this time with a little edge to my voice. He starts looking up extermination information and promises to adorn the premises with traps the next morning.
Then I see a mouse run out from under the bed upstairs.
We spend the night at my boyfriend’s dad’s house.
It’s not that I mind mice in and of themselves. I mind spiders. I fear, loath and abhor spiders. But mice I like. It’s just that – especially in large numbers – they’re not especially considerate of personal space or things like bathroom etiquette. It’s not about leaving wet towels on the floor so much as it’s about leaving little mouse poos in any and all corners. And in the cupboards. And the stove.
We continue to spend the next three nights out of the apartment, to avoid being woken every half hour by the SNAP of a trap sounding another tiny death. In the course of 72 hours we catch 13 mice, and it seems like things are winding down. The landlord brings in carpet cleaners to deal with the trails of feces and urine our furry visitors have left everywhere, and we sleep soundly in our own bed again.
And then, while sitting on the couch the next evening, watching season 2 of Dollhouse, I see yet another mouse make a mad dash across my kitchen counter. My kitchen counter! Back come the traps, back comes the landlord with plastic bins for all our foodstuffs, back comes my nervous twitch.
All this started two weeks ago and we still haven’t caught the last one, if it is indeed the last one. We hear him every now and then, but the deaths of all his compatriots (and possibly the trap-infested cupboards) seem to have taught him a little caution.
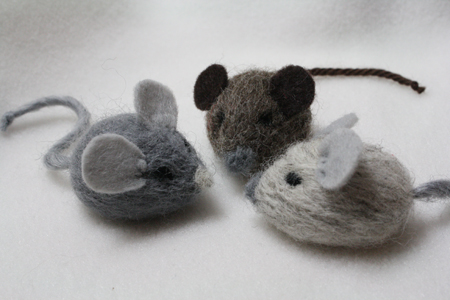
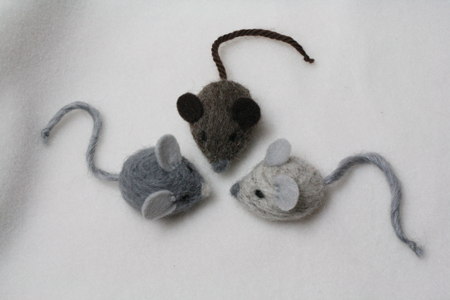
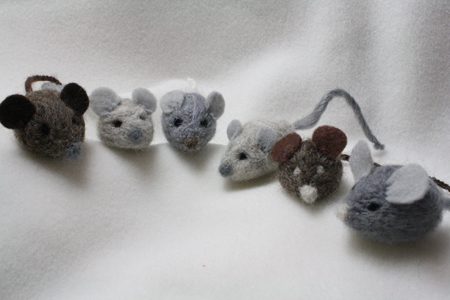
The funny thing is, this has nothing at all to do with why I started making needle felted mice. Rats, actually. My boyfriend is building a Commander deck (Magic again), and his Commander (the focal point of his deck) is a rat called Marrow Gnawer, whose principle function is to create more rats. So I’ve been making a bunch of little rats for Jeremy to use as tokens, instead of just boring old cards. But suddenly these critters became extremely thematic to our actual lives, and now I feel like I should perhaps make little needle felted vermin for each of the mice we killed and dumped unceremoniously in the trash can.
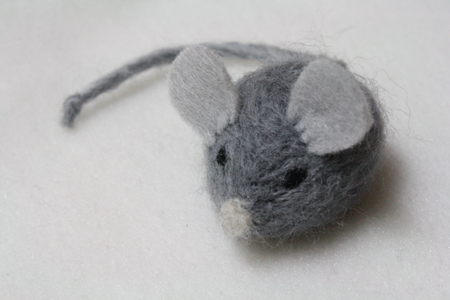
Hopefully you have no real-world equivalents to these crafted rodents, but they are wonderfully cute, and it’s a good simple project with which to build your needle felting skills once you’re fed up with just making round felt beads. Here are the basic steps.
(For some information on basic needle felting techniques, tools and materials – like what in heck wool rovings are – see my bacon bracelet tutorial and the second half of my felt beads tutorial.)
~
NOTE: I hope to have a couple brief videos for some of the steps below added to this post soon, as some points (haha) of needle felting are more easily understood in full motion. However, some issues have come up and I can’t get the videos added in time for this Friday’s posting, so just know that I will add them as soon as I can.
—————————————————————
What you’ll need:
- wool roving in whatever colour(s) you wish your rodents to be AND black wool roving (for the eyes)
- felt to match or coordinate with your wool colour(s)
- yarn (for rats) or string/embroidery floss/upholstery thread (for mice) to match or coordinate with your felt & wool colours
- needle felting needles (long, barbed needles, which you can find at some fabric or craft stores, or at many yarn and fiber arts stores, or online)
- thick foam
- thread to match or coordinate with your felt colour(s)
- a small sewing needle
- if you are using yarn, a large sewing needle (big enough for the yarn to fit through)
- scissors
—————————————————————
IMPORTANT NOTE: The number one rule of needle felting is never take your eyes off the needle. If you are going to look away, stop felting first. Stabbing yourself with a long, sharp, barbed needle is a painful experience. Trust me on this.
~
1) Separate a small section (about 6 inches) of wool roving from the rest.
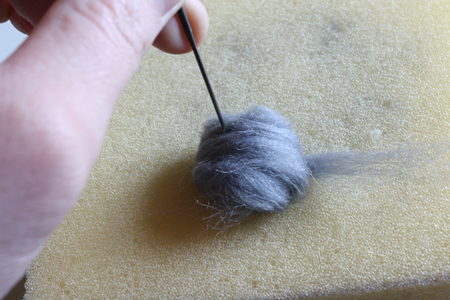
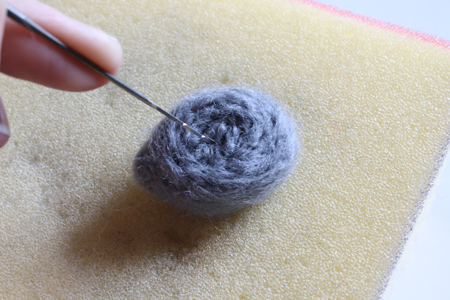
2) Wind this roving into a ball (keep it as tight as possible), place it on top of your foam and hold it together with one hand while using the other hand to stab it with the felting needle. Repeatedly. Stab stab stab. The barbs of the felting needle lock the fibers more tightly together with each stab, slowly forming the material into a dense, concentrated mass.
You’ll notice that in all the pictures I’m only using one hand – the hand holding the needle. That’s because my other hand is holding the camera, but for actually doing the felting you will, of course need to hold onto the object with one hand while operating the needle with the other. Start slow until you get a good sense of where that needle’s going to end up with each stab, so that you don’t put it through your finger. And of course keep your fingers as far from possible as the part of the wool you’re actively stabbing. Which isn’t very far given the tiny size of this project.
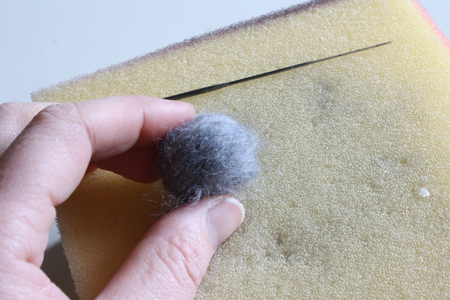
3) Add small bits of wool roving to your ball until it’s a little bigger than the size you want it. With needle felting, you’ll generally finish with an object that’s about 2/3 the size of the clump of wool you started with. You can add wool around the whole thing by simply rolling another bit of roving tightly around the ball and stabbing it into place. Or you can roll up a little clump of wool and stab it in place to add volume to just one end or side of the structure.
4) As you’re stabbing the wool into place, you can begin to shape it into less of a ball and more of an oval. By stabbing more in any given area, you’ll make that area denser and therefor smaller. Stab either side to compact them and elongate the sphere you’ve formed. Then decide which end of the oval is your rodent’s nose, and stab it more to pack it down into a pointed shape. Rotate the oval as you continue stabbing, so you shape all sides evenly.
Add some more wool to the back end of your rodent, stabbing it into place to give it a round, humped back and haunch area. Don’t worry about it not looking perfectly smooth for now – you just want to get approximately the right size and shape going.
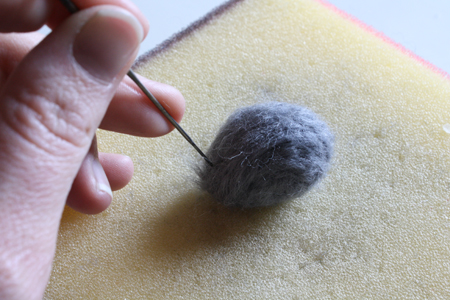
5) When you’ve got the overall shape you want, pick a side to be the underside of your rodent, and stab it repeatedly all over, flattening it out. It’s a good idea to do this with a larger felting needle, as it will be far more efficient and effective. If you don’t have a larger sized needle, you can also hold two or three small needles bunched together, which will have a similar effect.
6) Take a small, thin, spread-out piece of wool, wrap it around your entire shape and stab it into place. This smooths out any unpretty bits and gives the mouse or rat a generally even texture.
7) Now you can add a small amount of another colour of wool on the tip of your rodent’s face, if you like, for a nose.
To do this, take a very very tiny bit of wool, ball it up between your fingers, hold it in place centered over the rodent’s nose area, and stab it very carefully a couple of times to lock it down. Then continue to stab it, using the tip of the needle to collect stray fibers and push them into place as you go. The wool will shrink drastically as you push it in where you want it to go, and you can use the tip of the needle to basically shape the edges, making a nice even edge all the way around.


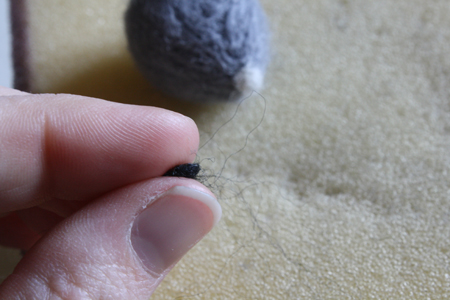
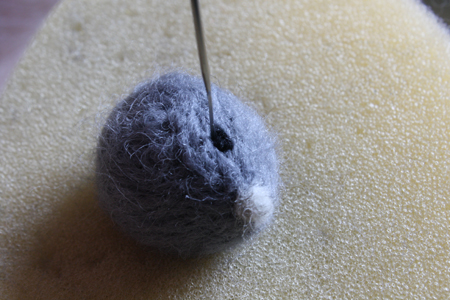
8) Take a very very tiny bit of black wool and use it to make the eyes. You’ll do this exactly the same way as the nose, using the same techniques to get it all into place and shape it. As you go, the wool will look increasingly less like a messy black clump on your rodent’s face and more like a small, concentrated, beady eye. You don’t need very much wool at all, but do also remember that the clump you start with will shrink significantly as you push it into place. That said, you can always add more wool, but it’s nearly impossible to remove any once it’s felted in.
9) Turn your rodent upside down and, again using a larger needle or a couple small needles together, stab a small round indent into the base of your mouse towards the back. This step is probably unnecessary if you’re making a mouse and using thread or embroidery floss for the tail.
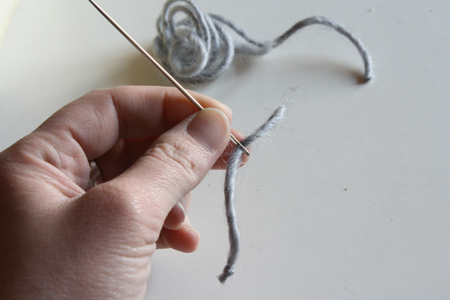
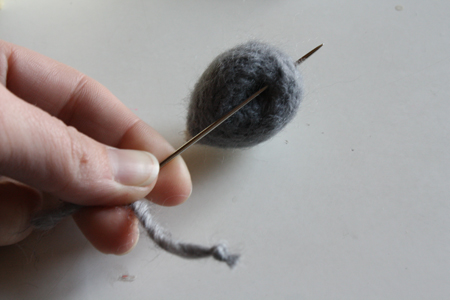
10) Thread your larger (if necessary) needle with a short piece of thread or embroidery floss for mouse tails, and yarn for rat tails. Knot one end of the yarn/thread. Push the needle into the indent you made on the bottom of your rodent in step 9, and out at the lower back end of the rodent.
11) Remove the needle. If you’re making a rat and using yarn, you may want to tie a knot in the end of the tail to keep it from fraying.
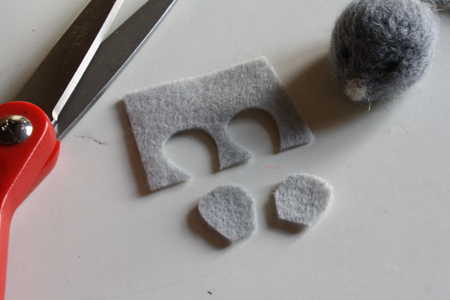
12) Cut two tiny felt half circles for ears.
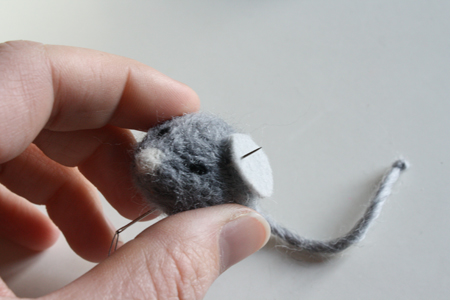
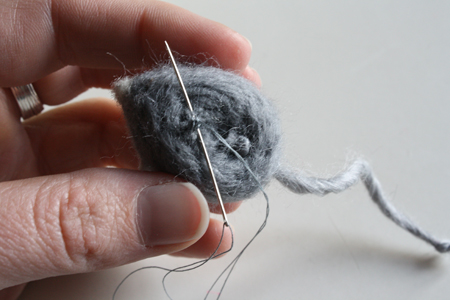
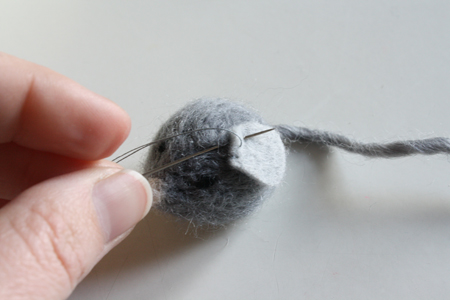
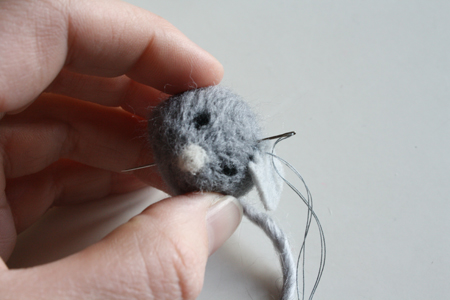
13) Thread your small needle. Hold one ear in place and push your needle into the bottom of the rodent, through its body and into the base of the felt ear. This, you see, is the utterly brilliant and wonderful thing about sculpting with wool. You end up with a solid object, but you can sew into it.
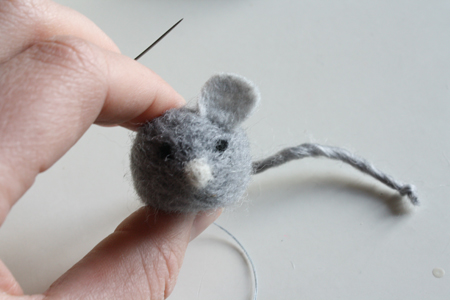
14) Use a couple small stitches to secure the ear in place along its base, then shove the needle back down through the rodent and out the bottom. Hold the second ear in place, push the needle back up through the rodent and into the second ear, and secure it in place. Finish by pulling the needle through to the bottom of the rodent again and knotting the thread. Give the thread a good tug to pull it tight after sewing each ear in place. This will pull the ears and make them stand a bit more upright, instead of lying completely flat along the rodent’s head.
15) Build an army of vermin.

