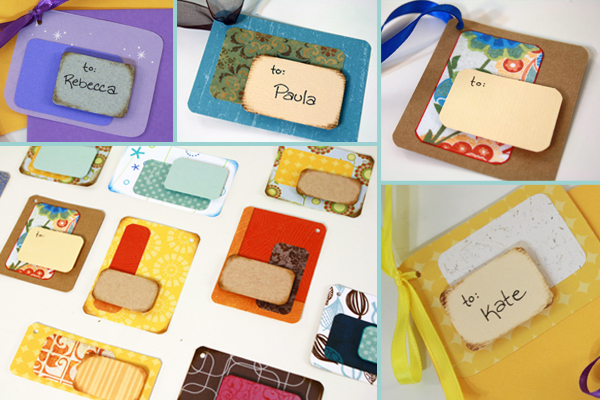
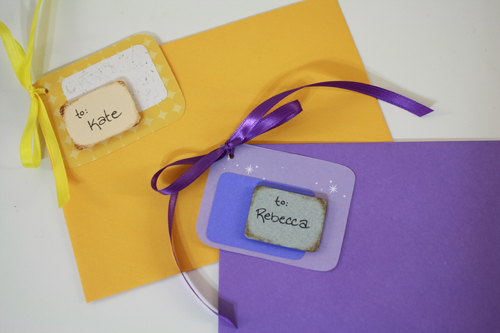
A couple weeks ago we had a sort of “unbirthday” party with my relatives for all the spring birthdays we’d been too busy to celebrate together as they happened. I made a couple small sweet hair accessories to give my cousins, and made gift tags for everyone’s goodies.
The party got scheduled a bit last-minute, so time was short, and I needed a quick, cute tag-making idea. As I’ve mentioned in other posts, my crafting lair is full of the scattered surplus materials of past projects, which I endlessly and futilely fight to use up. So for gift tag making, I opened up my small-bits-of-pretty-paper drawer and had a look.
In the end, this was such an easy way to use up paper scraps (and all gift tags are sure to be needed eventually) that I made a whole bunch of extra tags, to store away for the next time I’m hurriedly preparing gifts. A slightly larger scale version of these would also be a super simple way to decorate and personalize note cards. You could also glue and stick the coloured paper pieces right on top of a wrapped package, or a small gift box, instead of making a separate, tie-on gift tag.
——————————————
What you’ll need
materials:
- paper scraps – the more colourful, the better! You’ll want a few plain-ish ones, though, for writing the gift recipients’ names on.
- [optional] 3D foam pads – these are little foam squares or circles (like this) that are sticky on both sides, usually sold at scrapbooking and craft stores. They allow you to make bits of your otherwise 2D paper projects pop out above everything else. They can be substituted for with a small stacked pieces of felt or some non-adhesive foam combined with superglue.)
- ribbon, embroidery floss or string
- scrap paper
- paper cutter or ruler, pencil and paper scissors
- hole punch
- glue stick
- [optional] corner rounding tool – a smallish punch that cuts the sharp corners off of paper, rounding them neatly. Can be found at craft and scrapbooking stores such as Michael’s, Hobby Lobby, JoAnne Fabrics, etc. This Fiskars brand tool is the one I use, shown in the pictures in this tutorial, and I quite like it. I find this squeeze punch style easier and quicker to use that an up-and-down punch style.
- [optional] stamp pad or ink pad, or markers (can be permanent markers, watercolour markers, copic markers or any other type of markers)
- [optional, only needed if using a stamp or ink pad] Q-tips
——————————————
Putting it all together
1) Start by cutting a bunch of squares & rectangles of various sizes from your various paper scraps. You could do this with a bunch of different sizes of circles, too, actually, or any other shape. Think about what colours you want to put together as you cut, so that you cut bigger and smaller shapes from certain papers that you want to go together, thinking about what you want to stack on top of what.
I lay things out as I go, usually planning on 3 (sometimes just 2) shapes per gift tag. also keep in mind that the top shape needs to be written on, so make sure it’s a colour/pattern that writing will show up easily on.
Now come a couple of optional steps – ideas for extra embellishment and finishing touches that you can mix and match, ignore completely, or alter as desired. If you don’t want to do any extra shaping or decorating or anything, just skip right ahead to step 4.
2) Use a corner rounding tool (described and iscussed in greater detail in the “tools” list at the top of the post) to trim those sharp edges off all your squares and rectangles. I like this detail – I think it gives the paper scraps a nice finished, professional, “check it out, I’m a super skilled scrapbooking, artsy-craftsy type and I made these tags while also refurbishing an old armchair, doing a bit of light gardening, painting the spare room and baking 5 dozen cookies for a fundraiser to help orphans in Uganda, do you totally hate me yet?” look. Rounded corners can say a lot. And all you actually need is a simple punch tool.
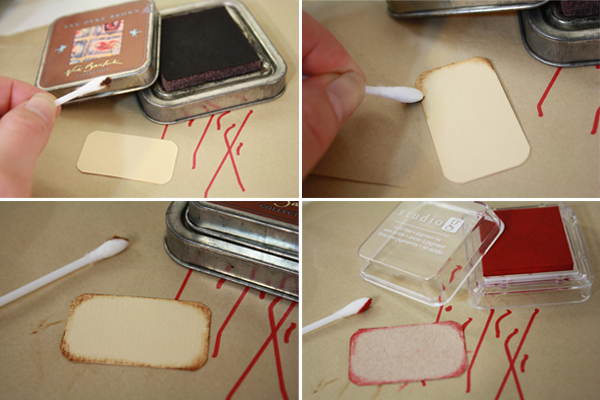
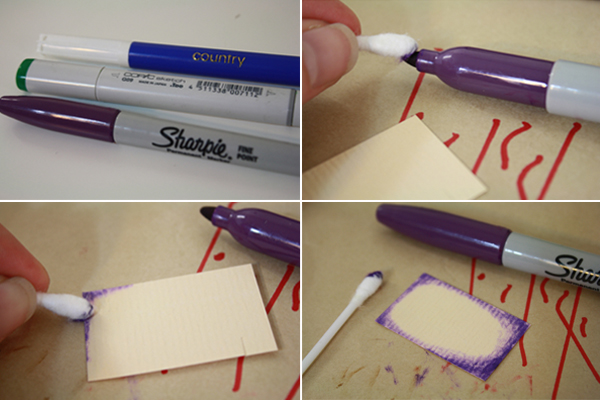
3) Set down a piece of scrap paper, as these next steps will get ink on the surface beneath your cut out paper bits. On some of the shapes, add coloured or “distressed” edges with a Q-tip and stamp pad ink or markers. Just swipe the Q-tip along the ink pad, or along the tip of the marker, then gently rub the coloured bit of the Q-tip along the edges of the paper, doing a bit more at the corners.
I’ve done this with all kinds of different stamp pad types and brands, all of which work just fine. For this tutorial, I also tried the technique with permanent markers, Copic markers and simple off-brand washable markers, and they all worked fine as well. The permanent marker was quite dark, though, so go gently and carefully with the Q-tip if you use permanent markers. It might be a good idea to practice on some scrap paper first, no matter what ink you use.
3.5) You can also add thin, exact coloured border to the edges of your paper using just a marker (permanent or otherwise). This works best on thicker, cardstock weight papers, but it can be done on thinner papers with some extra care. You also need markers with a medium or large tips for this to really work. Super thin tipped markers will not be very effective.
Bump the tip of the marker up against the outside edge of the paper, then run the tip of the marker carefully around the exact edge of the paper, outlining it. Basically, half the marker line will end up on the scrap paper underneath your cut out piece, and half the marker line will end up right along the edge of your nice paper. I use this trick constantly for card-making and scrapbooking projects – it’s the easiest, fastest way to add a perfectly neat, super fine border to a paper piece.
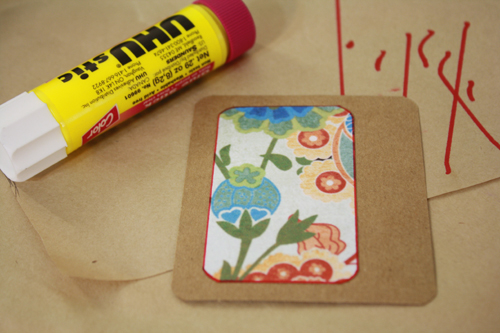
4) Now use your glue stick to adhere the middle paper piece to the largest, background paper piece.
5) If you’re using the gift tag right away, you may want to write the “to so-and-so” bit on the smallest shape before you stick it onto the card. You can write on it after, it’s just slightly more difficult to do so neatly.
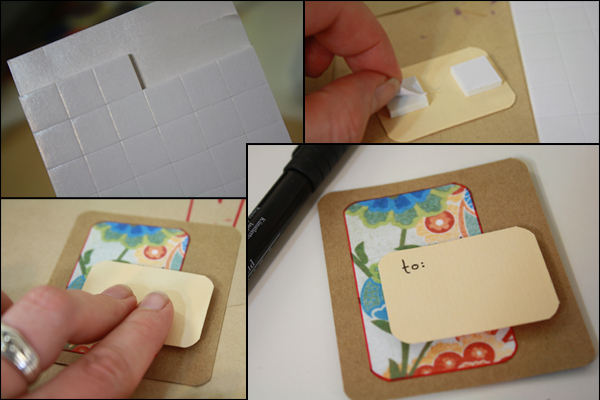
Apply two or three 3D foam sticky pads to the back of the smallest shape. Peel off the paper from the upward facing side of the sticky foam, then apply the shape to whatever area of the gift tag you wish. Just press down gently over the foam, and it should stay stuck.
As I mentioned in the materials list, if you don’t have or want to buy sticky 3D foam pads, you can just cut out small squares of felt or fleece, glue a couple on top of each other, and glue those to both pieces of paper. Or do the same thing with sheets of plain, non-sticky craft foam, or even pieces of thick cardboard. Has the same effect in the end.
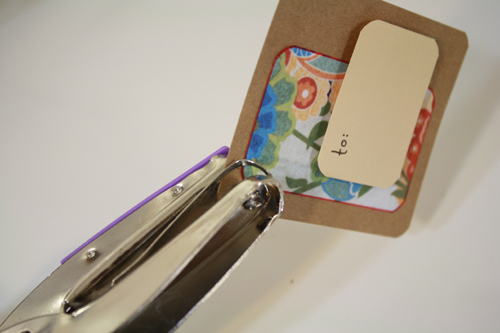
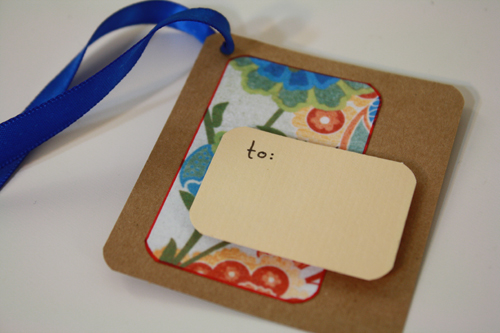
5) Punch a hole in one corner of the tag, and thread some ribbon or string or embroidery floss through it.
6) Label the tags as desired and give all the things!
Or use the idea to decorate greeting cards:

