Last week we said farewell to our friend Ash, who has now moved away to experience new things in new places. Ash, along with her brother Steve, is the creator of Megacynics, one of the few webcomics I actually read on a regular basis, and one I recommend. A while ago she did a couple of Doctor Who themed comics, and did a considerable amount of drinking research in order to create a whole set of yummy Doctor Who themed party drinks. (Click on the link to see them all.)
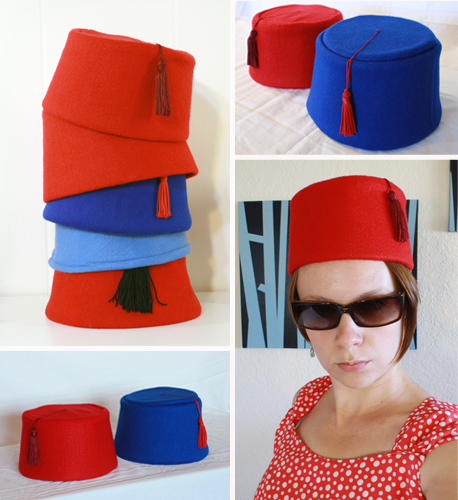
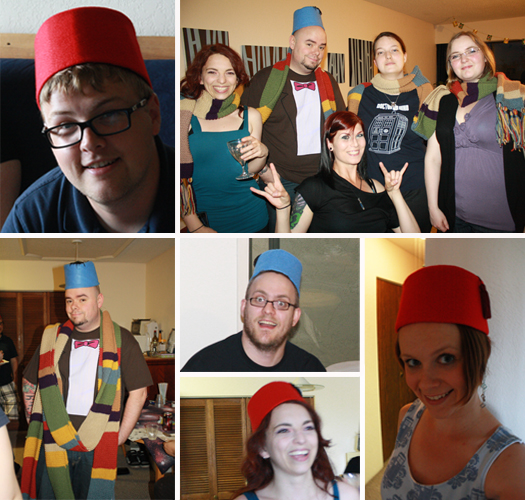
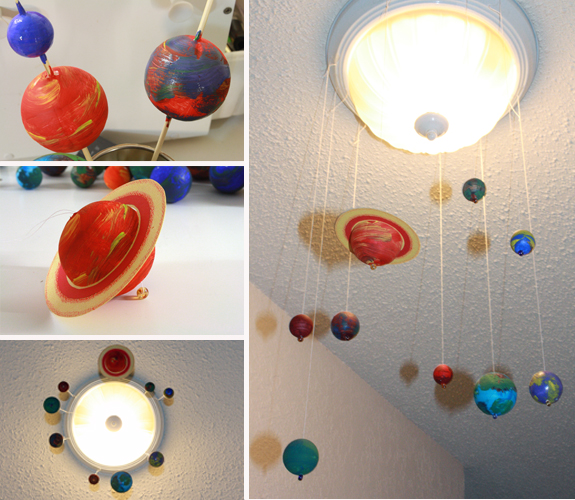
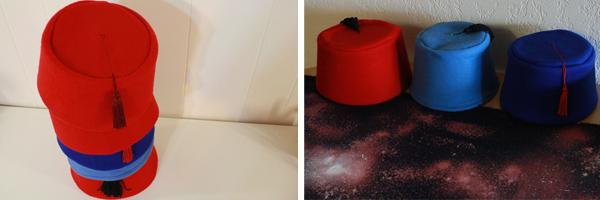
So we decided Ash needed to have a Doctor Who themed going-away party. I hung styrofoam galaxies in the hall and made a bleach and paint splattered galaxy-ish tablecloth, and made a bunch of fezzes for people to wear, because everyone knows that parties are more fun when they include amusing and thematic attire. Plus fezzes are cool.
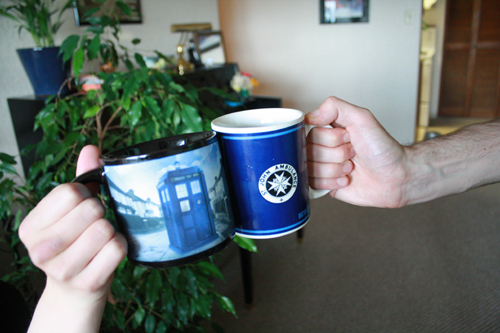
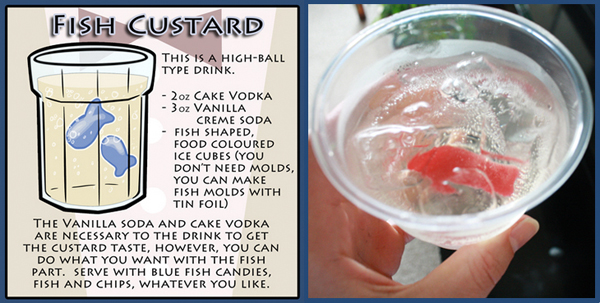
Ash also made everyone samples of two of her drink creations, the Fish Custard and the T.A.R.D.I.S. Below are her illustrated versions, paired with the real-life versions she created for us. (For the Fish Custard, she dumped in some colourful Swedish Fish candies since we didn’t have fish-shaped ice cubes on hand. It worked nicely, and boy were those candies soaked in alcohol and sugar by the time you got to the bottom of your cup!)
Throughout the evening, various people wore various fezzes as we enjoyed various Doctor Who drinks and jokes. All this party prep and fez-making is a large part of why I was too busy to post an actual tutorial last week, but now I will start making it up to you by teaching you how to make a simple, inexpensive felt fez.
The planet decorations:
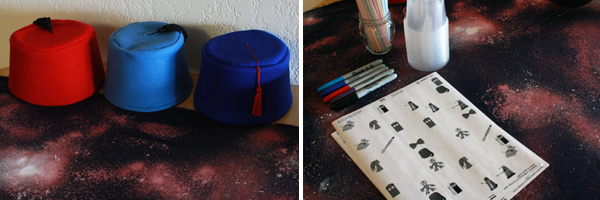
And the galactic drinks table, with Doctor Who themed nametags for everyone’s beverages:
And now, fez-making!
[EDIT: A fantastic dad over at CoreGeek has made an awesome upscaled fez for his daughter, using this tutorial as a base. He added extra exterior embellishment and even LEDs to it, turning it into a TARDIS fez. So awesome! Check out his project and get inspired to try your own!]
——————————————
What you’ll need
materials:
- felt – any colour! A lot of fezzes are red. A lot of trees are also green, but that just makes the pink ones even more noteworthy and special. You’ll need about 1/8 to 1/4 yard of material.
- thread to match your felt
- thin craft foam (best) OR thin cardboard (like an empty cereal box, beer box, etc.)
- scotch tape
- duct tape OR packing tape
- a tassel
- fabric scissors
- pen
- straight pins
- sewing machine
- glue gun
- sewing needle
- fez pattern– number 15. under “Sewing patterns”
- plain printer paper and plain cardstock for printing the pattern
——————————————
Putting it all together
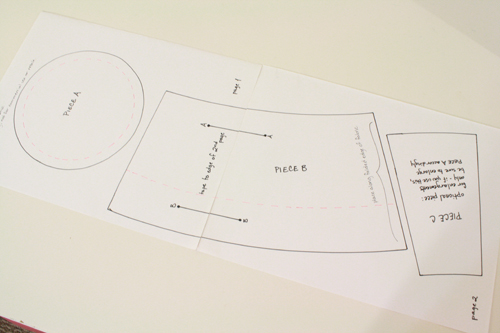
1) Start by printing the fez pattern onto plain printer paper and cutting it out. The pattern is two pages, so you’ll need to connect them. Just match up the edges exactly (use the lines marked A and B on pattern piece B) and tape them together. Match the edges of the paper, not the edges of the image, which may get partially cut off by print margins and stuff.
This pattern is sized small to medium, and you lose some circumference towards the end of the process, when you fold and glue the bottom felt edges inside the hat. Fezzes do look fine fit onto a head or just perched on top of it (as demonstrated in the photos above), but if you want to increase the size of your fez, I’ve provided a pattern piece for that – piece C. Just cut it out and tape it to one end of piece B to add to the circumference of your hat. You can trim it down to add only a slight amount of hat size, or increase it even more for a much larger fez. Just keep in mind that you’ll also need to increase the size of your hat’s crown (the circle that makes up the flat top of the hat) accordingly.
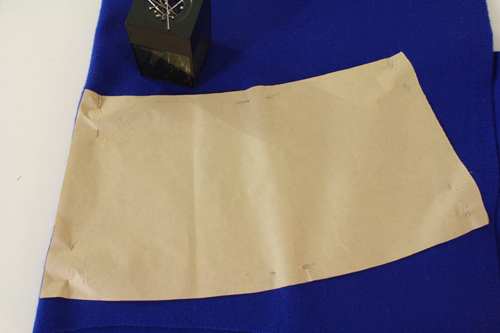
2) Take your piece of felt and fold it in half. Line up one end of pattern piece B along the folded edge of the felt, and pin the pattern into place. Pin pattern piece A onto the felt as well.
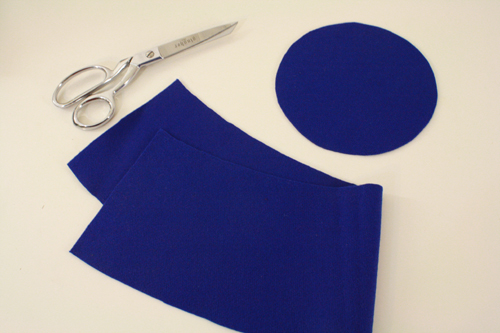
3) Cut the pieces out.
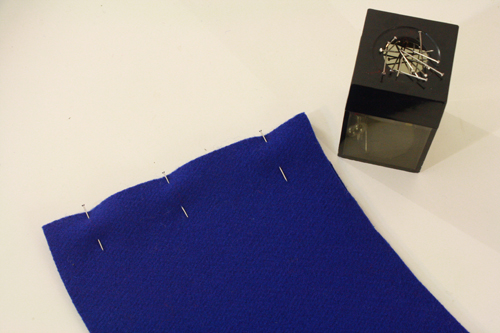
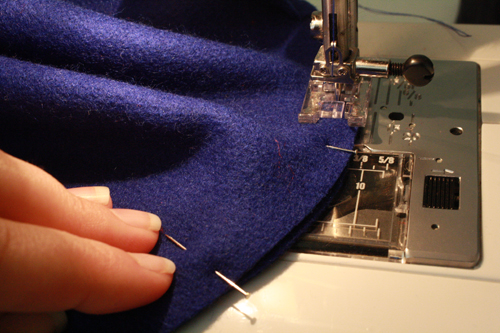
4) Fold the felt cutout of pattern piece B in half, matching up the ends. Pin the ends together.
5) Sew along the pinned edge, matching the edge of the fabric up with the edge of your presserfoot for an approximate 3/8″ seam allowance.
6) Now take your circular felt cutout of pattern piece A and set it on top of the fez, inside the circle of fabric. Pin the edges of both pieces together, all the way around the circle. You can tell where the fez’s top is because it should be slightly smaller than the bottom, since fezzes flare outwards from top to bottom.
7) Now sew all the way around the circle. Keep the edge of your presserfoot lined up with the edge of the fabric to get the right seam allowance and create an evenly rounded line of stitching. You’ll want to sew this with the round circle part facing down, lying along your sewing machine, and the “body” of the fez pointing upwards into the air. If you’ve been hanging around here for a while, you might remember that this is exactly the same thing we did to attach fleece pig faces to bodies (step 3 of that tutorial) and to create the bottoms of dice bags (step 8 of that tutorial).
If you’re not too familiar with sewing, just keep in mind that you can always stick your needle down into the thread, lift the presserfoot up, and turn the fabric underneath a bit to adjust your direction, then put the presserfoot back down and resume stitching. This is how you turn tight corners, change direction and follow jagged or tightly curved lines on a sewing machine. I go over this in a bit more detail (with pictures) in my Zelda hat tutorial (step 8 of that tutorial).
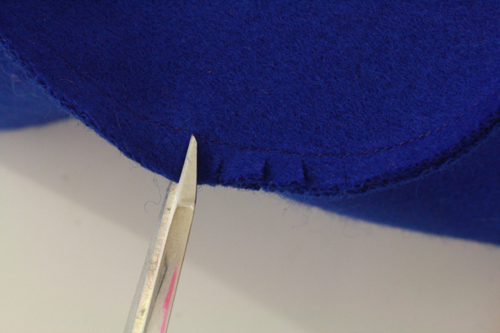
8) Using a good pair of sharp scissors, cut little slits all the way around the circle you’ve just sewn, going up to the line of thread, but not cutting through it. You’ll want to do this step very carefully. If you do accidentally snip through some thread, just go over that section of stitching again on your sewing machine – it’s not the end of the world, just a nuisance.
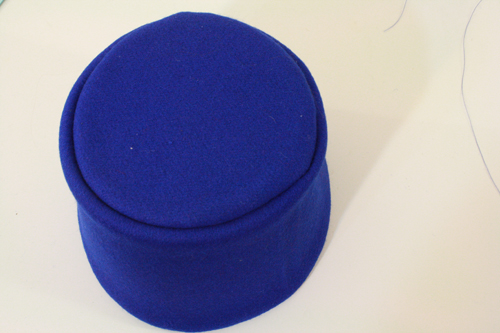
Turn the whole fez right side out. It’s going to have a sort of roll-y, not-pushed-out look to it at the top. Moreso if you’ve used thicker, heavier material. That’s ok, that’s normal. That’s what the next steps are going to fix.
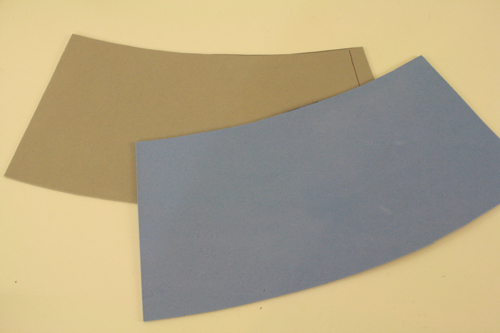
9) Print the fez pattern out again, this time onto cardstock.* This time, when you cut the pieces out, cut along the dashed line where there is such a line. This means you’ll be cutting out a smaller circle and and a narrower long piece.
*Not strictly necessary, it just makes the pattern pieces easier to trace onto the foam or cardboard.
10) Turn on your hot glue gun.
While the glue gun is warming up, trace the new pattern pieces onto your craft foam or cardboard. For piece B, you can’t really fold the foam or cardboard in half (and shouldn’t anyway), so just trace it twice and cut out two separate pieces. It’s likely your foam or cardboard won’t be long enough for you to do otherwise anyway.
The reason I recommend the foam (which you can get at stores like Michael’s or Hobby Lobby – it’s just super thin coloured rubber foam) over cardboard, is that it creates a smoother exterior for the fez. Cardboard never curves quite smoothly, so your fez will probably have some slight lines along its outside if you use cardboard. However, when I say slight I really do mean slight – it will in no way ruin the overall look of your fez, so there is no reason to go to any great lengths or costs or inconvenient trips to the craft store just to avoid using cardboard for this. I did fezzes both ways and they all turned out perfectly wearable.
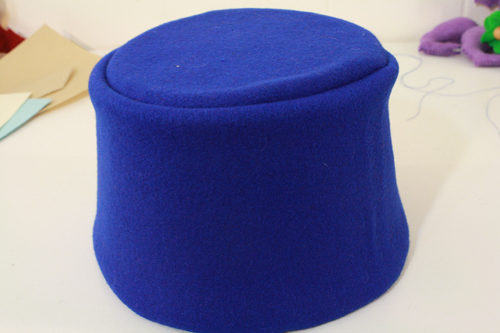
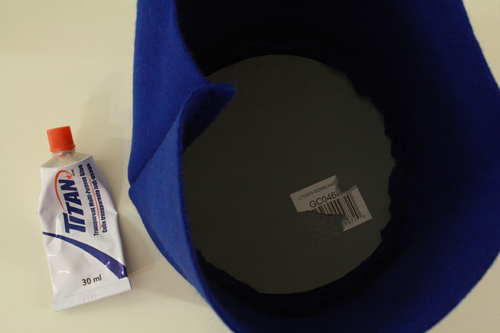
11) First, take your fez and turn it upside down, then take your foam or cardboard circle and push it down into the top of the fez. With some pulling and adjusting, it should fit inside the round seam of fabric at the top of the hat. If it doesn’t, take it out and trim it down slightly around the edges until it fits. Once you’re sure it fits, dab a little hot glue around the edges of the circle and insert it into the hat, pressing down to get the hot glue to go flat and hold the circle in place.
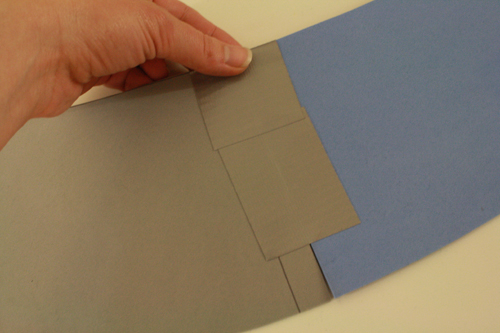
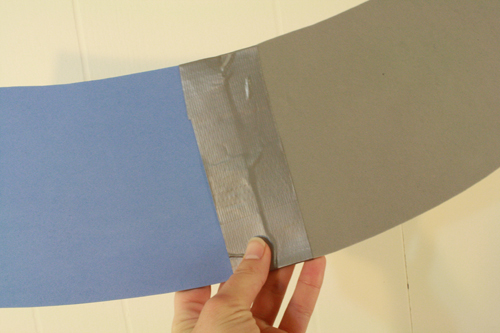
12) Now take those two copies you cut of piece B, match up two of the ends of the pieces exactly, and tape them together on both sides with duct tape or packing tape.
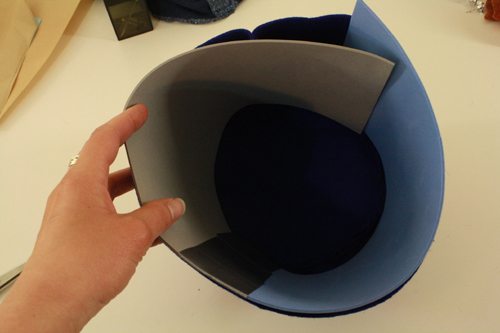
13) Now take this piece and fit it inside the fez. Push it all the way down to the top of the hat, and push it outwards so that it takes up as much space as possible, pushing the sides of the fez outward as much as possible. If the untaped ends of the foam overlap, make a little mark where they overlap. Also, when the foam is inside the hat, it should be about an inch shorter than the felt body of the hat. If it sticks out (like in the photo below) you’ll need to trim it. I’ve adjusted the pattern since making the fez in the picture below, so this shouldn’t be a problem for you, but if it is, just cut the foam down a bit.
14) Pull the foam back out of the fez and trim any excess at the ends, where you made the pen mark. If your foam was too short, you’ll need to cut another small segment (just use the original template for this) and tape it to the existing piece to lengthen it. Similarly, if the foam stuck out above the edge of the felt, you’ll want to cut it short along the bottom edge.
15) Now you can match up the open ends of the foam circle and tape them together. Then push the whole thing back inside the fez and adjust until it’s sitting in there nice and evenly.
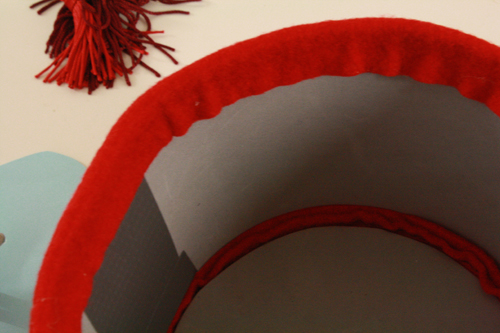
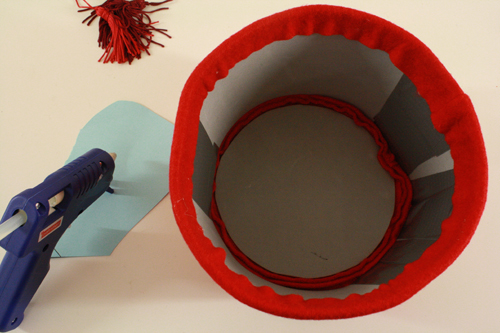
16) [Note: a bunch of my initial photos for these next steps got screwed up, so I took new photos while making another fez. That’s why suddenly you are now looking at pictures of a red fez instead of a blue one.] So now you have a had looking something like this, with just some raw flopping edges along the hat’s bottom edge (the edge that is actually facing up, towards you at the moment):
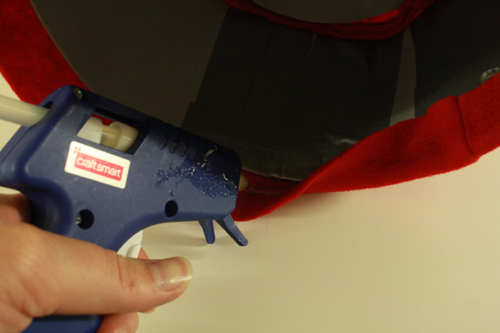
Grab your glue gun again, and make a line of glue a few inches long along the exposed bottom edge of the felt. Then pull the felt tightly over the bottom edge of the foam and press down. Try not to burn your fingers through the fabric.
17) Continue all along the bottom edge of the hat this way, until the felt all the way along is glued down inside the fez.
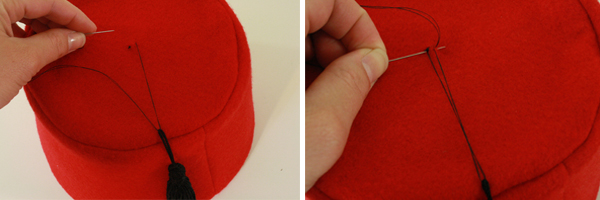
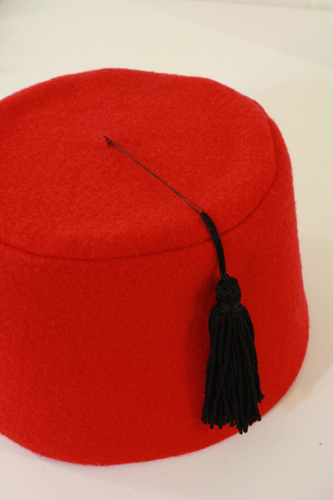
18) Let everything dry and cool, then flip the whole hat over and sew a tassel on the top. If, like me, your tassels are a bit short, you can leave an extra length of the thread that attaches them to the hat, so that they dangle further over the fez’s side.
19) Party time! Remind all your friends how cool fezzes are. If you have the right kind of friends, they should already know this. For even more coolness, add a bowtie. I unfortunately did not have time to make bowties for this party, but I’ll get to it eventually, and when I do there will be a tutorial for that, and possibly another party. I’ve got these little styrofoam planets around now after all – better just have another Doctor Who party in the future. Or the past. Whichever the Tardis lands us in.

