My parents recently moved cross-continent to a house with more square footage but less storage space than their old home. This provoked a dismaying (to me) and zealous desire to unload us kids’ old stuff, making us take possession of it once more, despite us living in apartments with an even greater lack of storage. I’m quite certain there’s a rule that your parents have to keep your old treasures in their basement until you’re at least in your 40s – that’s the deal my mom got with her parents. Oh well. I’ll avenge myself by passing this pain along my own children someday.
Anyhow, in the midst of a lot of just throwing things away & some retroactive disgust at growing up before the digital age and having to deal with physical photo albums, a couple of interesting items did surface.
One of those was my old beading loom, a child’s craft kit for making colourful beaded bracelets and harassing parents with a permanent collection of teeny tiny seed beads embedded in the carpet. (Seed beads are not as evil as glitter, but the margin of difference isn’t vast, either).

For all its basic-ness, the loom is really all you need to get started with beading. And I looked at it and realized that it would be very easy to make one’s own functional beading loom with some very inexpensive materials: namely a cardboard box & some string. This is one of those cases where you can get just as nice a result off a cheap DIY loom as off some manufactured metal thing with adjustable knobs and whatnot – it’s just a device to hold your craft in place while you make it, that’s all it is.
So here’s how to make your own little beading loom, and the basics of how to use it.
———————————————
What you’ll need
materials:
- shallow cardboard box or box lid
- duct tape
- seed beads
- thread
- graph paper
- crayons / coloured pencils / coloured markers
- [optional] large decorative beads, jewelry findings, clear nail polish (for securing knots)
tools:
- exacto knife
- ruler
- marker
- small needle (very thin, so it can fit through seed beads)
- fine-tipped scissors
- duct tape
———————————————
Putting it all together
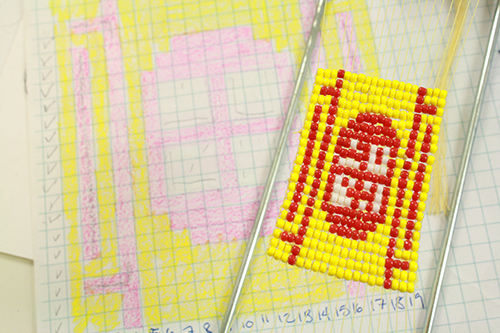
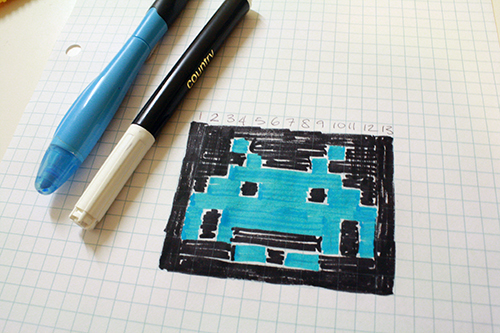
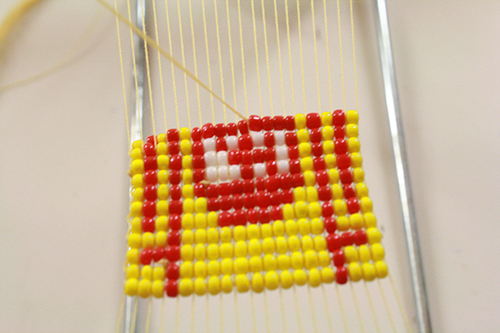
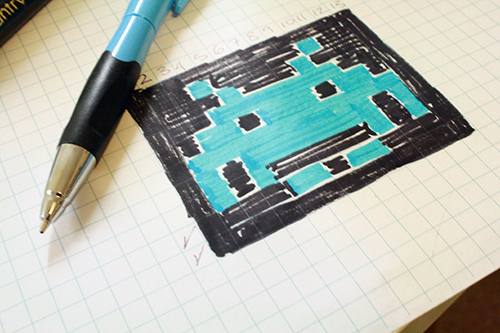
1) The first thing to actually do, at least before your first beading project, is make a pattern. In other words, figure out what you want to create on your beading loom and draw that. Like cross stitch, the pattern is just a bunch of little squares on a sheet of graph paper, each square representing one bead. All you need for pattern making is a piece of graph paper and some crayons.
For your first few pieces at least, the only limitations on your design are that it be square or rectangular – no uneven edges.
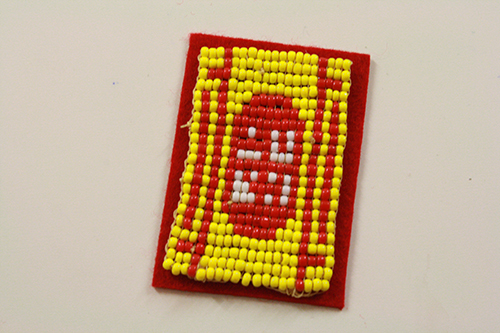
Draw and colour in whatever design you want on your graph paper. (Obviously this beading lends itself super especially well to pixellated images). I recommend doing this in crayon or coloured pencil (not marker, like I did) so you can still easily see the graph paper lines delineating each individual square.
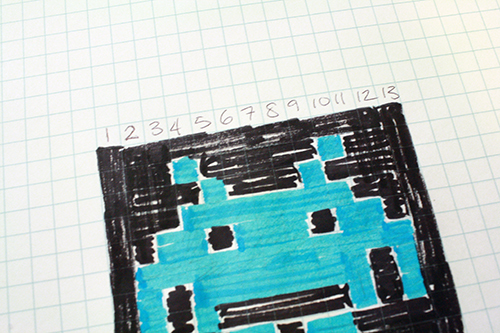
Not required but helpful: at one end of your design, number the line of squares that make up the design.
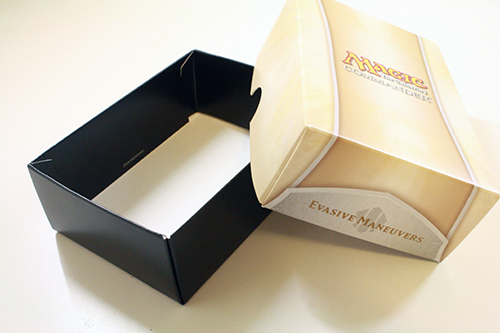
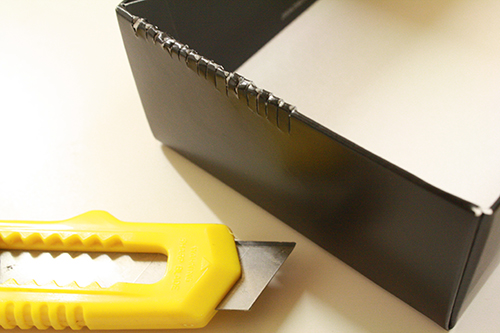
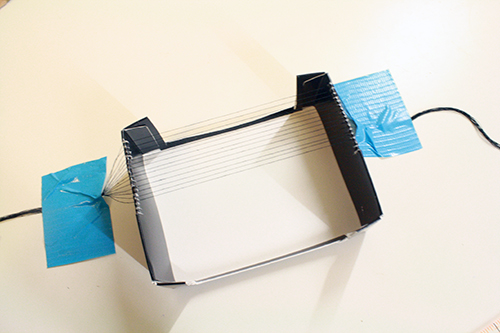
2) Set your design aside and make your loom. To do this, get a small cardboard box (or large, but it really doesn’t need to be). If it’s the sort of box that opens with folding flaps, cut those off – you want a box that’s got an even, flat edge at both ends.
Things like little gift boxes with nice sturdy sides work very well for this. Or MtG boxes…
One note: Your final beaded piece cannot be larger than the inside of the box, so if you’re using a very small box or want to do a very long or wide design, just make sure your box is big enough for it.
Grab a ruler and a marker that will show on whatever paper the box is made of. Use the ruler to make a series of little marks at both ends of the box – the ruler keeps them fairly straight across from each other.

To figure out how many marks you need, go look at your design. Count how many squares wide it is, and add 1. This is the number of marks you must make in order to create this design on your loom. (You can always make it extra wide, too, if you think you’ll use it to make bigger designs later. And you can just go back and make it bigger later, too.)
My design was 13 squares wide, so I needed at least 14 little marks on each end of the box.
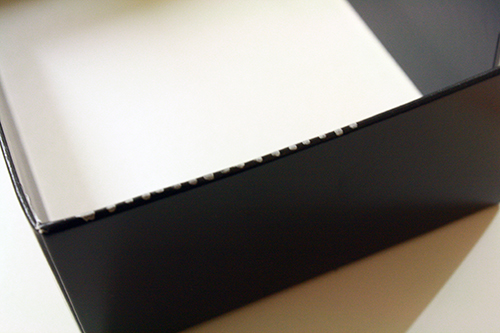
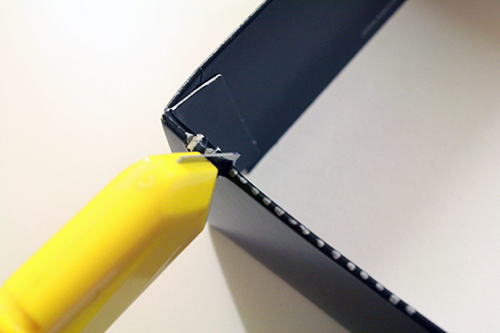
3) Now grab your exacto knife and, right where each and every mark is at either end of the box, slice downward into the box about 1/8 to 1/4 inch deep.
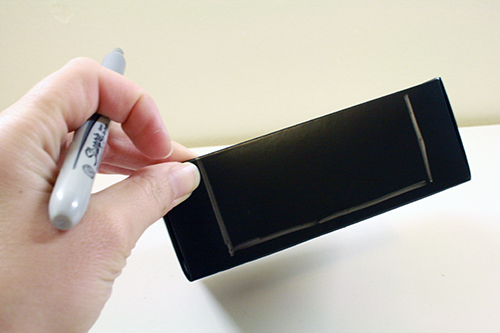
4) Next draw a squareish line on the box’s sides and cut that out, essentially cutting the sides of the box away but leaving just enough at the corners that it maintains its box-shape & structural integrity.
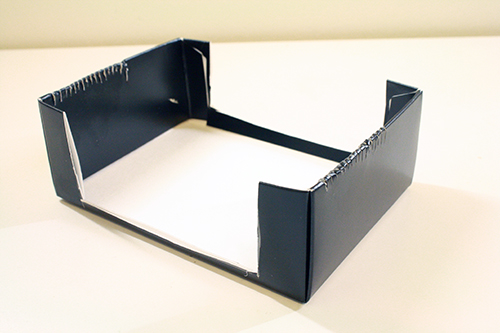
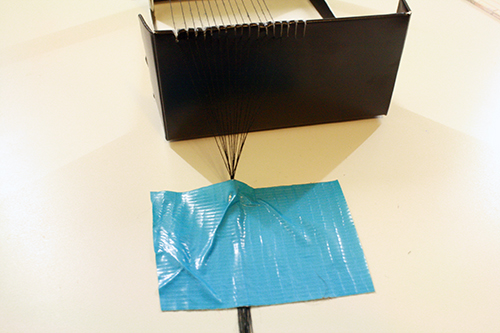
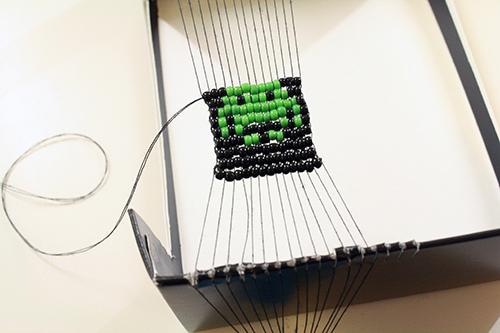
Voila, you have made your loom! Now you just need to thread it.
5) Cut X pieces of thread. X here is the same number you figured out in step 2, the number of squares across that your design takes up, plus 1. Make sure the thread is about 1 1/2 to 2 times the full length of your loom. (The deeper your box/loom is, the longer you should make the thread. If it’s a pretty shallow box, just cut thread that’s the length of your loom plus a few more inches at either end.
As you cut the thread, put each piece onto the loom. Put one end through one of the little cuts at one end of the loom, and the other end of the thread through the opposite cut at the other end of the loom.
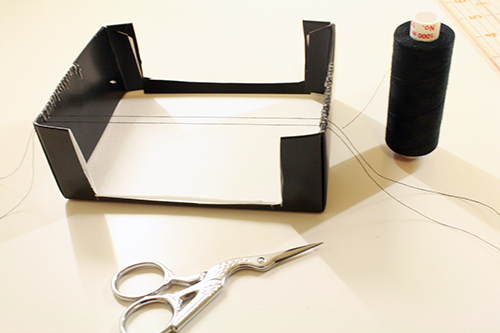
6) Once you’ve strung all your threads onto the loom this way, tape the ends down firmly, either to the outer sides of the box or to the table.
If your box is fairly large and doesn’t move around that easily, taping the threads to the box ends should be fine. If it’s small and light though, you probably want to tape the thread ends to the surface the box is sitting on.
Note: you may want to gather the threads and knot them together first – this helps keep one from pulling loose independent of the others.
Your loom is completed and prepped, you can now start beading!
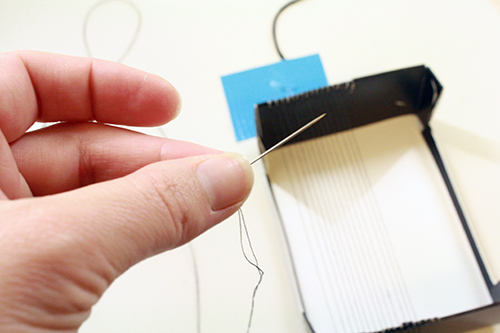
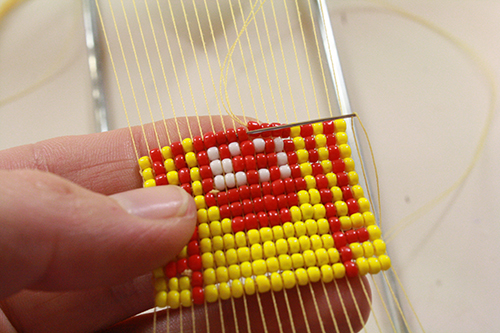
7) Thread your needle, doubling the thread. Tie the end of the thread in a good secure knot or three towards the bottom (end closest to you) of the loom on the left side, then carefully trim the excess thread close to the knot.
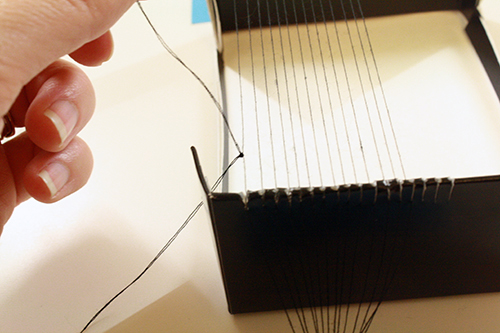
8) To start your beading, look at the bottom row of your design, and count how many beads of what colours are in it. Put those beads onto your needle, going from left to right, just like you would read a book.
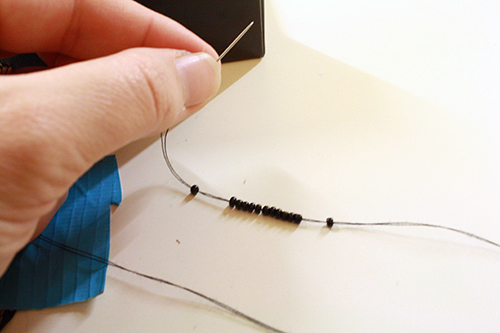
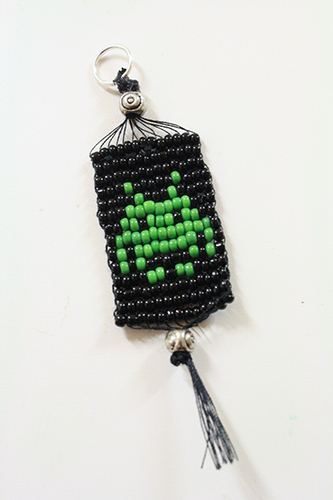
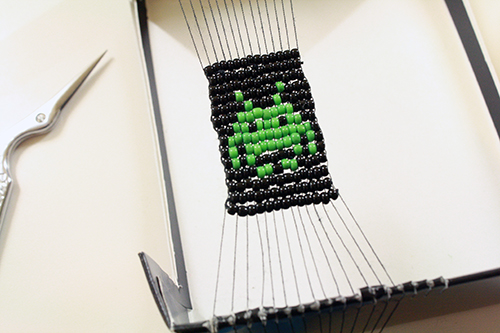
A note: you really really need a very fine needle for this if you’re working with actual seed beads. (You could do this with larger beads too though – just space your cuts on your loom a little further apart, or only string every other cut.) I had some beautiful blue beds I was going to use for my design, but the holes in them were too small to fit onto even my very narrow needle, so I had to use green beads for my space invader instead.
You may find that you have a bunch of beads of X colour, and most of them fit onto the needle but some don’t. That’s normal – beads and other such manufactured things vary a bit, so as long as most of the beads in a set fit, you’ll be fine and you can just skip the few that have smaller holes. If all or most of the beads in your set don’t fit though, you’ll need either a different set of beads or a narrower needle.
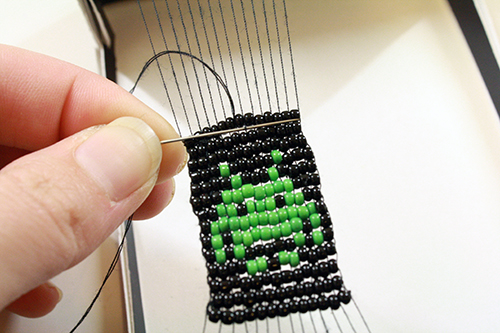
9) Now bring your needle, followed by the thread with the beads on it, underneath the threads on the loom, going from the left side to the right side.
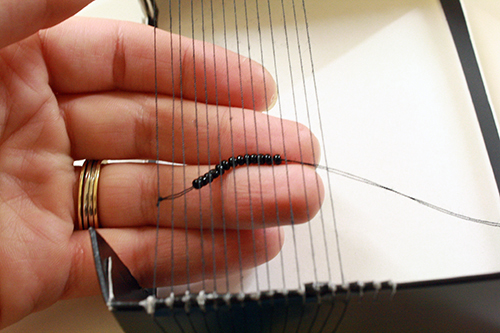
10) Use a finger underneath those threads to push the beads up, one bead popping up between each 2 lines of thread.
This is the finicky bit, and after the first couple of lines it will get easier as the beads already strung on hold the loom’s threads better in place, more perfectly spaced already for the next row of beads.
You can also just stick the needle through the first 2 or 3 beads on the right, then get the next few lined up and run the needle in through those, etc. You don’t have to get the entire row of beads all perfectly placed all at once – as long as each bead is where it should be when the needle reaches it, you’re fine.
Then you’re going to run your needle back through the line of beads, this time from right to left.
It is absolutely crucial that this time around the needle goes overtop of the loom threads as it passes back through the beads. This is what holds those beads in place.
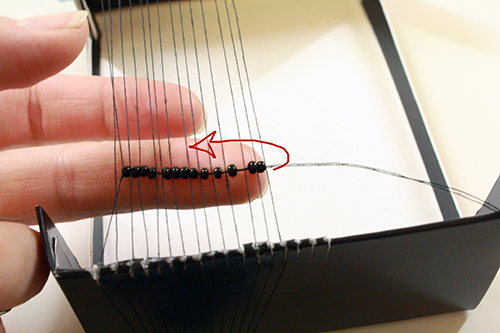
If your needle is not long enough to go through the entire line of beads at once, don’t worry. Pull the needle through the first half of the beads, and all the way out till the thread is tight. Then go right back down into the next bead and through the second half of the line of beads and out.
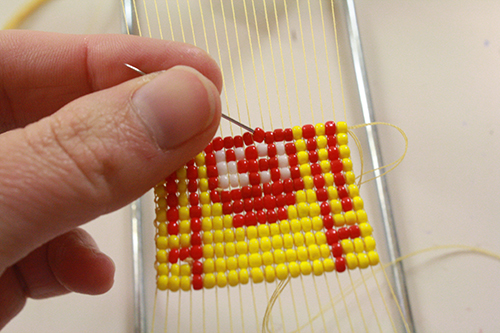
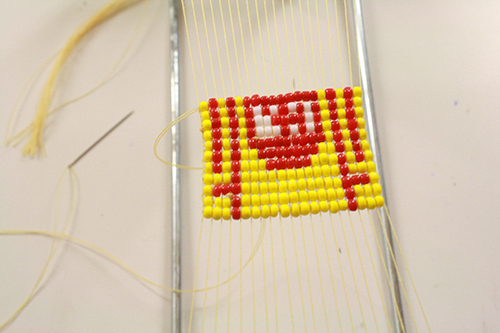
11) Lather, rinse, repeat, making sure that you’re reading and beading your image pattern from left to right when you string new beads onto your needle, and that you’re looking at the correct row of your pattern each time.
I like to make a little check mark beside rows as I finish them, so I can be sure I’m working on the right one as I go. Tip: do this in pencil & you can erase the marks & do it all over again, if you plan to repeat the pattern or use it again later.
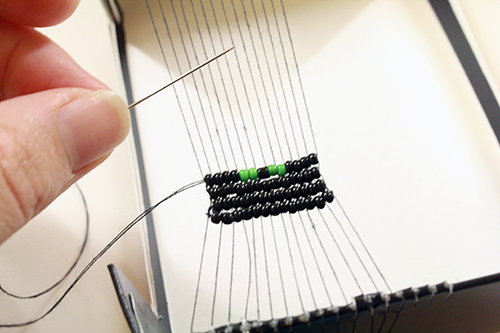
12) It’s unlikely that the thread on your needle will go far enough to do your entire beading project, so, when you inevitably run out of thread and need to re-thread your needle, here’s how.
Once you’ve finished a row, put the thread back through the just-finished line of beads again (go under the loom thread or you’ll just be undoing your previous work) and pull the needle out about halfway through the row. Knot the thread onto one of the loom threads in the middle of the row, then thread your needle through a couple more beads and then trim the excess thread. (This hides the tail of thread behind the knot inside the beading.
Then re-thread your needle, knot the end of the thread to the far-left loom thread, and start a the next row, just the same way you started your very first row.
13) When you’ve completed your design, knot, hide and and cut your needle thread the same way as described above.
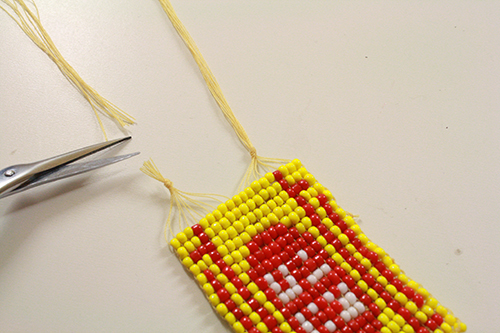
14) Carefully pull the loom threads off of one end of the loom. Then you’ll need to decide exactly what to do with them. Deal with the bundle of threads at one end, then do the threads at the other end.
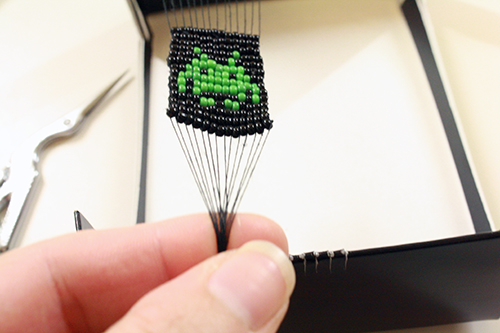
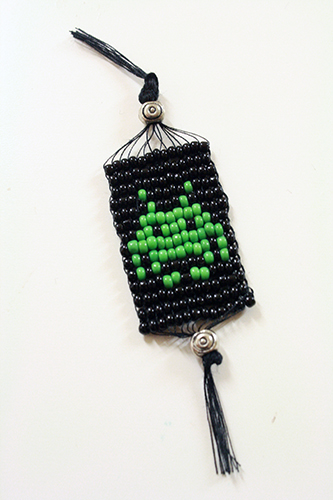
You can knot the threads all together fairly close below the last line of beads, then attach jewelry findings and and such to make pendants, earrings, keychains and so on.
You can string these loom threads into a couple of larger beads, then knot the threads below those beads.
You can divide the threads into two halves and knot each half together, which especially works better with a wider design.
You can take the knotted threads and fold them up behind the bead design and glue them to the beads. Then glue or stitch the piece of beading to a cloth or felt backing – this could work nicely for a bracelet.