
I have disliked candy “conversation hearts” since, well, ever. Which isn’t proper grammar, but neither are those dumb hearts. I dislike their chalky taste*, pastel colours (I like pastels fine in Monet paintings and summer dresses, but that’s about it) and completely inane, saccharine and usually irrelevant text. Why on earth are they called “conversation” hearts, anyway? What conversation is really and truly going to come of them? Seems to me if they actually do what they are in some fantastical universe intended to do, they may cause some moans and groans but not a whole lot of conversation. Their whole premise is daft and their name ridiculous.
So I figure it’s time to reinvent them. Let’s have some “conversation hearts” that actually merit the name. Valentine’s Day centers on loved ones, right? And loved ones are people you can talk to about all the craziness of life, good and bad. So how about some hearts that sit in a little bowl on the coffee table and might actually inspire some sort of meaningful conversation. While we’re at it, let’s make them chocolate, because why waste your daily sugar intake on sweetened chalk when there’s all sorts of quality chocolate around? Don’t. Come with me and let’s reinvent this whole ridiculous thing.
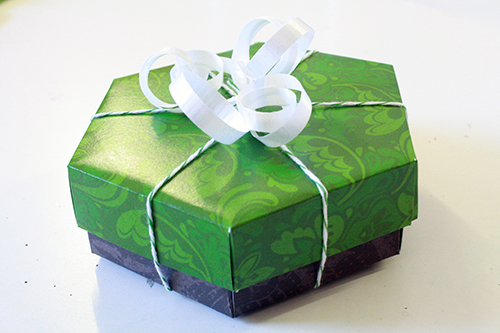
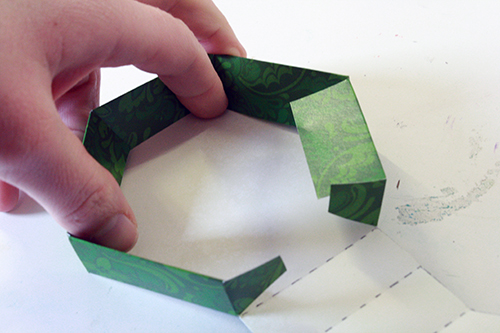
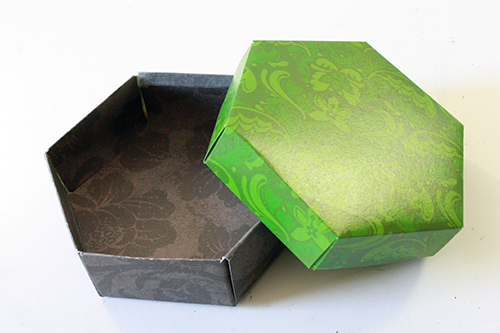
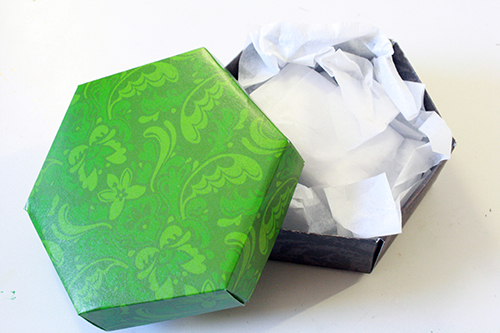
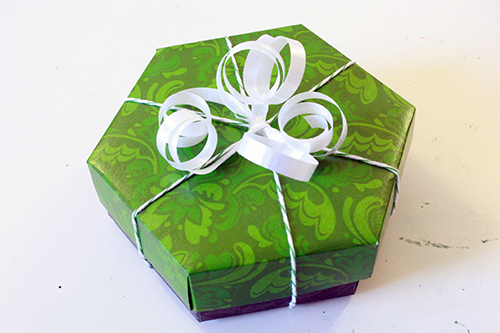
After we do the hearts, I’ll also show you how to make a very cute hexagonal box, in case you have a last minute Valentine’s gift to package. Or to put tomorrow’s discount chocolate in to make it feel all special and fancy.
*Do you know what conversation hearts are made of? Sugar and soda water. Seriously. Every DIY recipe for them I’ve looked at is just that. If you’re going to ingest sugar and soda water just go fix yourself a delicious cocktail – same ingredients but with some actual added flavour and BOOZE! Yeesh.
What you’ll need
materials for the conversation hearts:
- chocolate hearts
- washi tape
- fine tipped permanent marker
materials for the hexagonal box:
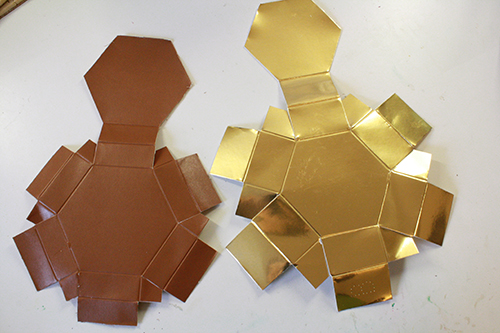
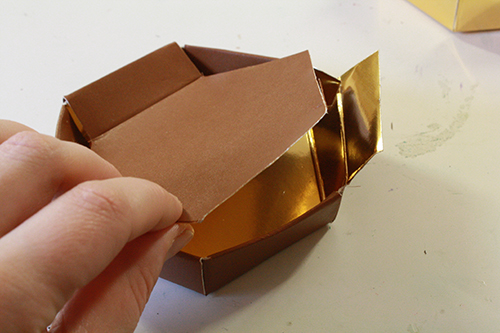
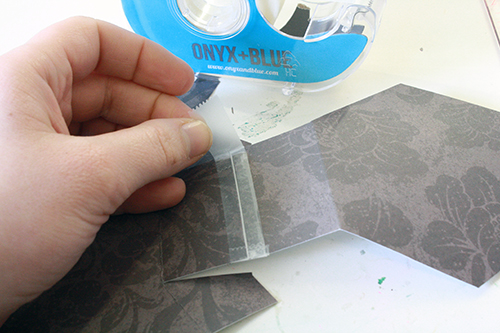
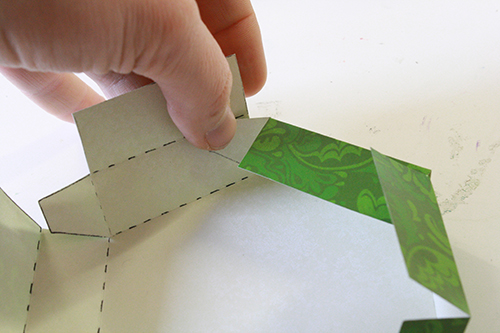
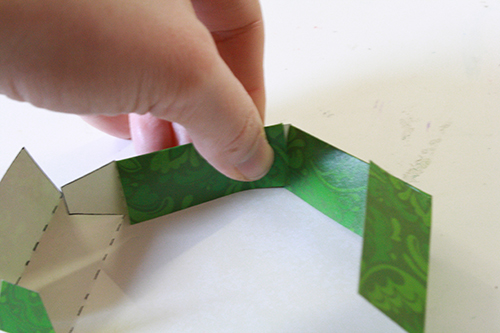
- coloured and/or patterned card stock
- [optional] ribbon, tissue paper, stuff to put inside the box
tools for the hexagonal box:
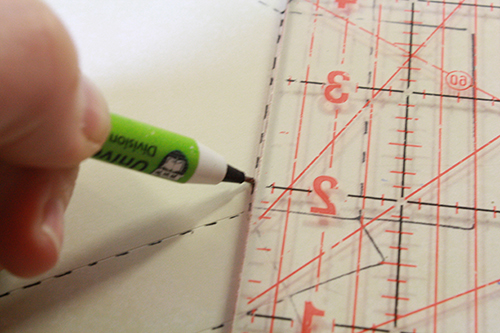
- mechanical pencil (preferably with a metal tip)
- printer
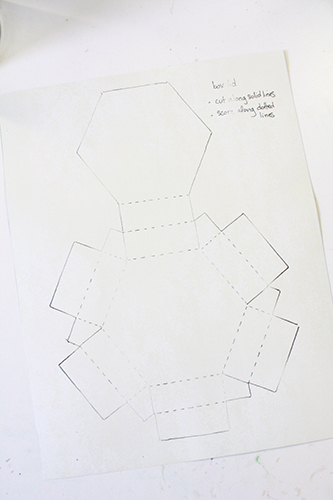
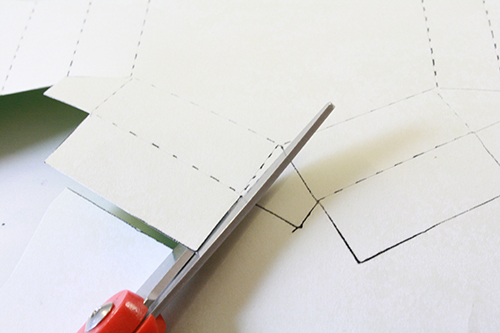
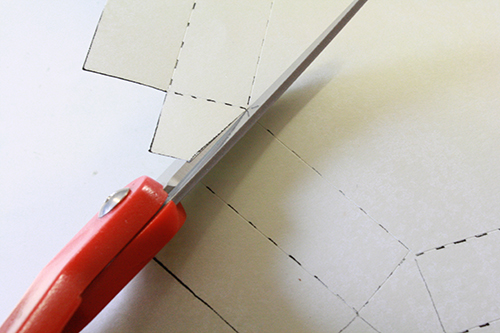
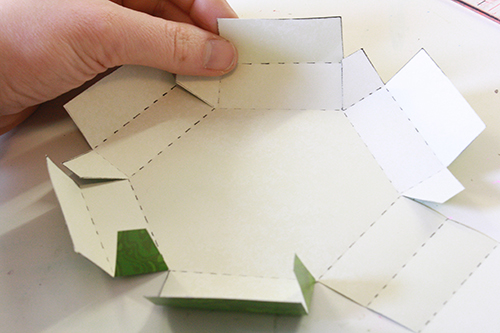
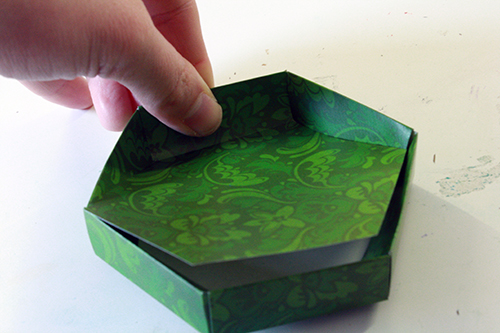
- these templates: hexagonal box lid and hexagonal box bottom
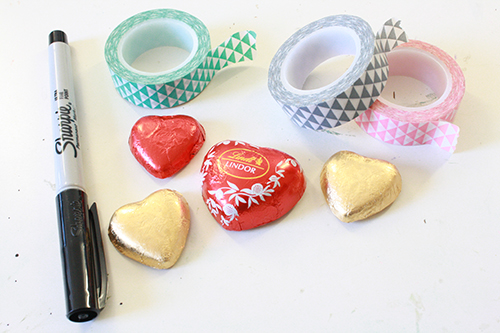
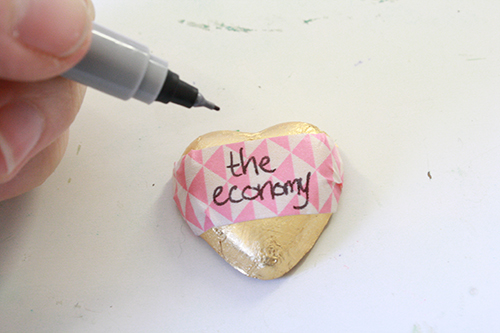
1) I debated a number of more complicated foil-wrapping, stamp-involving methods of doing this craft & they didn’t really seem likely to work plus I realized that sometimes, total simplicity wins over perfect aesthetic imitation. So yeah, just start by getting out all your foil-wrapped chocolates, leaving them in their foil, and cutting/tearing a piece of washi tape long enough to go across a chocolate’s front and wrap around to the back.
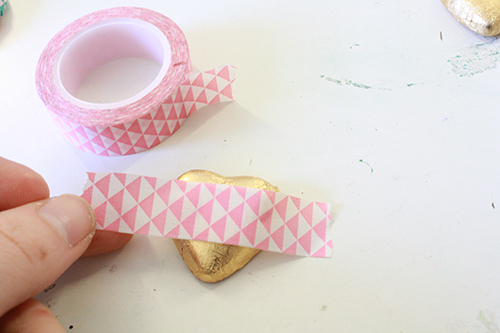
If possible, you want a tape that’s not too darkly coloured or heavily patterned, or it’ll be a bit hard to read the writing on it. These tapes were a little busy for the most fantastic result, but it’s what I had on hand and it worked well enough.
2) Press the tape onto the front of the chocolate, then wrap the ends of the tape over the sides of the chocolate and around to the back, pressing them as flat as you can.

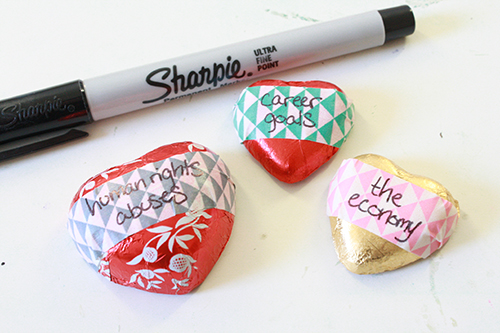
3) Write your conversation starters/topics on the front of the tape with a fine-tipped permanent marker. It does need to be permanent marker – I’ve found that even with washi tape, other felt pens smear. Ballpoint would probably work fine, it just doesn’t look quite as nice imo. Maybe a coloured ballpoint though…
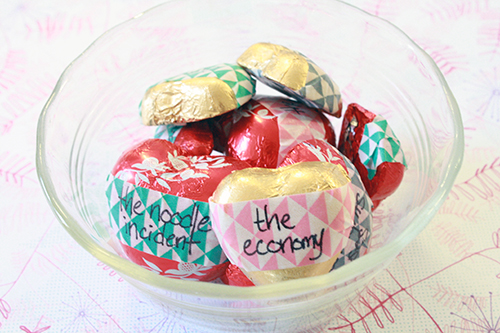
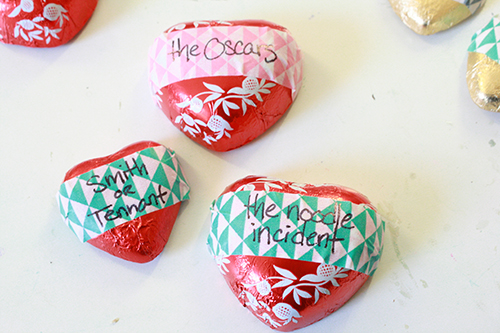
4) Continue until all your chocolates are taped and lettered. You can go with serious newsy conversation starters, or pop culture topics, amusing things, whatever.

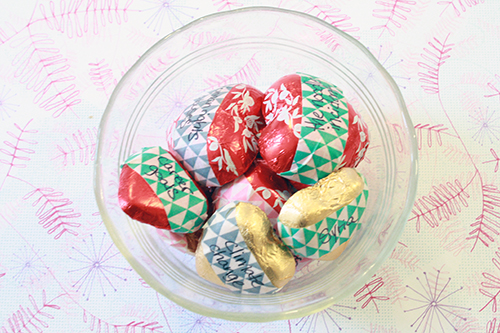
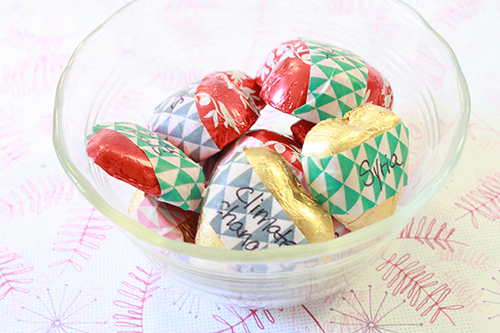
5) Serve.
I offered these to my husband after, and he was a little taken aback. “A bit grim” was his comment. Well perhaps, but “LOL” and “SO FINE” aren’t exactly going to lead anywhere especially interesting, after all…

シャネルスーパーコピーN級品
/ August 6, 2017日本超人気のブランドコピーブランド激安通販専門店!
┏━━━━━2017年人気最高品質━━━━━┓
◎━ 腕時計、バッグ、財布、アクセサリ ━◎最新入荷!
主に販売商品:ロレックスコピー、カルティエコピー、
エルメスコピー、ブラダコピー、ルイヴィトンコピー、
シャネルコピー、グッチコピー等一流のブランドコピー品。
商品の数量は多い、品質はよい、
高品質のブランドコピーを超激安な価格で販売しています。
信用第一、商品は絶対の自信が御座います!
驚きと満足を保証致します。
ぜひご来店くださいませ!
★ 2017年注文割引開催中,全部の商品割引10%
★ 在庫情報随時更新!
★ 実物写真、付属品を完備する。
★ 100%品質を保証する。 \r\
★ 送料は無料です(日本全国)!
★ 経営方針: 品質を重視、納期も厳守、信用第一!
税関の没収する商品は再度無料にして発送します
سپیده
/ September 5, 2021فروشگاه آنلاین سفارش روز پیشنهاد ما برای خرید شماست حتما سر بزنید
باربری تهران به یزد
/ December 1, 2022I really like your content
And I enjoyed your website very much.
I hope you will always be successful
M Shariful Hassan
/ March 11, 2024Great, also search for: https://school-companion.com/best-geometry-set-of-2024/
فروشگاه پمپ نصر
/ April 5, 2024very good (❁´◡`❁)