
My husband and I hunting for a new apartment right now, so it seemed like every time I sat down to write this week’s blog post, I was called away by one apartment viewing or another, and just kept on not getting the tutorial finished. But despite the fact that it’s 2 days late being posted, this project is incredibly simple and not particularly time consuming at all to complete.
Which is a nice change, because neither of those things are even remotely true of finding a new apartment to live in. Especially if you’re as horribly picky as we are. When you’ve hit your thirties but you’re still renting because the cost of housing is higher than Rob Ford on a pre-election bender and – speaking of politicians – some daft buggers or other screwed with the economy right about the time you’d normally have been landing your first grown up job and opening an RRSP, your tolerance for shittiness goes way down, and your concern about up-to-date appliances and the state of the baseboards ramps way up.
Anyway.
I can’t for the life of me remember how I first got the idea for this, but I’m super pleased with how this particular and somewhat random craft project turned out. It makes a great little customizable jewelry organizer, and the magnets on the back (though you can make it to attach via screws if you prefer) mean it’s very apartment friendly – no holes in walls necessary for hanging it up. All you need is a metal surface (a filing cabinet, medicine cabinet, the side of a metal desk…) and you’re golden. You could also put one on the fridge or the side of the microwave to hold keys and such.
Keep this one in mind six months from now, too, because I’m pretty sure it could make a great Christmas gift for someone who needs a little extra and nifty-looking organization in their life.
———————————————
What you’ll need
materials:
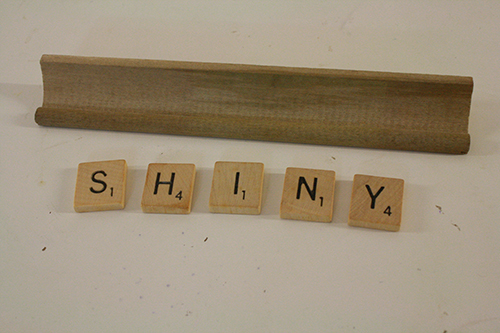
- Scrabble tiles to spell whatever word or name you wish
- Scrabble tile holder – that long wooden stand that you put your letters on when you’re playing Scrabble so the other players can’t see them
- small brass screws with loops on the end (you can get packages of these at the hardware store for just a few bucks – you’ll probably want around 6-9 screws, depending on how widely you plan to space them)
- strong glue
- strong small magnets OR magnetic strip
- cool jewelry and stuff to hang from your completed project
tools:
- [optional] spray paint OR acrylic paint and paintbrush
- round nosed jewelry pliers or needle nosed pliers
- pencil & ruler
- shoebox OR old newspaper OR a dropcloth (for painting on top of)
- clamps OR some string and a stair railing (the photos and text in step 8 will explain this)
———————————————–
Putting it all together
1) The first step and really the only at all tricky part of this project is finding a Scrabble game you can ruin. And by ruin, I mean turn into something newly and differently awesome than the initial awesome of the game of Scrabble.
If you don’t already have a spare Scrabble board sitting around the house (and I’m talking a proper wooden one, not those dinky plastic versions with the plastic tiles and tile holders, ugh, no), what I recommend is looking at thrift stores. It might take a few visits to a few different stores, but just start keeping an eye out, popping in whenever you’re nearby. I checked in at our local Value Village (a huge thrift store chain that has a whole aisle of used games) for a few weeks until I managed to procure one. And then I found a separate bag of just the letter tiles from another Scrabble game for sale there shortly after, and bought those for craft purposes too. If you want to put a lot of Zs or Xs or even Hs and Ms in your Scrabble crafts, you’ll need more than one set of tiles anyway.
Once you’ve sorted out the tile acquisition, you’ve completed the hardest part of this project. The rest is super easy.
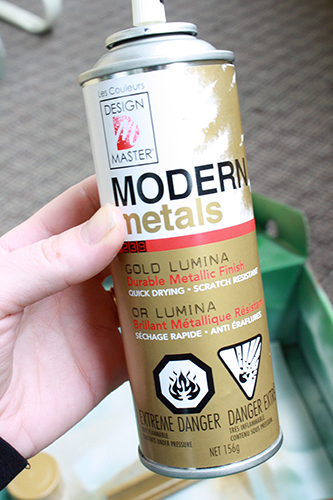
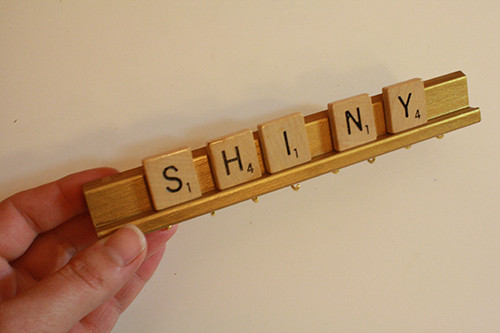
2) Pick out a tile holder and if you want, paint it. I spray painted mine gold, because I was having a bit of a gold spray paint kick for reasons I’ll discuss in a future blog post. Look forward to that post, you should.
For spray painting small things like this, grab an old shoe box or similar, take it outside (yes, even for just a wee bit of spraying – that stuff is thoroughly awful smelling and it takes only a bit to stink up your whole apartment), shake the spray paint can thoroughly and spray the tile holder. Once it’s dry, turn it and spray the other side, and so on and so forth. You’ll probably need to give it a couple coats, whether you’re using spray paint or acrylics and a paint brush.
You can also just give your tile holder a coat or two of varnish to make it shiny and more durable, or leave it as is. It’s not like you’ll be putting this thing out in the rain, so durability’s not too much of a concern.

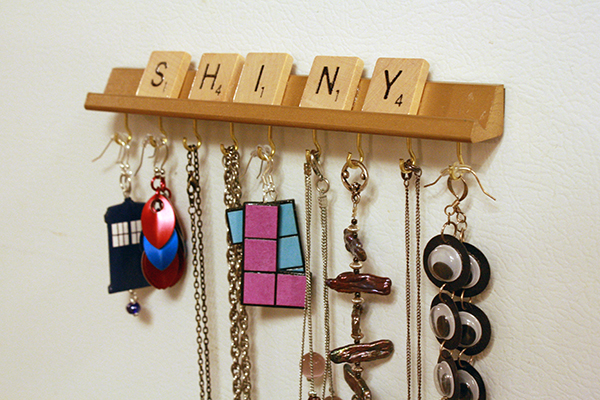
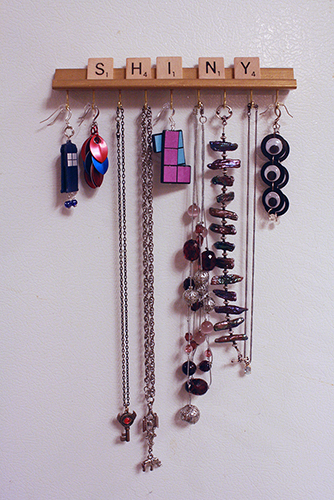
3) While your tile holder is drying (if you painted it), pick out the letters you want to use. You could spell out a name, or a favourite place, a word, whatever. I went with a Firefly reference, because I adore Firefly and the word happened to be super especially appropriate for a jewelry holder.
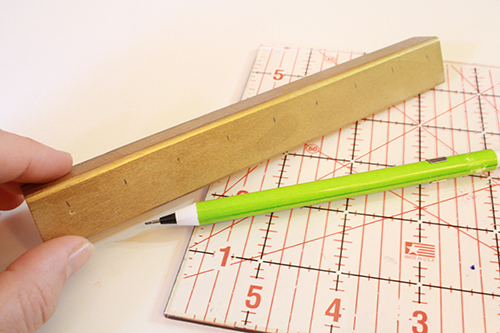
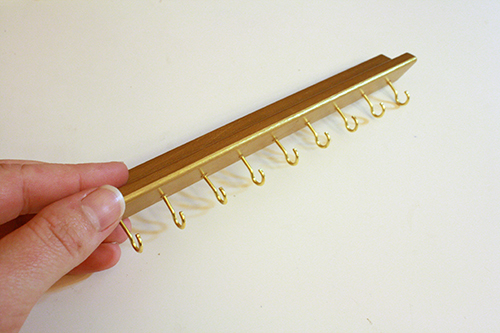
4) Once the paint/varnish on the tile holder is dry (if you painted/varnished it), tip it over so you can see the bottom surface of the tile holder. Towards the back, where the wood is thickest, make a series of little pencil dots where you want to place the hooks for holding jewelry. I recommend using a ruler to space your marks out evenly, and I recommend putting them between 3/4″ and 1″ apart. I went with 3/4″ spacing on mine.
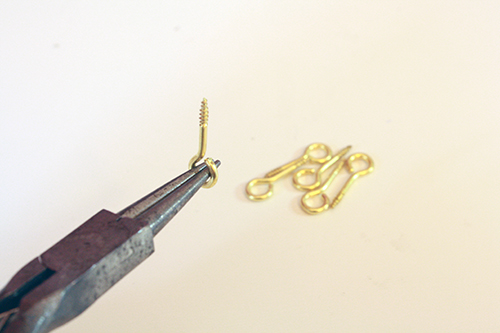
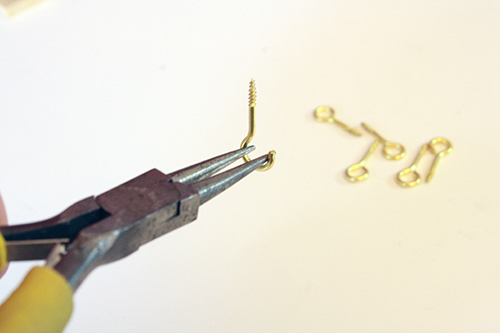
5) Now grab a screw, stick the tip of your pliers into the loop, and slowly pull the pliers open, also opening the loop of the screw, and making it into a hook instead. Since they’re brass, they should open up pretty easily – it’s a nice soft metal. Aluminum hooks (if they make such things) would also work fine.
Repeat with each screw.
6) Now grab an opened-up screw and give it a good poke into the wood where one of those little pencil dots is. Keep pushing inward as you turn the screw, twisting it by hand* into the wood until the full screw part is inside the wood. Make sure when you’re done that the hook’s is facing outward, facing the front of the tile holder.
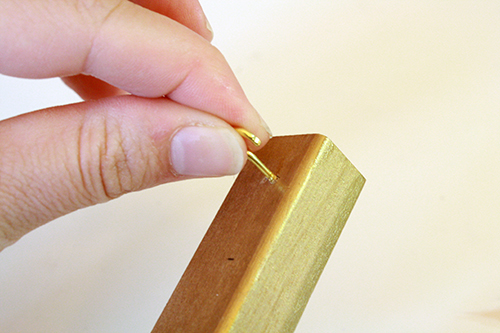
*You’d think you’d need to drill holes, but you really don’t. Given the softness of the wood, the tiny size of the hole needed and the difficulty of holding the tile holder still so you can drill straight into it, drilling is so totally more hassle than it’s worth in this instance. If you really find that doing it by hand is just not working, then you can get out the drill.
Repeat with each opened screw at each pencil mark.
7) Once all the screws are in, figure out where along the tile holder you want to place your letter tiles. Then glue them into place using a good strong glue. Though honestly, in a pinch, white glue would probably do the job here too.

8) Once the glue attaching the tiles is completely dried, cut a magnet strip the length of the tile holder, or grab a number of small strong magnets, and use your strong glue (you will need something stronger than white glue here for sure) to attach the magnet(s) to the back of the tile holder.
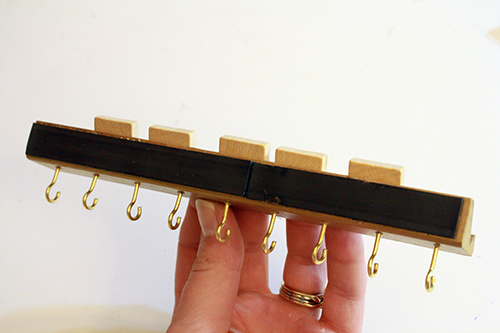
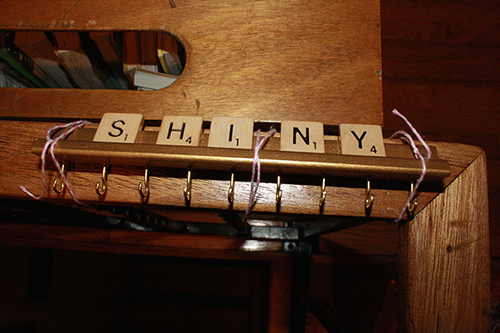
Let this dry thoroughly. Especially if you are using a magnet strip (which often comes in rolls) you may want to clamp the tile holder to a flat surface to hold everything tightly together while the magnets dry.
Since we’re house sitting and most of our stuff is packed and I’ve no idea where to get at our tool box with the little clamps in it (and was too lazy to go look in my uncle’s workshop to see if he had some little spring clamps, which I expect he probably does), I got creative. I grabbed some baker’s twine and tied the tile holder as tightly as I could to the stairway bannister, keeping everything tight and the magnetic strip flat while it dried.
Note: If you’d rather, you can get a couple screws and drill two size-appropriate holes at either end of the tile holder, to screw it into a wall. In this case, I’ve gone with the magnetic attaching method because the slant of the back of the tile holder would make screws going into it either stick out a bit or go into the wall at an awkward angle, and also because with a magnetic strip you need not drill any holes into any walls. Which, when you’re renting (or house sitting, for that matter), can be helpful.
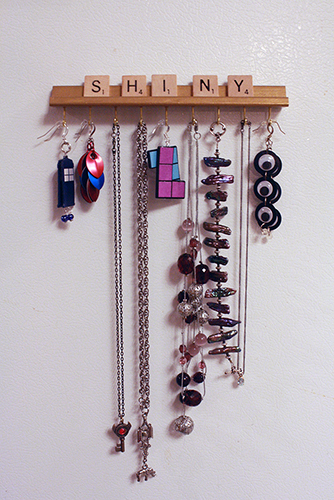
9) Once all the glue is dried, stick your jewelry holder to a magnetic surface and adorn with your favourite accessories! I found it holds earrings and bracelets just as easily as necklaces.
If you are lacking in jewelry to hang from your elegant organizer, or would like new jewelry to with your new organizer, you might try your hand at making some Pacman paper jewelry.
Or perhaps a pair of Star Trek com badge earrings.
And button jewelry is always a fun option.
Or keep it lightweight with some beach ball paper bead accessories.
So many possibilities!