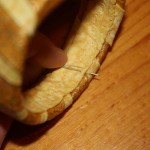
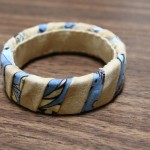
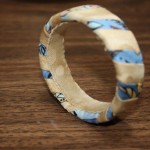
Alright boys and girls, here’s an original, totally Tally craft idea directly inspired by my conversion to West Coast use-your-trash Hippie-ism. As opposed to Midwestern donate-your-yogurt-tubs-to-local-kindergarten-art-teachers-and-throw-the-rest-away-cuz-the-recycling-companies-don’t-function-properly-out-here-ism, I suppose. But I digress. Next week, remind me not to write blog posts after a couple glasses of wine.
Thanks to making all those ribbon roses last week, I finished off a couple spools of ribbon and was left with the empty cardboard frames. I was about to toss them in the paper recycling bin when my hippie/pack-rat instincts kicked in and screamed, “Wait! I’m just sure you could use those for something!”
I also snitched a bunch of gorgeous little fabric scraps from my boyfriend’s mom this week. Put the fabric and the spools together and you get… beautiful new jewelry out of totally inexpensive materials – my favourite! Observe:
What you’ll need:
- empty ribbon spool(s) (Or other circles of cardboard/plastic etc. the right size to slip onto your wrist. You could also use this technique to re-cover old or ugly bangles you no longer like, or found cheap at the thrift store.)
- fabric scraps (even very small ones are totally useable for this)
- fabric scissors
- superglue (In case you aren’t aware, superglue is cheap. I can get a medium-sized tube from the dollar store for $1.25. And considering its varied, pretty much unlimited uses, it’s always worth having around the house.)
1) Peel the thin cardboard sides off of a ribbon spool. You’ll be left with a thick cardboard circle, perfect for a bracelet. Make sure to find a spool that’s the appropriate size for your wrist. And keep in mind that, with the fabric you’ll add to it, the size will decrease a bit by the end. So make sure there’s a bit of extra wiggle room when fitting the circle around your wrist.
2) Go through your scrap fabric and find a couple of different colours/prints to use. In total, you’ll want about 2 feet in length of one fabric and 2 1/2 to 3 feet in length of the other, in strips 1 1/2 or 2 inches across. It doesn’t have to be 2 consecutive feet – you can piece together smaller bits.
3) Cut your fabric into strips around 1 1/2 to 2 inches wide. This is variable. My strips were about 1 1/2 inches wide. Messing with the width will give you thinner or thicker stripes on your bracelet, so mess to your heart’s content, depending on the look you want.
4) Fold about 1/4 inch of each fabric strip over and iron it down. Do this on each side of the fabric, so when you flip it over you are left with a strip of fabric with no visible raw edges. You’ll need enough fabric to wrap completely around the cardboard circle (it can be in multiple pieces), as well as another piece of fabric (all one piece) to glue around the inside of the bracelet.
5) Using a bit of superglue, glue the folds in place. This is optional, but it helps keep everything tidily in place.
6) On one strip of fabric, run a thin line of glue along one edge of the front side.
7) Lay another strip of fabric in your second colour/pattern along that line of glue, face-up. Let dry.
8) Starting on the inside of the cardboard, glue down one end of your first fabric strip duo.
9) Wrap around the cardboard at an angle, gluing the fabric down on the inside of the circle.
10) If you run out of fabric, glue it down on the inside, trim any extra, and continue with a new strip where the old one leaves off.
11) Once the cardboard is entirely covered, take that one long strip for the inside of your bracelet and glue it in place.
12) Let everything dry.
Other, optional ideas:
- For more strength and durability, you can hand-sew the inside strip of fabric to the wrap-around bits.
- Decorate the outside with buttons, beads, flowers, etc.
- Before you glue the fabric to the bracelet, you could do some decorative stitching on the fabric, either by hand (perhaps with embroidery floss) or on the sewing machine.
- Try using 3 or more fabrics for a super colourful bracelet.
Now wear and enjoy! Make them in lots of different colours and mix and match. Then revel in the fact that your made-out-of-leftovers-for-next-to-nothing bracelet looks better than your friend’s $25 plastic accessories. Hah! (But because you’re such a good friend you’ll make her one too.)


Michelle
/ May 21, 2010These are so pretty! You did such a great job with these, and your tutorial’s very easy to follow. I just love that you recycled instead of just throwing out – very cool. I’m definitely going to try this one, thanks. Peace. :)
admin
/ May 21, 2010Thanks! I’m glad to hear the tutorial makes sense – it’s sometimes hard to tell, since of course _I_ know what I mean. :) Have fun making your own bracelets – I hope they work out great for you.
N.E
/ September 27, 2011It looks very elegant !!
Thank you :)
ramikakakaka
/ January 5, 2013Tök király!Tetsziik…Majd készítek ilyet…Very good…very ice
remade in Britain
/ March 4, 2015Recycling is an art in itself. True artists take inspiration from what they see, hear and perceive. Recycling is an art that uses what is perceived as rubbish and then turns it into something sustainable and useful. The bracelet is lovely. Thanks for sharing.
t8mc8lg004
/ February 3, 2016http://www.ooowatch.com/tokei/other_watch
スーパーコピー時計の激安老舗.!国内No.1時計コピー工房,アフターサービスも自ら製造したスーパーコピー時計なので、技術力でお客様に安心のサポー トをご提供させて頂きます。スーパーコピー 代引きN品をご 購入の方は、こちらへ.弊社は正規品と同等品質のコピー品を低価で お客様に提供します!すべての商品は品質2年無料保証です。 }}}}}}