I do this online crafting thing on swap-bot.com, a site where people trade snail mail, much of it handmade and crafty. It’s a gathering place for people who have too much free time (so not me) and/or a problematic crafting addition (hand goes up), and who feel an inexplicable compulsion to keep the tragedy known as the postal service in business.
Apart from involuntary interaction with the hordes of Twilight moms that inhabit these areas of the internet, I quite enjoy swap-bot. It’s a good way to get ideas for new projects, share your work, enjoy other people’s creativity and renew your resolve never to use phrases like “my Prince Charming.”
This week’s tutorial is for a craft I made for one of my swap-bot partners. The swap was titled “Look What I Can Do With Felt,” and like you’d expect, the requirements were that you make your partner something – anything – out of felt. My swap partner is studying marine biology, so I thought I’d go with that theme. (Additionally, my boyfriend and I got ourselves a fish a few days ago, for reasons I’ll explain sometime in the next 6 months. So ocean-y stuff seemed especially appropriate for this week’s update.)
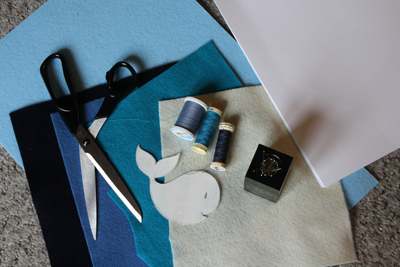
I also wanted to try something new. Which is why this week I’ll teach you to make a simple fabric journal – using felt. Why is this an awesome idea? Well, it means you can make a journal any size you want, with any thickness you want, give it a personalized cover and it’ll be cheap cheap cheap to do! Pretty much all it involves is felt (cheap!), paper (cheap!) and a bit of scrap denim or cotton (cheap if you cut up some old wrecked jeans, like I did – just remember to check with your boyfriend before you decide his jeans are ready for the scrap pile).
What you’ll need:
- scissors
- felt in several colours
- some other, non-stretchy fabric (denim, cotton, etc.)
- paper & pencil
- straight pins
- felt “board” (It’s felt but much stiffer, and can still be sewn through. They sell it at Michael’s, and probably other craft stores. If you don’t have any, you can just sandwich a piece of thin cardboard between a couple pieces of normal felt and sew the edges of the felt closed.)
- thread (to match your felt colours)
- sewing machine (or you can do this all by hand, if you wish)
- stack of printer paper
- phone book
- small nail or large needle
- hammer
- needle
- paper cutter of some kind (not strictly necessary, but highly recommended)
Putting it all together:
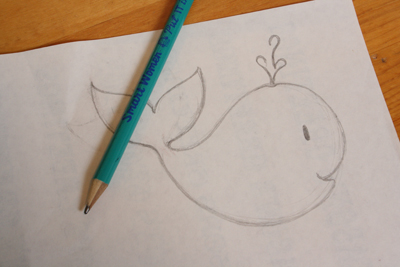
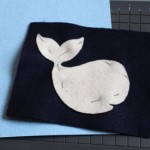
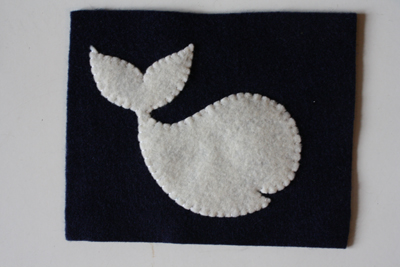
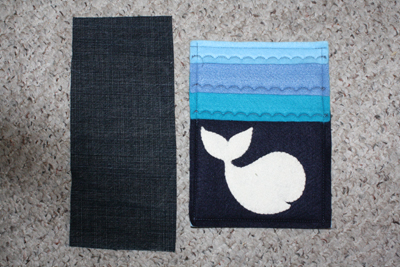
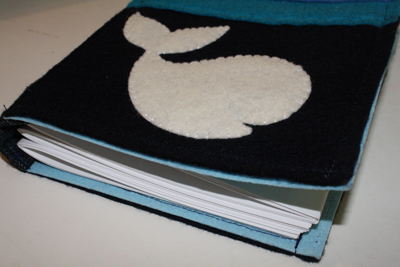
1) First design your cover. You can put an image on there, just do coloured stripes of felt, whatever. Maybe embroider something. For mine, I drew a whale (what with the whole marine biology angle). It’s probably the most scientifically inaccuarate whale ever, but it’s damn cute.
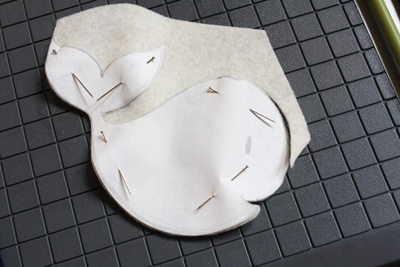
2) If you’re going with an image, cut it out, pin it to the felt colour of your choice and cut it out.
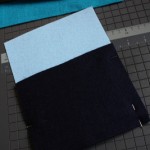
3) Now decide how big you want your journal to be. I went with 8″ x 6″. Cut two pieces that size from your felt board.* Then take the felt that your image will sit on, and pin that to one of the felt board pieces. Trim extra from around the edges, place your felt image where you want it, pin it to just the felt and not the felt board, then unpin those top two layers from the felt board.
*If you don’t have felt board, cut four pieces of normal felt the size you want your book to be. Then cut two pieces of cardboard slightly smaller than that. Sew all your fancy felt decorations and patterns onto two of the normal felt cover pieces first. Once that’s done, sandwich each piece of cardboard between these two pieces of felt and the other two (still plain and undecorated) pieces, and sew around the edges. So now you’ll have a front and back cover that are made up of two pieces of felt with a slice of cardboard sewn between them for solidity.
4) Sew your image on with small, evenly spaced stitches. (The style I used is called a whip stitch.)
5) Now take this whole piece, pin it in place on the felt board, and sew it down. You can sew through felt board with no trouble, even on a sewing machine.
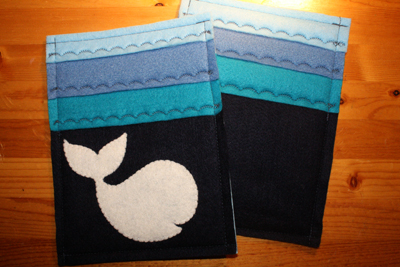
As you can see, I sewed straight across my felt stripes at the top of the cover, letting the extra felt hang over the edges. Once they were all sewn down I trimmed off the extra material, then sewed around the outside edges.
6) Add whatever other felt colours, shapes and embellishments you like to the cover. Use some fancy stitches, perhaps, or sew on some buttons, sequins, beads.
7) Repeat all this for the back cover, or do a different design there. I used the same design minus the whale.
8) Next, get your denim/cotton/other fabric and cut a piece that’s about an inch and a half to two inches longer than your covers. The width is up to you. Just keep in mind that you’ll end up with about a third of the width you start with. Also, the wider you go, the more pages you’ll have to sew into your book in order to fill it.
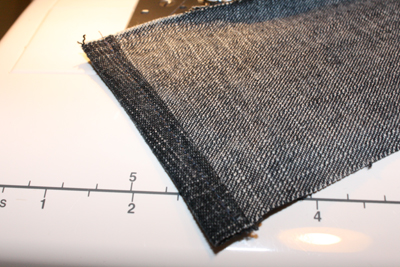
9) Fold over the short ends of your fabric rectangle twice, and sew them down.
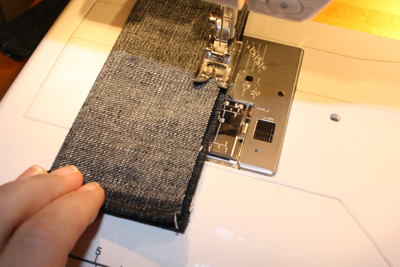
10) Fold your rectangle in half lengthwise, right sides together, and sew along the edge.
11) Turn the whole thing back right side out.
12) Press the now much narrower rectangle flat, and sew a straight line down the middle. (This is just to keep it from moving around on you while you sew your pages into your journal.)
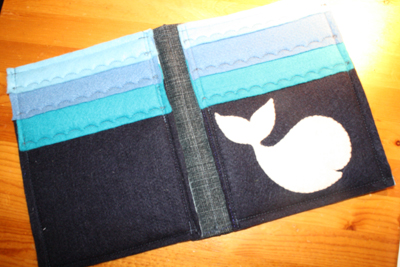
13) Sew one side of your rectangle to the inside of the front cover (on the cover’s left side, if you’re looking at its front.
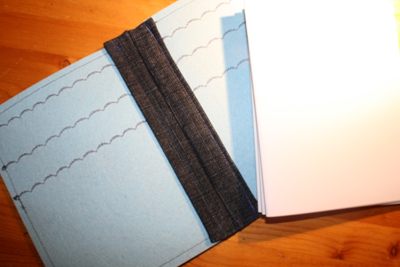
Attach the back cover in the same way (but to its right side, of course). You should end up with an empty book, like this:
14) Now, pages. Cut a bunch of paper to fit inside your book. This means that for my book, which was 8″ x 6″, I cut pages that were 7 1/4″ x 11″. (Because when the book is opened, you have to double its width, right?) Once the pages are cut, fold them in half. There, that’s your final page size.
You’ll stack one folded page inside another fold page, and so on and so forth. You may need to trim the outer edges so that the inner pages don’t stick out past the outer pages.
Make groups of these stacked pages. These groups are called signatures. You can put lots of smaller signatures into your journal, or just a few bigger signatures. They’ll be a bit more secure if you make them smaller, but you’ll also have to sew in more pages.
15) Take one single folded paper page and, on the inside of the fold, make a small pencil mark in the exact middle. Then make two pencil marks the same distance up and down from that middle mark.
16) Place this page (your template) in the middle of one of your signatures. Open up your phone book to the middle and place the signature on top of the phone book, so that the center fold of the pages is cradled in the center fold of the phone book.
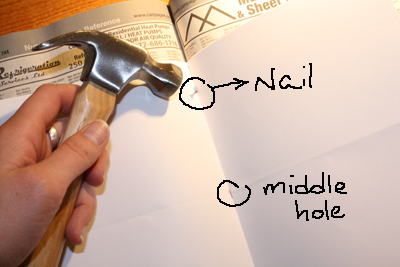
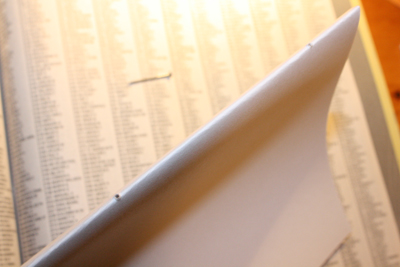
17) Using a small nail (or large needle) and a hammer, make a hole through all your signature’s pages at each of the three marks you made on your template.
You should now have a small hole through your signature in three equidistant places.
18) Repeat with each of your signatures.
19) Now take a needle and strong thread, Knot the thread. Place one of your signatures down over the inside back cover of your journal.
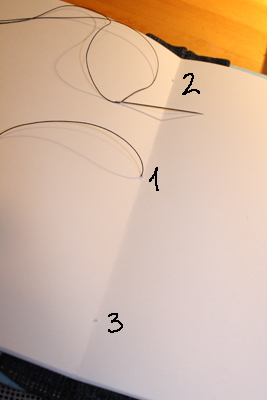
Insert the needle from the outside of the journal, up through the spine and through the middle hole (hole #1) of the signature.
20) Now push the needle through hole #2 (the top hole) and through the spine to the outside of the journal.
21) Bring the needle down the length of the journal and up through the spine and hole #3 of the signature (the bottom hole).
22) Push the needle through hole #1 (the middle hole) and out through the spine to the outside of the book.
23) Pull everything tight, but carefully so you don’t tear any pages. This is the tricky part. It takes some practice to get the tension right and keep it that way. You can always pull the thread out and try again if you mess it up, though.
When everything’s tight and the pages are securely sewn in and not going anywhere, knot your thread on the outside of the journal’s spine. Make a couple more knots, then cut the thread.
24) You will repeat this process for each signature. Once they’re all sewn in, you have yourself a nice new journal to fill. Start with a page about what a pain in the ass it is to sew pages into a book.


