So, long and slurred story short, I finished this blog post earlier, came home and drank a bunch of beer to celebrate the fact that it’s Friday and screw everything that has been irksome and difficult about this week, and now my will to write a cohesive introduction has been almost entirely annihilated*. So here’s the abbreviated, slightly buzzed version of what I might have said:
SPACE. Space is cool. I am cowardly and would absolutely suck at being an explorer of any kind (especially in space, what with the terrifying lack of oxygen & all), and I also probably know less about space and what it is and how it works than a baboon’s backside does. But I do know that it’s awesome. And cowardice aside, I love pretty pictures of amazing things, and images of space pretty much get top awards in that category. I also started following Phil Plait on Twitter recently (@BadAstronomer), who reinforces this whole notion of space being really damn cool, by posting links to really damn cool pictures & information about space all the time. If you’ve been following along here lately you’ll know that I’m working on a galaxy dress to wear at PAX. Last week I talked about the beginnings of making that dress (and all the shit that went wrong and how I nearly took a chainsaw to my sewing machine, or would’ve if I had access to a chainsaw), but this week I give you some more detailed ideas and techniques for just how to get that galactic look going on with just some bleach, fabric paint and a few ratty old brushes.
*I’m certain I have never before used that word in a blog post. See, beer is good for your vocabulary, boys and girls. Maybe not your pronunciation or annunciation, but definitely your vocabulary.
——————————————
What you’ll need
materials:
- black fabric – I used some recycled (“upcycled”) t-shirts, I’ve also previously done this on a plain non-stretch cotton. Pick whatever black fabric & try it out for varying results – just do a little test corner first w/ the bleach to make sure it’ll work the way you want it to.
- bleach
- water
- fabric paint – you definitely need white. I also suggest light blues, purples and/or pinks – at least one of these, maybe 2 or 3. Also, if you can get any or all of your paints in a spray bottle (Michael’s sells fabric spray paints, or presumably you could buy a small spray bottle and dump the paint in it), that is super helpful & makes the painting process faster & easier in my opinion.
- small spray bottle (for bleach & water mixture)
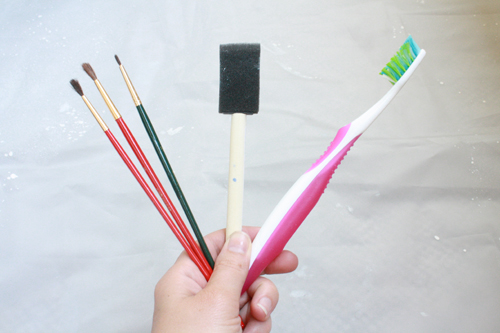
- small cheap sponge brush AND/OR various old or cheap paintbrushes AND/OR old toothbrush (you will need a toothbrush for sure if you are not using spray-on fabric paint
- dropcloth OR some old newspapers
- plastic yogurt tub lid or some other lid, dish or surface to use as a paint pallette.
——————————————
Putting it all together
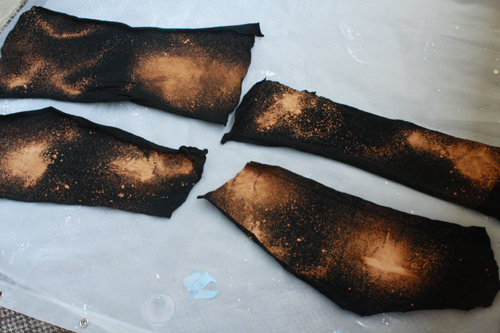
1) You start with the bleaching. I covered this bit fairly well in my descriptions of my galaxy dressmaking last week, so maybe have a read through that, and check out this tutorial on t-shirt bleaching for a few other general tips.
Basically, though:
- Put a mixture of about 1/2 bleach and 1/2 water into a spray bottle. (If it’s not strong enough, you can always add more bleach later once you’ve tried it out and determined that it’s not strong enough.)
- Lay fabric down flat in the bathtub, either with thick paper or newspapers under it, or between layers of fabric (if you’re bleaching an already-made garment or item, like a t-shirt). Regardless of whether you’re working on a bleach-safe surface (like the bathtub), excess bleach can leech through the fabric, then spread across the smooth surface below and be soaked up through the back of the shirt, messing with your design. It matters less for something as random as galaxy designs, but it can still be annoying.
- Do a test patch with the bleach on one corner or small area of the fabric, if you can, to see how it’s going to look, what the colour of the bleached area is, etc.
- Spray. Lightly. You can always add more bleach, but you can’t undo what you’ve already done. For space designs, I usually do some light mists from further back, and a few close-up sprays of specific areas, to create heavily bleached blobs and patches here and there.
- Wait. At first it will probably look like nothing is happening. Get up, leave the room, do something else for 5 or 10 minutes, THEN come back and see where things are at and whether or not you want to add more bleach. Trust me on this one.
- Add more bleach if desired/necessary.
Paint.
And it should be fabric paint. Yes, you can paint onto fabric with normal acrylics. No, it will not wash or last well. If you’ve ever tried this, you know that non-fabric paint mostly just sits on top of the fabric surface, creating a crusty or rubbery area. It keeps the fabric from draping well, it doesn’t last nearly as well and it also doesn’t look as good, at least up close. Fabric paint, on the other hand, soaks into the fabric a little, instead of just sitting on the surface.
If you can get fabric paint in a spray bottle (they sell it at Michael’s), I think it works brilliantly for this purpose. And you can spray some onto a pallette or just unscrew the spray top if you want to paint with it in a more traditional fashion. I highly recommend at least getting your white paint in a spray bottle if possible. You might be able to also just buy white fabric paint in a normal bottle and dump it into a small, cheap dollar store spray bottle. I haven’t tried this, but I assume it would work.
If you do not use fabric spray paint, you will most definitely need an old toothbrush in order to create the splatters of stars and such.
5) And now, some space painting tips, tricks and techniques.
First of all, understand that what follows are all suggestions, and there is really no right or wrong way to go about this.
When I was young (like, 14 years old young, not 6 years old young), my friends and I got super into Veggie Tales. There’s one episode where Larry (a very silly talking cucumber) is looking at the night sky and says “God made all those stars outta nothing. He just went Pthbbt! and there they were!” (Click to actually see the clip – this particular quote works better heard aloud.)
All theology and differing beliefs about the truth of that aside, that is pretty much what you’re going to be doing here. You are making stars. You just go “Pthbbt!” with your paintbrush instead of your mouth, and there they’ll be. You can’t really mess space painting up, when it comes down to it. Space can kind of look like whatever. There’s no right and wrong way to do this, you just start mucking paint around in some generally workable ways and you’ll have random stars and galaxies. So go crazy! Experimentation is really the key here.
Also, finding some space images online can be helpful. DO NOT try to copy them – you will only upset yourself with your inability to produce exact replicas on your fabric. Just look at them a bit for inspiration, then leave the computer and go paint using whatever space images and ideas linger in your mind’s eye.
So, getting started. Regardless of technique and brush choices, I recommend starting with your white paint. First:
Galaxy Centers
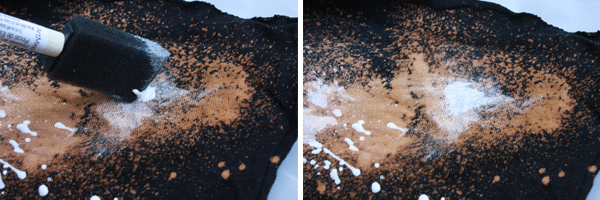
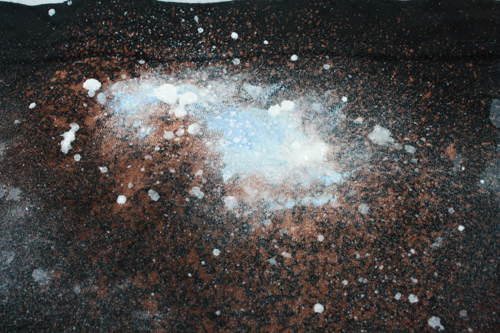
Regardless of what technique or tool I use to apply the paint, I usually start by getting some smears and blobs and general areas of white paint down in the middle of my big bleach spots. Y’know, to make those look like big galactic areas of bright light and matter and stuff. Space stuff. Sciencey, universal awesomeness going down in there.
Sponge Brushing
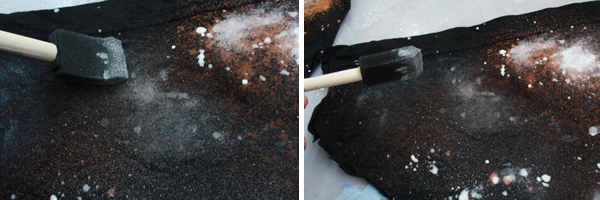
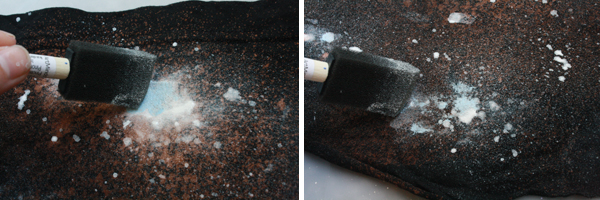
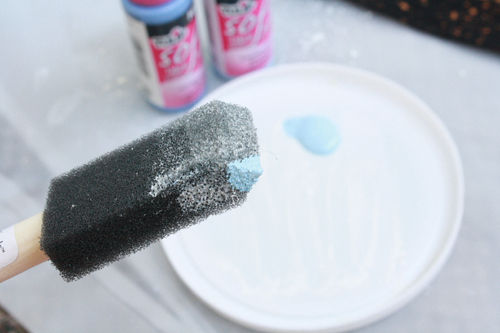
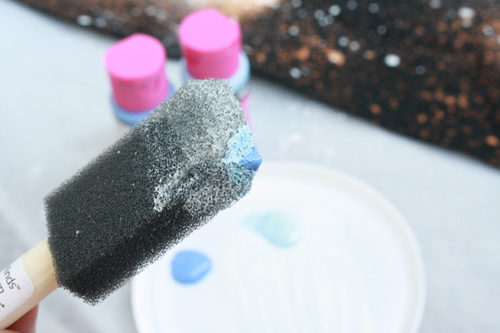
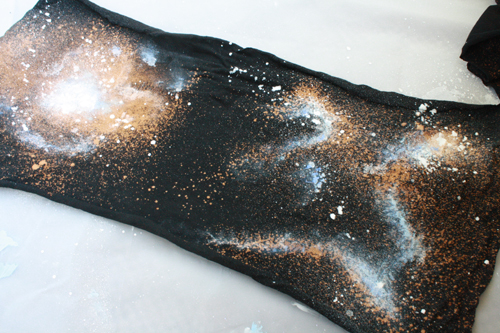
As you can see from the photos above, a sponge brush can work well for smearing paint around for those initial “galaxy centers.” Sometimes I’ll just spray a bunch of white paint in about the right area, then go in with the sponge brush and spread it around a little. Works well.
You can also create those sort of cloud-like areas and spreads with a sponge brush that’s got almost no paint on it. Usually I first smear about some paint in a galaxy center, then when the paint is mostly gone from the brush, I’ll wipe the brush around a bit in another area to create those light cloudy bits. I often do this around the edges of what I am now straight up calling a galaxy center, even though there is probably something very scientifically incorrect about that title.
When doing this, you will often need to hold the fabric taught with one hand while brushing with the other.
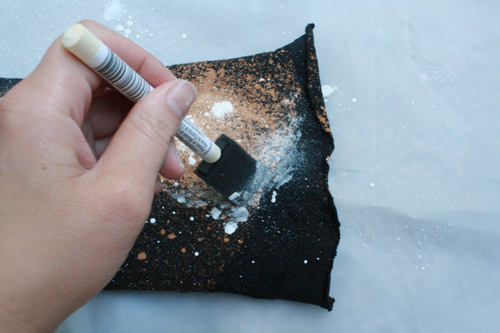
You can also use very corner edge of the sponge brush to do little dabs and dots of white or colour wherever you wish.
Spray paint.
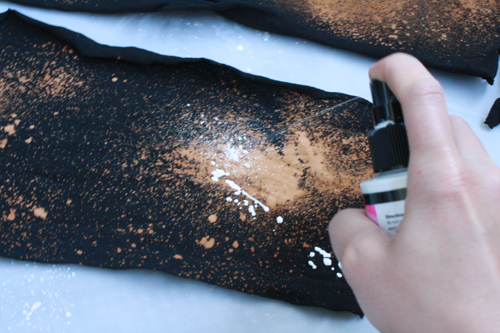
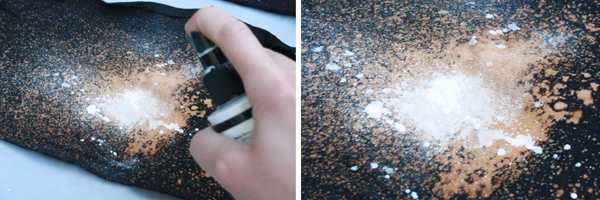
If you have sprayable fabric paint, you may want to practice a bit on some scraps. Or just practice spraying it onto some newspaper a couple of times. It took me a few tries to get used to how it sprayed. And depending on whether you press down quickly or slowly, you’ll get different results.
Quick press = a finer, more misty and evenly spread spray of paint.
Slow press = a blobbier, more drippy and concentrated and uneven spray of paint.
Both of these work well for different effects. You’ll also get a mistier, further-spread spray if you hold the paint further away, versus more concentrated and larger drops (more of a splatter effect) if you spray the paint from very close in to the fabric. Play around with this.
Paintbrush
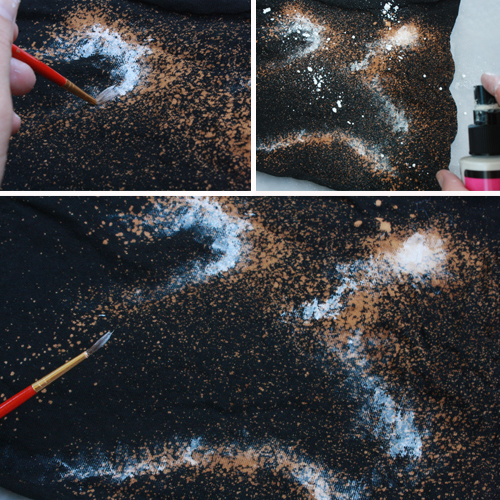
You don’t want to use high quality expensive paintbrushes for this, because you will not be treating them well. That said, cheap paintbrushes tend to lose bristles easily (which then stick in your painting and have to be picked out), which is why the plain old paintbrush is my least favourite tool to use for this. You can use it though, and do basically the same kinds of things as with the sponge brush.
There is one thing it’s very good for, though, and that’s creating little wandering mists of paint along the edges of galaxies, or to look like star trails or what have you.
To do this, flatten out the brush and get some paint on one side. Then lay it on the fabric, flattened paint-side down, and drag it backwards while wiggling it back and forth a bit. This creates a waving line of lightly applied paint, as in the photos below, and can look pretty cool in the right places.
Obviously a small paint brush can also work well for making small dots for stars here and there.
Toothbrush
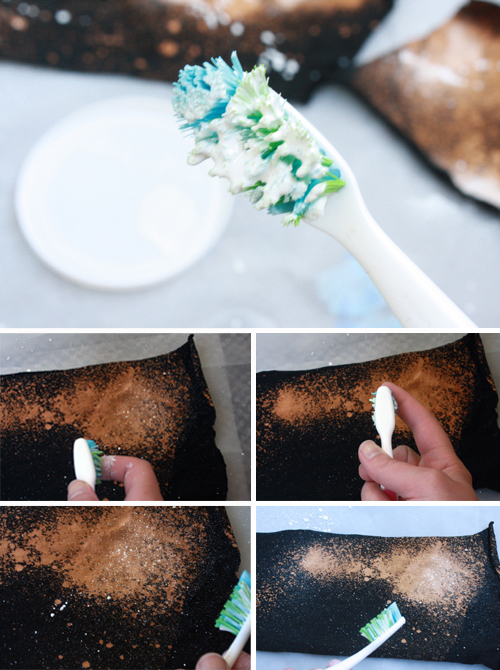
If you don’t have fabric paint in a spray bottle, you’ll need another way to get that spray of paint for stars and such. A toothbrush works fine (it’s the more commonly used method for this, honestly), it just requires more time and effort, and makes your fingers a bit sore.
It’ll need to be an old toothbrush obviously, or at least one you don’t plan to use again for anything other than art.
Dip the toothbrush in paint so its bristles are fairly heavily covered. Then hold the toothbrush close to the fabric, place a finger at the top of the brush, and pull your finger quickly and firmly backwards along the bristles, making them spray paint forward onto the fabric. It takes a bit of practice to get control over this technique.
The more paint you load onto the paintbrush, along with the closer you hold it to the fabric, the thicker, blobbier and more splatter-y the effect will be. If you put less paint on the brush and/or hold it further away from the fabric, you will get a finger, more evenly spread mist of paint.
Lather, rinse, repeat.
Adding colour
After I’ve done my white paint, I add a bit of colour. So far I’ve just been using a light blue and a medium blue/purple, but I’ve seen people make nice use of pinks and other blue and purple shades for space prints as well.
What I do is dab a very small amount of the lighter colour onto my brush, and just go over some of the white areas with the same various techniques I outlined above.
Then repeat with an even smaller dab of the darker colour. Basically just do the same things as with the white paint (except for the spraying, which I guess you could also do if you wanted to, but I don’t bother), but less extensively. the colour should help create highlights and depth.
Final Spray of Stars
Usually after using any of the paintbrush or sponge brush techniques, I’ll do one more spray of white paint over or near the area, to dot some more random stars about, which I think is a nice finishing effect. Sometimes I’ll do this after the white paint layers, and again after adding the coloured paint, and sometimes I’ll just wait until after the coloured paint to do my last spray of white.
6) Once you’ve finished painting (and I recommend leaving for a few minutes, then coming back and looking at it from close up and far away to determine whether or done or whether there’s more you want to add), follow the instructions on your fabric paint bottles for drying time and washing and such. My paint bottles said to let it dry for 72 hours before washing. The paint itself was dry before that though, within a few hours.
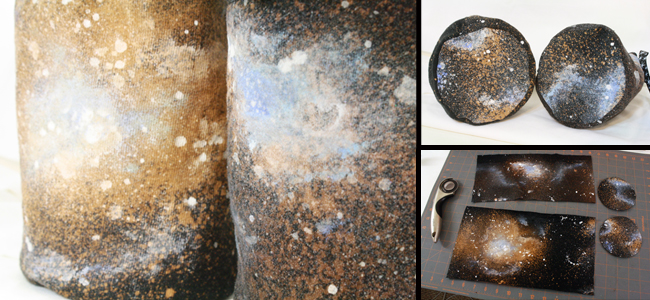
Here’s a picture of the various space fabric bits I was working on. Some are done and drying, some are still waiting for the colour bits to be added.
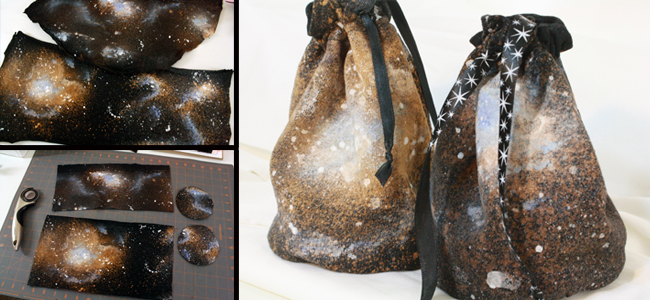
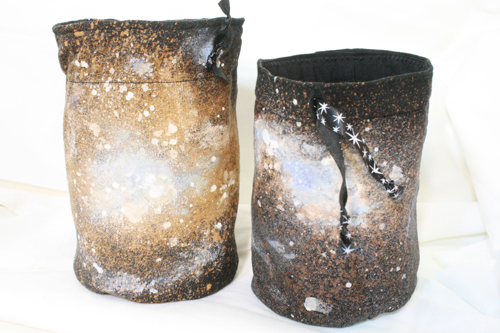
7) Make awesome spacey things! The day after fabric-painting, I turned some of my new space fabric into space dice bags using the dice bag-making method from this tutorial.

