Here’s a bit of crafting advice: don’t brush your teeth with the same toothbrush you use to scrub chemical substances off your craft projects.
I know, you’d think this would go without saying. But you’d also think I’d have known better than to dump green dye down a white porcelain sink that one time (I do know better now). We’re all a bit stupid on occasion.
The toothbrushing incident was a lesson in putting your craft supplies away after completing a project. I’d been etching glass jars before Christmas, as gift containers for homemade candied pecans. I scrubbed the last of the etching cream off with an old toothbrush, and left the brush to dry on the bathroom counter. Yeah, you see how this is going to go. The next morning, I grabbed the wrong toothbrush (it happened to be the same colour as my current actually-for-teeth toothbrush), and got most of the way through brushing before I realized what I’d done.
There followed a lot of spitting and mouth rinsing, and two more gum-abusing brushes with the correct toothbrush, and then some more rinsing. Because of course the etching cream jar had this on the label:
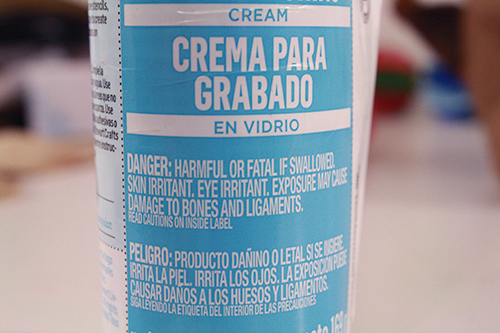
I happened to have a doctor’s appointment that afternoon for something completely unrelated, so I asked him about it when I went in (having not died in the meantime), and he looked at the ingredients and said the warning was somewhat over the top. So thanks for all the unnecessary worry there, Martha Stewart Crafts TM. But apart from some tingly gums and a heart-racing start to the day, in the end I was fine.
So, this week I’m going to teach you the very simple process of making etched glass jars (or other containers), which make great gift-giving vessels (fill them with hot chocolate mix for a winter birthday, cute paperclips for a coworker’s gift, chocolates for Valentine’s Day, and on and on) or storage containers for the kitchen or office or wherever. You just have to promise to be a more responsible crafter than I and not try to poison yourself at the end of the project!
———————————————
What you’ll need
materials:
- glass etching cream
- rubber gloves (Clearly the cream is not nearly as dangerous as the label would have you believe, since the label makes it look like this stuff might melt your insides if you just look at it too closely, but you should still be careful. It’s toxic shit – it’s eating into glass, after all.)
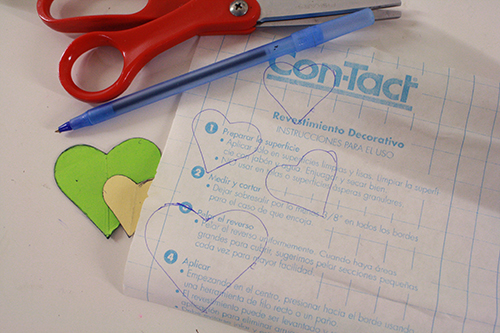
- contact paper (I think this is called something else in other places, but it’s basically plastic-y stuff – sometimes clear, sometimes coloured or with patterns on it – that has a paper backing and if you pull that backing off, the plastic-y sheet is sticky, like tape. Here, it’s often used to line kitchen shelves and drawers. My dad used to put the clear stuff over his book covers to protect them better. You can use clear or patterned stuff for this project.)
- glass jars to etch (with lids, if you need those) – empty and washed out peanut butter, pickle, and other such jars work perfectly for this, and if you collect them throughout the year you don’t have to go out and buy anything extra – just use jars for foods you keep in the house and use up regularly already.
- old towel or rag
- [optional] spray paint (for painting the jar lids if you like – it hides the peanut butter or pickle label on there), pretty paper (for covering the tops of jar lids) or pretty fabric & a rubber band & a piece of ribbon (also for covering jar tops)
tools:
- large-ish paint brush
- old toothbrush or other brush for cleaning off the etching cream
———————————————
Putting it all together
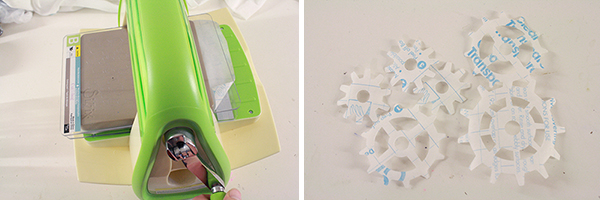
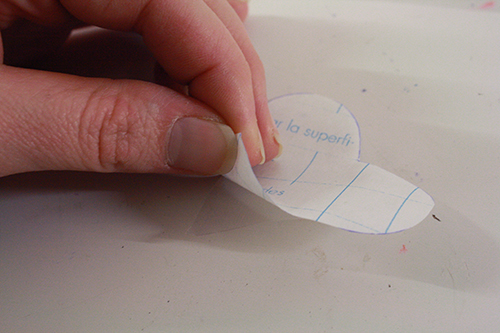
1) The first thing to do is figure out what images you want to have on your jars. Whatever it is, you’re going to need to cut the shapes out of your contact paper. I’d advise you keep the images simple, and/or make them something you can trace, or make them something you have a punch or stencil of some kind (like a Cuttlebug or other brand of die cut).
Draw/trace your images onto the paper side of your contact paper. Or, if you’re using a die cut, run an appropriately sized piece of contact paper through your die cut machine, to get a cut out of the image you want.
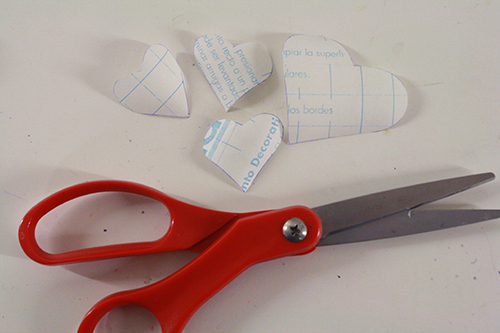
2) Cut the images out. There are two ways to proceed from here:
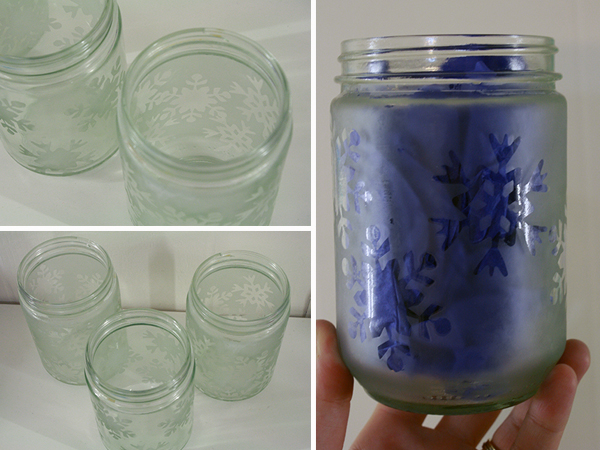
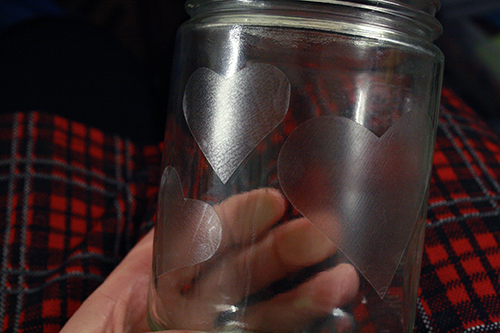
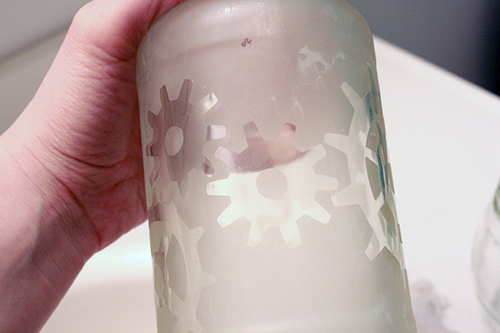
- You can use the positive image (the one you cut out from the contact paper). If you use this image, it will show up as clear glass on your completed jar, while the areas around it are etched (making them sort of foggy looking).
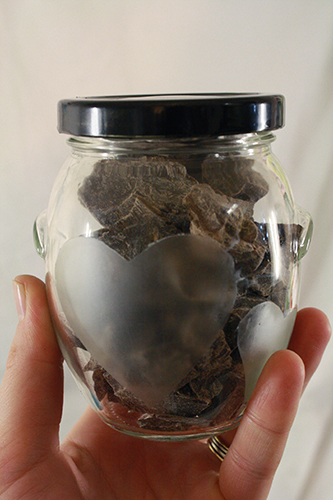
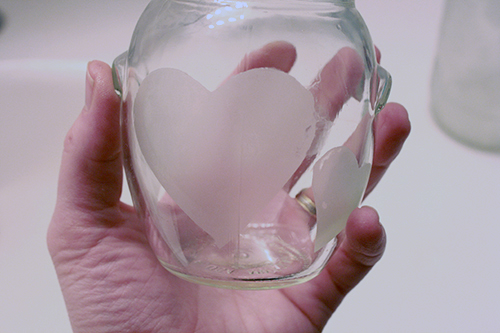
- You can use the negative image. To do this, you cut your drawn or traced image out of the contact paper and discard it. Then you use the contact paper from around that cut-out image, putting that on your jar and applying etching cream inside it, so that the shape of the image is etched and foggy, but the space around it is still clear, normal glass.
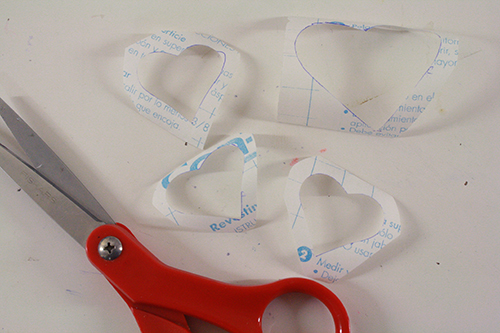
To cut out a negative image without cutting through any of the paper around it, use one blade tip of your scissors like a knife to cut a slice in the middle of the image. Insert your scissors through that slit, and carefully cut out the image from the inside.
I’ll show pictures of both the above methods as we go along, so you’ll have visual references for both.
3) Peel the backing off your contact paper shapes so that you have just the clear sticky stuff left. Apply it to your jar, and press it down firmly all over, especially around the edges. You can put more than one image on each jar, whether it be the same image multiple times, or multiple images.
Note: the larger your image relative to the size of the jar, the more you may have to fiddle with it a bit to get it to lie smooth over the curving surface of the glass.
Positive image method:
Negative image method:
You can also just use strips of contact paper (or tape, but I find contact paper is the thing that sticks best but also peels off without too much trouble) to make a striped jar.
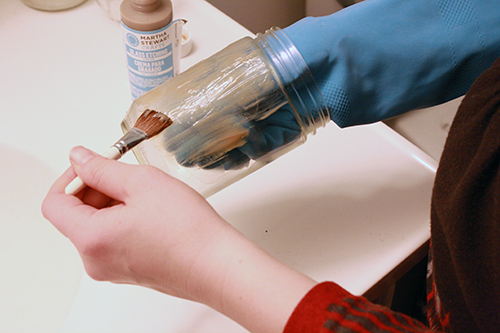
4) Now go into the bathroom or a workroom with a sink and turn on the fan or open a window. I don’t really recommend doing this in the kitchen, near all your food prep utensils and surfaces and whatnot. Put on some rubber gloves, get your brush out and open up your etching cream.
Note: the etching cream I used squeezed out in big blobs that were a little difficult to spread around at first, but after a few strokes with the brush it spread smoothly and evenly.
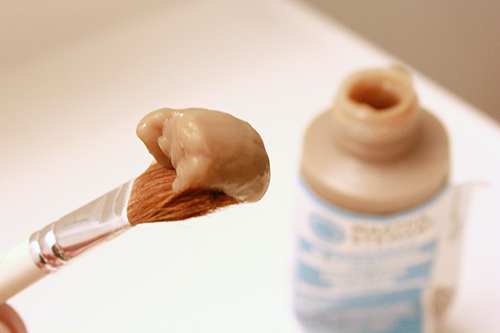
5) Follow the instructions on your etching cream bottle, which are probably to slather a fair bit of cream onto all the areas of the glass you want etched.
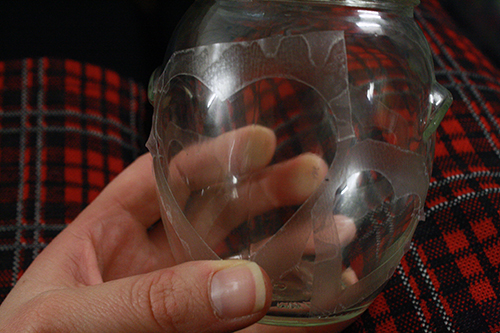
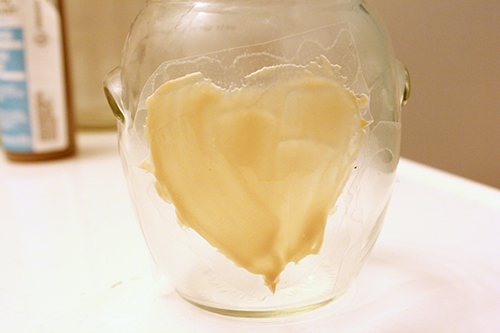
If you’re doing the positive image thing, then apply etching cream all over the jar:
If you’re doing the negative image thing, apply etching cream only inside the cut-out image areas:
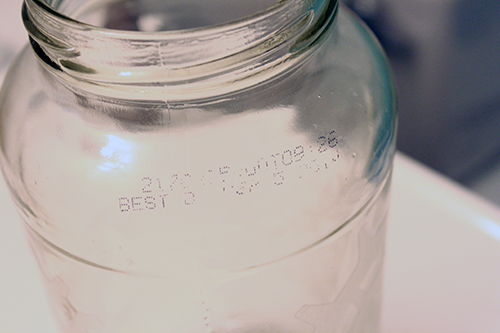
Note: You know those annoying date stamps that are sometimes printed right onto the glass? I wondered if the etching cream (which, of course, is basically acid that eats away at the glass) would remove them. The answer? YES! Just apply etching cream overtop of those bothersome date stamps and they will vanish completely when you wash the cream off.
6) Continue to follow your etching cream instructions, which are now probably to let the jars sit for a certain amount of time. I’d advise setting them on a piece of scrap paper – I’m not sure how likely the etching cream is to eat into a porcelain countertop, but I’m not super keen to experiment in order to find out.
7) While you’re waiting, figure out what you want to do about the jar’s lid. Here are some options:
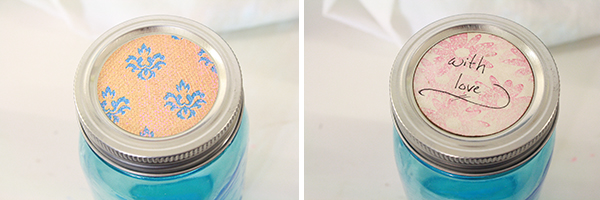
Mason jar lid with or without paper insert
If you’re using something like a mason jar, you might not want to do anything at all. Though you can cut out a circle of pretty paper the size of the lid’s inner piece, and perhaps write a message or the recipients name on it, or otherwise decorate it up.
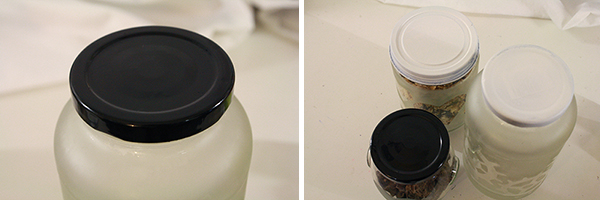
Spraypaint a metal lid
If you’re using a recycled food jar that has a metal lid, you can actually spray paint those. You’ll need spray paint, a drop cloth or cardboard box over/inside which to do the spraying, and you’ll want to do the spraypainting outside. One of those little rennovating masks isn’t a bad idea either – spraypaint fumes are nasty things to breathe in. You’ll need to do at least a couple coats of the paint, and make sure you stand the lid up on edge and work your way around it to paint the edges, too.
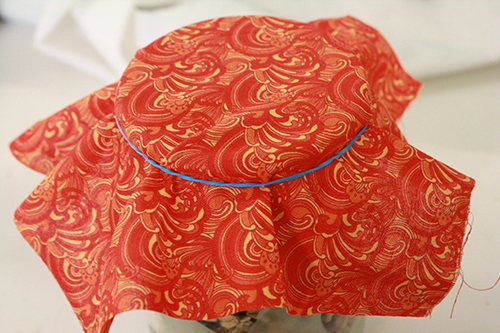
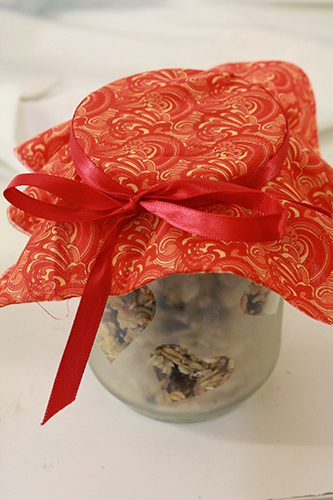
Fabric lid cover
Or, with any type of lid, you can cut a square or circle of nice fabric a bit larger than the lid, and use a rubber band to secure it overtop of the lid to pretty it up. Tie a length of ribbon around it to hide the rubber band.
8) Again, follow your cream’s instructions, which are probably to wash off the cream after the proper amount of time has elapsed. Use an old toothbrush to help scrub off the cream. (Make sure it is clearly labeled as a not-for-teeth toothbrush, and don’t leave it in the bathroom when you’re done!)
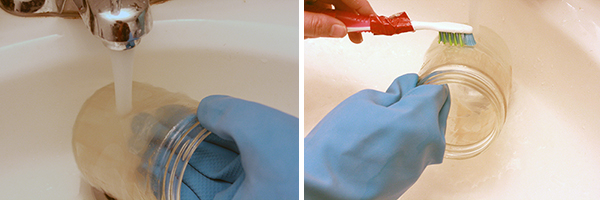
Use an old towel or rag to wipe off the water and any remaining bits of cream.
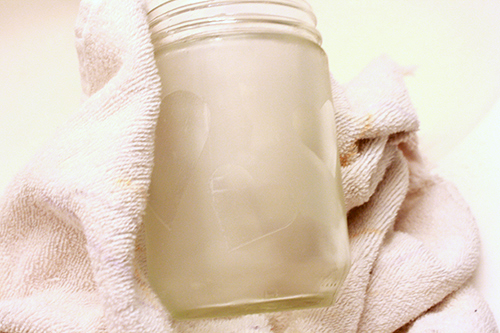
Note: glass etching is a somewhat subtle effect, and the first time I tried this when I got to the washing-off-the-cream stage I thought the cream had failed completely. I just couldn’t see it right away with all the water everywhere. Once the jar was fully washed off and dried, the effect was clearly apparent.
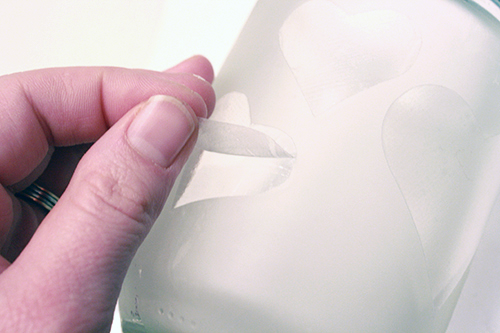
9) Now peel off the contact paper shapes. Sometimes they’ll actually be sticky enough to save and use again. Wipe the jar off again with a towel or rag.
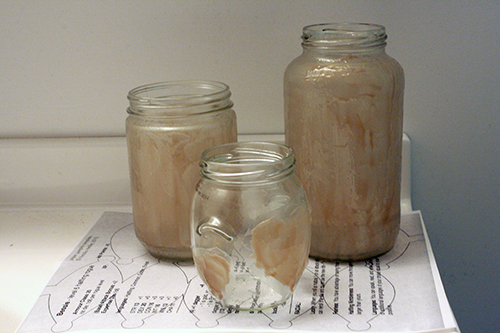
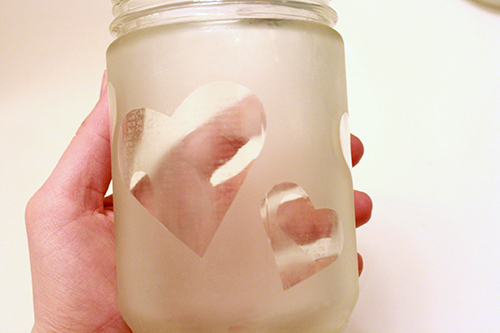
Positive image results:
Negative image result:
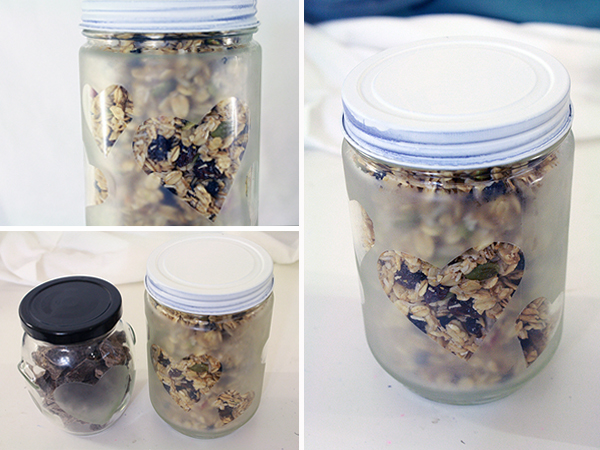
10) If you’re going to put food items in the jar, give the whole jar a good wash.
11) Fill with goodies!
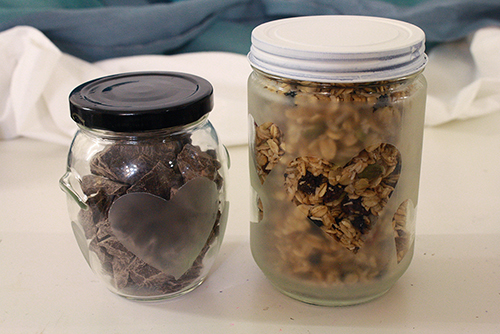
If you’re trying to avoid sugary treats, here are some ideas: nuts, fancy granola, dried fruit, homemade applesauce, high quality coffee or tea, spices, homemade dry soup mix.
Or, if it suits the recipient, fill a jar with things like craft or office supplies, seeds for planting, bath salts or a nice body scrub.
These can be done for any occasion. I used a die cut to do snowflake jars full of candied nuts at Christmas. Do hearts for Valentine’s Day, make monogramed jars for specific people, etc.