First of all, did you see yesterday’s post? I have created a Patreon page and would love it if you took a few minutes to watch the video (oh my gosh video editing is such a time consuming pain, please go watch it and give me a pat on the back for just getting it done) and consider becoming a Patron! As I posted yesterday, your donations will help me to continue doing these tutorials and hopefully adding future tutorials for new and different projects and mediums.
A couple other things happened this past week. On Monday, I found out that at the end of this month the Canadian postal service is raising the price of letter mail by anywhere from 10 to 65 cents, depending on where you’re sending a letter to. This says 2 things to me:
- We Canadians should send all the letter mail we’ve been meaning to but procrastinating on NOW, before April 1st.
- After April 1st, any letter mail you send should be that much more special. It’s gotta merit that extra postage!
- Ok actually there were 3 things, and the 3rd is obviously: Canada Post is dumb. Again. Always.
The other thing that happened was my birthday. I turned 29 on Thursday, and the day was filled with Twitter and Facebook posts from friends and family near and far, all wishing me a happy birthday. I also received several snail mail birthday cards during the week. They’re seemingly small & simple things, cards and tweets, but they can have a huge impact. I felt so special & cared for, getting all those lovely little messages.
So taking a moment to send someone a nice personal message is excellent, and snail mail is awesome. And it’s still a pretty small expenditure even with postal price hikes – at most a couple bucks, even to send a card to the other side of the world.
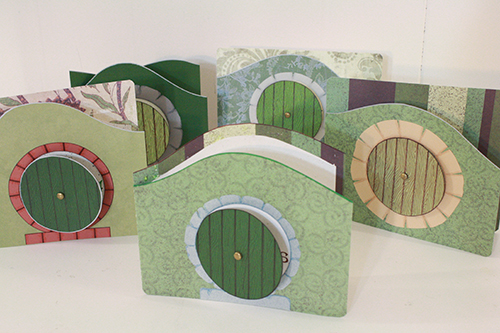
I’m going to challenge all of you this week to send a card to a friend or a family member, just because. Just to say hello, and tell them you’re thinking of them, and brighten up their day. And to help you with that, I’m going to show you one super cute card that you could perhaps make to send someone this week.

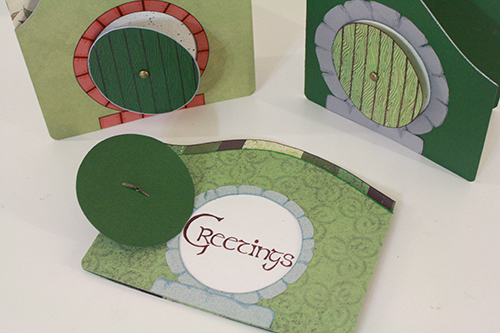
I love The Hobbit. I read it for the first time in elementary school, and I’ve lost track of how many times I’ve read it since. As a kid I was most taken with Rivendell, but the homecoming to The Shire was also a great moment (and even moreso the Lord of the Rings homecoming, which is far more dramatic and in which Merry and Pippin are badass). And whether you love hobbits and the world they inhabit because of the books or the movies or any other reason, the point is that hobbits are awesome and their darling little Shire home is one I think we’ve all at some point wished we could inhabit, or at least visit.
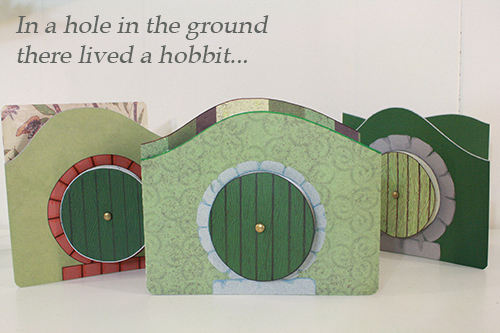
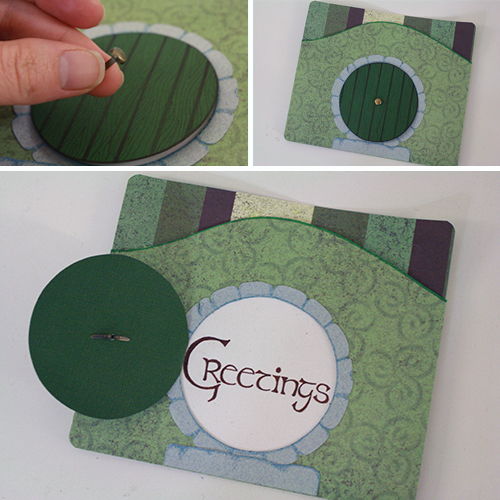
The Shire and the hobbit homes within it capture a homey contentment that seems to me a perfect theme for a greeting card. Hobbits are very welcoming sorts, as long as you’re not trying to sell them on a nasty adventure or snitch their silver spoons. I liked the idea of opening a hobbit door to see a warm, happy message of greeting inside. And that’s exactly what these cards let you do.
———————————————
What you’ll need
materials:
- paper:
- 1 sheet of green or green-ish card stock – large enough to fold in half to card sized. Card stock that has a colour/pattern on both sides is the best for this, though one-sided card stock is also fine.
- 1 piece of a different green card stock – for the hobbit hole door
- 1 piece of gray, brown or brick-coloured card stock – for the doorframe
- 1 piece of normal weight white or light coloured paper – for the lining inside the card, to hide the door opening and (if the card stock the card is made of is too dark to write on) to write the card’s inner message on.
- glue stick
- small gold brad OR gold paper & a hole punch OR gold paint & a paint brush
- fine tip felt pens OR a printer & a downloadable hobbit-y font
- [optional] crayons, coloured pencils and/or markers
tools:
- scissors
- pencil
- ruler
- 2 circular objects to trace, 1 smaller than the other – 1 for the door, 1 for the frame around the door (Jars and lids work well for this, or the bottoms of cups/mugs, etc. Anything you can find that’s the right size. My circles were 2.75 inches across and 3.25 inches across respectively, so that’s a half inch size difference between circles. I wouldn’t go any smaller a difference than that.)
———————————————
Putting it all together
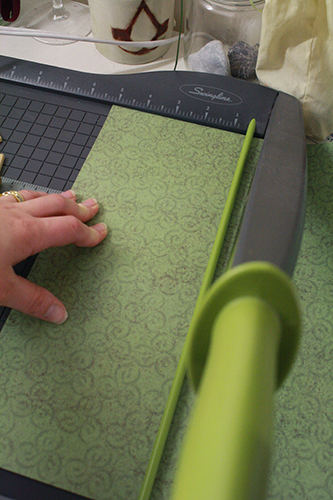
1) First cut a long rectangle from your main sheet of card stock, the one that’s to be the actual card base. I recommend making it at least 4 inches wide and 10 inches long. Mine was about 5 1/4 inches wide and 12 inches long.
Whatever size you make it, just remember to make sure you have an envelope the rectangle (once folded in half) will fit into, for actually mailing the card later.
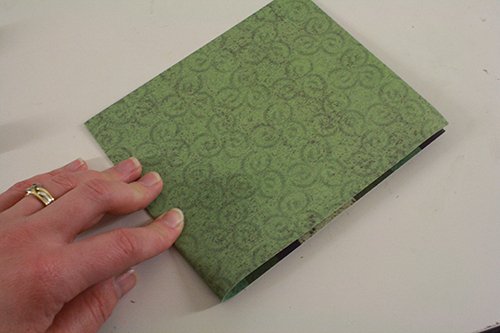
2) Fold the rectangle in half.
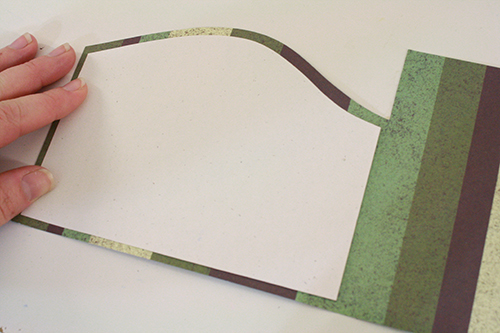
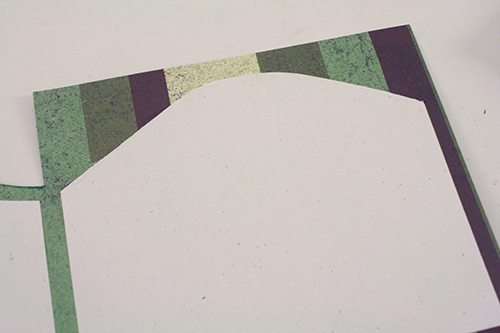
3) Now open the card up and inside, on the left hand side, draw a hill-shaped bump that varies in distance from the top edge by about 1.5 to .5 inches.
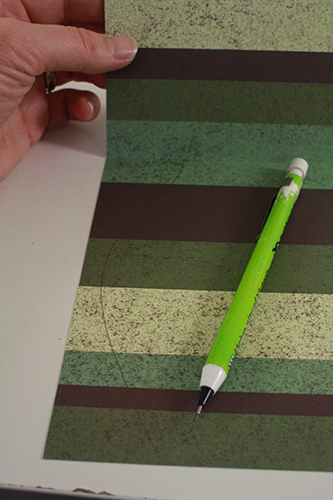
Then cut along that line only up until the card’s center fold. And then, cut down along the center fold line from the top of the card until you reach the other cut line.
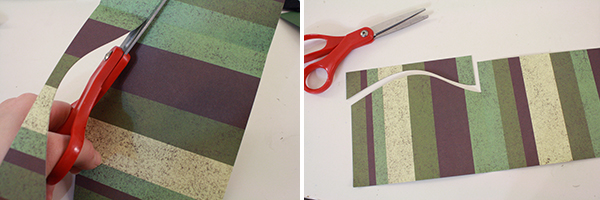
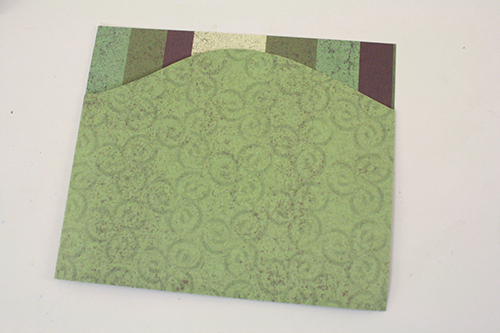
Voila, a hill for a hobbit hole!
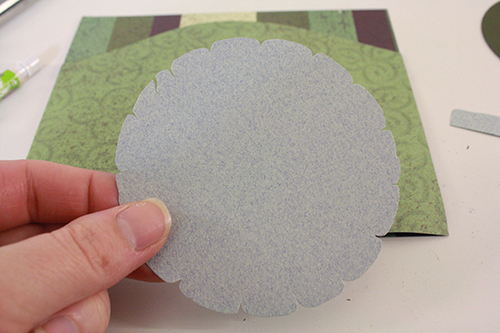
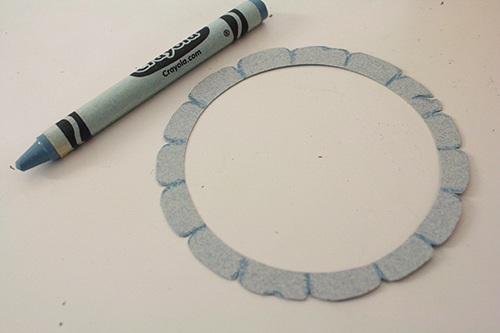
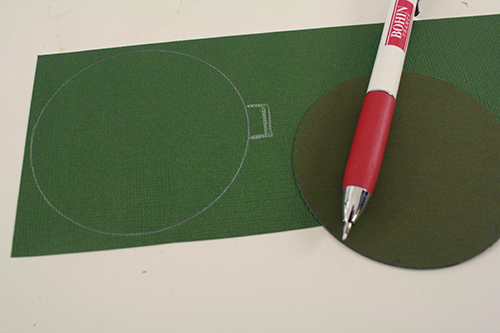
4) Now grab your two circular objects. Trace the larger one onto your doorframe coloured paper, and cut it out.
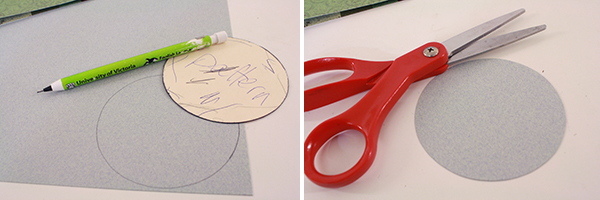
If you want, you can cut the edges to look like slightly uneven stones, or cut little slits to make it look like there’s a bit of space between mortared stones or bricks. Don’t cut your slits too far in though, as next you’re going to cut a circle in the middle of this one, creating a ring. You don’t want cuts all the way through that ring!
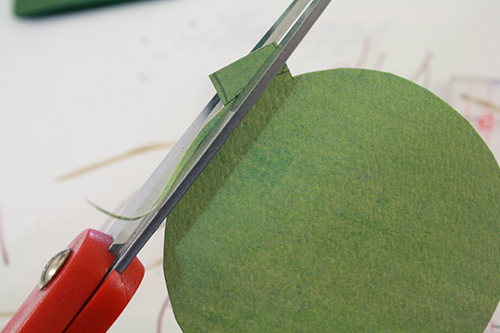
5) Grab your smaller circular object, and trace it right in the middle of your doorframe circle.
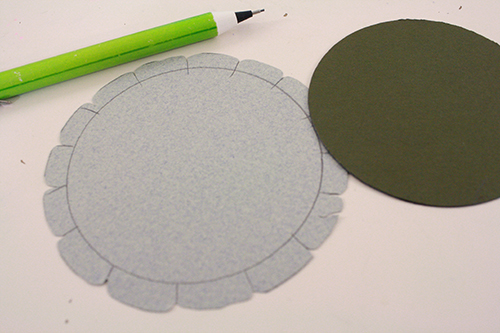
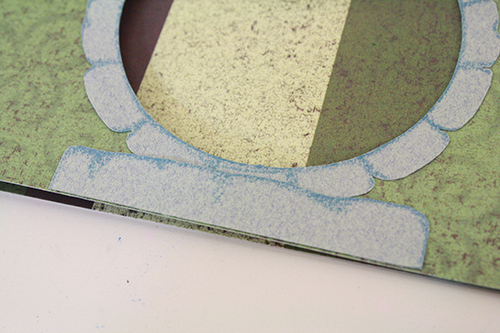
To cut this out, spread your scissors open and use the tip of one blade like a knife, to cut an X through the middle of the paper. Use that to get your scissor blades into the paper, and cut out the circle. Important: cut just a teeny bit inside the line, to create a very slightly smaller circular opening than the object you traced.
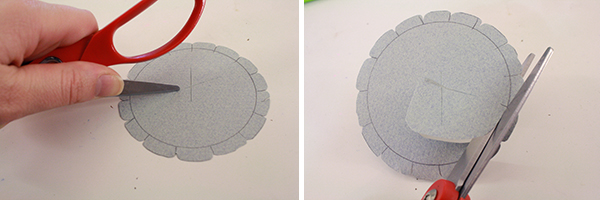
Cutting inside the line is important because if you don’t, later on you may end up with a wee gap between the door and its frame, as shown below:
6) If you wish, grab some crayons, coloured pencils or markers and add a bit of shading and some lines for the individual stones/bricks on your doorframe.
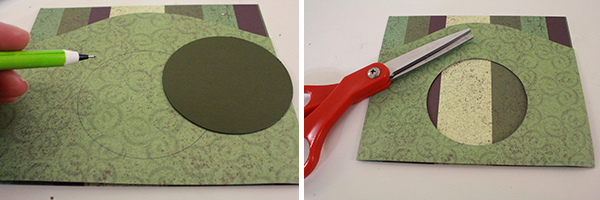
7) Place the doorframe on the front of your card. Figure out exactly where on the card you’ll want to place it. Then, grab your smaller circular object, and in that same place where the doorframe will sit, trace a circle, the circle that will be the opening inside the doorframe.
Cut this circle out of the front of the card, the same way you did for the doorframe. This time you can cut right on the line.
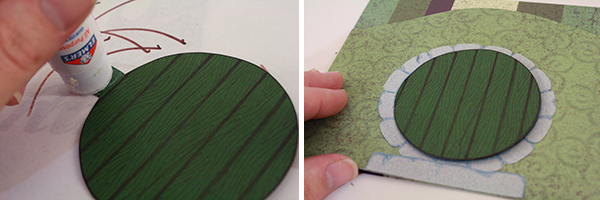
8) Glue the doorframe around the circular opening on the card front.
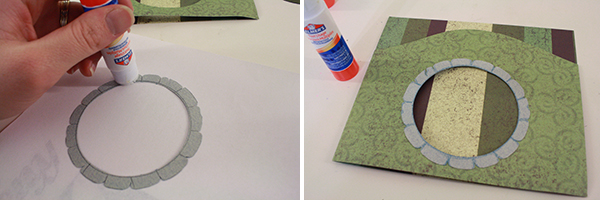
If you want, cut a little rectangle of the same paper and glue it below the doorframe to make a step.
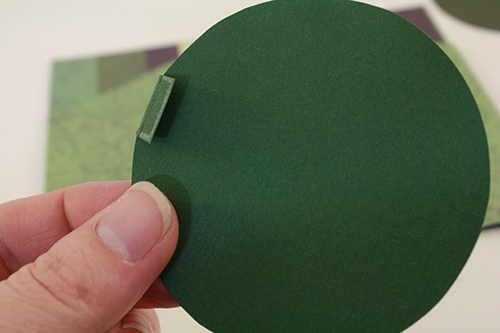
9) Now grab your small circle shape again, and trace it onto your door paper. Draw a small rectangular tab protruding from one edge of the circle, then cut the entire shape out.
And bend the tab over, creating a fold between it and the circle.
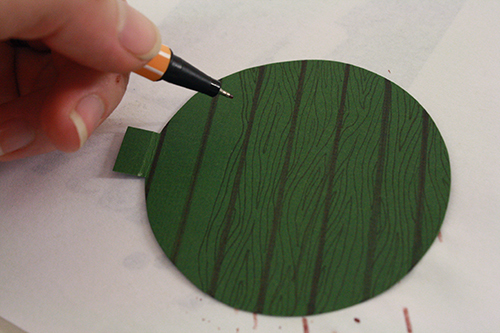
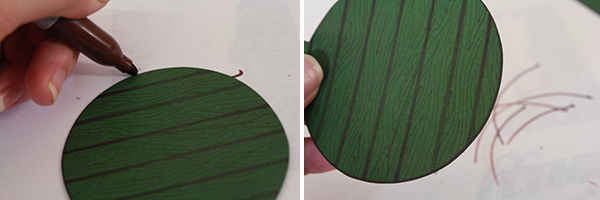
10) If desired, use markers and a ruler to make lines on the door, then draw wood grain between those lines.
You can also run a thick marker carefully around the very edge of the circle (on top of a piece of scrap paper!) to create a fine coloured edge on the circle. This is a great trick for card edges as well.
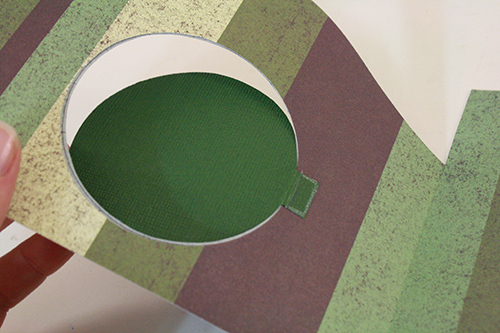
11) Now slot the door into the opening on the card front, so that the tab on the door is inside the card, and the door fits into the opening. See if it fits properly. The door may well come a little too far over on top of the right hand side of the door frame. If this is the case, trim it ever so slightly on the side with the tab, as shown in the photo below, cutting just up to the tab on either side. Then see if it fits about right.
Once the door fits, apply glue to the tab of the side that faces you when looking at the front of the door, and attach it. You can put a little tape on the back of the tab too, if you like. It won’t show in the end.
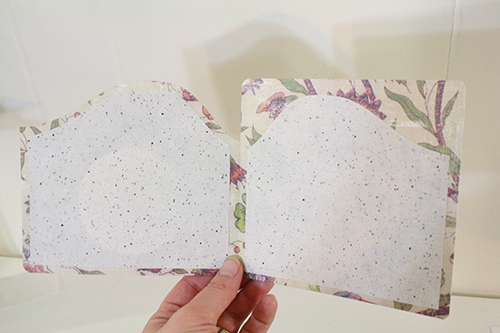
12) Next, fold the card closed and place your lining paper between card layers. Trace around the edges of the card onto the paper.

13) Cut that shape out, but cut about 1/8 inch in from the pencil line on all sides.

14) Glue this inside the front of the card, hiding the door opening, and giving you a space to write a message that will show when the door is opened.
If, like mine, your card’s interior is too dark to write on, do this a second time, and glue that piece (facing the opposite direction, of course) to the other inside half of your card.
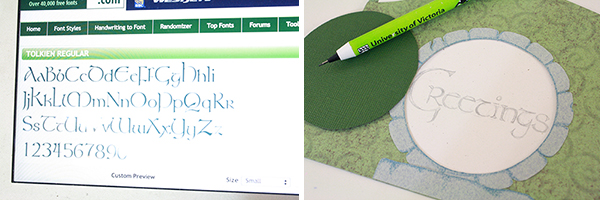
15) Flip the card closed again, open the door up, and write a greeting or message inside. If you want to really continue with the hobbit look, search for a “hobbit font” or “tolkien font” online and use that to draw your letters. Or download the font, use it to print a message the right size out in the middle of a piece of paper, then cut that paper to the right size and glue it in as your card lining.
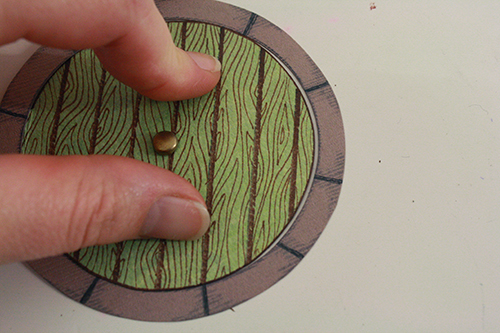
16) Finally, add the doorknob! I left this for last because if you’re using a brad, it will create a bump that could make it harder to glue the card lining in and, if you’re left-handed like me, to write your message inside the door.
If you’re using a brad, just poke a hole in the middle of your door with a needle, then push the brad through.
You can also use a hole punch to make a small circle from gold paper, and glue that on. Or use gold paint or a paint pen to make a little doorknob circle in the middle of the door.

17) Final touches: use that marker edge-lining trick on the edges of your card, give the card rounded edges, draw or cut-and-glue a couple flowers beside the door, whatever you wish!

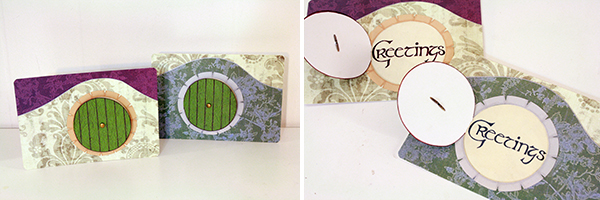
You could also cut the back half of the card to the same hill shape as the front, but a little taller. Or cut it to be a different hill shaped line, so your card looks like two lines of hills, one behind the other.

Play around with other colours and patterned papers. Do a non-folded version, where you just write on the back of the card.
18) Finally, write a message inside the card and put it in the mail! Send someone a little hobbit-y joy.