It’s summer, and – miracle of miracles – the weather in our part of the world is actually behaving like it’s summer. Sun sun and more sun, and actual decent levels of heat. Given that Canadian doctors have lately been encouraged to lecture their patients about our national vitamin D deficiency, you’d think people would gripe a little less about the heat, but people are weird. I am loving this weather.
Last weekend we went out to a rock concert and spent many hours lying in the sun and drinking beer. The good life. But after going to this event last year as well, I learned that a hat was needed. Last year I snitched one of my husband’s, but by this year I realized I had the skills to make my own (so it would actually fit). And once you know how it’s done, this style of hat is very simple to make, and can be whipped up in an hour or two, depending on your speed and skill level.
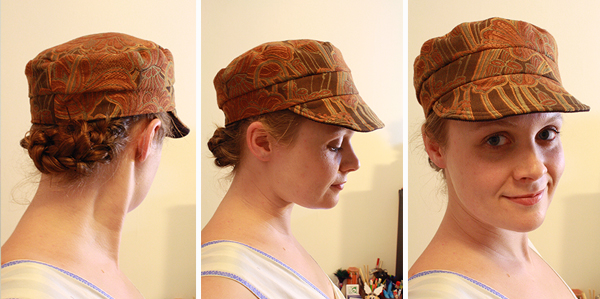
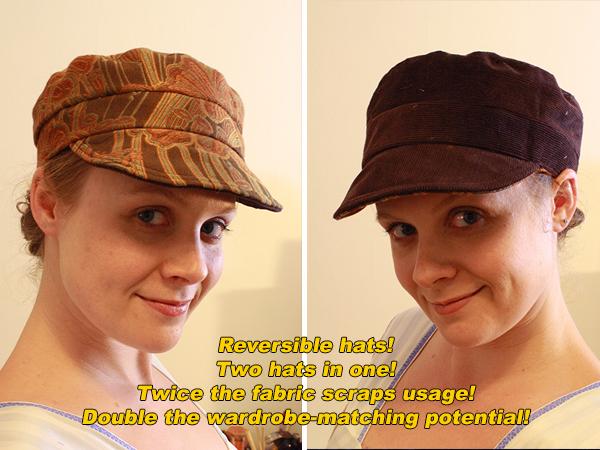
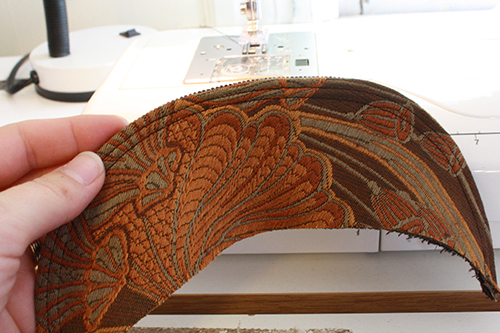
I’m not quite sure what to call it, but if a pageboy hat and a baseball cap had a baby, it would look like this. I’ve seen it called a dictator cap (think Fidel Castro), a general “military” cap and a cadet cap. That last one seems to be the most common according to Google searches, so I used it for the post title. While looking online for this specific hat style’s name, I found some site with a guy saying women should never wear caps like this, and I’m telling him to sod off. They’re practical & comfortable, they’re cute, they squish into a bag when you don’t need them, and they’re wonderfully gender neutral, though can be shifted one way or the other easily if desired by the fabrics chosen. Would be cute for kids, too.
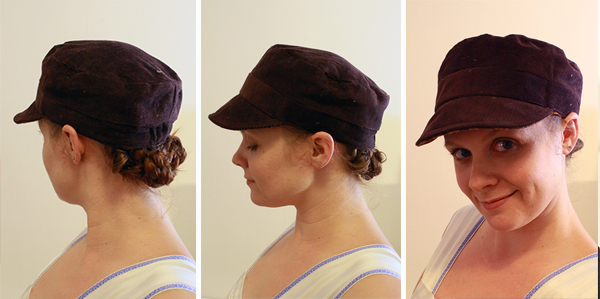
I liked my first one so much I made a second.
———————————————
What you’ll need
materials:
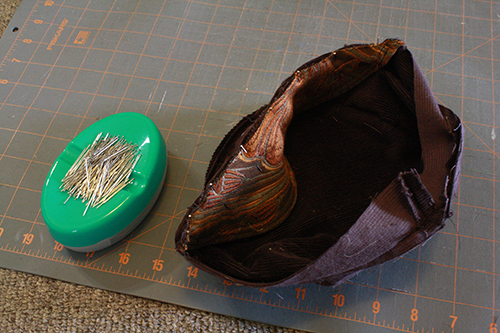
- fabric in two colours/prints/patterns (you need about 1/4 to 1/2 a yard or meter of each fabric – at minimum, it has to be as wide as the diameter of your head + 4 inches, and as long as the circumference of your head plus 2 inches)
- one colour of thread to match, compliment or contrast your two fabrics (this one colour of thread will show on both sides of the hat, so pick one that works with both fabrics in some way)
- [optional] scrap paper (You can use this to make a circle pattern for the top of the hat, or you can draw circles the right size directly onto the fabrics.)
- [optional] elastic (about 2-3 inches)
- hat brim pattern
tools:
- measuring tape
- compass (that thing from jr. high math classes that you used to draw circles) or a round plate, lid, etc.
- pen/pencil/chalk
- sewing machine
- fabric scissors
- straight pins
- cutting mat + rotary cutter + ruler OR ruler + fabric pen/pencil + scissors
———————————————
Putting it all together
1) Measure around your head and make a note of this number. Now we need to do a wee bit of math. Stay with me. I’ll walk you through it. For this project, you need two numbers.
- You need the measurement (around) of your head plus 1-2 inches (make it 1 inch if you’re using cottons or other fairly thin fabrics, and if you’re using thick fabrics – upholstery material, corduroy, that sort of thing – add 1/5 – 2 inches as you’ll lose more width from the seams with thick fabrics). You’ll use this to make a circle for the top of the hat.
- You need the measurement across (the diameter) of the circle you create using the first measurement.
We’ll use my measurements as an example. My head is 21 inches around, and I added 2 inches because I’m using two very thick fabrics. So the final measurement for my circle is 23 inches around.
To get the circumference, take that number (23 for me) and divide it by pi. The result will give you your hat circle’s diameter.
2) Now get some scrap paper* and make a circle on it that has the diameter you just calculated. If you don’t have a compass to do this really exactly, measure across some plates and bowls and lids and other round stuff till you find one the right size. If you don’t have one exactly the right size, just trace the closest one and sketch a line a little outside or inside its edge to make it the right size. It doesn’t have to be an absolutely flawless circle to work for your pattern.
Or go online, find an image of a circle, and print it out to the right size.
*In the materials notes, I pointed out that you could draw a circle directly onto the fabric, and that’s true. But it’s probably easier to make this circle on paper, as that way you can use a compass if you have one, or trace a plate or a round lid or something like that and easily sketch a slightly larger or smaller line around the circle if it’s not quite the right size. Also, then you already have a pattern for your next hat. ;)
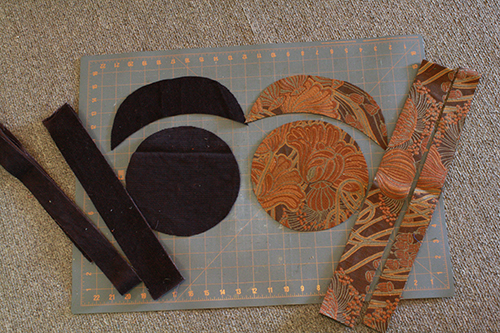
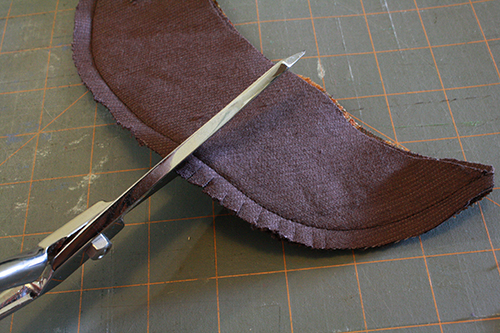
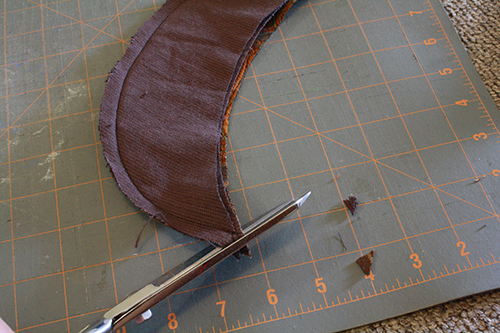
3) Place your two fabrics down flat, one on top of the other, and pin the circle to them. Cut around the circle, going through both layers of fabric.
Then, from each of the two fabrics cut the following:
– 1 rectangle of fabric that is 2.75 inches wide,* and 3 inches longer than your circle pattern’s circumference.
– 1 rectangle of fabric that is 1.5*
– a cap brim (that pattern is linked to in the materials list and oh look, it’s also right here: hat brim pattern)
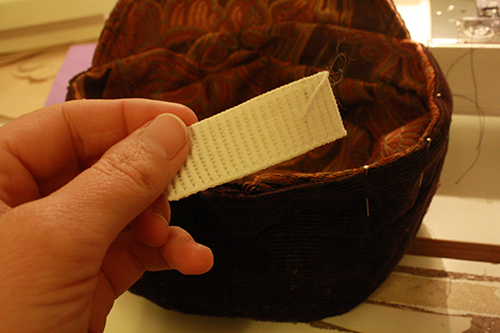
From one of your fabrics (it doesn’t really matter which one), cut 1-2 more brim pieces. Cut 1 if it’s a thick fabric, cut 2 or maybe even 3 if it’s a light cotton or other thin fabric. You can also cut these from some other scrap fabric – they won’t be visible on the finished hat, they’re just being used to stiffen the brim.
*If you’re making a hat for a particularly large head size (probably 24/25 inches around or more) make these two rectangles about 1/4 to 1/2 an inch wider. If you’re making a hat for a much smaller head size (probably 17-19 inches around, so baby or kid hats), make these two rectangles 1/4 to 1/2 an inch narrower. This will make the finished hat a little taller or a little shorter to accommodate a larger or smaller head.
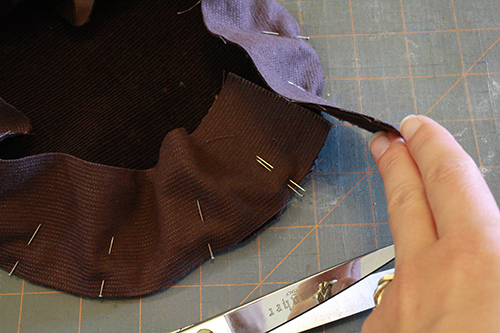
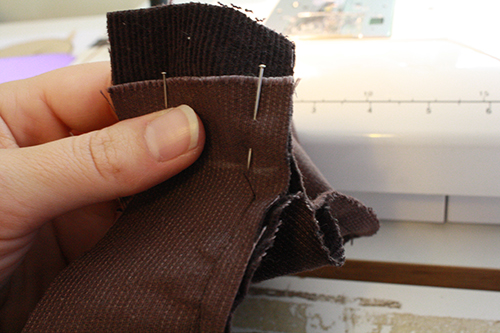
4) Take the circle and the thicker rectangle cut from one of the fabrics. Pin the rectangle all the way around the edge of the circle, with their right sides facing together.
Start at one end of the rectangle, and leave about 1 to 1.5 inches of fabric dangling. Pin around the hat to within about 1 inch of the first pin you inserted, and stop. So there should be a bit of a gap keeping the rectangular strip of fabric from meeting up with itself.

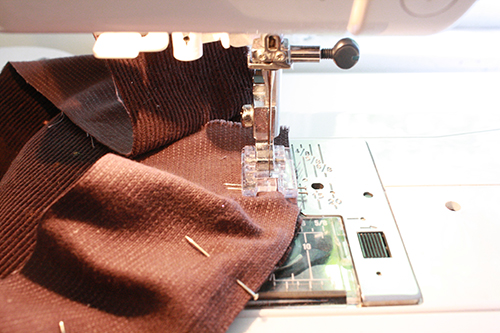
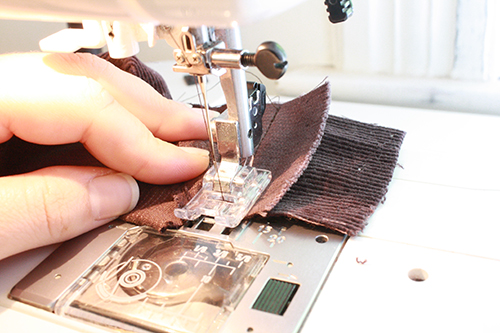
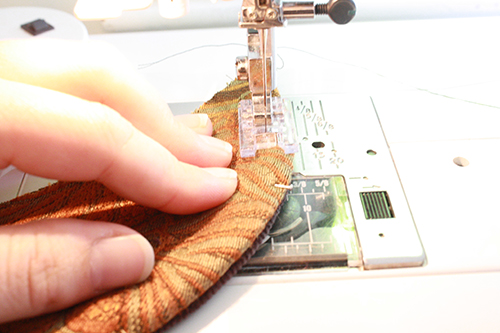
5) Start at your first pin, and sew around the circle, matching up the edge of your presser foot to the edge of the fabric. Stop when you get to the last pin, which will leave a short gap between where you started and stopped sewing.
6) Now, take the two loose ends of the rectangle, and pin them together such that they create an unbroken ring that is just the same size around as the fabric circle, and will exactly span the still-unsewn gap. Sew the rectangle ends together where the pins are (but don’t sew over the pins – remove them first).
I sometimes draw a line right where I want the stitches to go, as well as pinning the ends in the right place.
Then trim the excess fabric from the rectangle’s ends, and pin the sewn-together ends of the rectangle to the hat circle and pin them in place. Then sew them down, overlapping a little with the start and end points of the previous line of stitching.

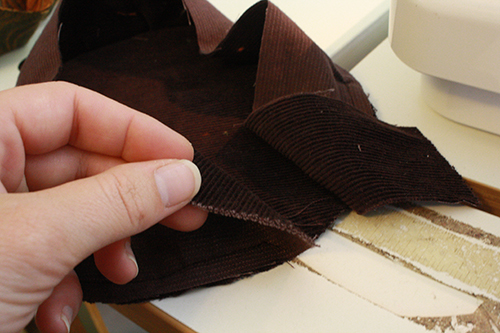
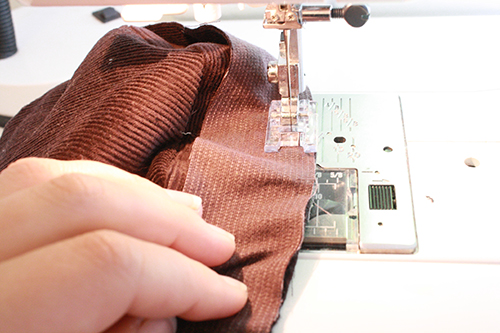
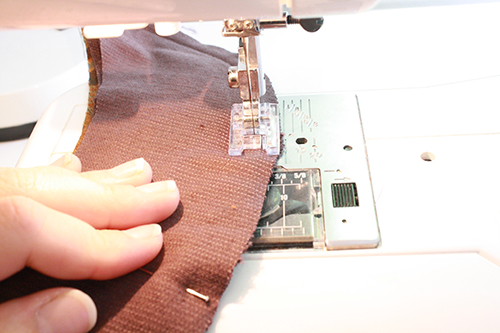
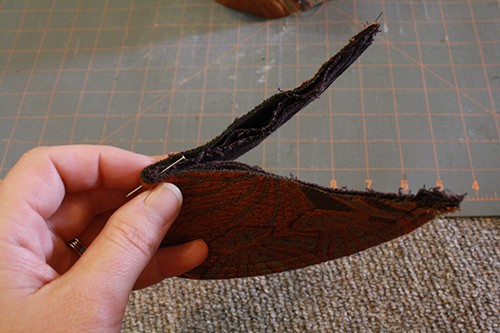
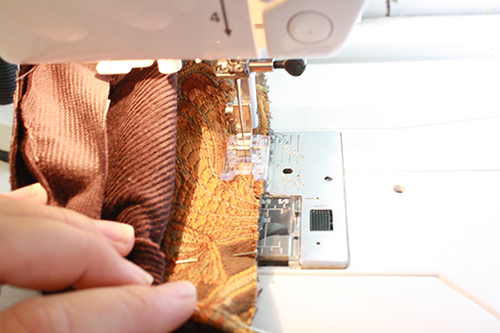
7) Turn this now bowl-shaped piece so the fabric is facing right side out. Then take your narrower rectangle of fabric and pin it around the open edge of the bowl shape, right sides of the rectangle and bowl fabrics facing together. Start it at the same place you started the previous rectangle, so that their coming-together seams will line up.
8) Sew along this pinned line, again matching your presser foot’s edge with the fabric’s edge. Do the same thing when you get around the circle and nearly back to your start point, stopping and leaving a gap, then sewing the ends of the rectangle together at the right length, trimming their ends and pinning and sewing that final bit of the ring in place.

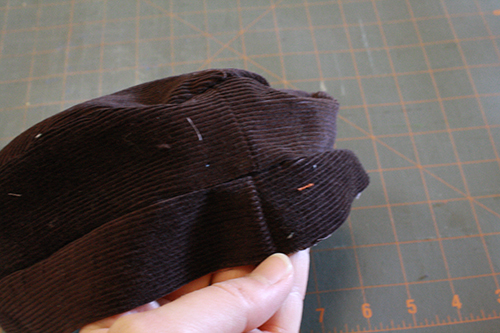
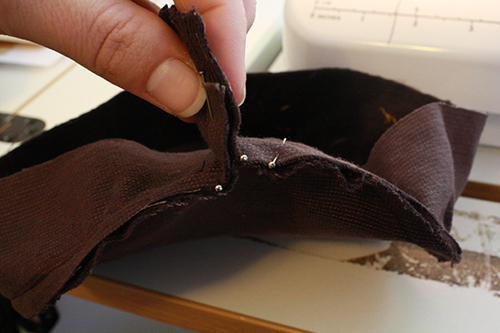
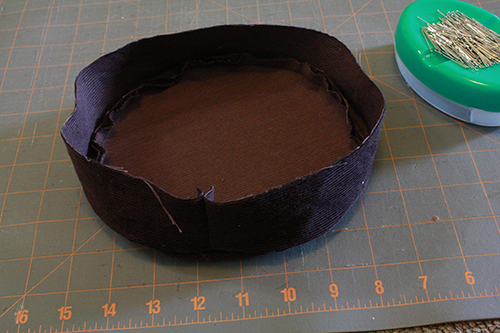
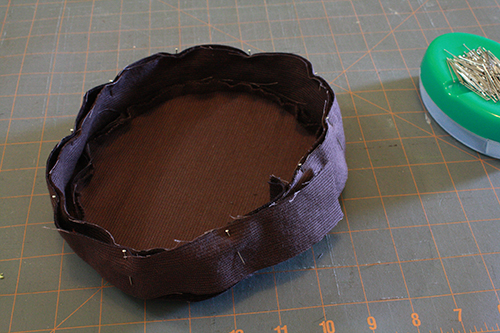
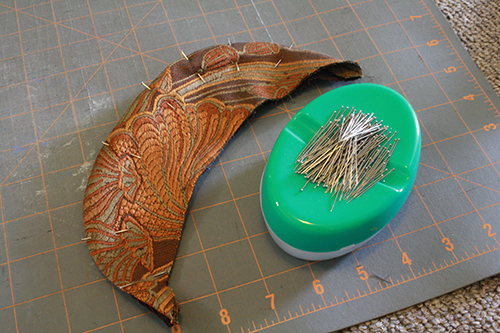
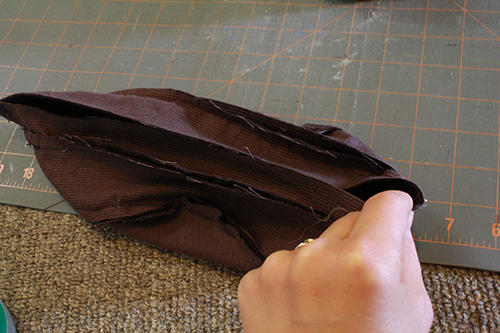
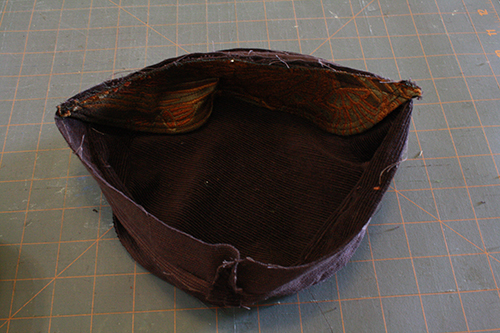
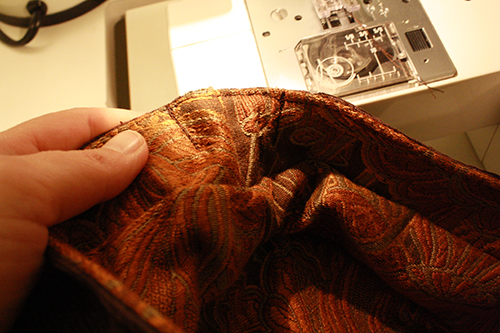
9) Now do the exact same thing with the circle and two rectangular pieces of your other fabric. Once that’s done, you should have two bowl-shaped fabric constructions consisting of a circle and two rectangle rings around it – the two sides of the hat, just without the brim (ignore that brim in the photo below. It’s just hanging out nearby, for company).
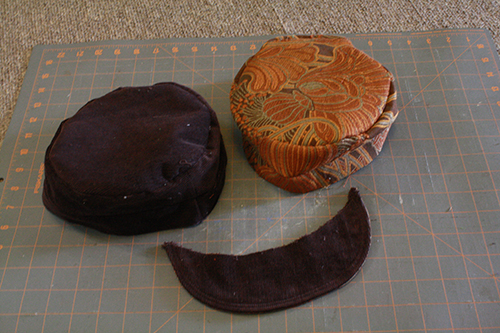
10) Grab two brim pieces, one from each fabric. Lay them down one on top of the other, right sides facing together. then take your other brim pieces and pile them on top, matching all the edges up. It doesn’t matter which way they’re facing or which one of the first two pieces you pile them on top of, as none of them will be visible in the end.
Pin the whole stack of brim pieces together along their curved edges.
11) Sew around the outer, curved edges of the brim pieces together, matching up the presser foot edge and fabric edge. Do not sew along the inward curved edges – leave that entirely open.
12) Use the tip of your scissors to very carefully make a series of small cuts from the edge of the fabric to the edge of the stitching (up to but NOT through the stitches!) at the most curved areas of the brim’s front.
If you do mess up and cut just slightly through the stitches, simply go back and sew over the stitches again. I’ve totally done that before. It’s only if you cut through the stitches and also way past them into the fabric that you’re totally screwed and would need to cut and sew new brim pieces.
You can trim the very corners off, too.
13) Reaching between the brim pieces of your two different fabrics, turn the whole thing right side out. Push the edges of the fabric right out and make them as smooth as you can with a finger or the end of a pencil, chopstick, etc. Then pin along that outer curved edge again.

14) Once again, sew along the brim’s outer edge, lining up the fabric’s edge and the presser foot’s edge. Especially if you’re using thick fabrics, your brim may be getting quite bulky by now, so go slowly and carefully so you don’t break a needle.
If you want, go back and sew a second time, placing the line of stitches between your first line and the edge of the fabrics I like the look of this and always do it on my hats – it’s like the look of the stitching on commercially made hat brims of this type.
15) Grab a fabric pen or pencil or some chalk, and make a small mark at the very middle of the brim, on its inward edge (the unsewn edge). To find the center, I simply fold the brim in half, and make the mark right in the middle of that fold.
Now also grab one of your bowl-shaped hat pieces, make sure it’s turned so the right side of the fabric faces in, and find its very front middle. To do this, you’re using the seam lines of the two rectangle pieces to indicate the back of the hat. Fold the open edges of the bowl together with the seam lines at one end, and make a mark right in the fold at the other end – that’s the hat’s front center.
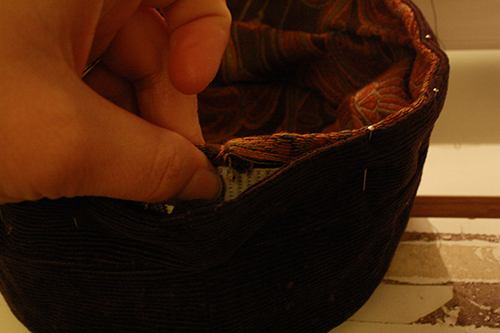
16) Place the brim piece inside the bowl-hat piece, so that the same two fabrics are facing together, the raw edges of the brim’s inner curved edge and the hat’s outer open edge match up, and the center marks on the brim and on the hat match up. Pin the brim in place along the hat’s edge.
17) Sew along the pinned edge, presser foot and fabric edges lined up as always.
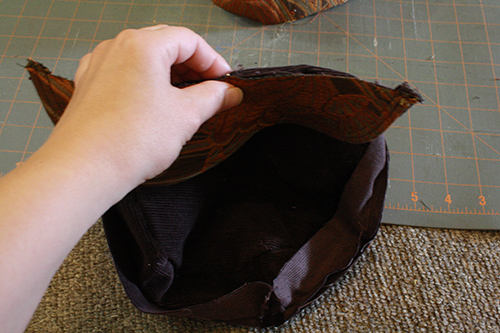
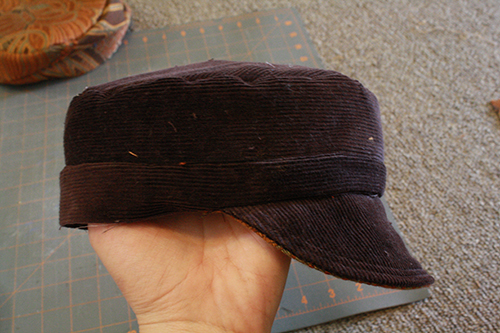
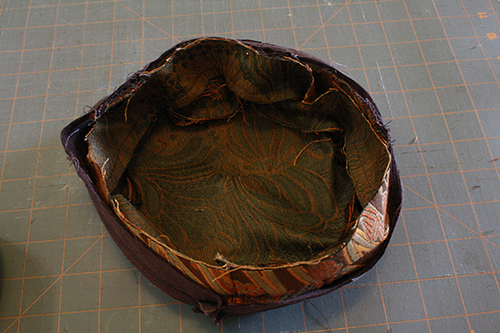
Once you’re done that, if you were to turn the hat right side out it would look like, well, a hat (an unlined one, of course):
18) But don’t flip it right side out, just let it sit how it still is. Make sure the right side of the fabric of the hat is still inside the bowl, and the brim is still folded inside the bowl of the hat.
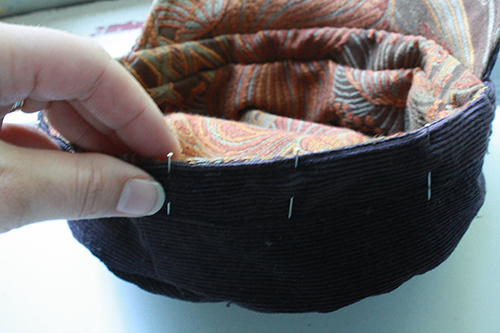
Take your other bowl/hat piece and mark where its front center is. Then turn it so the right side of the fabric is facing outward, and push it inside the first bowl/hat (the one with the brim already attached and pushed inside it), matching its front center mark with the brim’s center mark. Pin it into place along the brim first, then pin along the whole rest of it, attaching the open edges of the two stacked bowl/hat pieces to each other.
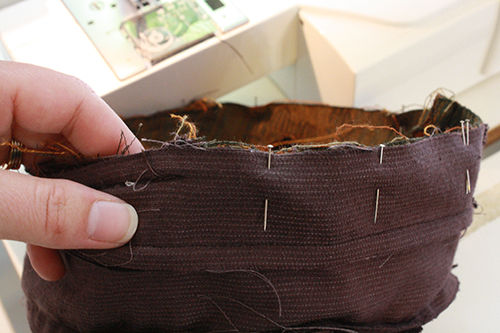
At the back, about 1 inch on either side of that middle back seam, place double pins to indicate that you will NOT sew through this area.

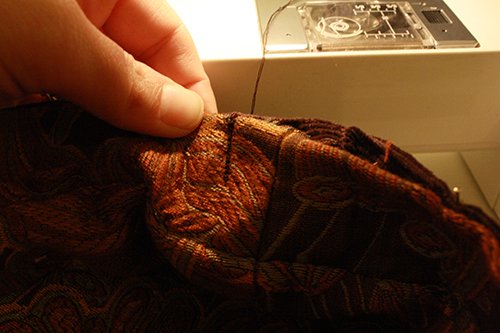
19) Start at one of the double pin markers, and sew all the way around the edge of the hat where you’ve pinned it, including across the brim. When sewing across the brim, sew on the side where you can see the line of stitches from before, that hold the brim to the first bowl/hat piece. Sew as exactly on top of that first line of stitches as you can.
Sew all the way around to the second double pin marker, and stop there.
20) Use the unsewn gap at the back of the hat to turn the whole thing right side out, and then stuff one layer of the hat inside the other, so you have a recognizable cap that can be turned either way out.


21) Pin around the edge of the cap, but NOT across the brim this time. Pin the gap at the back closed as well, folding the raw edges inside.
21 b) Side option: if your hat looks like it’ll be a wee bit large, or if you want it to have a tighter fit onto your head, you can put some elastic in the back to gather it just slightly. To do this, cut a piece of elastic about 1 1/2 – 2 inches long. Insert it into the gap you left at the center back of the cap, and pin one side of it a little to one side of the center back seam. Sew that into place with a straight stitch that runs perpendicular to the rim of the hat – go over it several times. Then pull the unsewn end of elastic over to the other side of the center back seam – make sure it’s pulled enough that it causes the fabric to bunch. Pin it and sew it down the same way. Then, across the gap, pull the elastic tight and tuck the raw edges of fabric inside, and pin everything into place. When you let go of the elastic it will all bunch up again, which is fine. Just put enough pins in that the raw edges stay folded in.
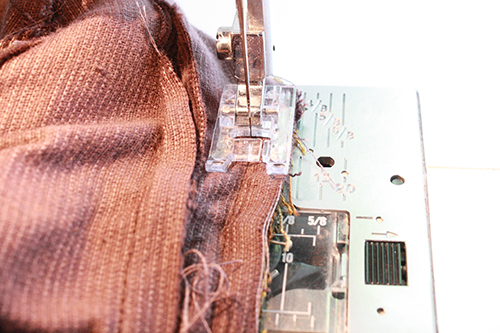
22) Starting at one side of the brim, sew around the bottom edge of the cap, all the way across the back gap* (sewing it shut) and around to the other side of the brim, and stop there.
*If you inserted elastic, then when you get to that back area switch to a stretch stitch. Pull the fabric and elastic out flat while you sew across it with the stretch stitch. Once you’ve crossed the elastic-filled gap, switch back to a regular stitch.


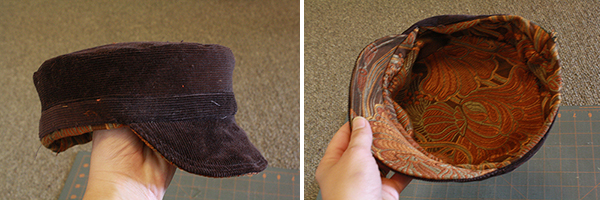
23) All done! Go outside and enjoy some sunshine!