
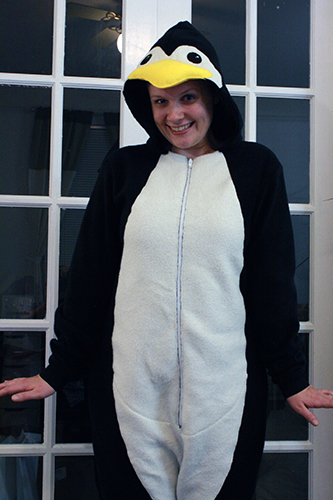
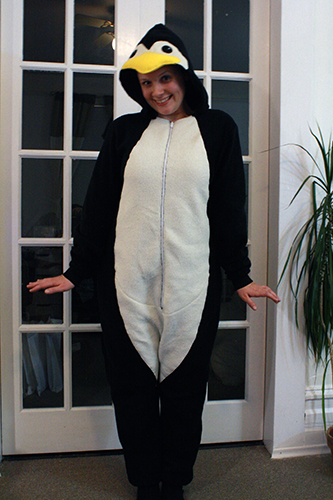
Remember that time I was on Feed Dump, and we discussed a news story about a guy who stole beer while dressed in a penguin onsie, and I was all: Wait where do I get a penguin onsie?! Well you can buy them all kinds of places, and lots of people sent me links with that wonderful information. But as usual, I decided to take things into my own hands.
Let me tell you, there is pretty much nothing more soft and comfortable and so so warm than a full-body wrap made out of fleece. I never want to take mine off. And with Halloween right around the corner, I cannot recommend this enough as a costume idea. While my instructions are for a penguin suit, with some simple modifications you could create all kinds of animals, from penguins and parrots to dragons, badgers, foxes, etc. And what does the fox say? It says forget those lingerie-with-ears outfits and put on some fur – it’s COLD outside in October! Here, wear this fleece onsie, you will be so very happy you did.
Happy Halloween!
———————————————–
What you’ll need
materials:
- 2 – 2.5 meters of black fleece (2 meters if you’re on the shorter end, like me (I’m 5’2″) and 2.5 if your a bit taller)
- .5 meters of black cotton or other thin non-stretch fabric (this is to be the lining on the hood)
- .75 – 1 meter of white fleece (again, a little more if you’re taller – this is for the tummy, and the taller you are the longer tummy you’ll need)
- yellow felt – just an 8.5 x 11 inch sheet of it, or about .2 meters will do you
- [optional] black felt – about 5 square inches (this is for the eyes, which I like doing in felt but you can also just use scraps of your black fleece – I wouldn’t bother with the felt if you have to buy it just for this, only if you already have some around)
- [optional, for if you want to do cuffs] wide elastic – about 4 feet, or enough to go around each ankle & each wrist with a bit of extra, just in case
- [optional, for if you want to do cuffs] black jersey cotton or other stretchy fabric – about .2 meters
- black thread
- white thread
- yellow thread
- stuffing / polyfil – about 1-2 handfuls
- long roll of butcher paper or similar
- [optional but recommended] sewable HeatNBond
- 20 – 30 inch white zipper
- pen / pencil / crayon
- paper scissors
- fabric scissors
- straight pins
- sewing machine
- zipper foot for your sewing machine
- penguin onesie hood template – number 23. under Sewing patterns on the linked-to Patterns page
- hood pattern – number 6. under Sewing patterns on the linked-to Patterns page
———————————————–
Putting it all together
—– BODY —–
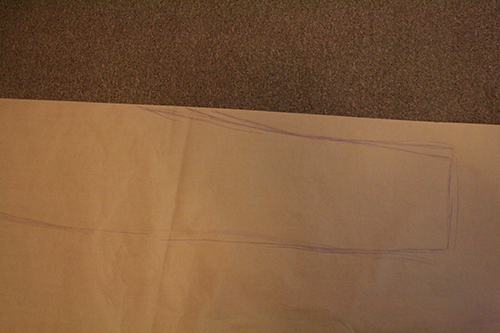
1) First you need a pattern. This is actually pretty easy, since onsie’s are not super fitted things, in fact it’s better if they’re a bit loose and baggy.
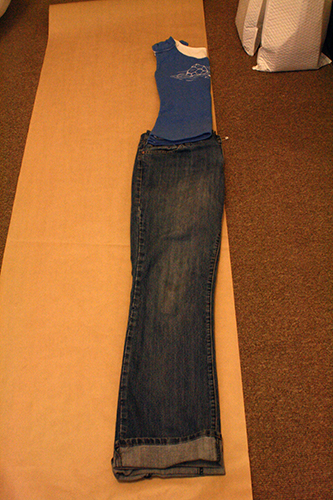
Lay down a long piece of butcher or other paper that is as long as you are tall.
Put on a pair of pants and a shirt (sleeveless, if you have one) that fit you comfortably. Make a note of exactly where the shirt overlaps the waistband of the pants, maybe put a little pin there.
Take the pants and shirt off. Fold each in half. Lay them down on the butcher paper so that their folded edges match up with the long edge of the paper, and lay them so that the shirt overlaps the top of the pants the same amount that it would if you were wearing them.
Trace around the edges of the clothes, 1-2 inches out from their edge.

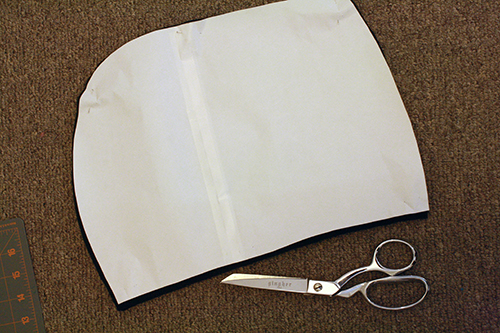
2) Remove the clothes from the paper, clean up your traced lines if needed, and cut the whole thing out.
If the shirt you traced is low necked or has narrow straps, you’ll want to draw a new neckline higher up and wider shoulder pieces. More like the shoulders and neck on a t-shirt.
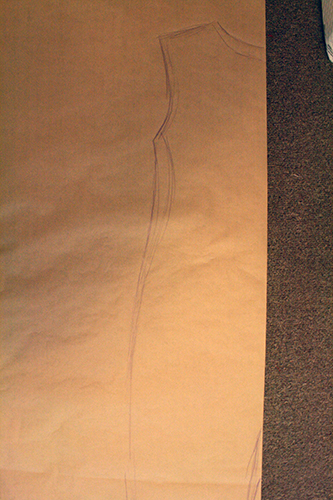
I also dropped the crotch of my onsie, so it would fit more loosely than my fitted jeans in the first place, but then I dropped it even more than that so it would create a bit more of a penguin waddle-y look. That’s optional, but I would still drop the crotch at least an inch or two regardless.
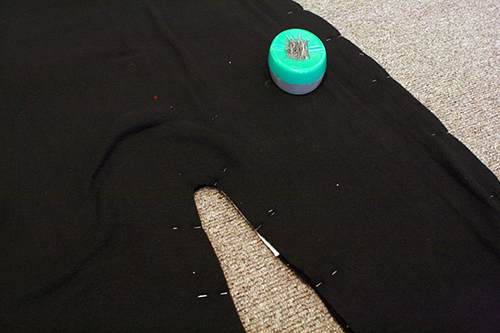
3) Lay your black fleece out, and fold one edge of it over, so that you have a double-layered length as wide as your pattern piece. Lay the pattern piece on it with the straight edge of the pattern matching up with the folded edge of the fleece, pin the pattern in place and cut it out.
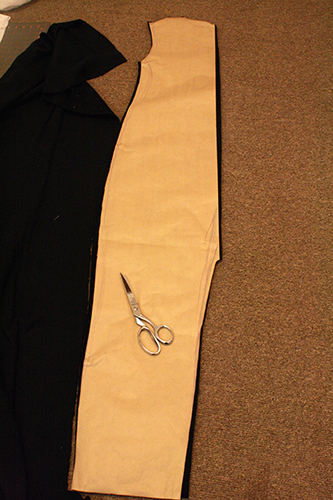
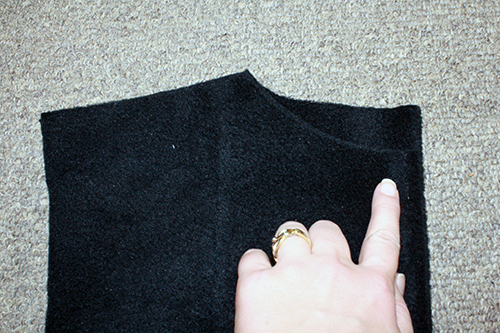
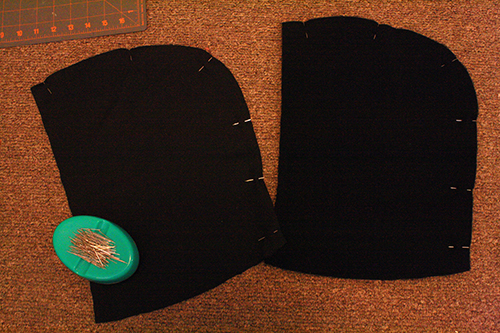
Then do the same thing again, folding the fleece over from the other side. This time though, cut the neckline a little bit away from the pattern’s edge, so that you get a higher, just-barely-scooped-at-all neckline. This will be the back half of the onesie.
See how the back piece has a higher neckline than the front piece:
4) Now take your onsie pattern and put it on top of another piece of paper. Trace the onsie pattern onto this paper, then remove it.
On the new paper, use the lines of the onsie pattern to draw a tummy pattern. It should start at the very top, the neckline, of the onsie pattern and go curving down as far as you’d like it to go, whether circling back up a few inches above the crotch, or going down to the crotch, or going a few inches below the crotch if you prefer. I wanted a long tummy that went a little ways down the legs, so I made the pattern go down a few inches past the crotch.
Cut this pattern piece out.
5) Pin your tummy pattern to a folded-over piece of white fleece, just as you did with the onsie pattern, and cut it out.
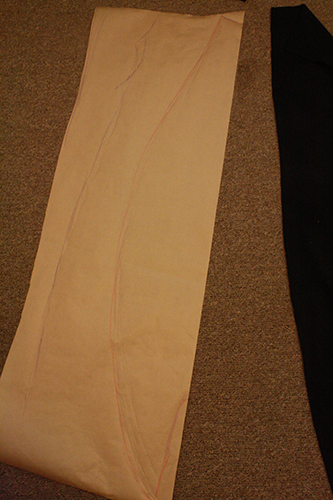
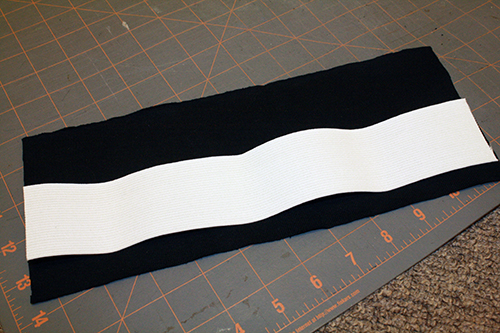
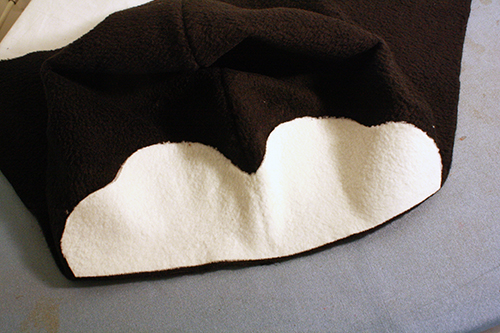
6) Unfold the white fleece and lay it on top of your front onsie piece. Match up the top neckline parts and the crotch / leg parts if it goes down that far, and make sure the whole tummy is centered on the onsie piece. Pin all the way around.
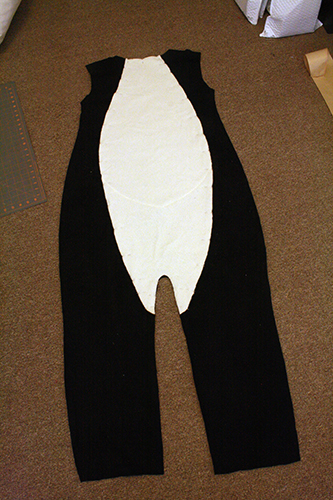
7) Now sew all the way around the tummy piece, just with a large loose stretch stitch, to tack it all in place.
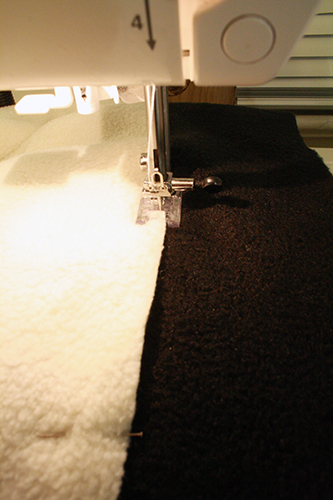
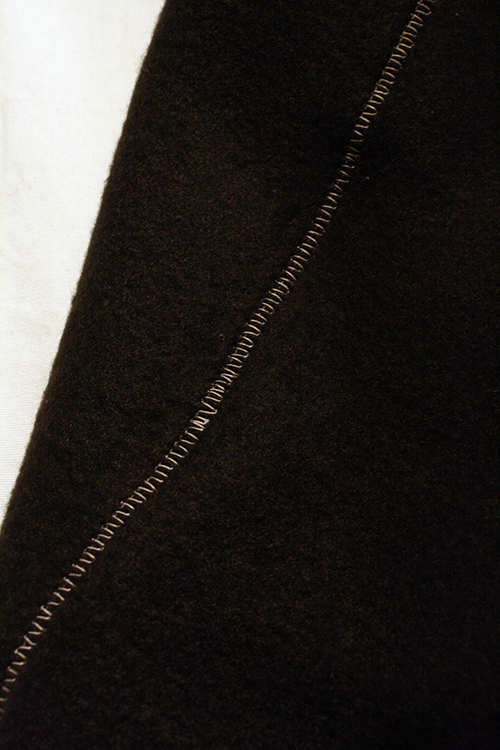
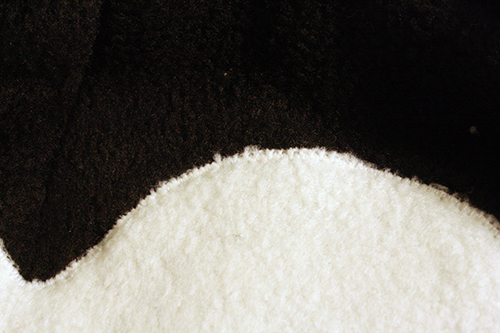
Then go back and sew all the way around the white tummy piece again, but this time with a close-together zigzag or other back-and-forth stitch, right along the edge of the white fleece, securing it very well in place.
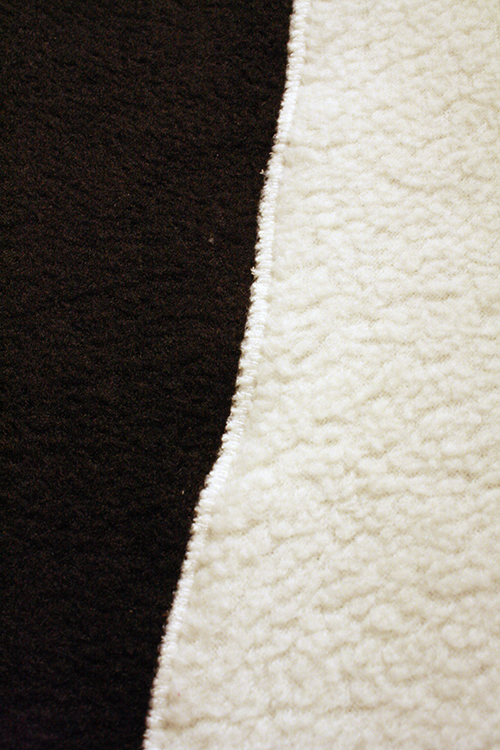
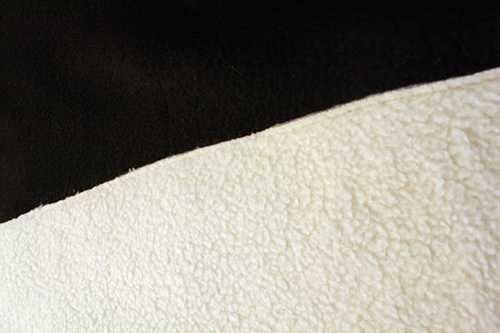
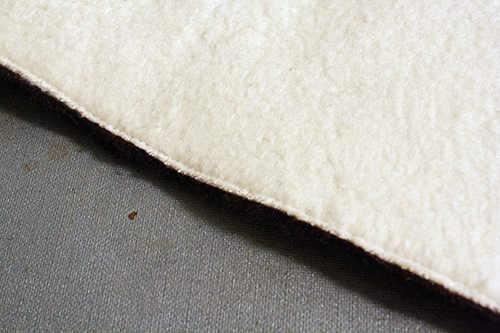
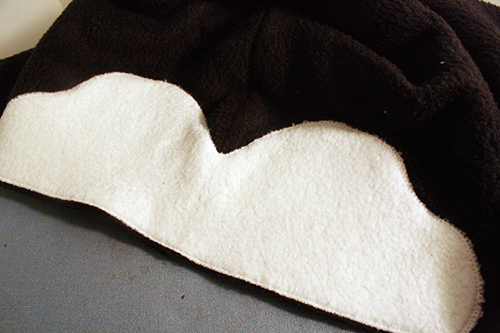
What it looks like on the back where you can see the stitches more clearly:
At the top edge along the neckline, and the bottom along the crotch and legs, just do a straight stitch to hold the white and black layers together for now until you pin the back piece of the onsie on.
8) At the very top of the onsie, you have a portion of neckline that’s lined with the white tummy piece. Fold just this portion of the neckline over once, pin it, and sew it down, finishing off just that bit of the neckline.
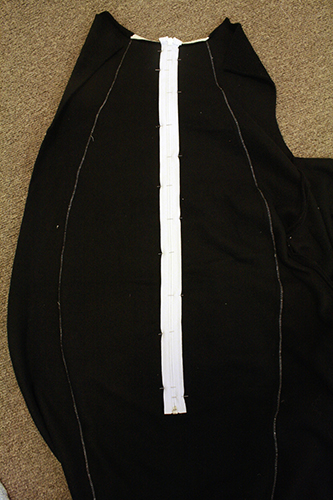
9) Now the zipper. You may want to use a ruler and chalk to make a line straight down the middle of your front onsie piece, on the back side of it, going from the middle of the neckline to the center of the crotch. This will just help you pin your zipper on straight.
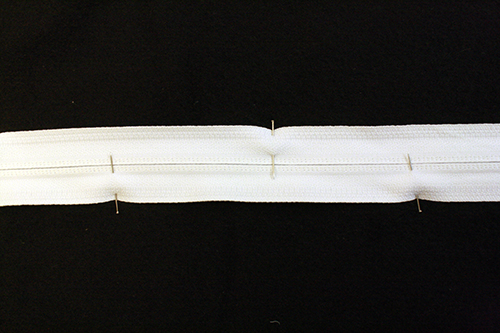
Take your zipper and unzip it a bit. At the top there will be two flaps of material that extend a bit past where the actual zipper part starts. Fold these backwards and tack them down with a few stitches. Then do the zipper back up.
Lay the front onsie piece out flat, front side facing down, so you’re looking at its back side. Lay your zipper down, also with it’s front side facing away from you and onto the fleece. So you should be looking at the back side of the zipper. Lay it flat down the exact center of the onsie piece, starting at the neckline. Pin it into place on both sides.
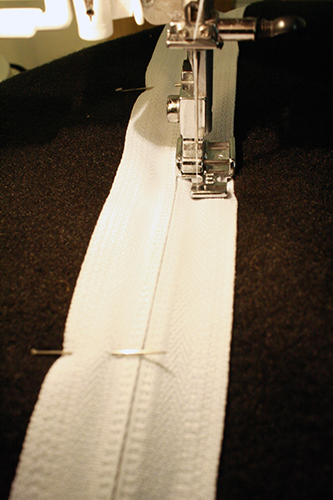
10) Using the zipper foot on your sewing machine, sew along both sides of the zipper and around the bottom, securing it in place. If you haven’t sewn a zipper before, note that you’ll need to stop sewing an inch or so from the top, undo the zipper a few inches, and then sew that top inch of the zipper now the pull piece of the zipper is out of the way of your machine’s presser foot.
YES, I know that as it stands right now, the zipper is unusable because of how you’ve sewn it on backwards. I just want to assure you that THIS IS OK AND CORRECT. Keep going. Everything is fine. :)
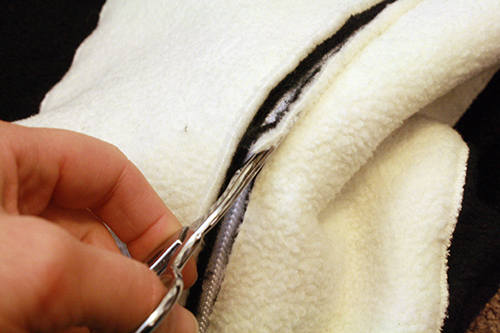
11) Now turn the onsie piece over so you’re looking at its front, and very carefully insert the tip of your scissors between the zipper and the layers of fleece on top of the zipper. Cut a straight line down, following the line of the zipper. Stop at the bottom of the zipper.
TA-DA! A working zipper! This is a handy trick you can use for zipper-insertion when you’re using fleece or other fabrics that don’t fray and have ok-looking raw edges.
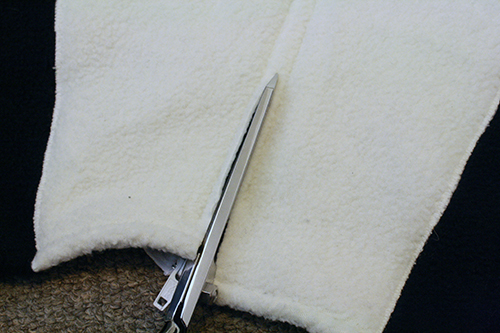
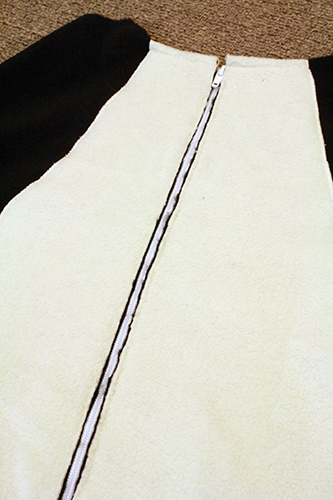
Now, to follow up on this, you may want to grab a pair of small, very pointy ended scissors and trim away some more of the fleece to open up the zipper a bit more.
Also, since in this case there’s going to be some black fleece showing through, I got finicky and cut away more of just the black fleece to minimize how much it showed through.
So from this:
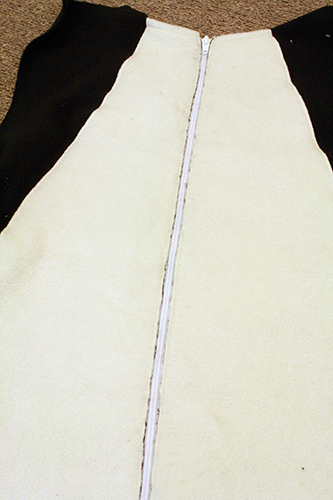
to this:
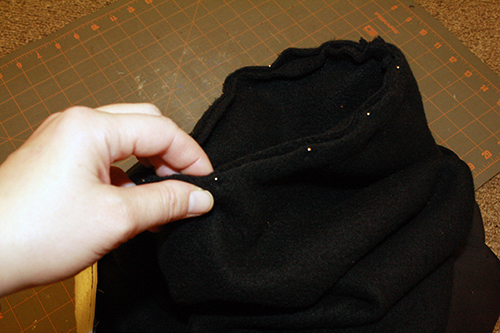
12) And now, it’s time to sew the other half of the onsie on! Lay this front piece down flat, right side up. Get your back onsie piece and lay it down on top of the front piece, with their right sides together. Pin around all the edges except, of course, at the neckline and the ankles.
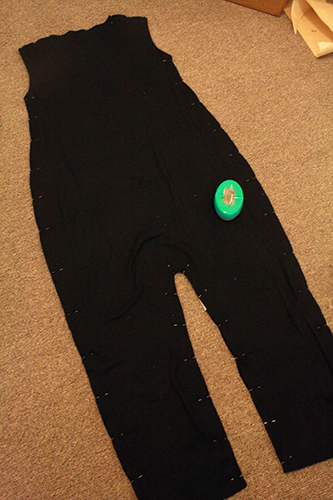
It may be that one of your pieces has ended up being a little wider in parts, and you can’t lay it perfectly flat and still have the edges match up. In this instance of clothing-making, this completely and totally does not matter. This is a wearable thing that you want to be loose and baggy. Just make sure the edges match up and you’re golden.
13) Then, of course, sew all those pinned edges together.
—– SLEEVES —–
14) Ok, so sleeves are not actually that hard, I swear to you. If the sleeve and the arm hole aren’t quite exactly the same size to match up to each other, you just kind of ease things and fudge it and make it all fit…
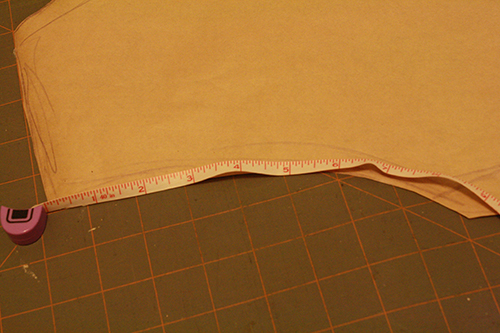
Get your onsie pattern piece, and measure the curved line of the arm hole, the one that you originally traced on there from a piece of your existing clothing. This measurement is X.
Get a piece of butcher paper. At the top of the paper, make a mark X inches in from the paper’s edge.
Measure from your shoulder to your wrist. If you ARE going to put cuffs on your onsie, subtract 1 from this number. If you are NOT going to put cuffs on your onsie, add 2 inches to this number. This measurement is Y.
Measure from this point on the paper straight down, that is Y inches long. Make a mark at the bottom of this measurement on the paper.
Measure around your wrist, and divide this number by two. Add one. This measurement is Z.
At the bottom of your Y mark on the paper, make a mark Z inches from the edge.
—–
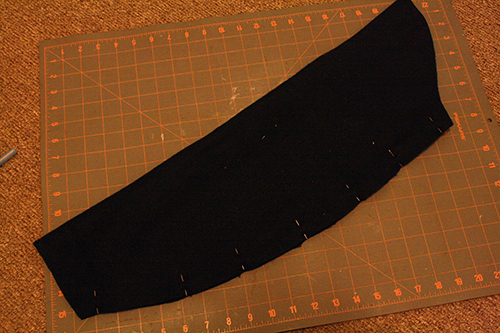
To explain in less mathematical and more visual terms, here’s what we’re aiming for – a normal sleeve pattern will end up being about this shape:
So, basically, you want to start with a rectangle. Make it Y inches long (the measurement from your shoulder to wrist), X inches wide at the top (half the measurement around your arm) and Z inches wide at the bottom (half the measurement around your wrist).
At the top, make a bit of a curved line, the same shape as you see in the picture. It doesn’t have to be perfect, just imitate roughly what you see in the photo. I just freehanded that curved line, truly, and it worked fine.
—–
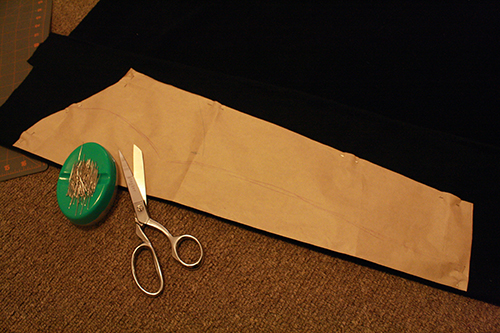
Now, before you cut your sleeve pattern out, if you want a bit of a loose flappy sleeve (y’know, more like a penguin wing), you can curve one line of your pattern out, like this:
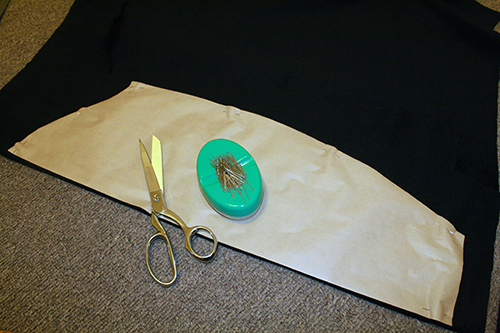
Except do it more extremely than that, b/c that wasn’t enough of an outward curve to make that much difference on my sleeves, in the end. It did help though.
15) Once you’ve got your sleeve pattern, fold a piece of black fleece over, and pin your pattern to your fleece, matching up the folded-edge of the fleece with the straight, longest edge of your sleeve pattern. Cut it out, then repeat for the second sleeve.
Fold each sleeve in half, matching up with itself, with the right side facing inward, and pin the long unfolded edges together, then sew along those edges.
16) Now, if you want to do cuffs, here’s how. (If you do not want to do cuffs, simply fold the bottom edges of your sleeves and legs up and inward once or twice, pin in place, and sew around those edges with a stretch stitch. If you don’t have a stretch stitch, use a wide zig zag stitch.)
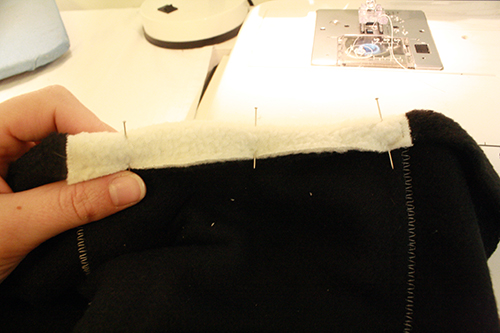
For each cuff, cut a rectangle of black stretchy fabric (old t-shirt pieces work well for this) that is:
- as long as the measurement around your wrist or ankle plus 1 inch
- as wide as the width of your elastic, plus 1/2 inch
So 2 rectangles for your wrists, 2 rectangles for your ankles. Cut 4 strips of elastic, the same length as each of your rectangles.
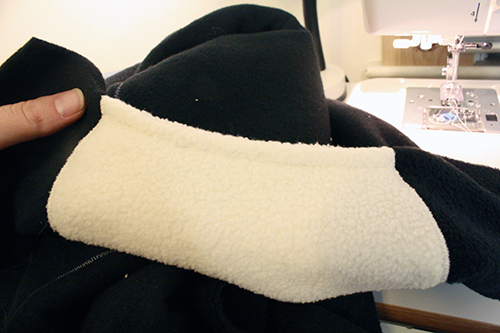
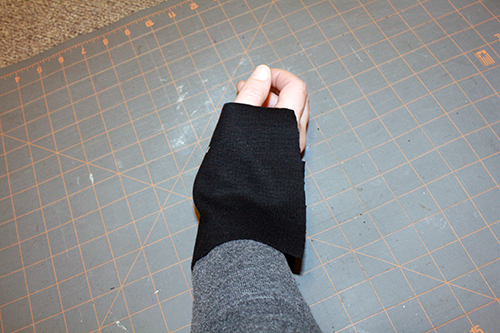
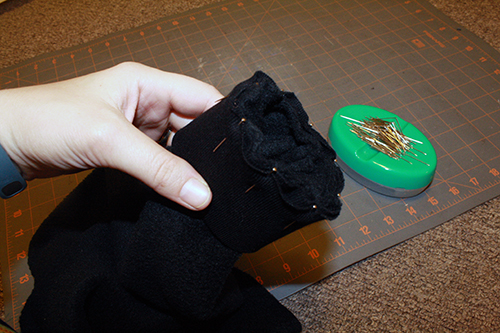
See, it fits nicely around my wrist:
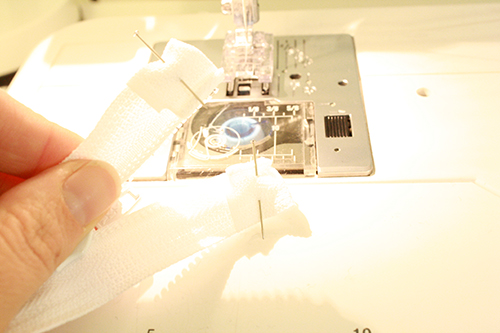
Elastic the same length as your rectangles:
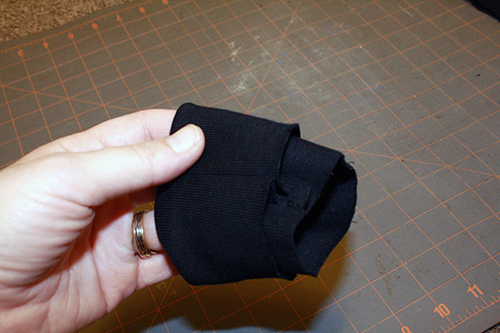
17) Fold each rectangle in half and pin the short edges together, right sides facing each other. Sew along those edges. Do the same thing with each piece of elastic.
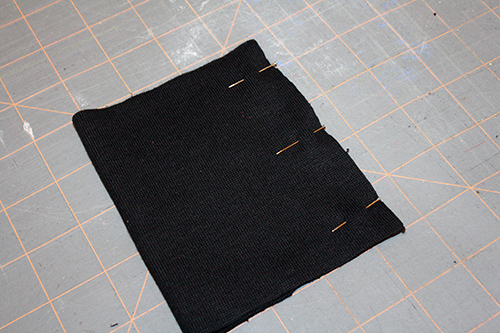
18) Fold each looped-together rectangle in half, with its raw seam edges folded to the inside:
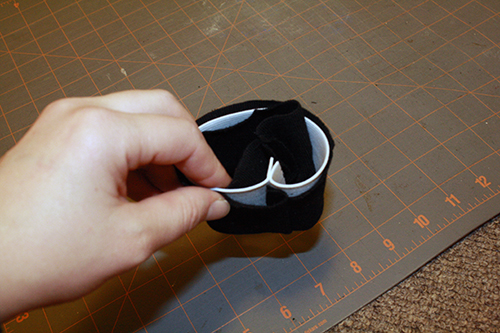
19) Insert a matching circle of elastic into this cuff piece. Match the raw edges of the cuff up overtop of the elastic, and pin them together.
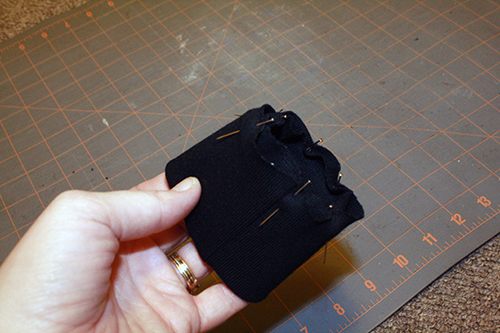
20) Grab a sleeve or a leg, and make sure it’s right side out. Insert its end in through the center of the cuff piece. Remove one pin at a time from the cuff, re-pinning it back through the cuff and the matched-up edge of the sleeve/leg.
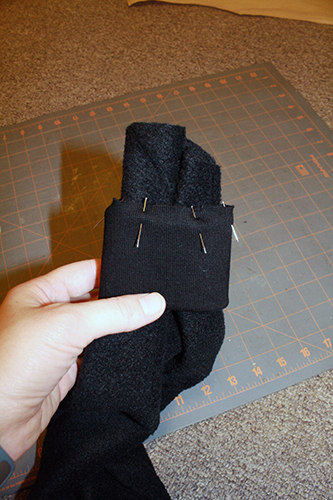
Set your sewing machine to a stretch stitch and sew around the pinned edge.
Pull the cuff down and you’re done!
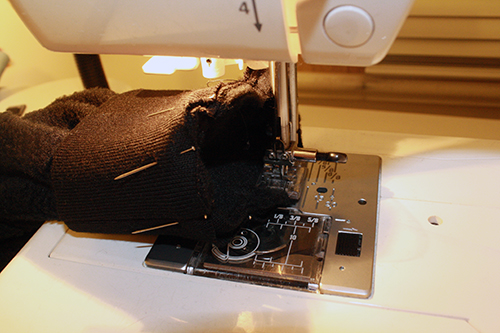
21) To attach the sleeves to the onsie’s body, turn the onsie inside out and the sleeve right side out. Stuff the sleeve into the arm hole of the onsie, so that both of their right sides are facing together. Then match up the raw top edge of the sleeve and the raw edge of the arm hole, matching their bottom seams together and pinning around the hole. Sew around the hole, turn everything back right side out, and you’re done!
—– HOOD —–
21) Cut out two hood pieces from black fleece, and two from your black cotton or other lining fabric. Take each set of two pieces and place them together with right sides of the fabric facing together, then pin them along their curved edges only. Sew along these same edges.
You can find the hood pattern on the Patterns page, number 6. under Sewing patterns.
22) Now I recommend using sewable HeatNBond for this bit, though you can get away without it if you’d prefer. I gave a fairly thorough explanation of using this stuff in my sad panda mask tutorial, which has a generally good set of instructions on basic fleece appliqué. I recommend having a quick look at it before proceeding, if you haven’t used HeatNBond before.
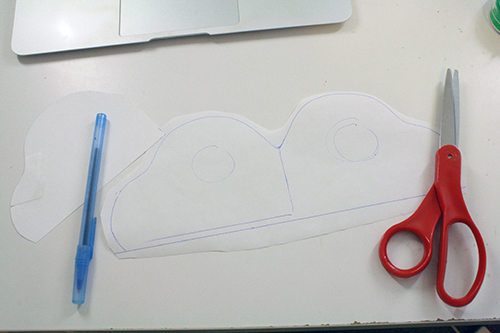
You’ll need the penguin onsie hood template from over on the Patterns page for this bit. It’s number 23. under Sewing patterns. Print it out and cut out the pieces.
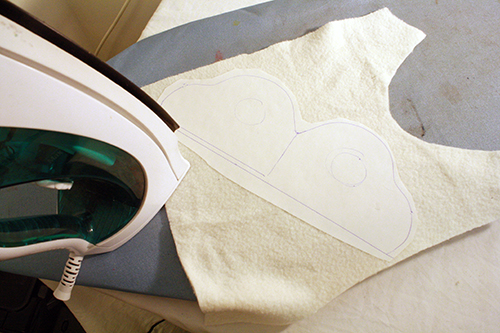
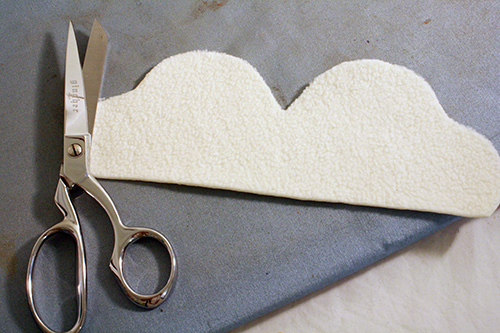
If you’re using HeatNBond, trace the face piece onto the HeatNBond, and cut roughly around it. Then iron it onto the back side of some white fleece, and cut the shape precisely out of the fleece.
23) Peel the backing off the HeatNBond on this piece, and line its center up with the center seam at the top front of your fleece hood piece. Line the edges up, and press down with your iron (use a pressing cloth in between the iron and the fleece so you don’t melt the fleece) till the white appliqué piece is stuck in place.
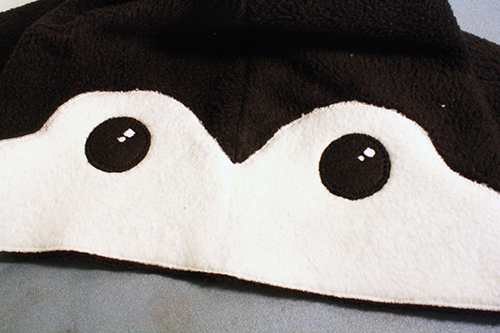
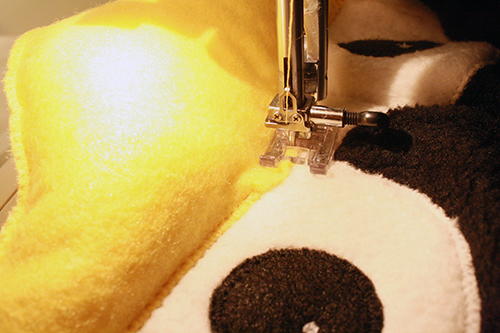
24) Now sew around the edges of the white fleece with a close-together zigzag stitch, like you did for the tummy on the onsie. Just do a straight stitch right along the edge of the hood.
25) Now do the same steps with cutting out 2 eye pieces from black fleece or felt and sewing those on. You can add some white accents with thread to give the eyes more depth.
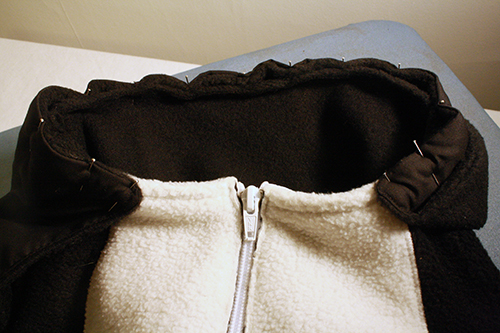
26) Now you’re going to follow steps 8-11 over in my tiger hood tutorial to put the hood’s outer layer and lining together.
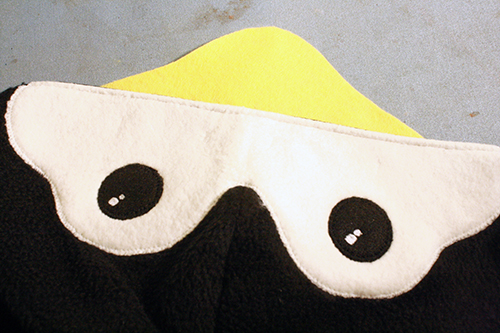
When you get to the stage pictured below, sew along the black edges of the hood with black thread and the white edges with white thread.
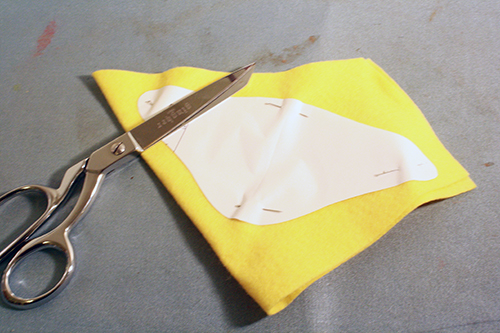
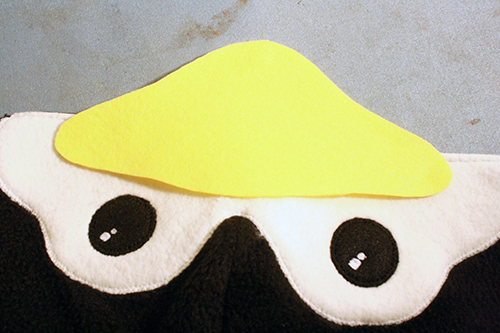
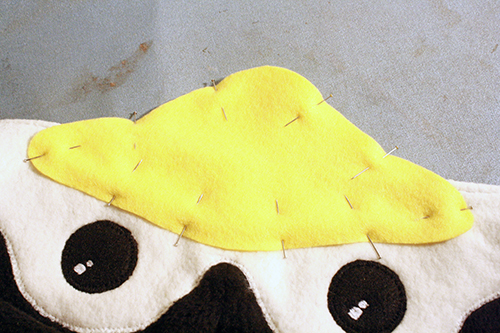
27) Now for the beak. Cut 2 beak pieces out of yellow felt.
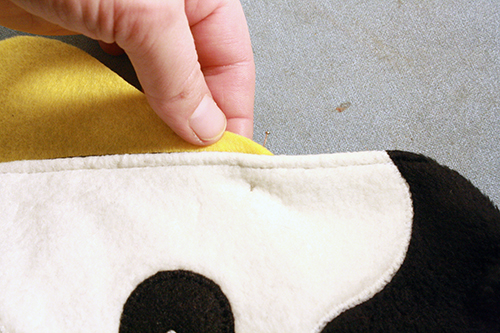
28) Lay the top of the hood out flat and place one of the beak pieces underneath it. Match the other piece up on top of the hood, making sure the beak is situated on both sides where you want it. Then remove the top piece and pin the bottom piece in place to the inside of the hood.

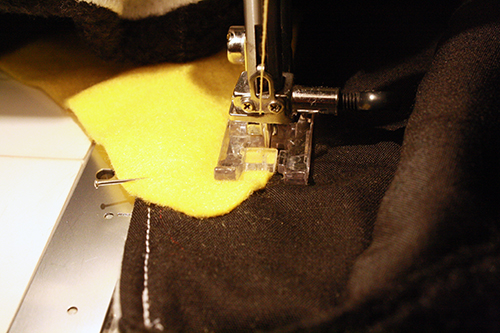
29) Sew with a straight stitch all along the edge of the felt where it’s pinned to the inside of the hood.
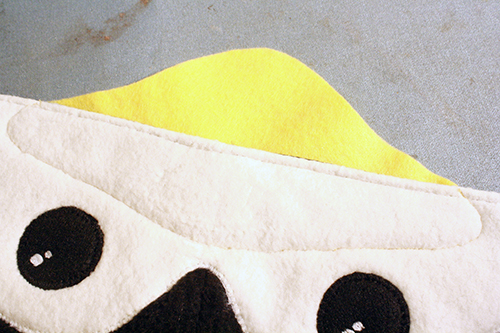
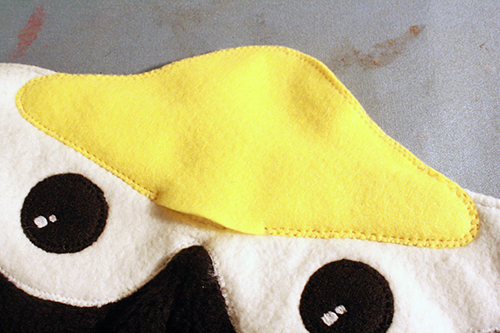
30) Flip the hood back over again, and on the outside you can see the line of where the beak piece is sewn to the hood’s interior. Match the second beak piece up right on top of this, and pin it in place.
31) Sew almost all the way around the edge of this top beak piece with a close-together zigzag stitch. At the top of the beak, leave about 1.5 inches unsewn.
Use this gap to insert stuffing. Spread this evenly throughout the inside of the beak, using a chopstick or pen to push it into the corners if needed. You don’t need to fill it super completely full, just enough to plump it up evenly.

32) Sew the gap closed using the same zigzag stitch, and you’re set!
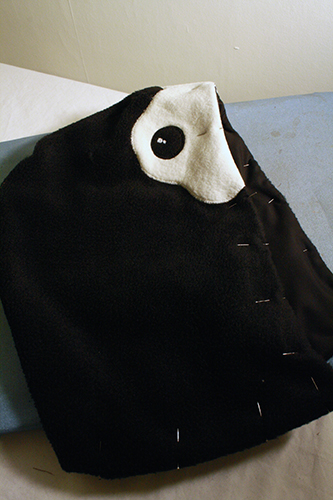
33) To attach the hood to the onsie, flip it inside out and match its inside center seam up with the center of the onsie’s back. Pin it in place there, and all the way around the rest of the collar until you run out of hood.
You should run just about right up to or slightly over the part where you’d already folded down and finished the neck seam on the front of the onsie.
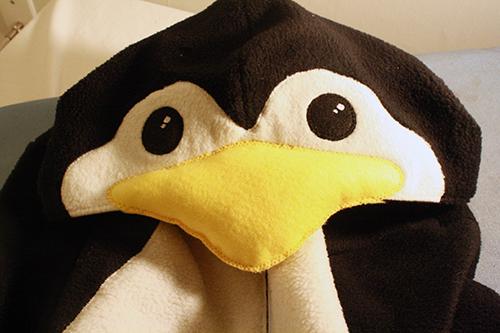
34) Wear your onsie and be warm and cozy forever!!!