

I don’t know about the rest of you, but I enjoy going in to my professional office job looking like a 5-year old coming home from art class. So far I’ve found that paint, markers of any kind and food colouring help me accomplish this nicely. No matter how careful I think I’m being, I cannot use any of these things without getting them all over my hands.
The cheerful bonus of unprofessionally multi-hued hands is not actually why I chose the project I did this week. I was thinking about Easter eggs a few weeks ago, and thinking about new and different ways to decorate them. I was messing about with googly eyes at the time, and those combined with eggs in my mind and this project is what happened.
Eggs in general are far more exciting when you imagine what might be stirring about inside them, ready to break open the shell and nom the first bug or unsuspecting finger it sees. And in addition to all the wee monsters your imagination can come up with, you can fill these eggs with chocolates and other treats to give them some weight and, well, deliciousness.

Featured on:


——————————————
What you’ll need
materials:
- eggs
- food colouring (or dye tablets from Easter egg dying kits)
- vinegar
- water
- strong glue
- googly eyes
- white paper
- circle punch or some small traceable circular object and a pencil
- coloured paper
- paper scissors
- largish needle or pin
- hammer
- pliers or large tweezers
- bamboo skewers
- styrofoam or something else to stick bamboo skewers into to make an egg-drying rack
- plastic bowls or tubs
- paper towels
——————————————
Putting it all together
1) Start by turning all the eggs upside down in their egg carton. Then take your needle or pin, place it over the base of the egg, and use your hammer to carefully but firmly knock it into the egg, making a small hole. Do this repeatedly in a small space, until the eggshell cracks between all the little pinholes. Then use the needle pull out the little bits of shell, making a hole, and use the needle and your fingertips to enlarge the hole till it’s roughly the size of a quarter.


If you don’t have a small hammer, or you just want to get out fewer items, you can use the flat bit in the middle of a pair of pliers as a hammer instead.
Try to keep tiny bits of shell from falling into the egg – that way you can use the eggs and follow up your eggshell-dying with a bit of delicious quiche-making.
2) When the hole is large enough, dump the egg out into a bowl.

3) Rinse the eggshell out thoroughly with water.

4) Repeat this with all of your eggs. It is, of course, easiest to do each step to all of your eggs at once – emptying all the eggs and rinsing out all the shells at the same time.
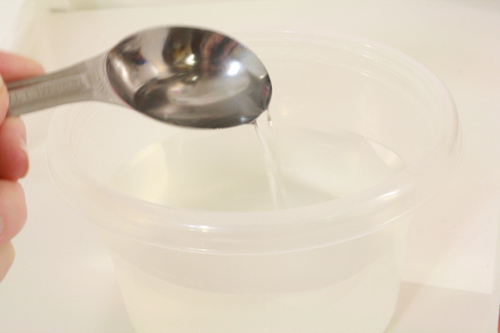
5) Mix your dyes. You can either use a store bought egg dying kit, or just use food colouring, which I find results in better colour anyway. The amounts are not precise, but I used a mix of approximately 1 Tablespoon of vinegar per 1 cup of water. Then add a bunch (yes, that’s my exact technical measurement for you) of food colouring until you get the colour and depth of colour you want. Obviously the more food colouring you add, the darker the colour will be on the eggs.


6) Submerge the eggs in the dye, letting them fill up inside so they sink to the bottom of the container. Let them sit. I left mine for a good 30 minutes to get lots of colour on them. The longer you leave them, of course, the darker they’ll get, to a point. You can also do the traditional childhood egg-dying routine where you dip parts of the egg in different colour to make stripes and other patterns, of course.

7) While the eggs are dying, make yourself some sort of drying rack for them. You can always just set them back in their cartons, or on some paper towel, but then part sitting on the towel gets a bit messed up. I stuck a bunch of bamboo skewers in a styrofoam ball, which I balanced in a cardboard ring cut from one end of a toilet paper tube. And I put a layer of paper towel underneath it to catch the drips, with a layer of plastic underneath that. I want my hands and the eggshells dyed pretty colours, not my desk.

8) Take the shells out and let them dry. Completely. Seriously. The insides should be entirely dry or gluing the googly eyes in place will be a total pain in the butt, if not a failure (depends on your glue). If you’re in a hurry, or just generally impatient, you can always get them to dry out faster using a hair dryer.

9) While the eggs are drying, use your circle punch to make several small paper circles, one for each egg (or trace a quarter onto the paper). Circle size depends on the size of googly eye you’re using. When you put the googly eye in the middle of the paper circle, you want there to be at least about 1/4 inch of paper left showing around it. You also want to use normal white printer paper for this, nothing heavier.

10) Glue a googly eye into the center of each paper circle.

11) When the eggs are completely dry inside and out, use your needle and hammer to make a small hole somewhere in the eggshell, probably towards the top. Make the hole about the size of the googly eye you want to put in it. It doesn’t need to be the exact same size, or a perfect circle. That would be a nearly impossible pain, and since when do egg-dwelling monsters make perfectly tidy holes in things, anyway?


Don’t worry if the shell cracks a little bit around the hole you’re making – that actually just makes it look even better.
12) Now it’s time to insert the googly eyes. Apply strong glue to the paper circle showing around the outside of the googly eye. Use needle nosed pliers, or large tweezers (or, if the hole in the top of the shell is close enough and your fingers are long enough, just use your fingers) to put the paper inside the egg, so the eye is poking out of the hole you made and the paper is glued down around the inside edge of the hole.


Once the paper-and-eye are in approximately the right place, use a finger to situate them exactly, and to push the paper circle down around the edges of the hole (gently, of course), getting the glue to hold it all in place.


Repeat with each egg. You can also do two, or three, or more eyes in a single egg. Who knows what exactly is in there?!
13) If you want to fill the egg with chocolates or other treats, do so now.


14) For the feet, draw a small circle (probably about 2 inches across, unless you’re doing this with ostrich eggs or something) on some coloured paper, with two little feet poking out one side of it. Again, use printer paper, not something thick like cardstock.

15) Cut out the circle-with-feet, and cut a little slit into the circle at either side of the feet.

16) Scrunch up the edges of the circle a bit. Then apply glue around the edges of the circle.

17) Stick onto the bottom of the egg, covering up the hole there and keeping the treats inside. You can also just glue little mini muffin papers onto the bottom of each egg, but I liked the way the feet looked.


18) Now hide these suckers in the grass on Easter morning and see if they make the neighbours wonder. Because my philosophy is if the neighbours are wondering, you’re doing it right.


