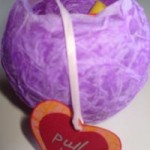
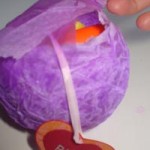
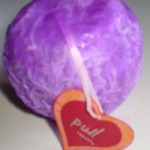
Every now and then I start hankering for a good paper maché project. The feel of wet newspaper between your fingers. The sticky gluey water that manages to make all nearby surfaces slightly tacky, no matter how careful you are to contain the mess. The final result of a lumpy, unidentifiable object that only one’s mother could ever truly praise. What’s not to love?
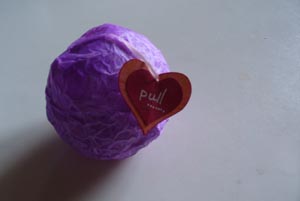
I saw this idea a while ago on another craft blog, and decided to try it out. It’s a tiny little container that can replace that dull, out-of-date convention of box-and-wrapping-paper when it comes to [miniature] gift giving. I gave my boyfriend his Valentine’s Day gift (chocolates, Nerf darts and a Gameboy cartridge) in one of these.
You’d have to be Martha Stewart to make enough of these to do party favours, which is what the blog I found the project on had used them for. Because really, it’s a simple project, but paper maché is bloody time consuming. And sticky – did I mention that? Anyway, it’s fun little project to get you over that paper maché craving for another few months.
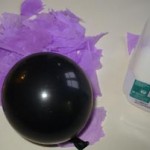
1) Find a small balloon. Or, if your dollar store is as lame as mine and doesn’t sell those tiny little balloons (which are a total pain to blow up anyway), use a normal balloon but don’t blow it up too much.
2) Tear tissue paper into petal-sized and shaped bits. You could mess with using a different colour tissue paper for each layer (you’ll want about 3 layers in total), or mixing colours in each layer for a sort of mosaic effect.
3) Mix white glue and water. Ok seriously, why am I telling you this? Hands up anyone who doesn’t already know how to do paper maché. Really? You don’t? Did you skip every single year of elementary school art class, or what? Ok ok, I’ll stop ostracizing you. But pay attention: mix plain old white glue and plain old water. The proportion is not an exact science, and I always do it by feel. If you’re finding that the paper isn’t sticking, add some more glue. The heavier the paper, the more glue you’ll probably need in the mix. So for tissue paper you won’t need too much. Try about a tablespoon of glue to a cup of water. Maybe. I dunno, I make this up as I go, like I said. Try it and see what works.
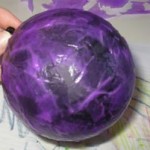
4) Dip the tissue paper in the glue, and layer it over the balloon.
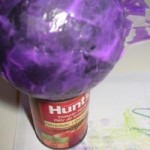
5) Let it dry. Perching the balloon on an empty tin can works well for this. Or you can use a paper clip or clothes peg to hang the balloon from its tied end over a sink or bathtub.
6) Repeat. As I say, you’ll want about 3 layers in total.
7) When completely dry, pop the balloon and pull it out. The globe may crumble a bit as you unstick it from the balloon, but you should be able to poke it back into its proper shape with no trouble.
8) Fill with goodies.
9) Glue a bit of ribbon or string onto the inside of the globe, letting it drape out of the hole. This part didn’t work out so well for me on my trial run, because I only taped it. So when my boyfriend pulled the ribbon, it just sort of popped out without tearing the globe open. Thus, I recommend gluing it down pretty well. A thicker ribbon will also likely give a better result.
You may also wish to attach a little instructional tag to the ribbon, as pictured.
10) Paper maché the hole closed. Let dry completely.
That’s it! Bravo, you are cured of your need to paper maché for the next few months. Now good luck unsticking those bits of gluey tissue paper that have dried onto your kitchen table.

