Here’s a fast, simple and elegant craft to help you prepare for Mothers’ Day. Or any other I-love-you, gift-giving, here-have-something-pretty occasion.
You don’t have to use ribbon for this, either. You can use any long and narrow piece or cloth. Try a strip of scrap fabric, even a shoelace might work. Don’t have either of those? Cut a strip off the hem of an old t-shirt. I mean, it’s for your mom. Surely you can spare one t-shirt.
What You’ll Need:
- ribbon – at least 1/2 an inch wide (or a narrow strip of fabric, etc.)
- glue (white or superglue)
- needle and thread (optional, but highly recommended)
- scissors
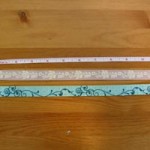
1) Cut 2 lengths of ribbon, anywhere from 4 – 12 inches. The longer (and wider) your ribbon, the larger your rose will be. You can cut 2 different colours of ribbon, or use 2 strips of the same ribbon, depending on whether or not you want a multi-coloured rose. (You could even get really multi-coloured and do 3 strips of ribbon.)
2) Lay the ribbons one on top of the other. If you’re using ribbon with a pattern on it and you want bits of the pattern to show, make sure you put the unpatterned sides of ribbon together, and leave the patterned sides facing out.
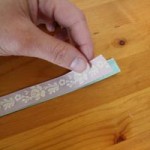
3) Glue the ends of the ribbon together.
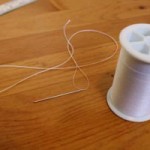
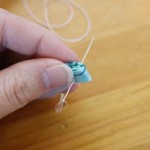
3.5) While waiting for the glue to dry, thread your needle and knot the thread. It’s best to use a thread colour the same or similar to your predominant ribbon colour. Though as you can see in the picture, I totally did not do this, b/c I didn’t have any turquoise thread. It doesn’t matter too much.
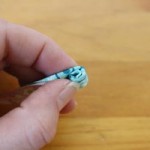
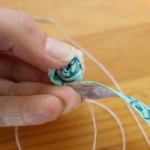
4) When the glue is reasonably dry, fold the ribbons in half and roll up one end of the ribbons, making 3 or 4 rolls. This will form the center of the rose.
6) Take your needle and thread, and run it through the bottom of the rolled-up section of ribbon. Then go back through the other way. When you’ve done this, just let the needle and thread hang down from the bottom of the rose.
[Note: A lot of the other tutorials for these kind of roses just use glue, not a needle and thread. You can use glue, but for this kind of thing I find glue is more mess than it’s worth, takes time to dry and just doesn’t result in as secure an end product. Most especially if your ribbon is a bit thick or bulky.]
7) Twist the remaining length of folded ribbon. You’ll actually have to twist as you go, of course. The twisting is what gives the rose its volume and the illusion of petals.
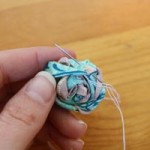
6) Curl the twisted ribbon around the rose’s center. After each 1 or 2 rolls around, secure the new sides in place with your needle and thread.
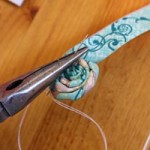
[Tip: Having trouble pulling your needle through such a bulky bunch of ribbon or fabric? Is it stuck? Is it just too short to get a grip on the other end and pull it through? Use a pair of needle nosed pliers to pull the needle through.]
8) Once all the ribbon is wound up and secured, tuck the ends underneath and sew them into place with a few small stitches. Knot your thread, trim it, and you’re done.
9) Use your roses to decorate presents or cards, make a hair pin, a necklace, etc. Be creative!
Scrap A Little, who has a very similar tutorial that I found quite useful in making my own, came up with another neat idea to make these little roses the center of a ribbon bow, thus:
Check out her tutorial for this. (Again, instead of using glue I sewed the ribbons in place. Honestly, it was much faster than standing there, pressing down and waiting for the glue to dry and hold everything in place.) She’s also got a ton of other awesome fabric and paper flower tutorials, for those interested.


