There’s nothing to get you in the Halloween spirit like stabbing a knife into a nice juicy pumpkin and sinking your hands into those stringy, gooey innards. Pumpkin carving was a strong tradition at our house growing up, and my brother and I would sometimes spend an hour sketching out the best possible jack-o-lantern design before committing it to the pumpkin.
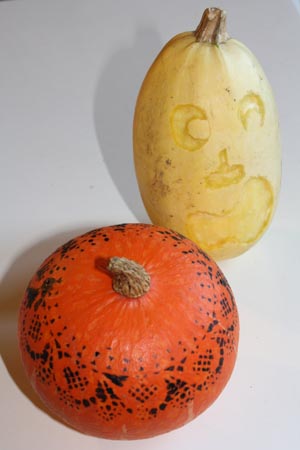
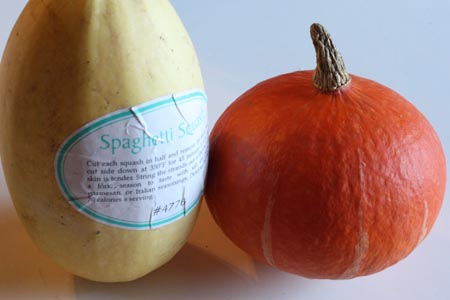
However, sometimes carving isn’t quite the thing. I found these two adorable little gourds at a local produce stand, but seeing as I wanted to use them for eating, I didn’t want to carve them all to pieces. So I tried a couple of alternative methods. One involves peeling, the other simply involves paint.
Let’s look at the paint option first.
What you’ll need:
- a pumpkin, squash or other autumnal growth
- a paper doily (or some old lace)
- acrylic paint
- paint brush
- scotch tape
Putting it all together:
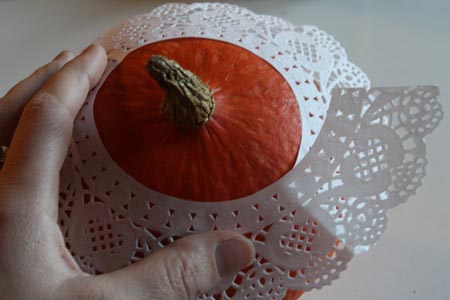
1) Take your doily and cut out the round middle section that doesn’t have any holes. If you’re using lace you won’t need to worry about this, of course.
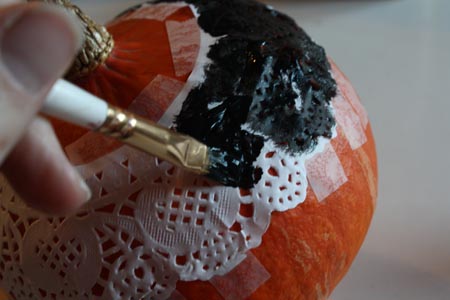
2) Place the doily over your pumpkin. Cut it smaller if necessary, then tape it into place without covering any of the doily’s holes with the tape. (If using lace, do the same thing.) This will take a bit of finagling, and you may have to scrunch the doily up in a couple of places.
3) Take your paint and paint over the entire doily (or strip of lace), paying particular attention to getting the paint in the doily’s holes, where you can see the pumpkin. (Black paint shows up very nicely against the orange, but you could also use white or any colour.)
4) Let the paint dry.
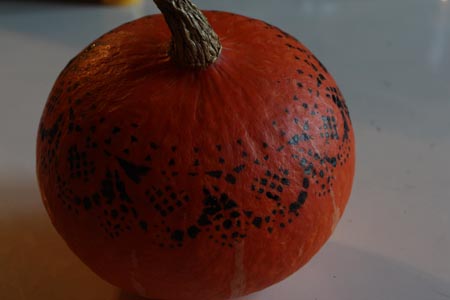
5) Carefully peel off the tape and the doily. Ta-da, you have a lovely lacy design. This takes some practice to get really clean, I think, and it’s better the lacier and more intricate your doily, but you can always just turn any smudged or imperfect bits towards the back.
——————————————————————————————————————————————-
Now for the peeling method.
What you’ll need:
- a pumpkin, squash or other autumnal growth
- a paring knife
- a pencil
1) Draw your desired design on the surface of your gourd with the pencil.
2) Using the tip of your knife, outline the features you just drew.
3) Using the edge of the knife, dig under the skin of the gourd and peel up just the top layer. You’re basically carving the gourd without carving all the way through, thus leaving the insides intact. As long as you only do this a day or two before Halloween, the squash should be fine to cook and eat after the holiday. Yum!
This squash even came with instructions on how to cook it, which is great for meat, cheese and carb lovers like me who are a little daunted at the prospect of dealing with such a hulking beast of a vegetable.
[Note: It would probably work better to reverse the two methods I’ve described here, using the paint method on the pale-skinned squash and the peeling method on the pumpkin. The pumpkin has a darker skin on the outside and a lighter inside, so the peeled design would show up much better than on the squash. Live and learn.]
——————————————————————————————————————————————-
In other Halloween and crafting related news, all 30 of the Creepy Dolls I have made/am making for LoadingReadyRun have sold! This was an exciting project (cuz it’s crafting I get paid for) that involved making a plush doll design from Kathleen De Vere’s creepy-as-hell webcomic character. The dolls appeared in this LRR video, as well as an episode of the Daily Drop.
Really though, I just wanted to share these cute and creepy photos with all of you. In the spirit of Halloween.

