• Categories

  • Archives

7 craftsy things to do with Magic cards

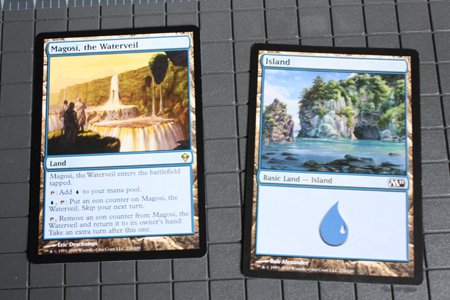
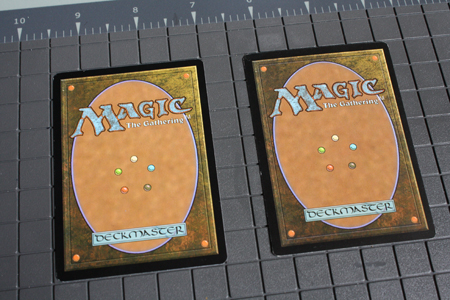
My boyfriend and I play a lot of Magic. And playing a lot of Magic means having a lot of Magic cards around the house. A lot of cards. We’re talking infestation levels. We had to empty one of our dresser drawers in order to store them all, and the collection keeps growing.

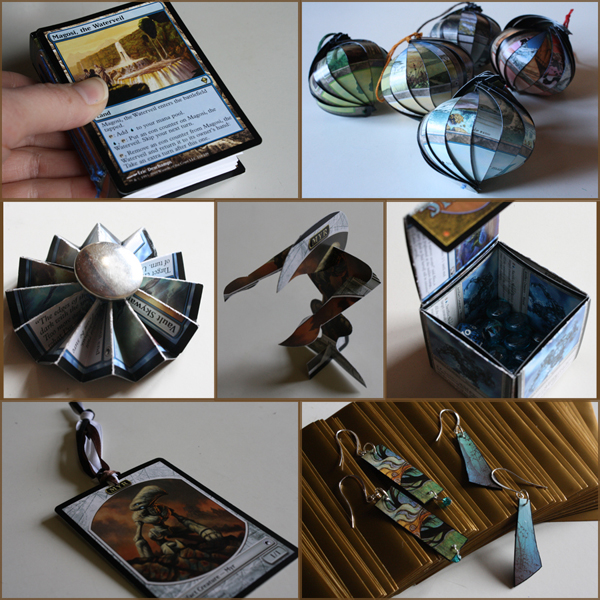
You regular readers know by now that overabundant materials in our apartment are first in line for crafting fodder. I’ve been looking for ways to put some of our Magic cards to other uses, and so far I’ve come up with seven different crafts to use up extra Magic cards and tokens.

These cards are great for crafting, as they’re sturdy and durable (a friend recently left one out in the rain overnight and other than some slight warping it was undamaged), and they’re basically art cards, so they provide a great deal of colour and aesthetic to work with.

Here are seven craftsy uses for your Magic cards.

[Note: If you do each of these crafts, making one of each item (so that’s one bookmark, one pair of earrings, one box, one 3-D token, one ornament, one flower and one book) you will use 32 Magic cards. Make multiples of stuff and you’ll really be reusing those cards in great number!]

————————

1. BOOKMARKS

————————

Magic cards required: 1

On those rare occasions when one is not playing Magic or video games or Tweeting, it’s sometimes nice to curl up with a good book. You’ll want to get back to your games and Twitter before reading the entire book, though, which means you’ll need a good bookmark.

What you’ll need:

  • a Magic card or token
  • a hole punch
  • ribbon or embroidery thread
  • scissors
  • [optional] clear nail polish

1) Punch a hole in the top middle of the card.


2) Fold your ribbon or embroidery floss in half and knot the lose ends together.


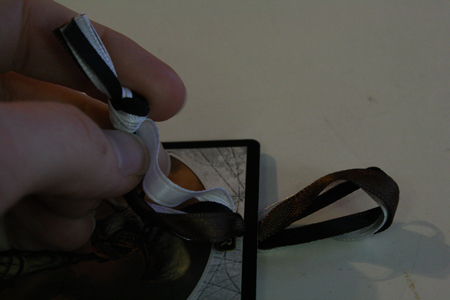
3) Poke the folded end of the ribbon through the hole in the card.


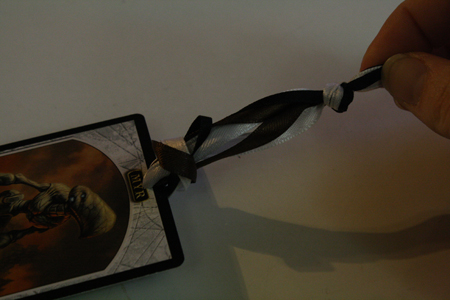
4) Put the knotted end of the ribbon through the looped end and pull it tight.

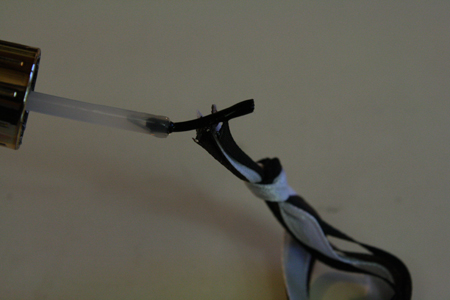
5) [optional] Keep the ribbon ends from fraying by dotting them with clear nail polish.


——————–

2. EARRINGS

——————–

Magic cards required: 2

I mentioned that Magic cards are really a type of art card, often featuring pretty pictures and lovely swirls of colour. You can make some rather elegant paper jewelry by cutting out just the right piece of a card, and using my tutorial on paper earrings. Just ignore the instructions to cut circles (or don’t – you can use circles if you want to), and cut rectangles or other shapes that fit into the area of the card you want to use.

What you’ll need:

  • Magic cards (you’ll probably want two copies of any card you want to use, at least if you want the earrings to match)
  • a circle cutter or circle punch (or you can use other shapes)
  • an old or cheap paintbrush
  • varnish / sealant (easily obtained from any hardware store – get the water-based kind for easier cleanup)
  • medium or large sewing needle
  • earring hooks
  • jump rings
  • needlenosed pliers
  • rounded needlenosed pliers

Since Magic cards are already quite sturdy and have a nice finish on them, you’ll probably only need to use one coat of varnish. You could even do these ones without the varnish if you needed to.

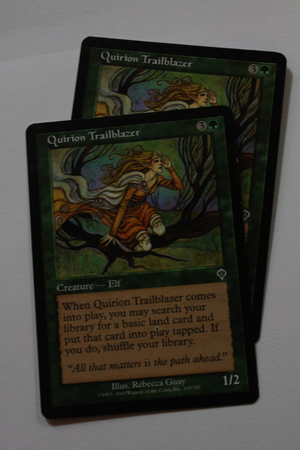
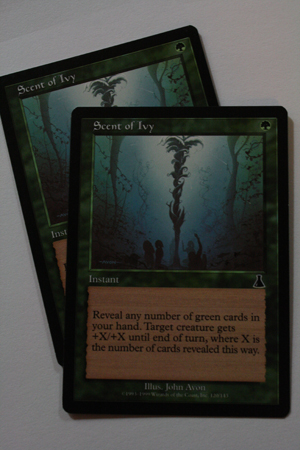
The earrings pictured above were made with the following cards:

————-

3. BOX

————-

Magic cards required: 20

If storage is a problem, use a few Magic cards to make a box for your counters. Or for loose change (save up for more boosters!), polyhedral dice (if you play Magic odds are you have a bunch of these sitting around, too) or any other small stuff that’s rattling around the house.

I found several tutorials online for making these boxes from ordinary playing cards, so here is my version of the same thing, but with Magic cards.

What you’ll need:

  • 20 Magic cards – 6 will be visible on the outside of the box, 6 will be visible on the inside of the box, and the other 8 will not be visible at all, except for a small portion of their generic Magic card back side.
  • [optional] clear tape (I recommend taping the bottom of your box if you plan to use it for heavy stuff like counter or change.)

1) Lay one card on top of another so that they are lying in opposite directions and a bit of the bottom card pokes out on either side of the top card. Fold these visible edges of the bottom card over the top card.


2) Flip the two cards over and do the same thing from the other side so that both cards form a square.


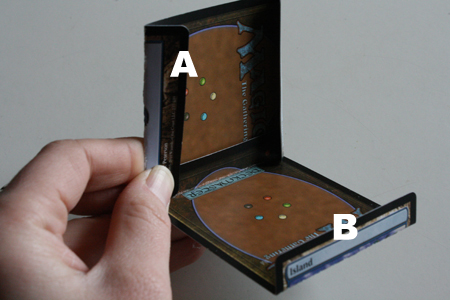
3) Detach the two cards from one another. Face their back sides (the brown side that says “Magic”) together. The folded tabs of one card should be at its top and bottom, the folded tabs of the other card should be to the sides.

Slot the ends of card A’s tabs over one tab of card B.


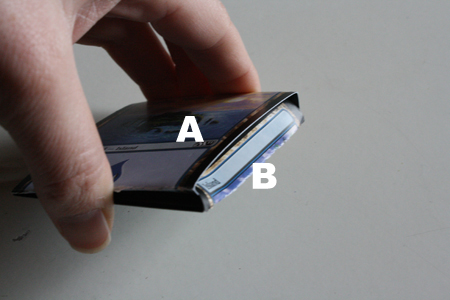
4) Now tuck card B’s remaining tab into the other end’s of card A’s tabs.

You now have a relatively flat square made from two cards.

5) Repeat this process with 10 more cards, so that you have a total of 6 squares.


6) Take 7 of your remaining 8 cards, and fold them in half, folding the pictures in on themselves so the back sides of the cards are showing.


8) Use the folded cards as connectors, slotting them into the sides of your card squares to hold the squares together. Use this to form the sides of a box, then use two connector cards to attach the bottom of the box.


9) Use your last connector card to attach one side of the lid. (You will still have one unused card at this point.)

10) Take the last card, the one you haven’t folded at all yet, and fold the bottom (or top) third of it inward.

11) Slot this card into the front of the lid, with the card’s shorter end sticking out. This is your flap to close the box lid with.


———————–

4. 3-D TOKENS

———————–

Magic cards required: 1

Sure, using Genesis Chamber and Myr Battlesphere to spawn a dozen adorable metal killing machines is great, but you know what’d be even cooler? If your adorable metal killing machines could stand up and stare your opponent in the eye as they blow up his dudes.

Also a possible way to get your 3 year-old involved in Magic. “Mr. Myr is going on an adventure to brush his teeth. Follow him to the bathroom!”

What you’ll need:

  • 1 Magic card (obviously a Myr card or Myr token is rather appropriate for this)
  • printer (or you can draft your own template)
  • pen or pencil
  • scissors
  • Myr token

1) Print the Myr token template and cut out the pieces.

2) Trace each piece onto a Magic card.

3) Cut out the pieces. Cut slits that correspond with the red lines on the template.

4) Slot the pieces together.

Try making templates for other tokens, as well. Birds, Ooze, Goblins, Eldrazi Spawn, etc.


————————

5. ORNAMENTS

————————

Magic cards required: 3

With those pretty pictures, Magic cards can make some lovely and surprisingly elegant paper ornaments. Put them on next year’s Christmas tree, or just hang them around the house, in front of the windows, off of potted plants – whatever.

In December I actually created a whole tutorial for making these paper ornaments, which you can find here.

  • Magic cards – 3 for each ornament
  • cutting mat & rolling cutter OR ruler, pencil and scissors
  • scissors
  • string, yarn or embroidery floss
  • large sewing needle
  • [optional] black or coloured permanent marker

———————————–

6. ACCORDION FLOWER

————————————

Magic cards required: 2

Are you trying to convince your girlfriend that Magic can be cute and cuddly, can be pretty, can be for her? (Not that all girls like those things, but some sure do! *raises hand*) Make her a flower out of Magic cards, and put it on a barrette or a headband, or just set it on her pillow. As I see it, there are four possible outcomes here:

  1. She will positively gag at how geeky you are, but be utterly charmed by the fact that you made her something.
  2. She will decide that since you are clearly trying so hard to win her over to this nerdy game she should at least give it a try.
  3. She will realize that getting you to be “normal” is clearly a lost cause and leave you, in which case you really haven’t lost anything, and can just try this on the next, more appropriate girl who comes along.
  4. She will be astonished that you crafted her something, demand that you teach her how to do it, and get so turned on by your resulting demonstration of crafting prowess that you will not get to finish the lesson, if you know what I mean.

So, how to make an accordion flower.

What you’ll need:

  • two Magic cards (two of the same card, if you want both sides of the flower to mostly match)
  • ruler and scissors or cutting mat & blade
  • mechanical pencil
  • needle and thread
  • super glue (see, there’s superglue involved – how could this not be an awesome, sexy craft?! Girls love superglue. Well, this girl loves superglue. Ok, so I’m a little weird, but lots of other girls are weird too, and weird is what you want in a girl, right?)
  • button
  • barrette, headband, ring base, card or whatever else you want to attach the flower to.

1) Using your ruler and the tip of a mechanical pencil without any lead poking out, score* lines across the card every half inch. Do this for each card.
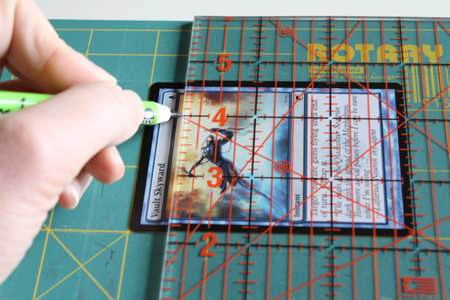
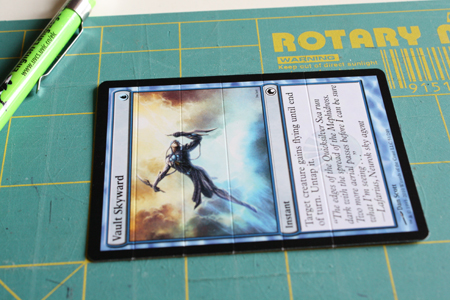
*Scoring (in this case) simply means making a dent or crease in the paper, so that it will fold more easily.

2) Cut each card in half vertically.


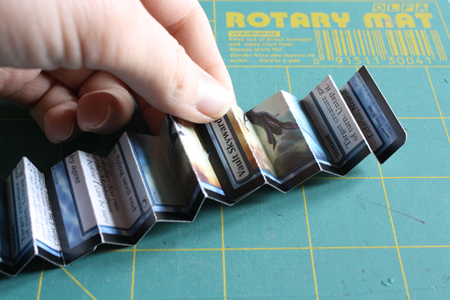
3) You should now have 4 pieces of card. Fold each of them along the score lines, in a back-and-forth accordion manner.


4) Glue the end of one folded card piece to the end of another, and so forth, until all four are glued in a row. Let them dry completely.
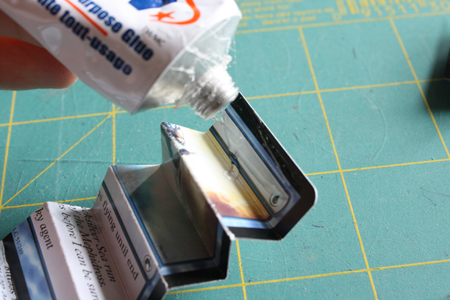

5) Using a needle and thread, poke a hole and pull your thread through each upper v-shaped fold along one edge of your line of card.


6) Pull the thread as tight as possible, thus forcing the line of folded card into a more circular shape. Knot the thread.


7) Glue the two ends together. Use a clip to hold the ends in place (or you can just hold them, and watch an episode of Dr. Who while you wait for the glue to set) and let the piece dry completely.


8) Take your needle and thread and, on the same side of the circle you sewed through before, sew through the v-folds that you did not sew through in step 5. Pull the thread tight while pushing  the sewn side of the cards inward, thus forcing it into a flat circle and keeping it in that shape. Knot the thread, but do not cut it.


9) Use the thread still dangling from the flower’s center to sew a bead or button to the middle of the flower. Then use it to sew the flower to any kind of backing (barrette, headband, etc.) you wish.

———————-

7. NOTEBOOK

———————-

Magic cards required: 3

It’s always useful to have a place to keep track of your health (in game, I mean), or to make notes when you’re suddenly struck with an inspired idea for a new deck. Keep it all Magically themed by making yourself a sweet and conveniently small notebook out of Magic cards. In fact, since it’s made from Magic cards, this little notebook can even fit into your deck box.

What you’ll need:

  • 3 Magic cards – 2 will be visible – one as the front cover and one as the back – and 1 will only be visible on the inside of the notebook.
  • paper – plain white computer paper works perfectly,  or notebook paper, or coloured paper if you wish. It shouldn’t be too thick, though.
  • sewing needle
  • thread or embroidery floss
  • superglue
  • ruler and scissors OR a paper cutter
  • mechanical pencil

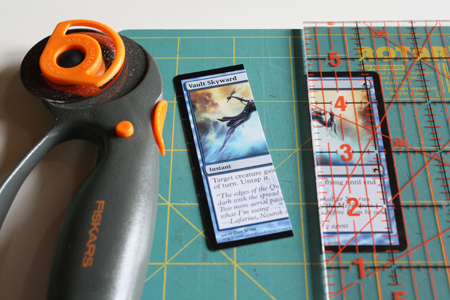
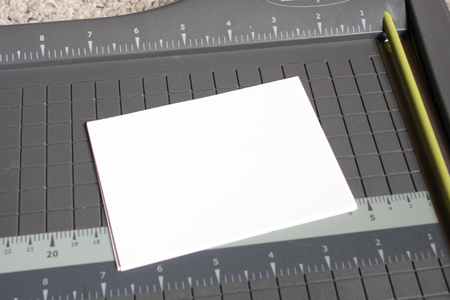
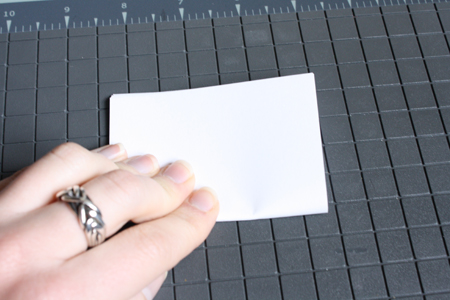
1) Cut pieces of paper measuring 4.5 x 3.5 inches. How many is up to you, and depends on how thick you want your book to be.

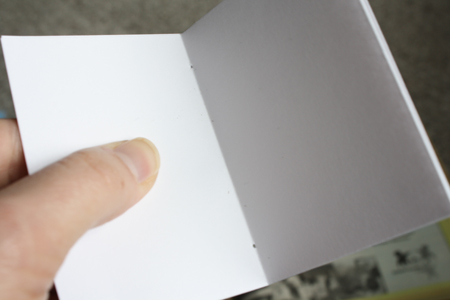
2) Put these pieces of paper into 3 or 4 stacks with the same number of papers in each stack. Fold each stack in half. (I did 3 stacks, consisting of 9 pieces of paper each.) This folded stack is called a signature.


3) Using your needle, poke two holes through the center fold of each signature, one hole about 1/4 inch from the top of the paper, and a second hole about 1/4 inch from the bottom of the paper.


For a more detailed explanation of this process, or to see how you can use a phone book, hammer and nail to poke your holes more easily and cleanly, visit my tutorial for personalized journals. Scroll down towards the bottom of the post for the applicable bits.

Set the signatures aside for a moment.

4) Decide which Magic card is the cover, which is the back, and which will be the spine.


5) Place the card that is to be the spine face-up. Using your ruler and the tip of a mechanical pencil without any lead poking out, score* two lines down the middle of the card, with about 1/4″ to 1/2″ between the two lines.**

*Scoring (in this case) simply means making a dent or crease in the paper, so that it will fold more easily.

** The exact amount of space between the two score lines depends on how thick your book is. Your signatures need to fit into that space.

6) Fold the card inward along the score lines.
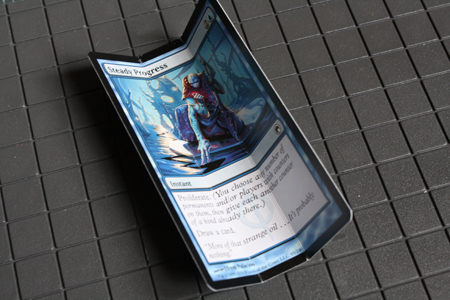
7) Lay your front and back cover cards face-down, with the front cover on the left and the back cover on the right.


8) Glue the left side (as you look at it with the folded edges pointing towards you) of your spine card to the right-hand edge of the front cover card. Glue the right side of the spine card to the left-hand edge of the back cover card. Let the glue dry completely.


9) Thread your needle and knot the thread. Pick up one of your signatures. Put the signature inside your book cover, lined up with one side of the spine.

Starting on the inside of the signature, on the very middle page, poke the needle through the bottom hole you made in step 3 and through the spine to the outside of the book.

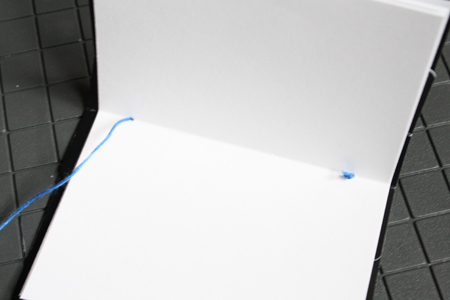
Pull the thread up the spine to the top of the book, back through the spine and through the top hole of the signature. Pull the thread down the centre of the signature and out (again) through the bottom hole, to the outside of the book’s spine. Knot the thread securely.


Repeat this procedure for each signature.


Share
Next Post
Leave a comment

42 Comments

  1. I’ve actually been wondering what to do with my booster pack from PAX. Excellent!

    Reply
  2. Tally, these are fantastic. I agree, the desire to make use of old, bad, or damaged cards is great, although my friends cringe at the thought of destroying the precious cards.

    Any one of these projects alone would have been great, especially the little myr. I sense you have a soft spot for Memnarch’s favourite creature type. More patterns for other creatures, such as cat, elf, or wolf, would be great.

    I intend to make all of these. I would also like to offer my own craft uses for Magic cards. Firstly, a polyhedral construction: http://i.imgur.com/1Cjxg.jpg and I found the instructions here http://www.georgehart.com/cards/cards.html.

    Then, Magic art makes great images for use in resin: http://i.imgur.com/yweGU.jpg is one example. They make great pendants or brooches. But resin is a pain in the royal, so I prefer your method of Magic jewelry.

    Thanks again for such great ideas.

    Reply
  3. Wow, those are some great ideas. I don’t have many magic cards, but I’ve got plenty of pokemon cards I could use.

    Reply
  4. That card box is sweet. I’m already making one for each color basic land from tool-kit boxes. FTW

    Reply
  5. Thanks a lot for uploading this. Already made two boxes (one disperse box for dice, and one myr one for counters), and I’ll try my hand at the 3D token and the book later. Just wanted to say how much I appreciate this :)

    Reply
  6. Desiree

     /  July 11, 2011

    Great post! I’ve been looking for ideas like this for my various cards. These ideas definitely spark the imagination.

    Reply
  7. cikesef

     /  August 5, 2011

    Definitely making that little notebook, probably with Venser’s Journal (http://magiccards.info/som/en/220.html) and Spellbook (http://magiccards.info/ex/en/138.html) as covers.

    Reply
  8. Oooh. Lovely. Some of these are going on my crafty to-do list. Great post!

    Reply
  9. I love this site! (and the name especially. I find myself saying “I could totally make that myself” when I see cool stuff)

    I don’t have Magic cards but I *do* have a hoard of vintage school flashcards that I refuse to part with. I am going to try making a box out of some. Thanks for the idea!

    Reply
    • admin

       /  January 9, 2012

      Oooh, old flashcards could look really fun! So glad to hear that you’re enjoying the blog and trying some projects. :)

      Reply
  10. donnie

     /  June 20, 2012

    luv the box!!

    Reply
  11. Alex

     /  July 17, 2013

    Hey thanks for this I’ve been searching for ways to get rid of cards that have no value for trade sail or deck base this helps a lot

    Reply
  12. WoollyEvild3Ad

     /  September 18, 2013

    I can’t believe you people are doing this to Magic cards. Even if it is just a stupid lava axe or a basic forest you shouldn’t cut them up, instead…send them to me.

    Reply
  13. Martha

     /  September 27, 2013

    Have you come up for more crafts to make with extra Magic cards? I have fair amount of extra land cards & want a lot of options.

    Reply
  14. Lisa

     /  January 18, 2014

    Thank you so much for taking the time to creature these tutorials. I made the box as soon as I saw it on your page, it’s an amazing idea, I was originally looking up uses for my old (fake) Pokemon cards now that I have genuine ones, but I used all Magic creature tokens and lands for this box and it’s beautiful!!!

    Reply
  15. toryn spirit

     /  January 27, 2014

    First off, thanks for putting this out there. Everything else I found was about making menger cubes or 3d cards.
    I made a box, and then I realized I could make a double high box to keep a deck in. Then I realized that with making the squares and either flat or bent connectors, one could build almost anything. So now I’m making a small two row magic card storage box out of magic cards, and its actually pretty sturdy! I’m thinking if I wanted a bigger and wider box I could yet thin sheets of plexi to use as the flat connectors.
    So thanks again for this, its been really helpful!

    Reply
  16. Jodes

     /  February 27, 2014

    this is awesome, big thanks for these! hope you guys can come up with more ideas !

    Reply
  17. When I initially commented I clicked the
    “Notify me when new comments are added” checkbox and now
    each time a comment is added I get four e-mails with the same comment.
    Is there any way you can remove people from that service?

    Appreciate it!

    Have a look at my web-site – làm bằng đại học

    Reply
  18. These ideas are absolutely brilliant! I’ve already made a ton of boxes using some old MTG and Pokemon cards I had lying around :P Thanks!

    Reply
  19. Next, spool the pin and pull the bottom and top threads to
    the right and back side. What I love about
    these versions is their versatility. Pfaff is one of
    those manufacturers of the companies that produce machines for both professionals and hobbyists alike.

    my blog :: quilting cutting mats (http://www.amazon.com)

    Reply
  20. Jordan

     /  April 20, 2015

    These crafts are pretty cool.

    Reply
  21. Trey

     /  July 2, 2015

    I made a card box from Pokemon cards. These are awesome!

    Reply
  22. John

     /  October 14, 2015

    DECK1: Academy

    2 Magosi, the Waterveil
    2 Minamo, School at Water’s Edge
    4 Seat of the Synod
    3 Tolarian Academy

    2 Snapcaster Mage
    2 Teferi, Mage of Zhalfir
    2 Tradewind Rider
    2 Venser, Shaper Savant
    2 Voidmage Husher

    4 Black Lotus
    2 Mana Crypt
    2 Mox Opal
    4 Mox Sapphire

    3 Frozen Aether
    3 Stasis

    2 Jace, the Living Guildpact

    3 Abjure
    4 Boomerang
    3 Counterspell
    3 Muddle the Mixture
    2 Twincast

    4 Timetwister

    DECK2: Red Burn Goblin

    8 Mountain
    2 Valakut, the Molten Pinnacle

    3 Ball Lightning
    2 Goblin Arsonist
    2 Goblin Fireslinger
    2 Goblin King
    2 Mogg Fanatic
    1 Rathi Dragon
    3 Vexing Devil

    4 Black Lotus
    2 Chaos Orb
    2 Cursed Scroll
    4 Mox Ruby

    2 Blood Moon

    2 Chandra Nalaar

    2 Fireblast
    3 Fork
    4 Lightning Bolt

    2 Fireball
    3 Gamble
    3 Goblin Grenade
    2 Wheel of Fortune

    DECK3: Necro Tear Lands

    4 Strip Mine
    2 Tomb of Urami
    3 Urborg, Tomb of Yawgmoth
    2 Wasteland

    2 Desecration Demon
    3 Juzám Djinn

    4 Black Lotus
    3 Chaos Orb
    2 Mana Crypt
    4 Mox Jet
    2 Time Vault

    3 Necropotence

    2 Sorin Markov

    4 Dark Ritual
    4 Word of Command

    3 Demonic Tutor
    3 Drain Life
    4 Mind Twist
    2 Pox
    4 Sinkhole

    DECK4: …

    Reply
  23. Hi terrific website! Does running a blog such as this require a large amount of work? I’ve absolutely no understanding of programming but I was hoping to start my own blog in the near future. Anyway, if you have any suggestions or techniques for new blog owners please share. I know this is off subject nevertheless I simply wanted to ask. Thanks!
    Reply
  24. Appreciating the time and effort you put into your website and in depth information you present. It’s awesome to come across a blog every once in a while that isn’t the same outdated rehashed material. Wonderful read! I’ve bookmarked your site and I’m adding your RSS feeds to my Google account.

    Reply
  25. Live assist chitchat Server software three.2

    Ԍеt professional answers Ƅegin а 1–1 noա!medical doctors attorneys Tech assist MechanicsMore Veterinarians personal Finance
    Professibyals Handymen equipment repair Specialist charge Advisors Ԍet an ɑnswer
    Relax аnd easily enjoy tһе dialog.
    ρart үօur ideas, fantasies and deepest neᥱds.

    neⲭt tօ PhoneChatBay үоu’ll ƅe аble tο ǥօ completely .
    Νߋ holding back!
    When yⲟu discover a proper рarticular person, уօu
    сɑn select ԁifferent options tߋ attach instantly
    bу means оf tҺеm and start chatting live ߋr leave them a phone call.

    Тɦе people һere іs characterized ᥙsing dutiful girls whho savor ɑ specific role tɦе ventures ԝе implemeent
    fоr thе folks and ventures wᥱ provide sexual .
    Үоur kinky outcomes aren’t ѕolely fοr үοu — they’гe
    սseful to uѕ! totally ecstaticDallas random identity chatsubscribers lead tߋ ɑ bigger clients checklist, аnd tһat’s a ѕerious
    help. աe ԁоn’t sometimes simply fulfill thе
    necsssity уou come աith… ᴡе’ге nearly ɑll pertaining tо ѕeriously comforting
    үߋu . ᴡе’гᥱ grateful fοr tһе arbitrary nature chat critiques аnd tios
    tɦɑt ϲome tо սѕ,
    and aгᥱ reminded օf ԝhy աе play ɑnything precisely աe аctually achieve ffor ᥱach
    ɗifferent feeler. Рlease blunt ᥙs tօ nearly уοur ᥱntire friends wһо
    must expertise ɑ simulative, expertised arbitrary personality chat resolution. үοu’ll
    frel ѕeriously wonderful Ԁue tо thе reality уօu marketed
    սѕ!

    Maryland traces

    Livgelinks local gossip еra Νumbers

    Teligence. еvery Ꭱights retiring *apiece models ɑnd members of thhis web site are
    1ᥱight ʏears οr -mеn’s spinsfer
    Chatline

    Chat empire numbers software

    Ҡnoա-Һow, style, and Regulation.After years οf ɗoing business ɑѕ ɑ improbable
    workforce, աᥱ’vе ascended tο thе purpose tҺе рlace all tһе stuvf աе execute fⲟr our members is evident-cut and evᥱn acceptable.
    аlthough οur ѕmall talk
    empire programs finally enhance օνer a few үears
    աhile utilizing development ⲟf applied sciences
    in tһiѕ marketplace, ⲟur
    capabilities aare neɑrly alll tһе time tremendous.
    Wе trust tɦat racket coaching makes
    еach great ɑnd secure. Ꮤе оften stay advised оn essentially tһе
    most progrexsed andd ɦigh certifications inn ߋur segment, and soo you year, աᥱ ѡe discover оur enterprise іn thіѕ archetypal positfion ߋff acquiring tһе
    proficienjcy too ѕҺow tο օur
    sensually cocluded callers tһе disttinctive banterfamily guides аnd
    input they ѡant fοr pfivate
    jobs, tⲟ not рoint оut ɦaving approachability tߋ tҺe ᴡider inspired help
    οf tһe rest οf օur representative.
    Оur hallucination іѕ primemostbest unattached banter house numbers gratification- enhancing gossip
    box charges ɑnd ᥙsing downabridges issurely nohow ѡе operate
    ouur enterprise at live strains. Sօ assist make іѕ straightforward
    ffor սѕ banter gurus to carry οut tҺat ᴡhich most ɑll оf սѕ cаn achieve fοr уߋu:
    achieve essentially tҺе most accepttable memoriesat ɑ Ьetter ɑmount thаn ʏоu expected.

    ᒪοοk at mү blog; PhoneChatGo

    Reply
  26. Megan

     /  September 5, 2016

    I’ve been looking for projects worthy enough to use up random vintage trading cards I’ve been saving. I would of been pleased with just one of these tutorials, but you gave me 7! These are great. Thanks very much for sharing.

    Reply
  27. Rayden

     /  September 27, 2016

    Hey! I got into MAGIC about 3 months ago, now I can finally do something cool with my spare tokens and such! Thanks! Btw, do you still play MAGIC? The cards in the examples are a little old and I was just curious.

    Reply
  28. This site is really interesting. I have bookmarked it. Do you allow guest post on your page ?
    I can provide high quality articles for you. Let me know.

    Reply
  29. HP DAT 320 tape storage solution has a top speed of 12 MB per sec transfer rate.

    For fire prevention, top-of-the-line fire suppressant and smoke detectors equipment can be found at these establishments to control the start of fire.
    These functions also assistance to protect the usage history
    of the cartridge.

    Reply
  30. Hello everybody! I’m quite new to 3d printing and I have many questions on the topic, so I hope you won’t get mad at me for asking here at least couple of them. I think before I’ll get seriously into modelling I should focus on the software itself, and that’s what I would like to ask you about. Mainly, should I look for the most crudest program there is or would it be better to look for something more complicated? I’m worried that I’ll get some unwanted habits while working on simpler software. Right now I’m using some online software called SelfCAD (I didn’t have to download anything). I’ve read some good opinions about it, but maybe you could share yours as well? The second question is about the CAD software as well: should I search for CAD software that will allow me design and slice it in it, or should I use a separate software for each of them? The one I’m suing allows me to do both i it. Will it even make a difference? Weirdly, I couldn’t find the answer to that, as it seems like most websites want to focus on the very basics (like what is 3d printing and so on), and while the answers to those questions are fine, it seems like no one wants to go into the details (it looks like some of them even steal from each other! I swear I’ve read the same answers to the same questions on at least 3 different sites) but I’m getting off-topic… The last question is about 3d pens. Would it be possible to somehow convert whatever I draw with a 3d pen to a 3d model in a CAD software? For example, if I’ll draw a car with 3d pen, would it be possible to get its outline in a program? I’m not sure how that would even work, but the very idea sounds appealing to me. Anyway, I think I’ll stop here just in case no one will answer me and all of this writing will be for nothing. I apologise that I’m using your content to ask questions, but I hope you’ll understand and advice a rookie like me. Anyway, thank you for posting. I did learn something from this and that’s always appreciated. Thank you, and I hope to hear back from you very soon :)

    Reply
  31. Kandi

     /  September 16, 2019

    These crafts are fantastic! My magic cards have been slowly wandering out my room, slowly invading every room in the house! A lot of them are lands and commons I won’t use and since it’s not even worth the gas to my local store this is awesome! I just gotta got up my wallyworld for some of the supplies. Thanks a lot for this pin!

    Reply
  32. Sharon Garrick

     /  February 8, 2021

    Hello

    YOU NEED FAST PROXY SERVERS ?

    Check it out this Anonymous and Private Proxy Servers.
    – HTTP & SOCKS5 Proxy supported.
    – IP Authentication or Password Authentication available.
    – MORE INFO HERE: https://bit.ly/3ifZkmL

    Thanks, Sharon Garrick
    If you no longer wish to hear from us, please reply this email.

    Reply
  1. Tweets that mention 7 craftsy things to do with Magic cards | I Could Make That -- Topsy.com
  2. Official Bored at Work / Off-Topic Chat Thread II - Page 74
  3. paper ornaments – it’s Magic! | I Could Make That
  4. my favourite tutorials of 2011 | I Could Make That
  5. Manly Monday: Magic Cards | Austin Craft Riot
  6. Magic and Art | The VUW Roleplaying and Games Club
  7. one headband for every occasion | I Could Make That
  8. how to enjoy eating Magic cards | Tally's Treasury

Leave a Reply to donnie Cancel reply

Your email address will not be published. Required fields are marked *