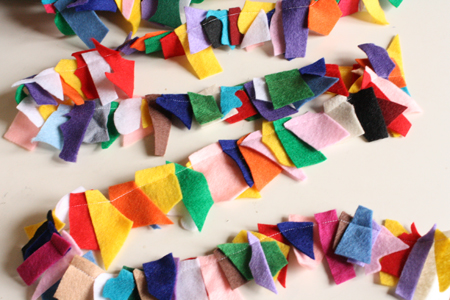
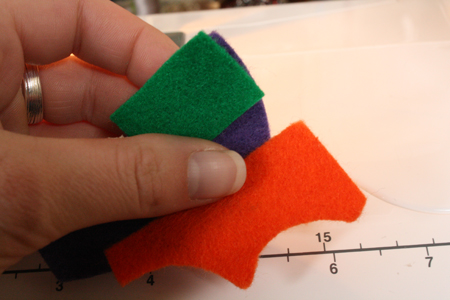
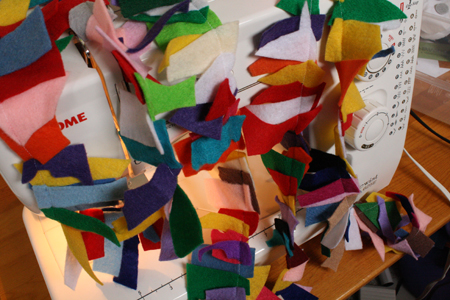
Y’know those cartoons where some hapless mom opens their kid’s bedroom closet and is engulfed by an avalanche toys, clothes, dirty dishes, rabid dust bunnies and heaven knows what else? Well that’s becoming the state of my crafting corner. The biggest offender is my fabric pile, which I never seem to reduce quite enough, partially because I won’t throw out any scraps that are larger than a quarter.
I have a bag for general fabric scraps and one for felt scraps, both of which are threatening to overflow and become huge multi-coloured scrap beasts, devouring everything in their path. I’ve been wondering for a while what to do about this. It’s all well and good to use a scrap here or a scrap there for part of a project, but I need a way to get rid of many many many scraps all at once. Finally, last week I came up with a way to turn the felt scraps into a lovely garland with (this is key) very minimal time and effort. And absolutely no laborious cutting of multiple identical small shapes. Because y’know what? A-symmetry is in. Just ask all those sad hipsters.
—————————————————————–
What you’ll need:
- felt scraps – any size, any colour, any shape
- scissors
- sewing machine – you could theoretically sew this garland by hand, it would just take rather a long time.
- thread – any colour
- ribbon – about 12 inches, any colour
—————————————————————–
Putting it all together:
1) Gather your felt scraps. If you have as many as I do, you may need a cattle prod to corral them all into one place. You can always do this with fleece or with other fabric scraps, as well. Other fabrics will, of course, fray, but that could be a deliberate part of the look you’re going for. In fact, it’ll have to be, unless you want to spend hours hemming tiny pieces of fabric. And if that’s something that appeals to you, you’re in the wrong place right now. You’ll probably feel more at home over here.
2) Pick your colours. You can pull out all your blue or green tones, or do a pastels-only garland – whatever you like. Or you can just put a bit of every colour you’ve got in there, which is what I went for.
3) Cut your scraps into smaller pieces of relatively uniform size. Now, you can do a garland of big bits or small bits, it’s up to you. You could cut all your scraps into squares or strips, but nothing fancy or time consuming. And when I say “relatively uniform,” I mean that they’re all between, say, 1 and 4 square inches of surface area, rather than a piece 1 inch square next to a piece the size of a postcard. Though if you wanted to, you could do that.
The whole idea here is that you do NOT have to measure or trace or cut carefully. I just took pieces and started snipping them into random bits with straight or diagonal or rounded or funny shaped edges. The correct attitude for this project is basically “oh whatever.”

Sometimes you may have scraps that already have interesting edges and shapes. Just use those without changing or trimming them at all.
4) As you go, dump everything into a medium sized container. Be sure to mix all the pieces together for a fully blended, random assortment of shape and colour.
5) Once your container is full (or as full as you want it), head over to your sewing machine and grab a few felt pieces at random from your box. AT RANDOM is the key here: do not plan or arrange colour or anything like that. It’s a headache and takes time and won’t work out evenly anyway. Let it go. Just grab colours and go with them. You can say, oh, that green next to that blue is sort of jarring, I think I’ll switch it, and then swap that one bit. But that should be the extent of your colour meddling.
Remember to backstitch on the first piece of felt, knotting your thread. You don’t need to leave extra thread dangling or anything – we’ll add loops for hanging the garland later on.
6) Place several pieces of felt next to each other so that their sides overlap, and so that their top edge is in a rough line. Start sewing.
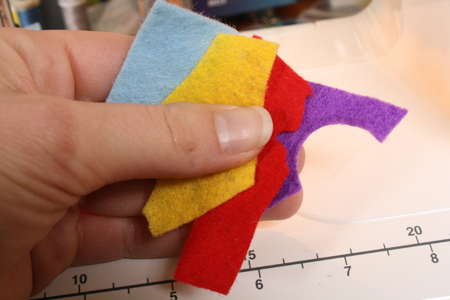
7) As you sew, keep adding new pieces of felt, remembering to overlap them. You should be sewing through at least two layers of felt much of the time, and there should never be a gap with absolutely no felt and only thread showing.
8) Keep going until you run out of felt scraps. I had just a handful left at the end that didn’t make up a very good mix of colours, so I added a few more scraps to the pile, then finished off the garland. Then knot your thread (backstitch) and cut it. If you like, you can sew over the entire garland again, following the original line of thread. Do this in a straight line for more strength, or use a fancy stitch for more strength and an extra bit of decoration.
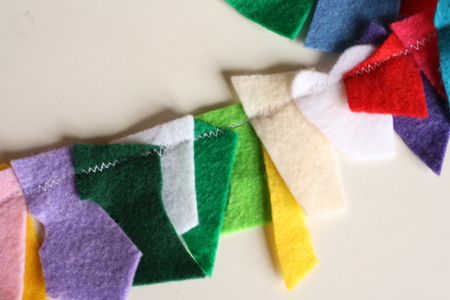
9) Cut your ribbon in half, so you have two lengths of about 6 inches. Make each one into a loop and pin them to the final felt scrap at either end of the garland. Sew them in place. Now you have a little loop on either end to hang the garland from. If you wanted, you could put some loops in the middle, as well, sticking up from the top edge of the garland.
10) Decorate! Enjoy the fact that your remaining felt scraps will now actually fit in whatever container you store them in. Or, if desired, lather, rinse and repeat until you’ve used up ALL your felt scraps and made many many garlands.
One of the best things about this garland is how quickly it comes together. Most garlands take a lot of work to get any significant and therefor useable length, but this one got very long very fast. The only limitation is the amount of felt you have available.
Featured on:

