This weekend welcomes yet another celebration of overpriced sugar extravagances and goofy plastic decorations. That is to say, it’s another federal holiday.
Apart from hitting up the post-Easter chocolate sales, I plan to spend some time hanging out with family and eating too much. I was also planning to do a bunch of Easter crafting and maybe play some video games, but because an adorable little nest of sweet springtime mousies decided to make itself at home in our walls, I’ve instead been emptying mousetraps, moving the furniture to have the carpets cleaned, packing up the pantry, washing every dish in our cupboards, emptying the attic and vacuuming little rodent poos out of every imaginable corner.
I imagine that if I decided to dye eggs this year the mice would come out of the walls to nibble on the dye pellets and perhaps bathe themselves in the little bowls of coloured water. At the very least they’d no doubt have the nerve to get themselves SNAPPED in a trap right as I was dipping an egg, causing me to jump and inadvertently dye a patch of carpet pastel pink. Either way, I’ve avoided any possible egg-dying trauma by making another kind of Easter egg this year: a wet felted one.
This project is simple, kid-friendly, and leaves you with soft, sewable Easter eggs that you can fill with goodies and hide, use as decorations, or lob at any relatives who have a little too much punch and get chatty about what you were like back when you were in diapers. Or at your friendly household rodents.
———————————————————————
- a plastic Easter egg
- packing tape
- wool rovings
- an old pair of pantyhose
- a bowl or pan
- dish soap
- hot water
- sharp scissors
- exacto knife
- [optional but useful] needle felting needles
———————————————————————
Putting it all together:
1) Cut the foot off your pair of old panty hose and set it aside. Cut about 6 to 8 inches up from the toe.
2) Divide your wool rovings up into several pieces, and pull the pieces apart a bit into wide, flattish segments.
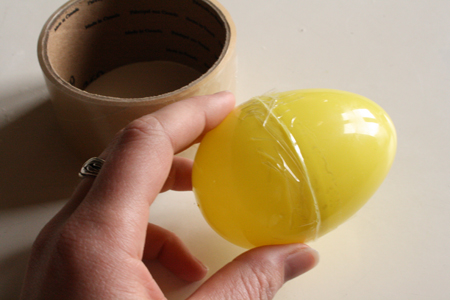
3) Put tape around the opening of your plastic Easter egg, so that it can’t come apart. This step is very important – if you don’t tape the egg it will come apart while you’re trying to do the felting process and your wool will have no shape.
4) Wrap the segments pieces of wool roving around the egg, so that all areas of the egg are covered. Do it again. Make several layers of rovings, and try to pull and hold them reasonably tight as you go.
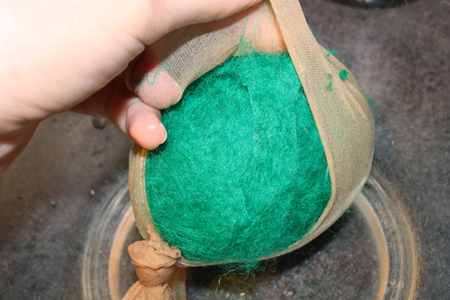
5) Pull the pantyhose foot over one hand, then grab the wool-wrapped egg in that hand and pull the pantyhose back off of your hand and over the egg, so it is encased in the pantyhose. Then tie a knot in the open end of the hose. Your craft should now look like a very ugly potato.
6) Place the egg in a bowl or pan (or just use the sink, with the drain closed). Drizzle dish soap over it, then fill the bowl a third or halfway with hot water.
7) Start kneading the egg around, working up a soapy lather and creating lots of friction between your hand and the egg.
8) After a couple minutes of this, take the egg to the sink and run cold water over it. Squeeze the water out and knead the egg some more. Continue this for 30 seconds to a minute.
9) Return to the hot soapy water and repeat step 7. Then go back to the cold water and repeat step 8. The temperature changes are helping the wool fibers to shrink and lock together, along with the agitation.
Notes: Your egg may feel a bit lumpy, even once you’ve repeated steps 7 and 8 many times. Don’t worry too much about this; just smooth all the sides out as best you can to create even shape, then let it dry.
I did two separate layers on this egg (the light green and then the turquoise-y green), which I don’t recommend. I let the first layer dry, then repeated the process with a second layer, but it didn’t lock into the first layer very well and I had to use a felting needle to really work them together. Just start out doing a nice thick layer of wool around the egg and you’ll have nothing to worry about.
10) Finish off by rinsing the egg under cold water to get all the soap out of it. Then squeeze all the water you can out of the wool and cut and peel the pantyhose off of it. The hose may have stuck a bit to the wool – just give it a gentle tug and it’ll come away.
11) Set the egg aside to dry – at least overnight and probably for a day or two. If you’re getting impatient, you could probably use a hair dryer to speed up the process.
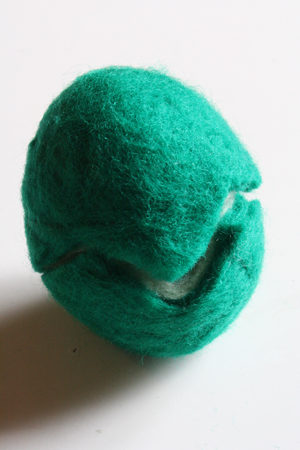
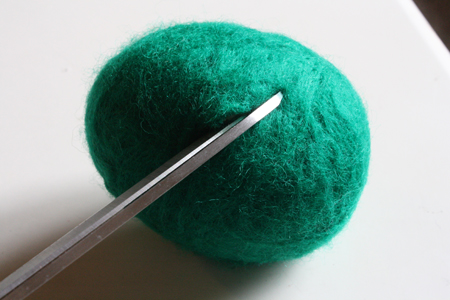
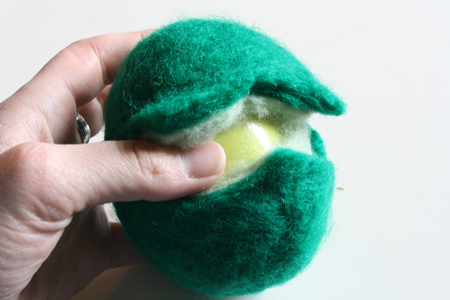
12) Once the wool is dry, use your exacto knife to cut a hole near the middle of the egg. Then get the tip of your scissors in there and cut a line (straight or zigzagged or however else you prefer) three quarters of the way around the egg.
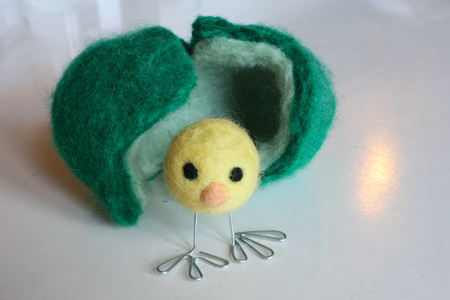
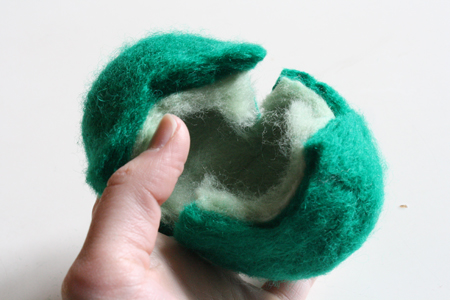
13) Pull the sides apart, pop the plastic egg out from inside (you can reuse it to make more of these) and you have a hollow wet-felted egg!
14) If there are any bits of the wool that didn’t quite felt together all the way, you can use a felting needle to finish the job. This may actually be easier to do before cutting the egg open and removing the plastic center.
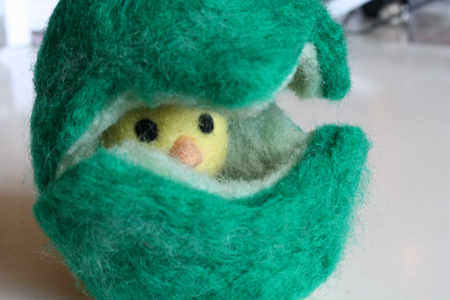
15) Use the egg to store candies or a little toy or whatever you wish. One of the wonderful things about felted creations is that you can easily sew on and through them. So you could embroider your egg, sew felt spots or beads or ribbons onto it, needle felt it with other decorative colours and shapes… whatever you wish.
Unrelated to wool Easter eggs, but related to Easter crafts in general, I spotted this little idea over on the Brown Paper Bunny blog. It’s just a simple paper chain of bunnies, but with little white pom poms glued to their rears, making them really darn cute.

