Halloween approaches, and with it the daunting annual search for a costume that is comfortable and covers more of the body’s surface area than a teatowel. At least, I am a fan of costumes that are comfortable and non-skanky. And here’s a little revelation: it is possible to have an awesome, effective and interesting costume that is flattering AND covers your ass. Imagine.
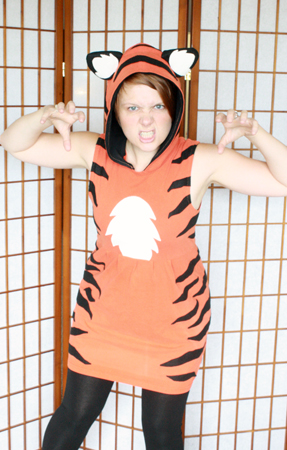
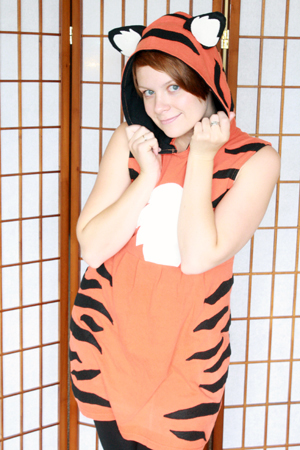
I’ve decided to be a tiger this year. Cats are cute, and tigers are awesome and they’re colourful – what’s not to like? I also had an idea for making a really cute tiger dress. Good thing I started with a solid concept in mind, because Google search offered pretty much no inspiration. Nearly everything that came up for “tiger costume” was either a full body fur suit that would make you drown in your own sweat, or something a hooker might wear for Furries Night.
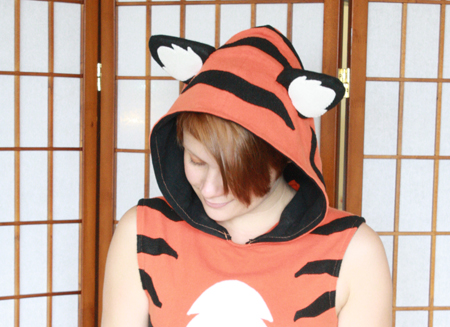
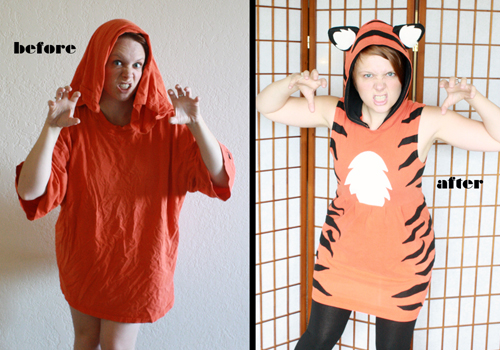
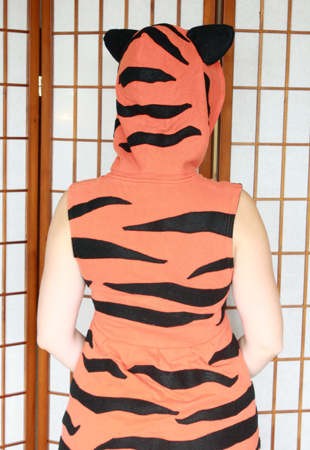
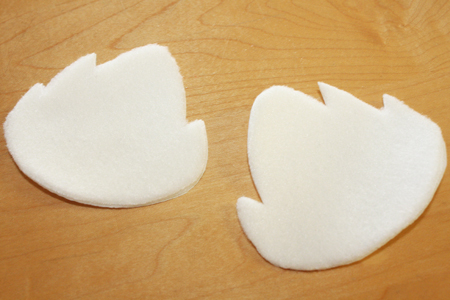
To make the dress, I used a large orange t-shirt and the basic t-shirt dressmaking techniques outlined in last week’s post. I used the HeatNBond appliqué method from my fleece masks tutorial to add the white fleece tummy piece, and cut random stripes of black felt and sewed them in place with a narrow zigzag stitch. The pattern for the tummy piece is included with the tiger ears pdf, which is linked to below in the materials list below if you’d like to use it.
The main tutorial for today is how to make a simple hood and attach it to an existing t-shirt or sweatshirt or high-collared dress. This can be a very simple way of costuming up for halloween; put little triangles down the center of the hood, attach it to a shirt, you’ve got a casual dinosaur or dragon costume. You can add wings, or a clip on tail, or other details as desired. Put ears on a hood of the right colour and you can create a whole variety of animals. Or find two shirts just the right blue and a silver fabric pen and make a Jace the Mindsculptor hoodie. The possibilities are practically endless.
Following the tutorial for the hood, I will also include a tutorial with the specifics of putting ears on said hood.
One of the reasons I find the whole make-your-0wn-hooded-shirt thing particularly useful is that actual hoodies are flipping expensive. Also, they tend to come in few colours, thus limiting costume possibilities, whereas if you look in the right place you can get a plain t-shirt (even a long-sleeved shirt) in just about any colour, and for way cheaper. Michael’s has a decent variety of plain coloured t-shirts for about $5, for starters. Thrift stores are a good place to look, too.
For further simple costume ideas and help, here are a few other tutorials I’ve done in the past:
- fleece masks (sad panda and phoenix patterns provided)
- cat ears
- fairy wings
- paper top hat
- piggy ears and nose
———————————————————
What you’ll need:
for the hood:
- 1 t-shirt (or about 1/2 yard of any piece of fabric, or 1/4 yard of any two pieces of fabric) of the desired colour(s) – you’ll likely want to make it the same colour as the shirt you’re attaching it to
- thread to match the shirt/fabric
- fabric scissors
- straight pins
- sewing machine
- shirt or other high collared clothing item to attach the hood to
- felt/other fabric or fabric markers or fabric paint for any desired embellishments (stripes, spots, etc.)
- hood pattern – number 6. under “Sewing patterns”
- felt or fleece in the desired colour(s)
- pencil and paper AND/OR tiger ears & tummy template – number 7. under “Sewing patterns”
- [optional] HeatNBond (optional and likely unnecessary if you’re using only felt, highly recommended if you’re using fleece for the inner ear) PLUS iron & ironing board, pencil
- small sewing needle
- [optional] small handful of stuffing
———————————————————
1) Print out the hood pattern – it’s two sheets of paper. Match the two papers up at A and B and tape them together, then cut out the pattern.
2) Make sure your fabric is folded over, so there are two layers of fabric, one on top of the other. If you’re using a t-shirt, just lay it out flat and you’ll automatically have two layers – the front of the shirt and the back of the shirt. Pin the pattern to your fabric and cut around it.
NOTE: This hood pattern fits a small to medium adult head. For a child’s head, simply cut a little ways further in from the lines. For a larger head, cut a ways out from the lines. All I did to make the pattern was trace the hood of an existing hoodie that fit me, then tweak it slightly, so you could also simply do that.
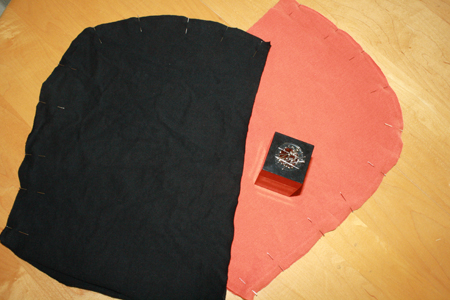
3) Pin the pattern to another double layer of fabric – either the same fabric, or one of another colour. This will be the hood’s lining. Cut around the pattern.
Note: If you wish to add dinosaur/dragon spikes or anything else that springs up in the middle of the hood, you’ll want to cut those out and pin them between the two layers of fabric that will be the outside of the hood (pin them facing inward, and thus hidden from view a this point), before moving on to step 4.
4) You should now have four separate pieces of fabric. Pair the pieces up and pin them together, right sides facing each other.
5) Stitch the pieces together on 2 sides: top and back. DO NOT stitch the front, or the bottom, curving line of the hood together. Follow the edge of the fabric with the edge of your presserfoot for a 5/8 inch seam allowance.
6) Once they’re stitched together, use the tip of your fabric scissors to make a line of small snips in the fabric along the back of the hood where it curves. Cut from the edge of the fabric to just before the line of thread – DO NOT cut the thread!
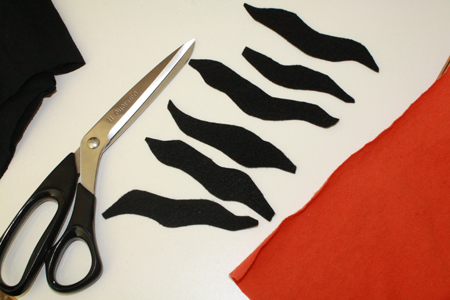
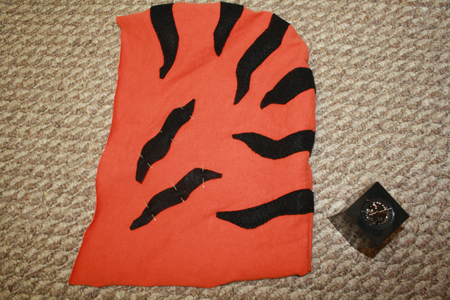
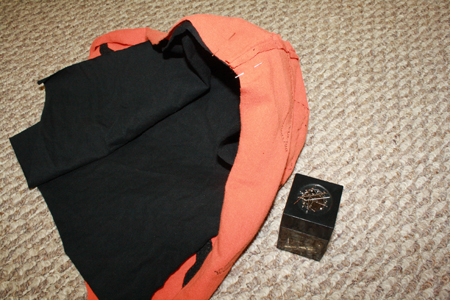
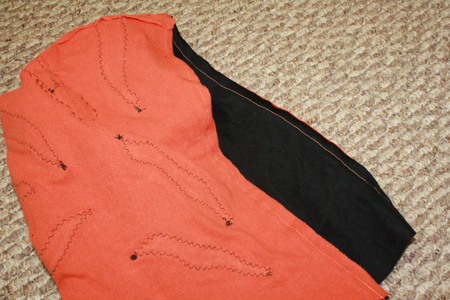
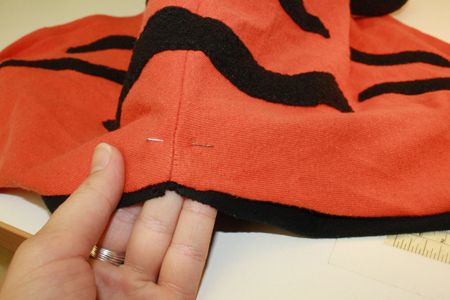
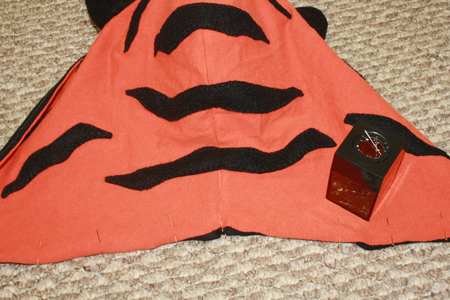
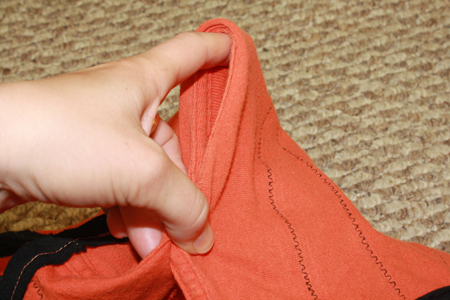
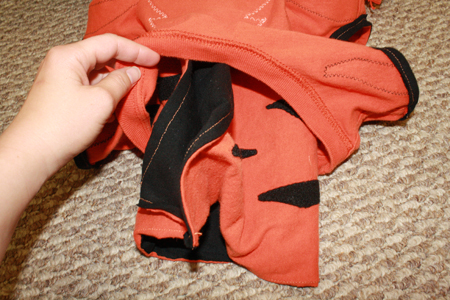
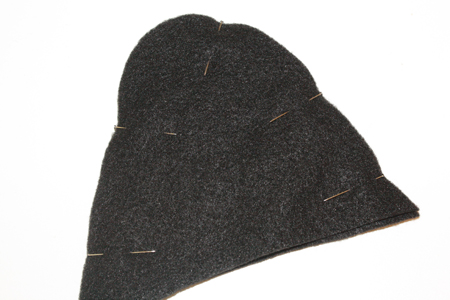
7) At this point you’ll want to add any decorations to the outer layer of the hood. Turn that layer right side out and appliqué, draw or paint on whatever embellishments you wish. Below are some photos of my embellishing process, where I cut random curvy stripes of black felt and pinned and stitched them to the outer, orange layer of the hood.
If you are adding ears (tutorial for that below this one), this is also the stage at which to sew those in place, again just to the outer layer of the hood. The ears can still be sewn on when the hood is completed, it’s just that the stitching will show on the inside of the hood. Which is not necessarily a problem, so it’s up to you when you’d like to do the ears bit.
8) Pin the hood’s outer layer and the lining layer together, with right sides facing each other (this means that ears, embellishments, etc. will all be hidden for the moment). Pin the layers together all the way around the front of the hood, but NOT across the bottom of the hood.
9) Stitch these layers together around the front of the hood where you pinned. DO NOT stitch the bottom of the hood together.
10) Turn the hood right side out and tuck the lining inside the outer layer. You should now be able to see all embellishments on the outside layer of the hood.
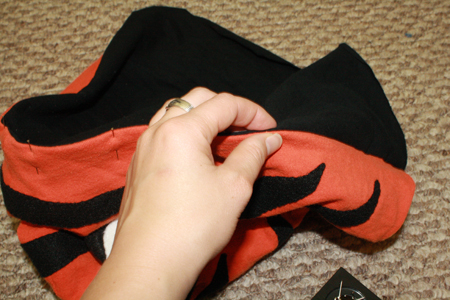
11) Along the whole front edge of the hood, where the lining connects to the outer layer, use your fingers to wriggle the fabric back and forth until you can just see the stitches between the layers, then pin the layers together again. Sew along this edge. This will keep the lining in place.
12) At the bottom back of the hood, match the two center seams together and pin them. Sew an inch or two up the hood right along this seam.
13) Pin both layers at the bottom of the hood together, making sure they match up at the center seam, as well as the edges. Then sew them together.
14) Get the shirt or dress you’re going attach the hood to. Find the exact center back of the shirt collar and mark it with a pin.*
*An easy way to do this (and to avoid measuring, because who wants to measure?) is to fold the collar in half, matching the shoulder seams at either side. The resulting fold at the back of the shirt will show you where the center is.
15) Turn the shirt inside out. Leave the hood right side out, and stuff it inside the shirt’s collar, top first. You should end up with the raw edges at the bottom of the hood lined up with the outer edge of the shirt’s collar.
16) Match the back center seam at the bottom of the hood with the pin in the back center of the shirt collar. Then pin the bottom of the hood to the shirt collar, all the way around. Depending on the size of the shirt collar and the size of the hood, the hood may not go quite all the way around, or the hood’s ends may overlap each other a bit at the front. Either of these are absolutely fine, so long as there’s no more than an inch or two of overlap.
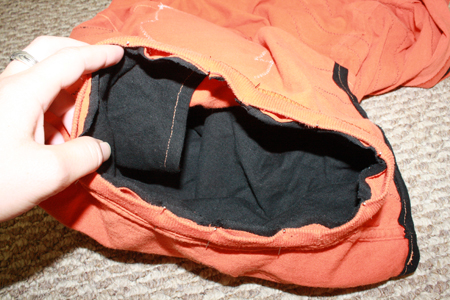
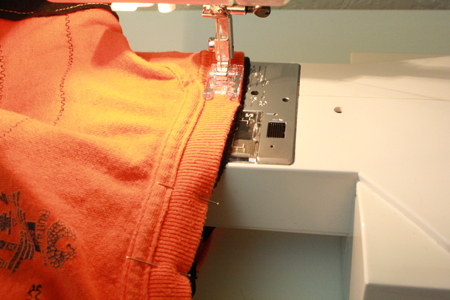
17) Stitch around the collar, attaching it to the hood. If you don’t want any of the collar showing on the outside of the finished garment, sew around the very bottom of the collar. If you don’t particularly care, just use an ordinary seam allowance, where the edge of your presserfoot matches up with the edge of the fabric.
18) Turn right side out, wear and ROAR your delight!
———————————————————
Making the ears:
1) Print and cut out the tiger ears template. You can use the exact template, or use it as a basis to design some other ears. Or just draw your own from scratch.
2) IF YOU ARE USING FLEECE, A THIN COTTON OR ANY KIND OF SLIPPERY SYNTHETIC FABRIC FOR THE INNER EARS I recommend following the steps below. If you’re using felt or something that’s fairly thin and doesn’t move around much when you pin it, just cut out two inner ear pieces and skip to step 3.
- Get out your HeatNBond, and trace the inner ear pattern onto it once, then flip the pattern and trace it a second time.
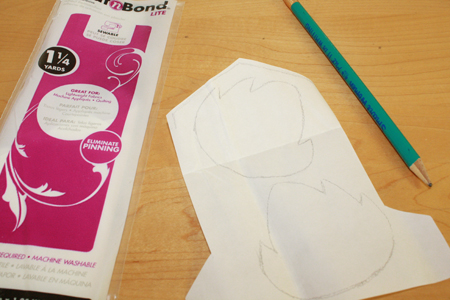
- Cut these shapes out, cutting about 1/8 inch from the pencil line.
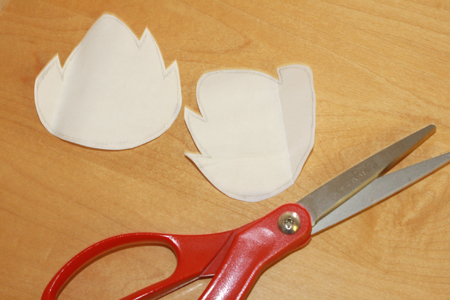
- Place the HeatNBond onto the fleece or other fabric you’re using for the inner ear, with its textured side down.
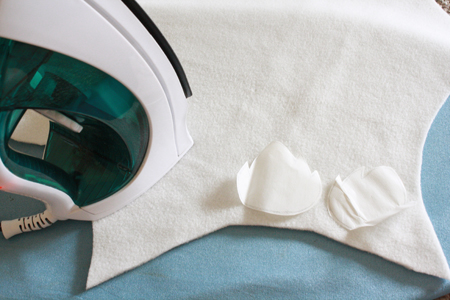
- If you’re using fleece or other delicate, meltable fabric, place your ironing cloth overtop of everything, then iron thoroughly with the iron on medium high heat. The HeatNBond should be firmly secured to the fabric. Make sure all the edges are completely stuck down.

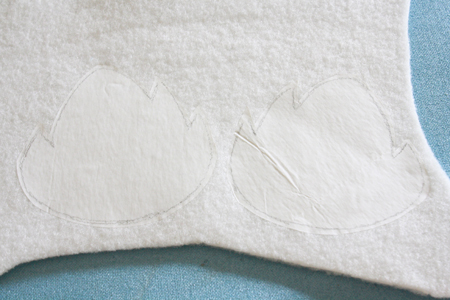
- Cut out the fabric shapes, this time following the exact pencil lines on the HeatNBond.
3) Pin the outer ear pattern to a double layer of the fabric of your choice (I used felt – it’s cheap, easy to work with, looks good, and comes in pretty much any colour.) Cut around the pattern. Then flip the pattern piece over, pin it to another double layer of fabric, and cut that out. You should now have four ear pieces that match up in pairs.
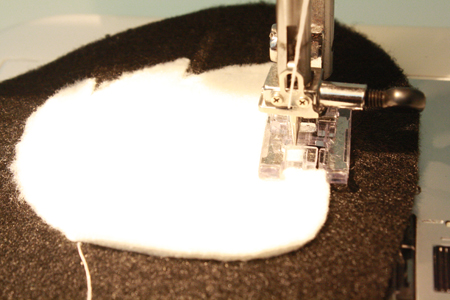
4) Take one outer ear piece from each pair. If you are NOT using the HeatNBond method, pin the inner ear pieces to the center of the outer ear pieces, and stitch them into place using a narrow back-and-forth stitch (like a zigzag) all around their edges. Then skip to step 5.
If you ARE using the HeatNBond method, follow the steps below:
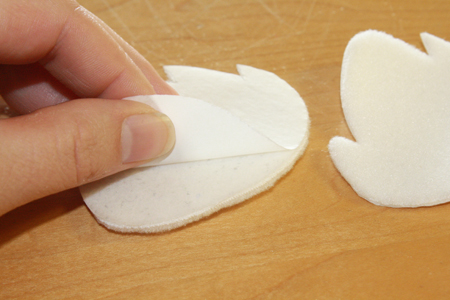
- Peel the back layer off the HeatNBond on each inner ear piece. Center them on the outer ear pieces, put the ironing cloth overtop, and iron them firmly into place.You may have to leave the iron sitting on the fabric for 30 seconds or longer to get the HeatNBond to stick.
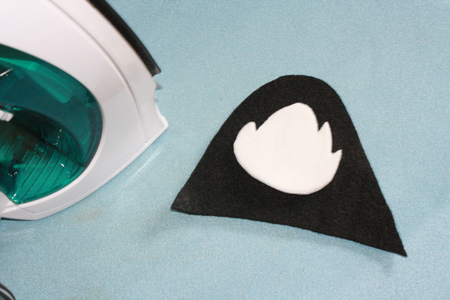
- Sew the inner ear pieces into place using a narrow back-and-forth stitch (like a zigzag) all around their edges.
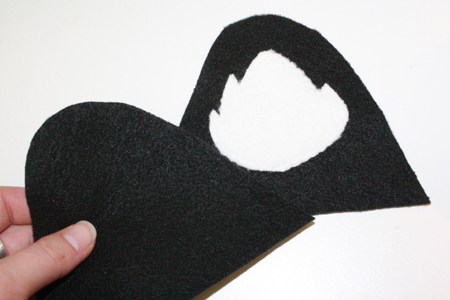
5) Pin each pair of ear pieces together, right sides facing each other.
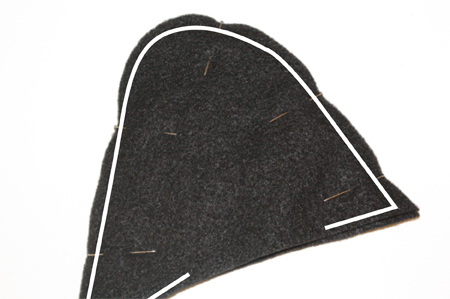
6) Start about an inch and a half from one bottom corner of each ear. Sew to the corner, then all around the tops of the ears, then about an inch and a half back in along the bottom of the ear. Or, to put it more simply, stitch along the white line shown in the photo below.
You should be left with a small gap in the bottom center of each ear.
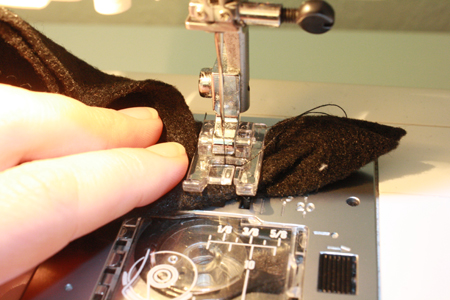
7) This next step sounds a bit tricky, but is ultimately very simple. At the bottom corner of the ears, pull the fabric out to either side, flattening out the bottom of the ear so that it forms a triangle, with the seam along the side of the ear squished flat in the middle of the triangle. Pin this in place.
8) Now, about an inch to an inch and a quarter from the ear’s bottom corner, sew a straight line across that flat triangle.
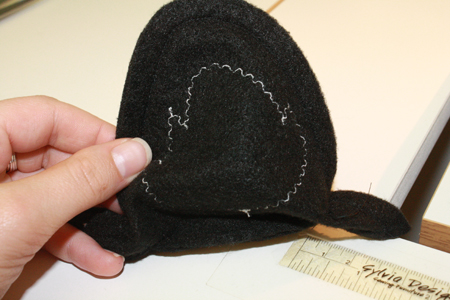
Once both sides of the ear are done, it should look about like this:
9) Cut off the excess fabric about 1/4 inch from the stitching. If you’re wondering, this is all to give the ear a flat base so it can sit straight up on the hood, rather than flopping over and lying flat. This is also a useful trick for flat-bottomed dolls and other plushies – it’s the method I used to give those 30 Creepy Dolls (scroll to the bottom of the linked page to see what I mean) a flat base so they could stand up on their own.
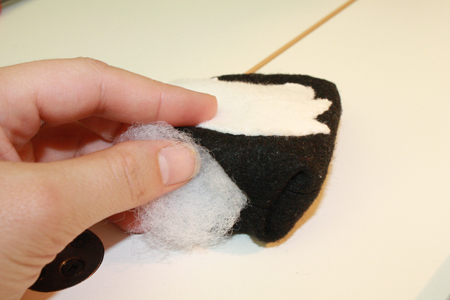
10) Using the gap in the bottom, turn each ear right side out. Insert a small amount of stuffing into the ear if desired for extra shape and volume.
11) Use a small needle and thread to sew the gaps on the bottom of the ears closed.
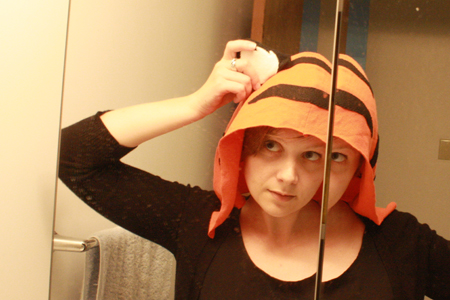
12) Standing in front of a mirror, place the other layer of the hood on your head and figure out where you want the ear to be. Hold it there, then remove the hood and pin the ear in place. It’s easiest to insert three or four pins from the underside of the hood, going up through the fabric, across the base of the ear, and back through the hood’s fabric again. Place the other ear in the same manner.
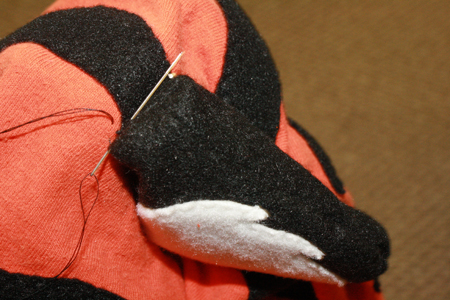
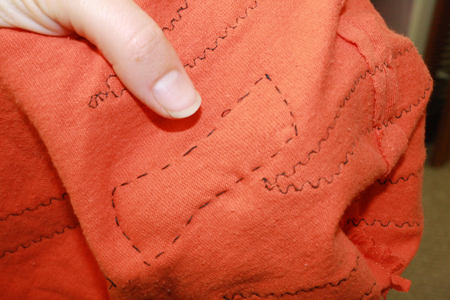
13) Stitch the ears in place by hand. This is a little tricky. I used one hand inside the hood, holding the ear on two sides, and with the other hand sewed another side of the ear in place. You’ll basically sew a small rectangle, following the four edges of each ear’s base.
The underside should look something like this when you’re done.
14) Try it on, make sure the ears match up, and make an necessary adjustments before moving on to finish the hood. I totally got one ear in the wrong place on the first try from not paying enough attention back on step 12. Had to pick out my stitches and try it again.

