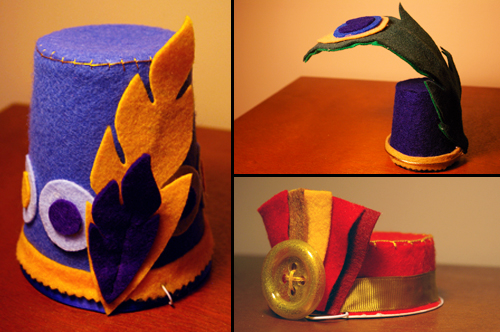
When enough champagne is imbibed, people become willing to put just about anything on their heads and pose for a picture.* Or so I’m hoping, since this week my mom and I made several silly, colourful party hats from old yogurt tubs. With New Year’s Eve happening tomorrow, I have a perfect opportunity to test this hat-wearing theory against my friends’ levels of inebriation. I’ll be sure to keep my iPhone close at hand so I can share the results of my research in picture form.
*Unless they’re my friend Paul, who doesn’t require the champagne step, and has made his adventures in headgear choice into a YouTube meditation. But only Paul can be Paul – other people require champagne.
This particular craft could also be used to provide celebratory headgear for other occasions, such as birthdays, retirement parties and royal weddings. If Princess Beatrice had had access to this blog post before the recent nuptials of William and Kate, maybe she’d have saved herself some unfortunate attention.
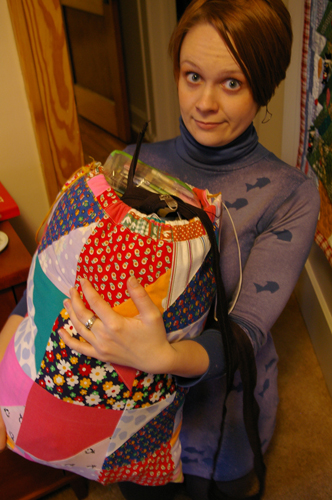
And it’s yet another craft that gives you a chance use up overabundant crafting supplies – buttons, ribbons, sequins, etc. In a related note, visiting your family for the holidays provides you with the important opportunity to show your boyfriend how outrageous your mother’s ribbon stash is compared to your own (see below). “See honey, my one little drawer of ribbon really isn’t that bad, is it?” Just hope it doesn’t occur to him that an ever-growing ribbon supply is what he has to look forward to in life.
Yes, really. That’s ALL ribbon. And zippers. My mom has a large supply of zippers. I think she should make a bag entirely from zippers in which to store them.
And I apologize in advance for all the blurry and/or poorly lit photos. Along with pulling plastic-y glue gun strings off of every darn thing, I spent a good deal of time cursing at the lack of good light in my parents’ house, and my inability to get my father’s ostensibly high quality camera to take a decent picture. Ah, vacation.
———————————————-
What you’ll need
materials:
- plastic tubs (clean) – yogurt tubs, margarine tubs, ice cream tubs, old Zip Loc containers… whatever you have around
- felt in lots of different colours
- ribbon, sequins, beads, colourful thread, other decorations
- elastic cord
tools:
- glue gun
- scissors
- straight pins
- measuring tape
- hammer, nail & scrap wood
- Party Hat template, and possibly the Peacock Feather template (numbers 1. and 2. under “Other patterns”)
———————————————-
Putting it all together:
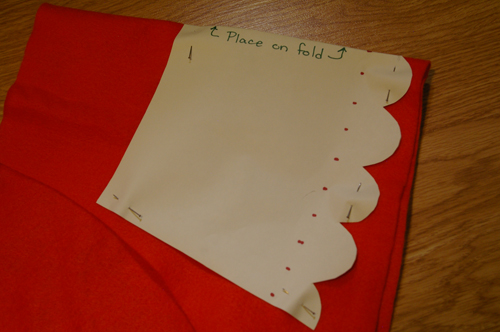
1) Start by either using the Party Hat template or by making your own template to fit your plastic tub. You can also use the Party Hat template as shown, or cut it shorter to eliminate the petals at the bottom. To make your own template, you basically need a long strip, as tall as your plastic tub and slightly curved, like a smile. The template (made by my mother – thanks Mom!) that’s linked to in the materials list is made to fit a fairly standard Canadian yogurt tub, but it’s wide enough to be pretty easily modified for bigger (or smaller) containers.
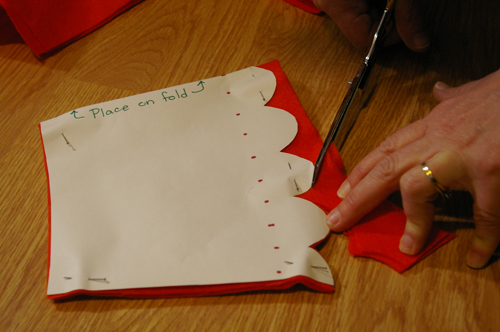
Print out the template. Fold a piece of felt in half, and place the pattern edge that is labeled accordingly up against the fold.
2) Pin the pattern into place, then cut around it.
3) Cut out pieces for the top of your hat. You can use the template’s triangles (you’ll need to cut 8 for the size of hat we made), or you can trace the bottom of your plastic tub onto your felt and cut out the resulting circle.

4) Heat up your glue gun. Yes, I said it. I’ve previously proclaimed a fierce dislike of glue guns, but in this case it is the most efficient tool for the job. And picking glue strings off of everything builds character, or something. Glue the felt circle or series of triangles onto the top of the hat. If you go the triangles route, you can also cut a small circle of felt to put in the middle, hiding the messy overlapping points of all the triangles.
5) Now to glue the felt around the body of the hat. Put a line of glue down one end of that piece of felt, and put it in place on the hat. Continue adding glue to the top and bottom edges of the felt a little bit at a time, then rolling the tub onto it.
6) Let the felt at either end overlap slightly, and trim the excess felt. Then glue the very edge of the top piece of felt down flat.
7) If you’ve used the pattern with the petal edge at the bottom, take your scissors and trim a line between each petal, all the way up to the plastic tub’s edge. This will allow those petals to spread out and lie flat on your head.
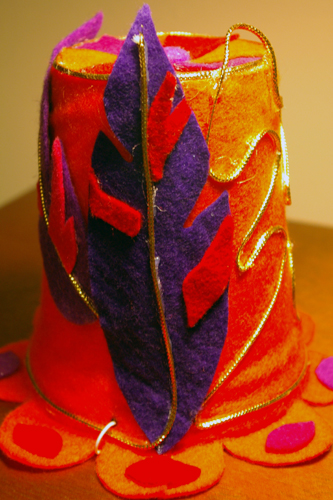
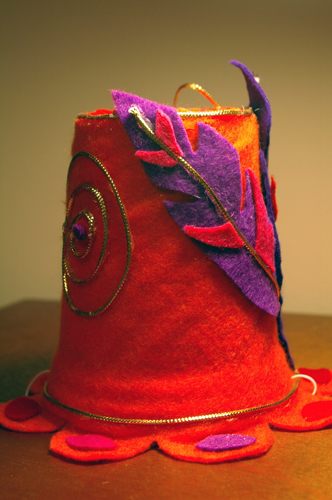
8) Now decorate! Try gluing on cord or ribbon or sequins or polka dots or other shapes cut from coloured felt.
If you used a shorter pattern that didn’t cover the bottom of your plastic tub, where there’s usually an uneven line or lip of plastic, you can glue a piece of ribbon or a narrow line of felt to that lip to hide it.
I also like doing a simple blanket stitch (outlined in step 5 in this tutorial) to add some decoration to the top of the hat and hide any remaining gaps in the felt that let the plastic tube below show through.
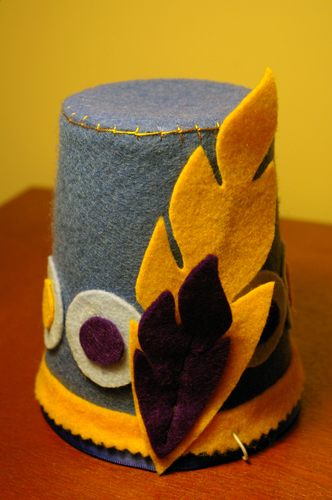
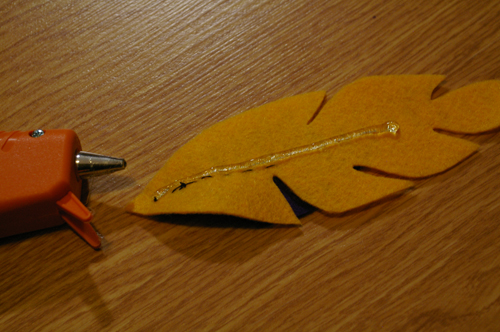
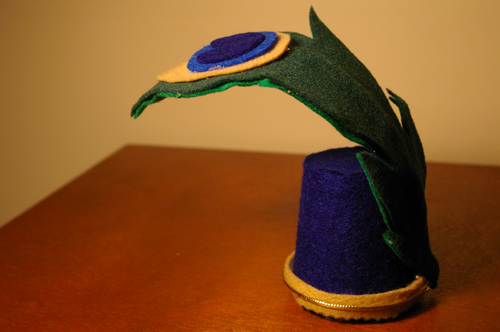
9) To add feathers, use the feather shapes from the template, or fold a piece of paper in half and cut a pointy-ended oval to make a basic feather pattern. Try layering feathers of different sizes. Once you’ve cut your feathers, put a line down the middle of the feather and glue it where you want it on the hat. Do the same to attach one feather to another. Add little cut felt accent pieces if and as desired.
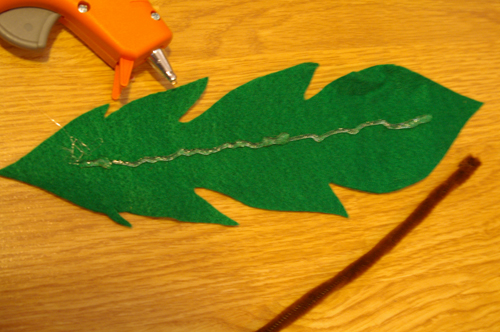
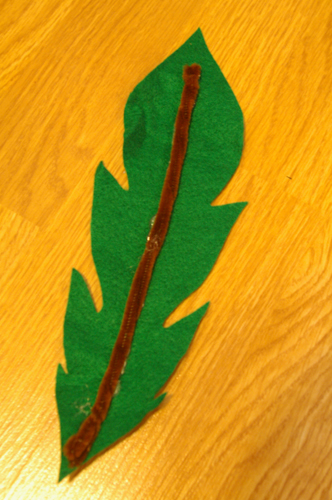
10) For the peacock feather I used on one of my hats, cut two of the main feather, and one of each other shape from the appropriate colours. Glue the blue and brown circles that make up the feather’s “eye” in place on top of one another.
Next, twist a couple of pipe cleaners together. Put a line of glue down the middle of the bottom feather piece, and lay the pipe cleaners down on top of it. Then glue the two feather pieces together, so the pipe cleaners are sandwiched in between.
11) When your hat is decorated to your satisfaction, get a measuring tape and measure under your chin all the way around to the top of your head. If you’re using a largish tub for a hat, subtract four inches. If you’re using a smallish tub, subtract two inches. Cut a piece of elastic that length. (You can use ribbon instead of elastic – you’ll want to add a few inches to your head measurement instead of subtracting. Divide that number by two, then cut two pieces of ribbon that length, which you’ll tie under your chin to hold the hat on your head.)
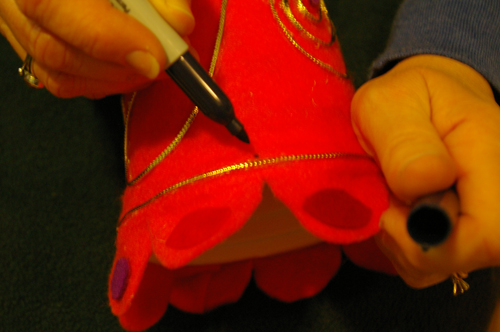
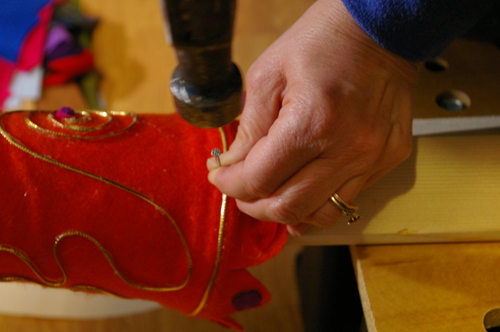
12) Using a marker, make a dot on either side of the hat at the very bottom where you want the elastic to attach. Use a large nail and hammer (with a piece of scrap wood inside the hat to hammer into) to poke holes where you made each of the marks.
13) Insert one end of the elastic through each of the holes and tie several knots so it can’t slip back out through the holes.
14) Attach to your head and get with the celebrating!
Yeah, you love my crappy Photoshopping, don’t you? This is thanks to the complete inability of my mom, my boyfriend and myself to all pose in a non-derpy manner at the same time. If two of us manage to look normal for a picture, the other one has to photobomb it. “Special” is, I think, one word for us.

