It’s been one of those weeks. It’s been the week, really – the week that vacation is over and it’s back to work and school and no more obeying those natural body rhythms that keep you in bed till noon. It’s a cruel world.
We got back from our vacation last Monday morning and I had a plan. A plan for the week’s blog post. Then, due to missing a key material, that plan went poof. So then I made a new plan: the post would be about how to make the item I was missing. And then it turned out I was also missing an ingredient that I would need to make the missing item. So I came up with another, totally new plan, but then I decided I didn’t like it. Plus there was the we-didn’t-have-time-to-clean-the-house-before-we-left-on-vacation thing, the vacation’s-over-but-all-my-motivation-has-evaporated-indefinitely thing and the whole show-up-to-work-every-day thing. Urgh.
On top of all this, my boyfriend is reading Ulysses.
He spent the weekend prone on various surfaces (couch, floor, bed), turning back and forth between a massive book of Joyce’s verbal spew and a massive book of scholars’ notes about Joyce’s verbal spew. Jeremy maintains that he is getting something out of this (beyond ticking off another course requirement for his major). I maintain that a book that requires a second book in order to be able to read the first book is flat out doing it wrong. We have been here before; English major (him) versus creative writing major (me), he investigating the purpose and meaning behind the writer’s thoughts, and me unwilling to let go of my God-given right to judge the living daylights out of the work of any published author, their ability to engage me and their worthiness of the title “great.”
I went off to help a friend craft items for her upcoming fundraiser on Sunday afternoon, and told her that I’m pretty sure Joyce is unhealthy both for my boyfriend and for anyone in his vicinity. And as far as I’m concerned, what I found when I got home later proved my point.
Knowing that his general moodiness (caused by all this outrageous reading) had made me a bit grumpy as well, Jeremy decided to make dinner. He wanted to do something nice for me. And probably stop reading Joyce for a while. He thought he’d roast chicken breasts, and he thought he’d do so in our brand new (given to us yesterday by his grandparents) silicone baking pan. He put the chicken in, added veggies, cooked rice, went to check on the chicken, got a knife and cut the chicken open to see if it was done, put it back in the oven.
Heard a dripping noise from inside the oven.
Looked in. Chicken juice was oozing out the bottom of the pan. Onto the floor of the oven. Through the vents and into the drawer below the oven that contains all the (clean) pots and pans. Through the cracks in the sides of that drawer and onto the floor underneath the oven.
Which is why when I stepped through the door ten minutes later, the drawer was pulled out of the oven, dishes dripped with jus du poulet were scattered everywhere, our new silicone baking pan had a hole cut in the bottom and Jeremy was on the phone with his mother, venting. Having wisely understood, you see, that I might need a little venting moment of my own, and would certainly not be prepared to see the humour of all this just yet.
And while a part of me would like to go on a little rant about what kind of idiot uses a knife when operating on meat in a silicone pan, another part of me remembers that little incident in November when I dumped a batch of green dye down our brand new white ceramic bathroom sink, which then itself took on a matching shade of green that was not remotely interested in fading away or being scraped off, and that part of me thinks we should just quietly move along, thank you and good night. Most of the time Jeremy is far more competent in the kitchen than I am, and can be trusted (unlike myself) not to burn things or forget to actually make half the meal. Thus my conviction that a day buried in Ulysses temporarily fried his brain, leading to all the culinary chaos. James Joyce is bad for your health.
The chicken was salvaged, and was very tasty.
~ ~ ~
I did know by Saturday evening what project this blog post was to be about. I spent that night and Sunday (well, the parts I didn’t spend criticizing Joyce, fundraiser crafting or washing dishes) working on it. I simply didn’t realize how appropriate all the derpyness would end up being to that particular day.
Wether or not you’re having a derpy day, I recommend this project. It will probably make things better either way.
————————————————
What you’ll need
materials:
- black fabric (felt or any other fabric) for the outside of the bag, and for the lining – can be two different fabrics or the same fabric. I like to make the outside from something about fuzzier, softer, thicker, and the inside from a simple thin black cotton or similar.
- felt in yellow, white, possibly black
- thread in black, white, yellow
- [optional] large googly eyes AND superglue or a glue gun
- ribbon (about 1 1/2 to 2 feet long)
- scrap paper
- fabric scissors
- straight pins
- large ruler
- pencil
- seam ripper
- compass OR traceable circular object (plate, bowl, lid, etc.) that measures 5 inches across
- sewing machine
- derpy penguin doll pattern – number 8. under “Sewing patterns” (you will only use the beak and tummy pieces, and possibly the eyes)
————————————————
Putting it all together
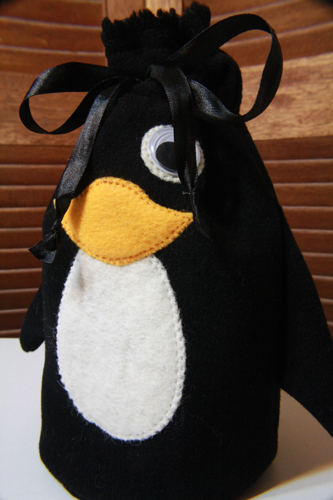
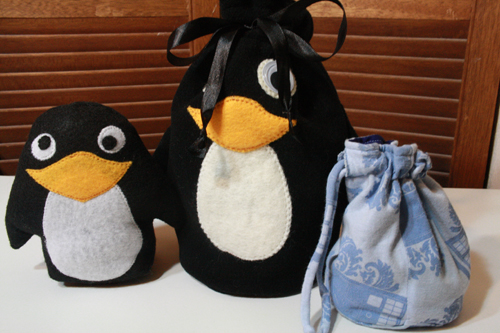
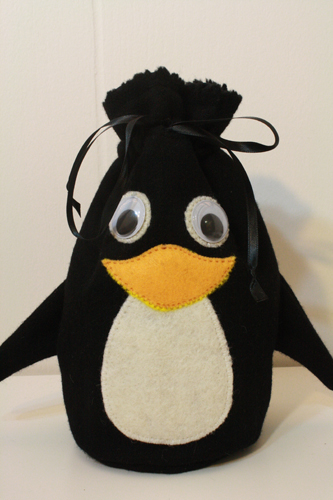
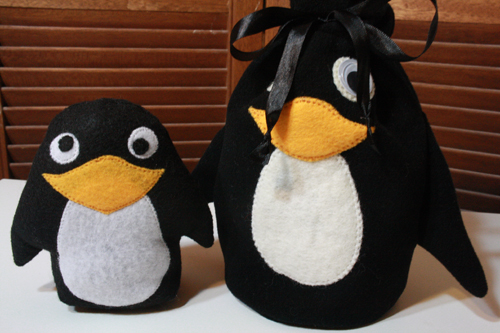
This project is a conglomeration of my tutorial for lined dice bags and my tutorial for derpy penguin dolls. We are essentially taking the tummy, beak and eyes from the doll and appliquéing them onto the outside of a dice bag (plus adding wings on the side). If you haven’t yet, I’d recommend reading through the dice bag tutorial first, and perhaps even trying it. An extra drawstring bag or two can be useful to have around.
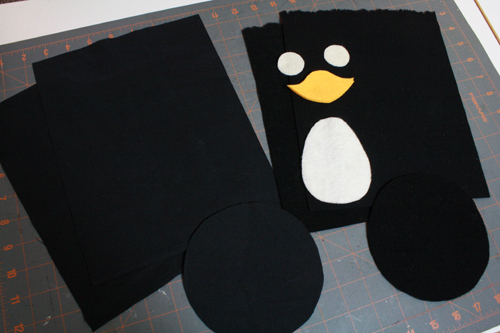
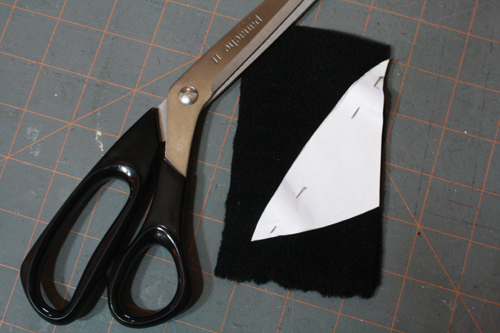
1) Print out the derpy penguin doll pattern from my Patterns page. Cut out the beak and tummy pieces, pin them to the appropriate colours of felt and cut them out. You may want to cut two of each piece and stack them on top of each other – since these are light colours and since most store bought felt isn’t especially thick, the other colours and fabrics underneath may show through a bit unless the white and yellow are double layered.
You can also cut out the eye pieces the derpy penguin doll pattern. Or you can glue on large googly eyes at the end. What I like to do is cut and sew two large white circles, then glue googly eyes on top of that, so that the glue doesn’t go straight onto the bag, and the eyes could be fully removed and replaced if one of the googly eyes were ever to fall off.
Now cut four rectangles that are 10″ tall and 8″ across – two from your outer bag fabric, and two from your lining fabric. Then cut two circles that are 5 inches across – one from your outer bag fabric and one from your lining fabric.
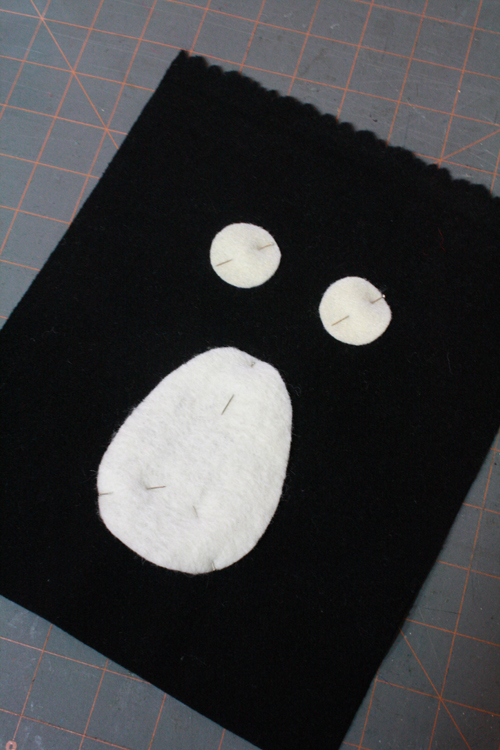
2) Take one of the rectangles cut from the fabric that’s to be the outside of the bag. Arrange the tummy and (if applicable) eye pieces in the middle of the rectangle. You want the bottom of the tummy to be about 1 1/2 to 2 inches from the bottom of the rectangle. Pin the pieces in place.
3) Using a very close-together back and forth stitch (a zig-zag, or some fancy variation thereof, depending on what options your sewing machine gives you), sew all the way around the tummy and each eye piece.
A couple of helpful hints: when you’re sewing a line around the edges of curving objects like this, especially small ones, it can be tricky to twist the fabric enough to keep your needle where it needs to be. Don’t try. Instead, when you reach a sharp turn, leave the needle embedded in the thread, lift the presserfoot and twist the fabric around. The needle sticking into the fabric keeps the thread tight, but the fabric can be moved around as needed, pivoting on the point where the needle is.
Also, knotting a zigzag stitch can look messy, as backstitching creates quite a lumpy area of thread. So instead, stitch all the way around your shape, stop with the needle out of the fabric, switch to a straight stitch and then stitch back and forth a small amount over the zigzag stitches, locking them in place. It’s both neater and more effective.
4) Next, pin the beak in place and stitch it down the same way you did the tummy and eyes (with the appropriate colour of thread, of course).
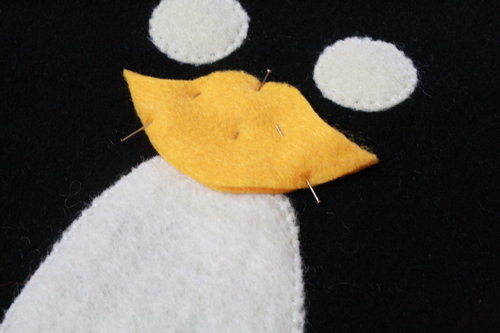
If you plan to do sew-on eyes, now is the time to add some small black circles for pupils. I’d just hand stitch these in place, given that they’ll be quite small. Or you can wait and glue googly eyes on (best to do that at the very end).
5) Buttonhole time! Be not afraid: the steps below, taken from the dice bag tutorial (hence the yellow floral fabric), outline how to do this. You’ll want to place your buttonhole in the middle of the fabric, about 3/4 inch up from the top of the eyes, and 3/4 inch down from the top of the rectangle. Ish. It depends on just exactly where you placed the tummy, beak and eyes. You’ll want the buttonhole itself to be about 1/2 to 3/4 inch long, depending on the width of your ribbon (which needs to fit through the hole). Right, so. Buttonholes:
First of all, don’t freak out! Buttonholes terrify many people (myself included, until recently), but all you need to do is figure out how your machine works, and practice on a bit of scrap fabric until you’re confident. Now, all machines are a little different, but on mine, for example, I simply have to turn my two dials to the red buttonhole setting, as in the photo below.
One important thing to note: on my machine and, I believe, on many sewing machines, the needle starts by going backwards when you are making a buttonhole. This means that I need to start the needle at the bottom of where I want the buttonhole to be. The needle goes up, over, and back down again to make the buttonhole.
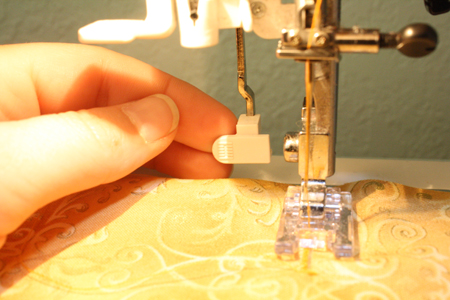
On my machine there’s a little buttonhole arm that comes down behind the needle (see the photo below). I ignore it at first, and just start the needle going at the bottom of the place that’s to become a buttonhole. It goes back and forth doing a wide stitch for a moment, then starts going backwards, doing a narrow, close-together stitch. When it gets to the top of where I want the buttonhole to be, I stop the needle, push the little buttonhole arm, and start stitching again. The needle does another wide stitch briefly, then comes back down the fabric, doing a narrow stitch a tiny ways apart from the the first line of stitching. Once it’s back at the bottom of the buttonhole, where the stitching started, I backstitch to knot the thread, then lift the presserfoot and cut the thread and I’m done.
As I say, it’s different on every machine, but probably not too much different. Experiment a couple times on scrap fabric till you’ve got it figured out. If you don’t have an instruction booklet for your sewing machine, you may be able to get information by looking up its make and model number online. And for this particular buttonhole, you do not need to use a fancy buttonhole presserfoot, even if you have one.
Remember to reset your sewing machine when the buttonhole is done, back to a normal straight stitch setting.
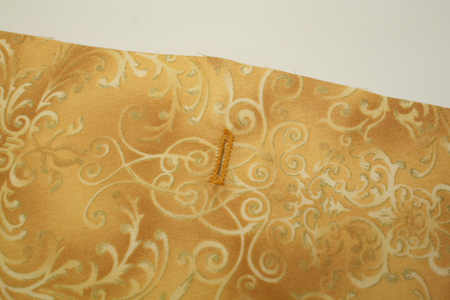
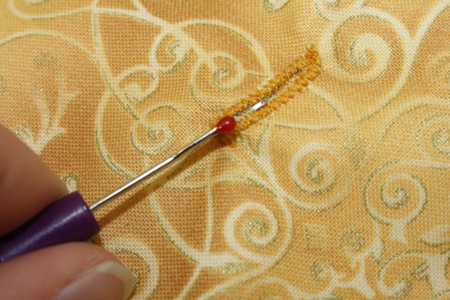
Use your seam ripper to dig into the fabric in the buttonhole’s center, cutting it and leaving an actual hole between the stitching.
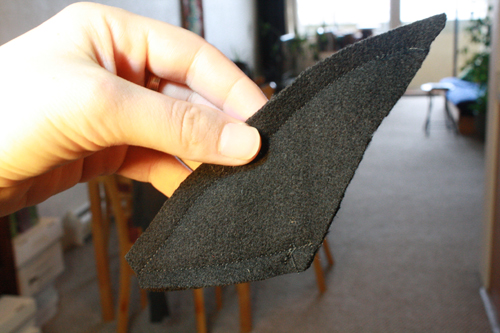
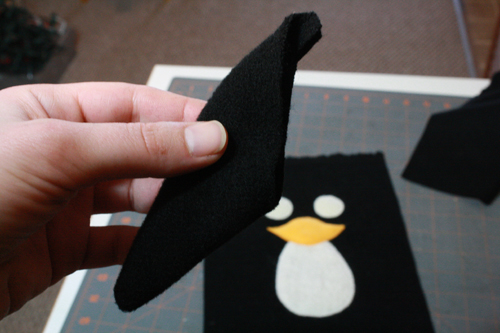
6) Now you’ll need to make your penguin some wings. Get a piece of scrap paper with a straight edge. Draw a sort of curvy-edged, downward pointing triangle, using the straight edge as one of its sides. As in the photo below:
You can make the wings whatever size you like, but I wouldn’t go any smaller than 4 inches long, and 5 inches long is better. Keep in mind that once you sew the wings and turn them right side out, they will shrink in size considerably. The ones in the picture above were, in the end, too small for my liking, so I went back and made a wing pattern that was a couple inches larger.
7) Cut four of these wing shapes from your outer bag fabric. Stack two of the on top of each other (right sides of the fabric together), and pin them together. Do the same with the other two pieces.
8) Take a set of wing pieces and stitch the two curved sides together about 3/8 inch from the edge (just follow the edge of your sewing machine’s presserfoot), leaving the long straight edge unsewn and open. Repeat with the other set of wing pieces.
Trim the very tip off the wing (being careful not to cut through any stitches!), then turn each wing right side out. Poke the end out gently with the tip of your scissors, and press the wings as flat as you can get them.
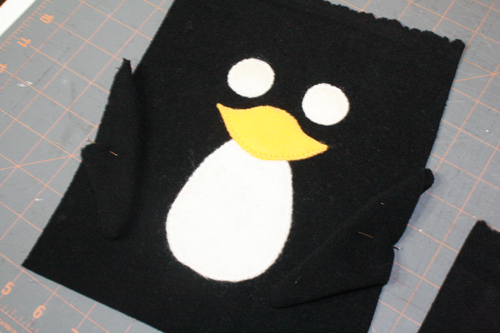
9) Lay the wings down on either side of the penguin-ified rectangle, facing inwards, their straight, open edges lined up with the rectangle’s edges. Put them at whatever height you want them, and make sure they’re both even. I do mine so the wings’ tips are about even with the bottom of the penguin’s tummy piece. Pin each wing in place.
10) Stitch each wing in place, sewing a straight line about 1/4 inch from the edge of the fabric, all the way along the open, straight edge of the wing that matches up with the edge of the rectangle.
11) Place the second rectangle of outer bag fabric on top of the penguin-ified rectangle, face down, so their right sides are together. Pin them together along the sides.
12) Stitch the two rectangles together along the sides. Sew about 3/8 inch from the edge of the fabric – easiest way to do this is just line the edge of your presserfoot up with the edge of your fabric.
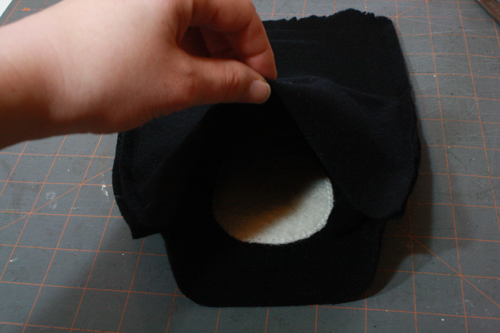
You now have, essentially, an inside out tube of fabric with a penguin hiding inside it.
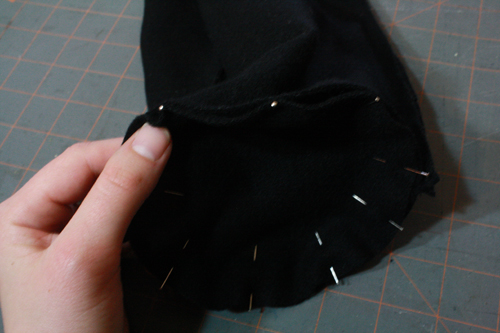
13) Take the circle you cut in step 1, the one cut from fabric for the outer bag. With the circle’s right side facing inwards, pin its edges to the edges of the bottom end of your penguin tube.
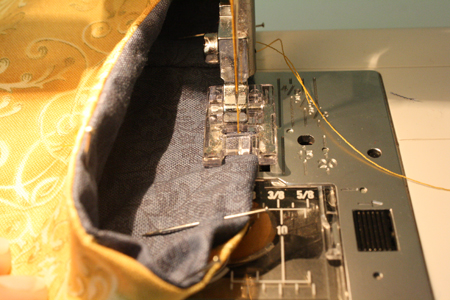
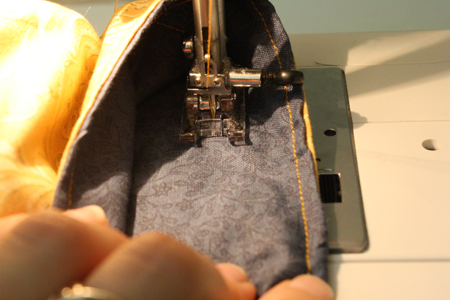
14) Stitch all the way around the circle at the base of the tube, removing pins as you go. (Sewing over pins is bad for the pins and bad for the sewing machine, so try to avoid it.)
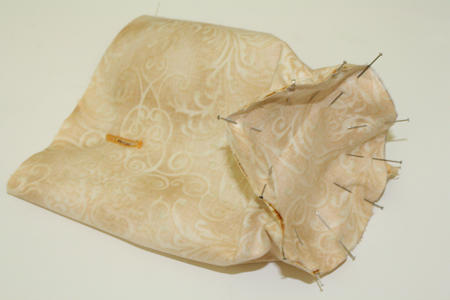
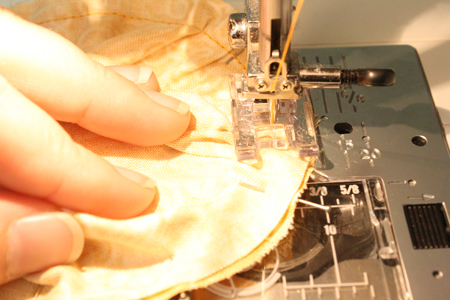
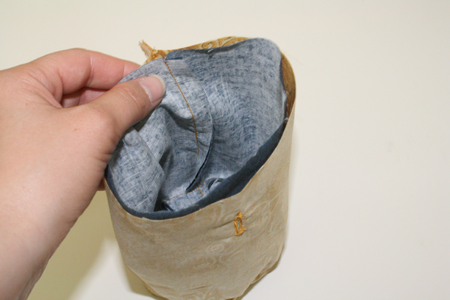
Again, keep the edge of the fabric matched up with the edge of the presserfoot as you sew. Below are a couple of hopefully helpful and clarifying photos of this same process on a different bag, taken from the dice bag tutorial.
You may notice a small amount of puckering at the bottom of the bag, where the tube and the circle join up. This is fine and normal.
15) Repeat steps 11-13 with the lining fabric, pinning the two rectangles right sides together, stitching them together along the sides, and attaching the circular bottom piece. You should now have two inside-out bag shapes, one for the outside of the bag, and one for the lining.
16) From here on out it’s exactly like the dice bag tutorial (plus possibly adding googly eyes at the end). You can hop over there and start at step 12 for the rest of your bag-making instructions, or just keep reading below, where I’ve copy/pasted the necessary steps from that tutorial.
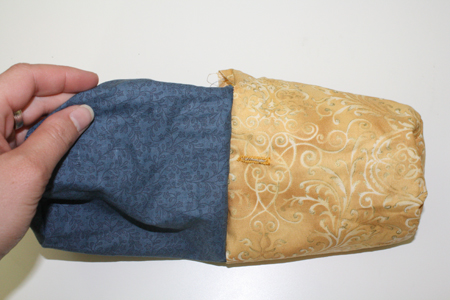
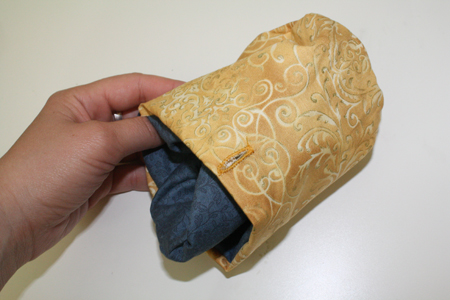
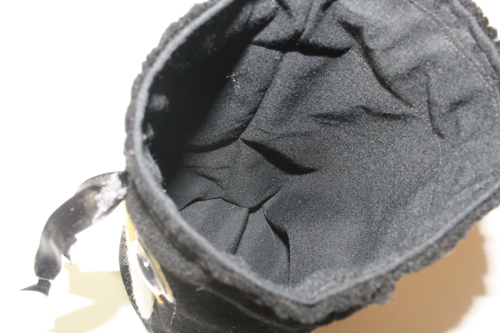
Turn the lining right side out, and push it inside the penguin tube you made, matching up their side seams.
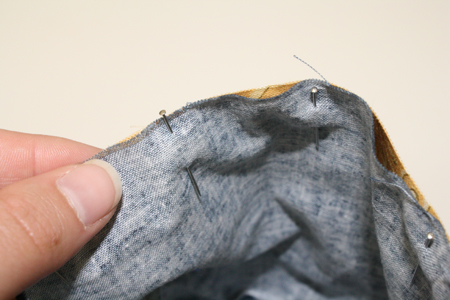
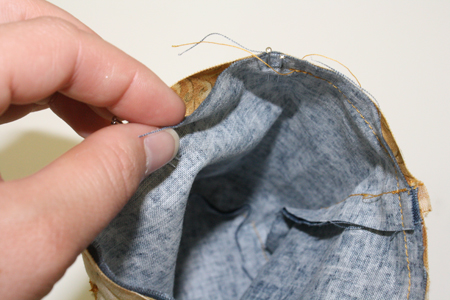
Again, illustrative photos from the dice bag tutorial (which are way easier to see, since the two fabrics are different colours, rather than all light-absorbing black):
17) Pin the top edges of the lining and the outside fabric together. On one side, use two pins together to mark a two-inch gap, where you will not sew the fabric together.
18) Starting at the first set of double pins, sew around the top edge of the bag, stitching the two layers together. Keep your fabric edge lined up with your presserfoot edge. Stop at the second set of double pins, backstitching to knot the thread. You should be left with about 2 inches where the two layers are not sewn together.
19) Use that gap to turn the whole thing right side out, so the two fabrics’ right sides are showing, and you have what looks rather like a giant empty pill casing.
20) Stuff the lining inside the outer layer. Then use your fingers to make the top edges of the bag flat and even, and pin them together again.
21) Stitch all the way around the top edge of the bag. This time, leave only about 1/8 inch between the stitching and the edge of the fabric. To do this, I make sure the edge of the fabric is following the edge of the little oval opening in the middle of my presserfoot.
This will close up the gap you used to turn the bag inside out.
22) Now sew another line, about 1 1/2 inches below the bag’s top edge. To do this, find a line on your sewing machine in about the right place that you can keep the fabric’s edge lined up with.
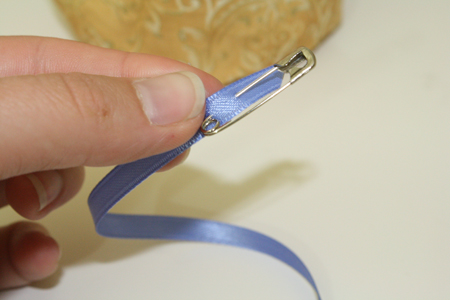
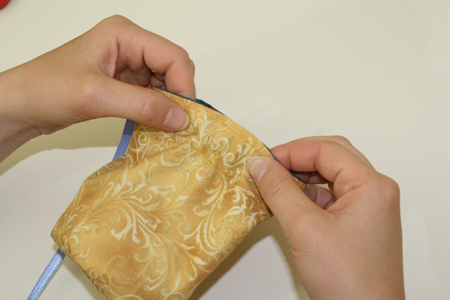
23) Next take your ribbon, and attach the safety pin to one end. Insert the safety pin into one side of the buttonhole at the top of the bag.
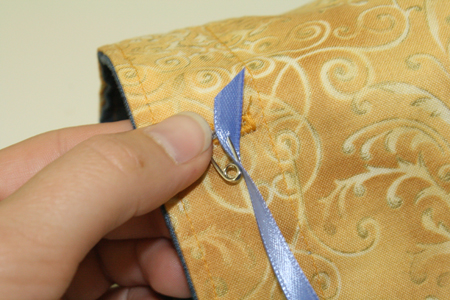
24) Work the safety pin all the way around the bag. To do this, hold the back end of the safety pin through the fabric, and scrunch more fabric up over it. Then grab front other end of the safety pin with your other hand, and let go of the pin’s back end. Continue this until the safety pin pokes out the other side of the buttonhole, then pull till there’s an equal amount of ribbon dangling from either side of the hole.
25) Knot the ribbon’s ends and put some fray check or clear nail polish on them to keep them from fraying. Tie the two ribbon ends together and pull to close the bag.
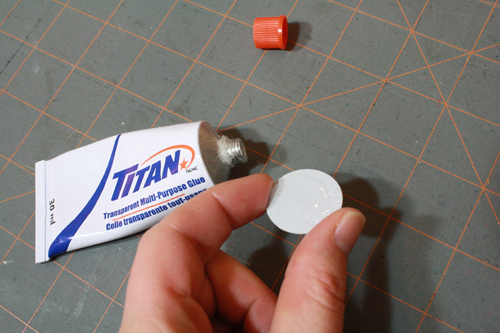
26) If you opted for a googly-eyed bag, it’s finally time to get out your superglue or your glue gun and stick those eyes on. (And then, if you’re me, run to the store because you were one googly eye short!)
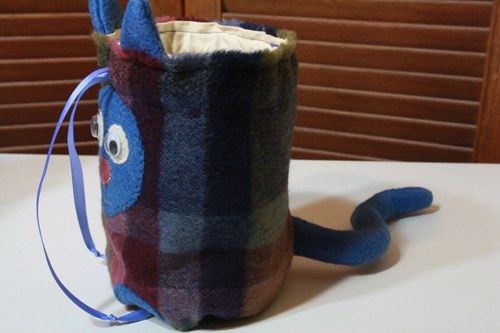
27) Fill with good things! Possibly other penguins. Try making up other animal appliqés to adorn the bags – add ears, tails, spots, stripes, etc.

