So last week’s blog post just… never happened. I did manage to move ahead on a bunch of commission work, plus drink too much with friends and get through a couple Mass Effect missions, so I consider the week (and the long weekend in particular) a success. But I fell behind on tutorial-writing.
I’ve also been kept busy answering a small flood of Craft-Along emails, which I mention because if you’re not familiar with the Desert Bus for Hope Craft-Along, I encourage you to watch the video below and get acquainted with the event. It’s a chance for crafters and artists to donate their work for a great cause, and is part of the outrageous, awesome, crazy week-long event that is Desert Bus for Hope. We made a handy little informative video to tell you all about it, and you can learn more about Desert Bus itself on the event’s website.
So definitely check that out!
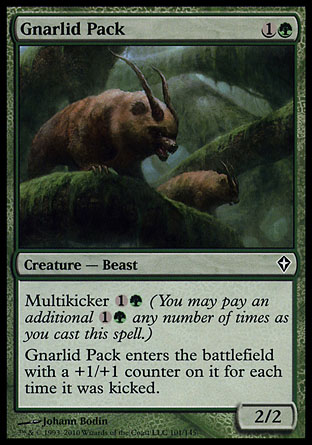
Getting back to the matter of the missing blog post, for which this post is meant to be a replacement of sorts, I’d like to show you one of the specific commission projects I completed earlier this spring: a plush Gnarlid, based off the MtG card Gnarlid Pack:
Matt, the same Matt who made my new business cards and gave me my first ever plushie commission, asked me to create a plush Gnarlid as a birthday present for his wife Nicole (who happens to be a fantastically talented artist).
I started out by looking at a lot of pictures of teddy bears, and particularly at their snouts. I knew that was going to be the trickiest part, because it needed to be a two-piece mouth so it could be open and show those teeth – that’s what I feel really gives the Gnarlid its growly personality on the card. Without that, it would just look like a teddy bear. With horns.
In the end I mostly just made it up on my own, flying by the seat of my pants. The mouth was being two separate pieces, “hinged” together at the back with a piece of felt, then sewn to the face. I had to stitch around it about three times before I got it as tightly attached as I wanted.
Each piece of the mouth was a strip of brown fleece connecting a U-shaped piece of brown fleece and a U-shaped piece of pink felt. Once stuffed, the pink felt stuck up quite a bit, so I needle felted it flat, which works just brilliantly if you’re using synthetic felt and the right kind of polyfil (that being the super dense stuff). Then I hand stitched the nose (black felt) on, putting a bit of stuffing under it as I went so it stuck out a little. The teeth were a double later of white felt, attached using HeatNBond, then stitched together around the edges, then hand sewn to either half of the mouth. The whole thing was put together as its own piece before being attached to the head.
It looked pretty special, just chomping around on its own and sneaking up on people. And even fiercer with pins sticking out of it!
The body itself went through a couple of revisions – there was a mock-up done first from other fleece, and after correcting a few small details I made the for reals body. But afterwards I realized it was faaar too wide underneath, so I had to turn it inside out, sew a new seam down the middle to narrow it, turn it right side out, re-stuff to see how I liked the sizing, unstuff and narrow it some more, and lather, rinse, repeat about three or four times in total. Wheee.
I also decided that the feet needed some special detail:
As well as fierce claws, of course (which at first were more 3-dimensional and stuffed, but they looked weird, so I took them off made different ones as seen below):

At some point during the construction, I realized that I couldn’t just do felt eyes on this particular creature – it wouldn’t look right. I wanted eyes that would catch the light and glint at you. That’s when I discovered that none of the craft stores, bead stores, dollar stores or any other stores I called in Victoria sold safety eyes. WTF?! So I ordered some from an Etsy seller in Hong Kong, which delayed things for a bit since I couldn’t go too far with construction till I’d attached the eyes.
When they did arrive, I had my first experience with using safety eyes, which is a bit tricky but also very simple. I discovered that the hole in the middle of a spool of thread was the perfect size for pushing on the inside piece of the eye to get it to pop into place.
Thus, my first foray into installing safety eyes. I was very careful to mark where they should go and make the marks nice and symmetrical, because the whole point of safety eyes is that once they’re in, they are never coming out, unless you basically cut them and the material around them out.
Holding the mouth on in this photo – I didn’t actually attach it until I’d gotten the eyes in place.
The horns were super easy – just two matching felt shapes hand stitched up the sides, stuffed, and sewn onto the top of the head.
He was getting pretty close to done at this point, but Gnarlids look mean, and this fellow appeared, well… derpy.
“Yeeeeah! Hey guys, how’s it goin?! Hey, have you heard the one about the goblin and the Acidic Slime? Guys? Guuuys?”
Reeeally needed to do something about that derp factor. He needed one last very important expressive detail: eyelids!
Ah, so much less derpy:
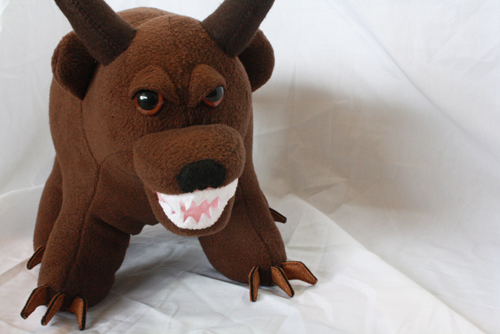
Although ultimately, he really is still just a big teddy bear with horns.
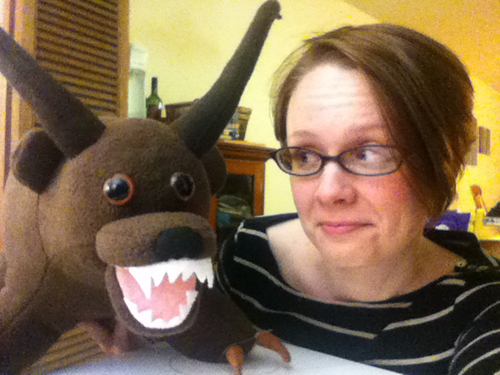
Though he does have a tendency to get lippy. “You said what to me now?”
And that, ladies and gentlemen, was my creation of a plush Gnarlid.


