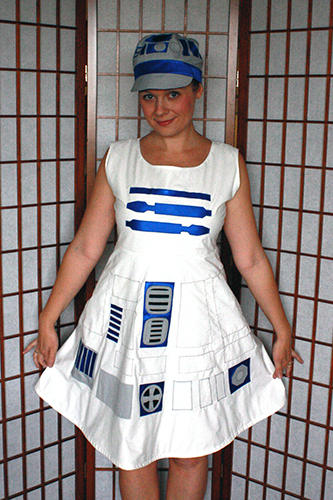
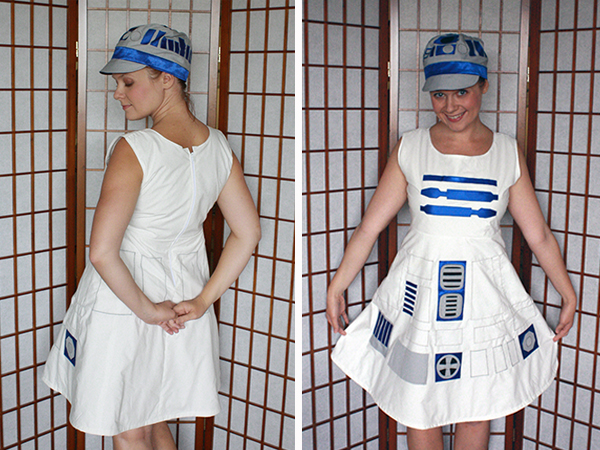
I made another dress! I’m sure you’re all shocked. Every PAX I find myself scrambling with some awesome project that I only thought of at the last minute but am desperate to have done in time. This year it was all those felt pins I posted about the other day, and an R2D2 outfit.
Unlike Star Trek, which I had to wait till adulthood to enjoy, I grew up with Star Wars. The first time I saw the films, we watched them as a family over the course of three nights. I remember very vividly how I slept in my brother’s room that first night, after watching A New Hope, because besides being scared of the dark I was now sure that Darth Vader lurking in it somewhere too.
And the next night, after watching The Empire Strikes Back, I wailed at my mom about how worried I was for poor Han Solo, frozen in carbonite – he couldn’t be dead, could he? I could barely stand waiting a whole day to learn his fate. “Mom, how did you guys wait whole years to find out what happens?!?” I cried, incredulous.
Those are some of my happiest memories of a childhood initiation into the big important things of the world…
So anyway, like pretty much everyone else in the universe, I adore R2D2, and by gosh does his design ever make for a fun dressmaking (more like dress decorating, really) challenge. I know there are R2 dresses and hats for sale out there, but as usual I wanted to try making my own, one with my own design choices and a perfect-for-me fit.
If any of you want to try this sort of thing yourself, all you need is a basic dress pattern / basic pageboy hat pattern, and you just appliqué the appropriate shapes in the appropriate colours to those clothing items as they’re under construction. To help you out, here are PDFs (very rough, just my scribbled drawings!) of the appliqué pattern shapes I drew to use myself. Just about everything you’ll need for the appliqués is on those two sheets – you’ll need to make a few more rectangles for the back of the hat, but that’s easy enough.
———– R2D2 pageboy hat ———–
I considered doing the dress half gray and half white, so that R2’s head would have been the top part of the dress. But I just didn’t like the idea that much from a design perspective, plus it would have made all the appliquéd shapes smaller and therefor more fiddly and less visible from a distance. I decided I’d rather do a hat. I’m so short that most people will be able to see the top of my head and the R2 design there anyway.
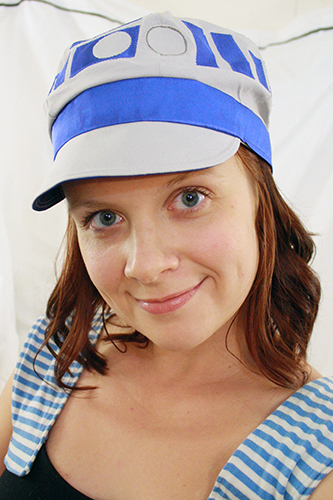
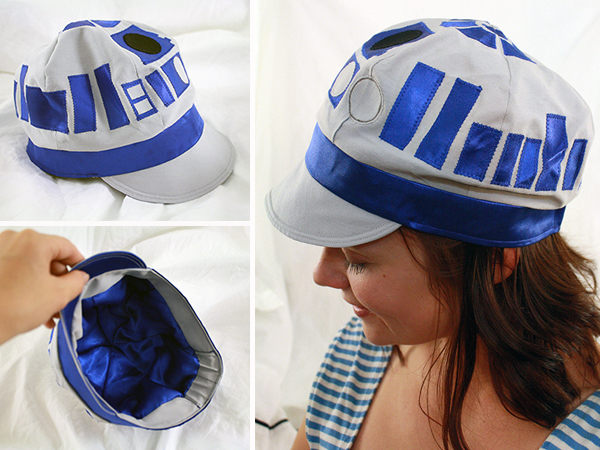
Since it’s summer, and since beanies/toques are rather warm and also less flattering on me, I thought I’d try an R2D2 pageboy/newsboy hat. I’ll tell you, there is no shortage whatsoever of R2D2 beanies and toques out there. But I did not see one single other R2D2 pageboy hat. I think it works rather well.
I just made a normal pageboy hat, appliquéing all the details onto the crown in the right places as I went. (Just exactly the same way I did the top of my R2D2 plush, but a little bigger.) I found a lovely scrap of blue satin at the fabric store, just the right shade, so I decided to appliqué with it, because I am insane. Only an insane person would think satin should be appliquéd with. But actually, it wasn’t really troublesome at all, since I used HeatNBond. I’ll go over that exact process further down, when we get to the dress.
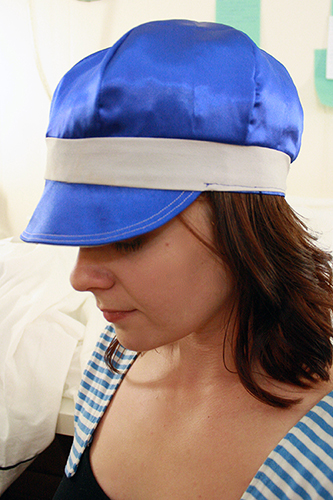
The hat is reversible, which is kind of nifty, though as pretty as the blue satin is, I can’t imagine why I’d want to wear it with the R2D2 appliqué hidden. But hey, it’s always fun to have options, even if you never use them.
See how sad I look with the R2D2 stuff hidden away inside the hat? Yeah, not gonna wear it like this. Photo for demo purposes only, and all that.
———– R2D2 dress ———–
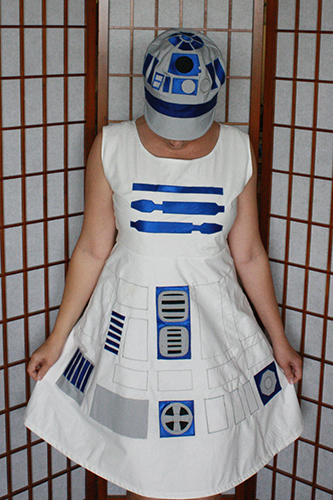
The dress is made from a plain white sheet I got at Value Village (thrift shopping, baby!), and a lot of blue and gray and black appliqué bits. Fun fact: the black fabric is some of the last scrap from the Creepy Doll plushes I made a few years ago for LoadingReadyRun, but facing backwards so it’s “wrong” side (which is slightly shiny) shows. Stashbusting for the win!
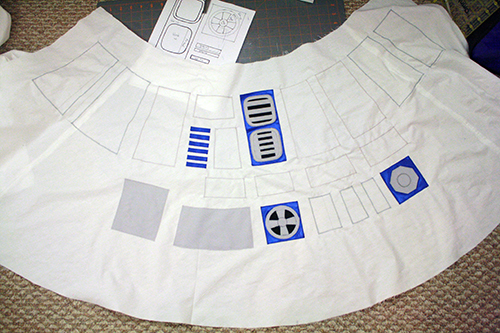
I made the top and bottom of the dress separately, and each one is layered. So first I completed one layer, then appliquéd all the R2 pieces onto it, then sewed it to the lining and finally pieced the whole dress together.
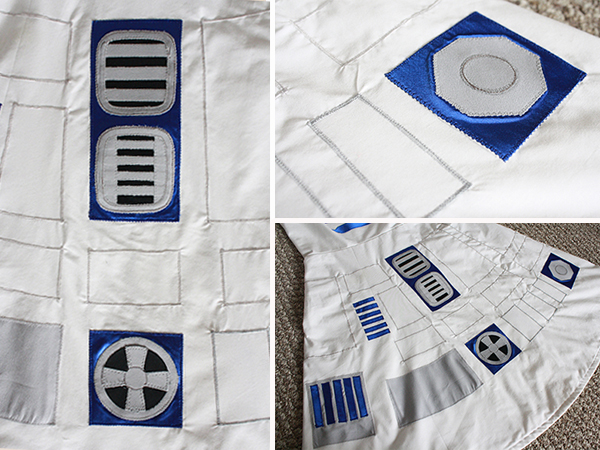
To do the applique, I used HeatNBond, in part because I was appliquéing with very fray-prone fabrics (blue satin and a thin gray cotton), and that helped hugely to control the fraying. It also helped hugely to get straight, accurate lines when cutting out all the shapes.
So first I drew the shape on a piece of paper, then I traced the shape onto the HeatNBond. Then I ironed the HeatNBond onto the appropriate fabric, cut out the shapes, and then ironed it into place on the dress piece. Finally, I stitched around the shape with a very small, close-together zigzag stitch in the appropriate thread colour.
My tutorial for fleece masks goes this appliqué method in detail, if you want to know more or give it a try yourself.
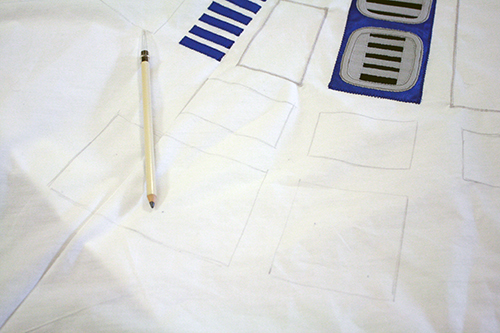
That’s how I did the blue and gray and black shapes on the bodice and skirt. For the square panels on R2’s lower half, I got out my fabric pencil and drew where I wanted those shapes to go. I made them slightly triangular rectangles to match the shape of the skirt.
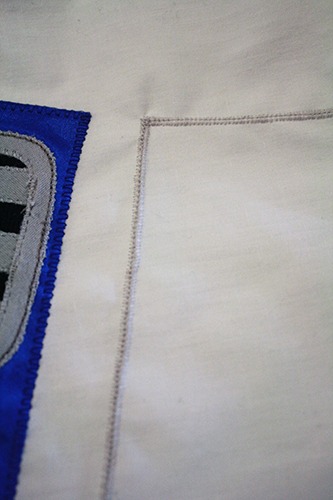
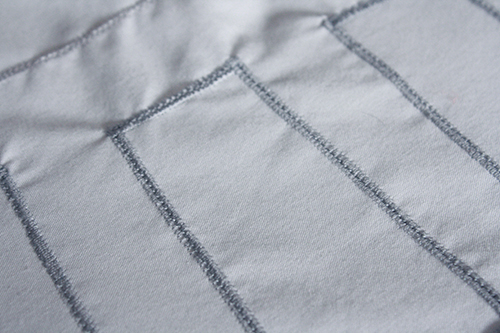
Then I sewed over the lines with a medium and very close-together zigzag stitch, the went over those lines of stitching again with a straight stitch to make sure it was all very secure. This pulled the thin cotton of the sheet a little at some of the rectangle’s corners, but not so badly that I felt it was worth it to try appliquéing incredibly thin lines of grey fabric for the rectangles instead.
Then it was just a matter of attaching the skirt and bodice and installing a zipper. Which wasn’t too difficult till I got to the bottom of the zipper – I still haven’t learned how to do that bit neatly. So here’s a picture of my terrible zipper imperfection. Still, it’s reasonably tidy and it’s functional, so it’ll do for this. One day I’ll learn how to finish zippers properly.

At the end, I wiped any still-visible pencil marks away with a damp cloth, and gave the whole thing a quick pass with the iron.
Then I tried it on with the hat, and positively squeeed! (I guess I should practice my *beep boop bleep* noises instead.) Now all I have to do is resist wearing it every single day of PAX because I love it so much! (I would, but oh gosh the smell that would accumulate… You sweat a lot at PAX.) I think I’ll wear this ensemble on Sunday, as that’s the day of my crafting panel. Seems appropriate. I have other lovely geeky dresses to wear on the other days still!
And when I’m wearing this dress, if anyone accuses me of being a “fake geek girl” (not that I expect this to happen), I’ll say “Am not!” and they’ll say…

