I get commissions for all kinds of different things and all kinds of different reasons. Things from “My boyfriend loves this character” to “I’d like to give her a custom plush of her forum avatar” and “The baby needs a sun hat for summer anyway, why not have an awesome R2D2 one” have all come up.
And sometimes the reasons are a little more zany, or involve a detailed backstory because the commission is basically the physical manifestation of an inside joke or a “you had to be there” moment. The one I’m showing you today was made because the buyer wanted a nice big, soft and very much throwable bus, so that he could by tossing it over people’s heads, “throw someone under the bus.” I love my work.
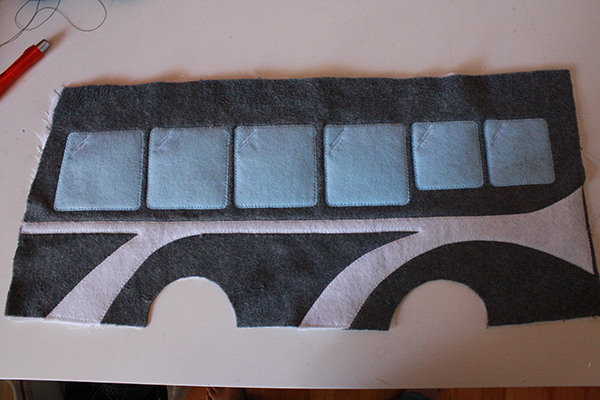
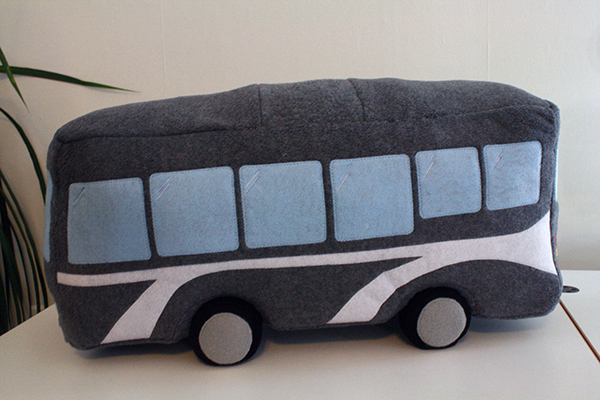
Apart from some baby toys, I’d never made anything so simply rectangular. But that simplicity was good, as none of the bus’s sides could actually be put together until all the embellishing of them was completed. In other words, there would be hours and hours of work put in before I’d have a chance to figure out whether all the pieces would actually fit together properly. So it’s a good thing they were all simple, easily measured lines.
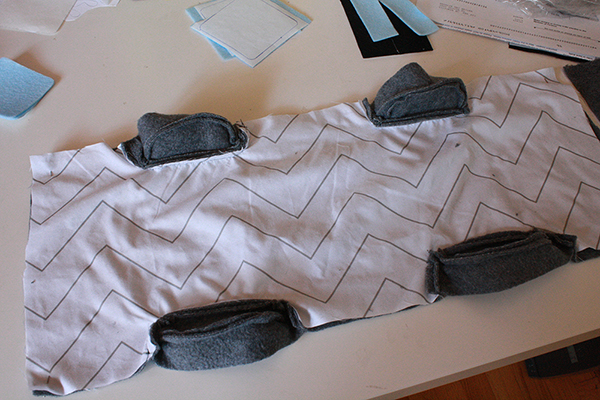
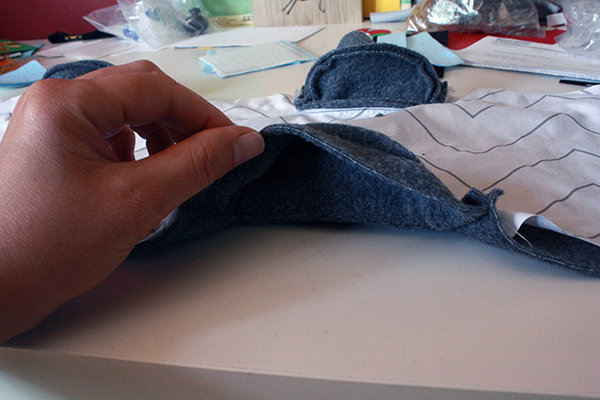
Except for the wheel wells. Holy crap. Wheel wells are evil. They weren’t actually hard to put together as far as the sewing went, it was the figuring out that was so tricky. I see why pretty much every plush vehicle I could find an image of online did not bother with proper wheel wells. But I just thought it would look so much better with them! (And I was right.)
I decided to line the whole bus with some simple non-stretch fabric (actually the casing off a pillow I’d bought just to use the stuffing inside) to hold the straight lines of the pieces better. Fleece has a bit of stretch to it, and that often becomes way more evident when you stuff it, and rounds everything out. Which is great for plush animals and such, but not so much for things with flat surfaces and straight lines.
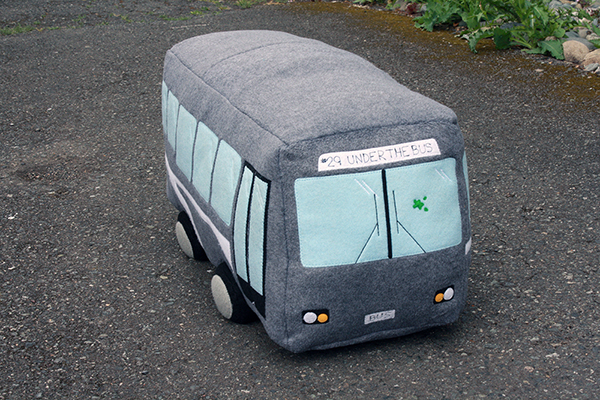
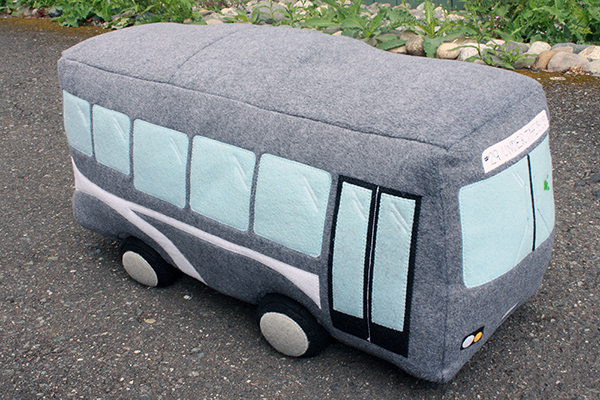
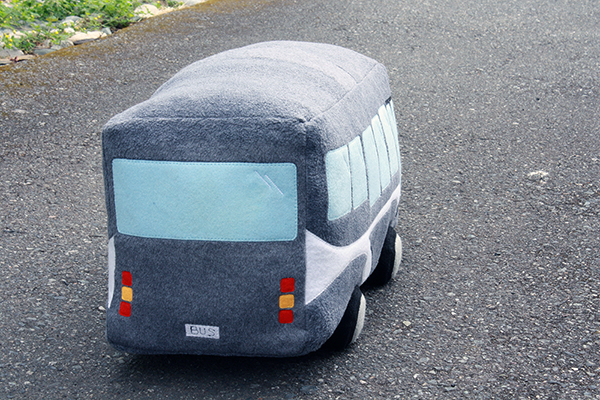
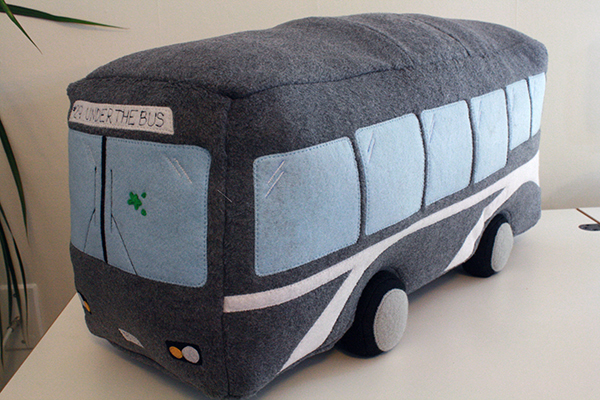
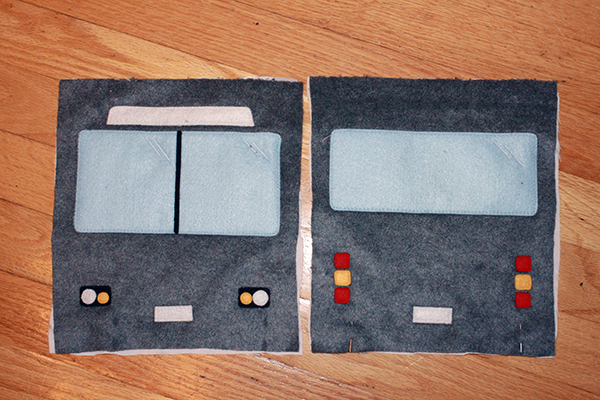
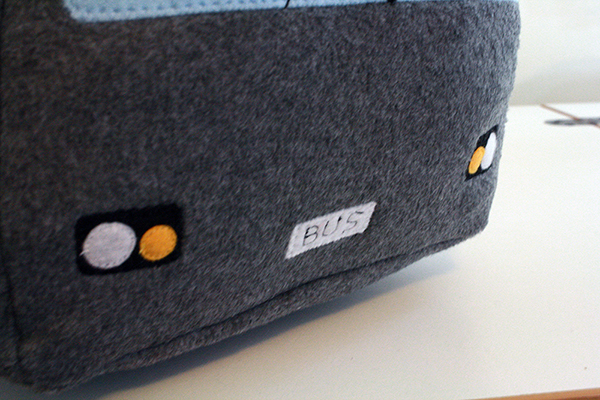
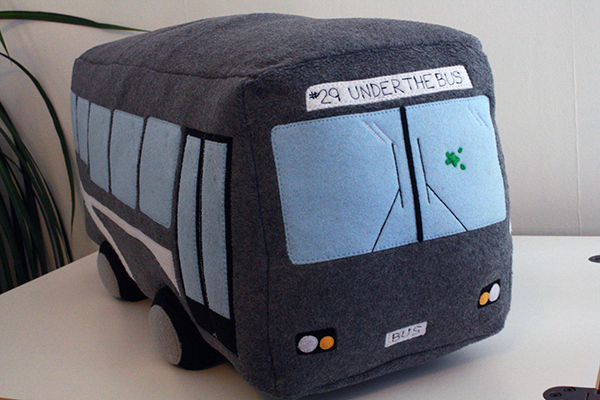
The sides and front started out by getting windows, doors, headlights, license plates and those sorts of vehicular basics. Plus the place to show the bus’ number and route.
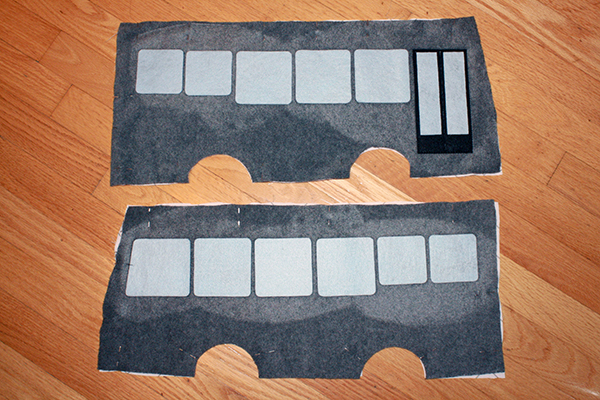
Then the sides got some stripey details, because busses gotta be pretty too, y’know.
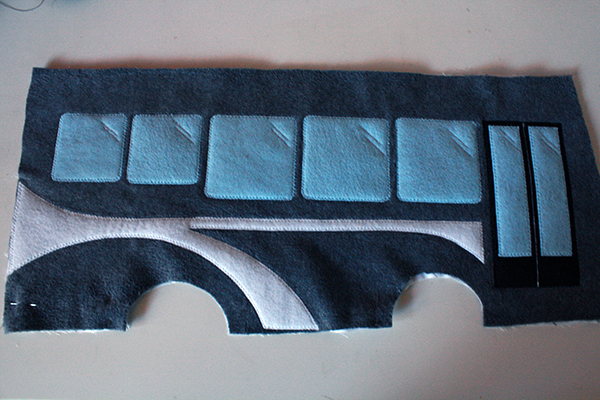
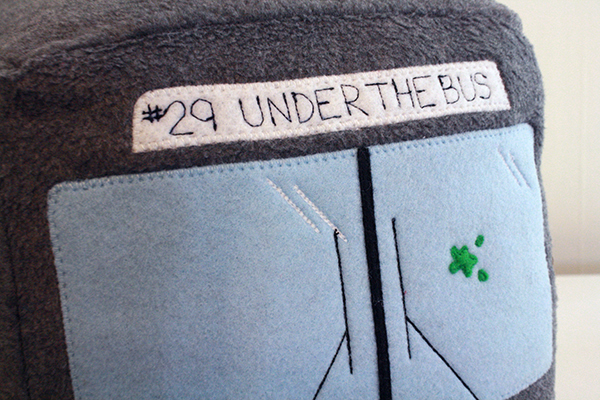
The fellow who commissioned the item watches Desert Bus for Hope, because he’s awesome like that, so we decided to put a bug splat on the front window as a Desert Bus tribute. (And I added some windshield wipers just with lines of straight stitches, which I thought gave the bus front some more nice detail.)
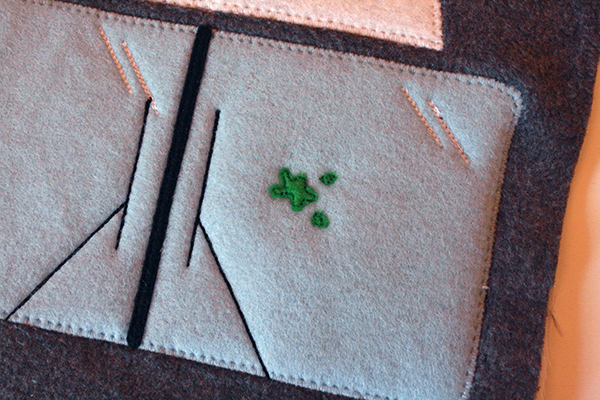
He also chose what would go on the license plates and what would be the bus route and number. The route name is pretty self explanatory, but I love where the route number – 29 – came from. He explained that 29 is the number of the chapter in Numbers (a book of the Old Testament) that details the proper way to prepare a sacrifice. Which. Is. Awesome.
And then I actually put everything together, and it worked! With some special finagling. I failed to get photos of that part, because we were getting ready to move and I was trying to still finish this project and everything was getting into mayhem mode and photos were forgotten. But if you ever want to try something like this, some of this information might be valuable, so here, without pictures (sorry) is what I did:
I got some sturdy foam and cut it into the same shape as the pattern piece for the bottom of the bus – so essentially a long rectangle with four rectangular indents cut into it where the wheels would be. I applied spray-on adhesive to just the wheel indents, then stuffed the foam into the bottom of the bus, trying not to get adhesive on any other parts in the process, which was super finicky and annoying but eventually worked. I pushed the fleece of the wheel wells into the indented spaces of the foam, where they stuck thanks to the adhesive. Later, when I sewed the wheels in place, that further made the wheel wells keep their positions.
The foam wasn’t quite tall enough, so I cut a bunch of pieces of quilt batting (because that’s what I had) of the same shape and spray adhesived (spray adhered?) them together, and stuffed them in on top of the foam. Then I stuffed the rest of the bus with polyfil, stitched up the 8 inch ish gap I’d left open in the top side for all this stuffing, and sewed on the wheels.
Then I took it for a test drive!