All right ladies, you know the drill. This is about modifying awesome t-shirts from awesome events where they only carry apparel in awesome over-large unisex sizes. Awesome sauce all round.
My boyfriend acquired this week’s t-shirt (very limited edition) at PAX two years ago, where the 1Up Yours guys tossed them to the crowd during their panel. Jeremy (who you can see making fabulous faces in last week’s post) wore it a couple times but gave up on the shirt as workable apparel since it was too short for him. Tall slender people have it so hard.
But you can’t just ditch a one-of-only-X-number-printed t-shirt, especially when it says “Weekend Confirmed.” It would be wrong. Puppies would die in Siberia. Somewhere, the deity of small print-run t-shirts would cry.
So when I started modifying t-shirts, Jeremy gave it to me.
This was a great shirt to play with because it didn’t require very much resizing and because the graphic on the front is fairly small and is placed low enough to accommodate a nice girly scooped neck. Considering the message on the shirt, I decided it needed to be fun. What’s fun? Ruffles are fun.
So, read on and learn how to confirm your weekend. T-shirt.
————————
What you’ll need:
- a t-shirt – this mod works best with a shirt that is about the right length and just a little too wide and too baggy.
- sewing scissors
- straight pins
- thread that matches your shirt colour
- a sewing machine (sorry, but even with extraordinary time and patience you couldn’t hand stitch the edging on these ruffles)
- [optional] bias binding that matches your t-shirt
Note: Depending on exactly how your t-shirt fits you to start out with, this mod may turn out a little differently for different shirts and different people. It should be cute regardless, but if you’re specifically looking to creat a shirt that covers the shoulders and has that slight capped sleeve look, you’ll need to start with a t-shirt that’s too wide in the shoulders for you. Apart from that specification, you can pretty much do this with whatever shirt you’ve got.
Putting it all together:
1) Turn your t-shirt inside out. Then start by cutting the sleeves off. Do this by cutting right along the inside of the sleeve-to-body seam.
2) Pin the shoulders of the t-shirt together at either edge of the collar. Pin the two sides of the shirt together under the arms and at the shoulders just at the top of the arm hole. Essentially, you are folding the shirt together, so it folds in half along the middle of the back and the middle of the front. This probably makes more sense if you simply look at the picture.
Once those pins are in place, put a couple more in along the folds on the front middle and back middle of the shirt, to keep everything from moving around.
3) Decide how low you want the shirt’s collar to go in the front and back, and make a little mark at these points along the fold lines on the front and back of the shirt. Then decide how far across you want the neckline to be. Make a little mark to the side of the collar for this.
On a light shirt, pencil works for this. On a dark shirt use a white crayon.
4) Draw a curving line from one mark to the next. This is the shirt’s new collar line.
5) Cut along the line you drew.
Your shirt should now look about like this. Now to resize it for a more flattering, shapely fit.
6) Fold your shirt in half (the usual way). Pin it together along the edge.
7) Measure yourself around the waist (this is the “in” bit of the female hourglass figure, right around the bellybutton, not where your pants waist probably sits). Divide this measurement by 4. Measure this final number of inches in from the center fold of the shirt. Make this mark midway up the shirt, about where your waist would be. (It would be wise to add 1/2 inch or so, for breathing room and seam allowance. I didn’t, I should have.)
For example, my waist measures 28 inches, so I measured 7 inches in from the center fold. (Should have made that 7 1/2, though.)
8) From the edge of the shirt under the arms, to the hem of the shirt (perhaps in from the edge an inch or two), draw a line that curves inward at its center to touch the mark you made in step 7.
9) Cut along this line. (Keep the scraps you cut off the edges of the shirt.) Then unfold the shirt and pin the now-open sides together. Sew the shirt’s new sides closed.
Your shirt should now look a bit like this:
10) Now to finish the neck and arm holes. If you wish to use bias binding, continue on to step 7. Otherwise, simply fold the edges of your sleeves and collar to the inside, pin and iron them, and sew them down. Then skip ahead to step 11.
11) To use bias binding, turn your shirt right side out. Take your bias binding and unfold it completely. Now fold over one end of the binding and pin it up against the edge of the new collar line.
Important notes:
- a) Notice how, when the bias binding is folded in half lengthwise, one side is slightly longer than the other. You will want this longer edge to be on the inside of the shirt. Therefor, the shorter edge is the one you want to pin along the collar’s edge in this step.
- b) Be sure the shirt is right side out, and that you are pinning the binding to the outside of the t-shirt – as in the side that has all the printing and such on it! This may seem a bit odd, but it will work out perfectly, trust me.
- c) The key to getting your bias binding to lay flat on your t-shirt is squishing the t-shirt very slightly while stretching the bias binding slightly, particularly on tight curves. Otherwise the bias binding will bag outward a bit. Which it does on my shirt, and it’s not a huge deal. This takes a bit of practice to get just right. Washing the shirt will also flatten the binding down a bit, as will ironing the collar and sleeve edges when you’re done.
12) Pin the bias binding all the way around the collar in this manner, pinning frequently – every 1 1/2 to 2 inches. Be sure to pull the t-shirt fabric tight so the binding will sit evenly once sewn.
13) Sew the bias binding in place. See that first fold line on the binding? Sew along that, as precisely as you possibly can. (Note: the pictures in the next couple steps are from a different shirt mod).
14) Fold the bias binding over to the inside of the shirt and pin it in place. Then sew along the outside of the shirt, following the line where binding meets t-shirt.
Because the binding is a bit longer on the inside, this will catch that inside layer and sew it in place. Of course, if you’re using single fold bias binding like I did on my white shirt (not the one pictured right here), this may be a bit finicky, in which case just sew down the middle of the bias binding.
15) Time for ruffles! They’re super easy. Take the sleeves you cut from the t-shirt and cut them open along their seam. Cut the hem off the sleeves. Now slice a wide (between 2 and 3 inches) strip from each sleeve.
16) Sew these two strips together at one of their short ends.
Do the same thing with the strips you cut from the sides of the shirt. Make sure both of your sewn-together strips are the same length. It doesn’t matter if the lines you cut are not exactly straight. When the ruffles are done, a bit of unevenness along their edges won’t be noticeable.
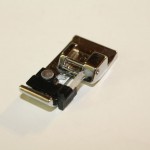
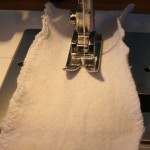
17) If you have one, use a special edge-stitching presserfoot (see picture) to finish all the raw edges of your fabric strips. Make sure you check your machine’s manual (if you have it) to find out what the proper settings are for this presserfoot. On my machine the tension is set to A, stitch width is at 5 (max), stitch type is zigzag and stitch length is just above the buttonhole setting.
This is the ideal. If you don’t have such a presserfoot you may want to invest in one, as they’re really useful and I’ll be using mine for more t-shirt mods later on. However, you should be able to replicate this reasonably well by setting your machine to a wide zigzag stitch and putting the stitch length on or very close to the buttonhole setting.
Whichever method you use, this is going to take a lot of thread, so make sure your bobbin isn’t running low when you start this step.
18) Going back to the normal presserfoot and using a straight, very long stitch (I set mine at 4, which is the max on my machine), sew a line down the middle of each fabric strip. Do Not backstitch at either end! When you cut the thread, leave several inches dangling from your fabric strips.
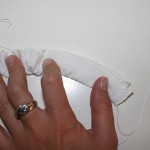
19) At either end of each strip, pull one of the threads gently so that the fabric bunches up along it. You have to do this at either end because of the seam in the middle.
These are your ruffles.
20) Pin each ruffle from the underarm seam of the arm hole around to the back. Mine weren’t long enough to go around the whole arm hole, so they end midway down on the back side of the shirt, which looks fine. You’ll want to pin the center line of the ruffle just this side of your arm hole’s hem lines.
Pin everything to make sure it’s the length you want it (adjust by pulling out some of the ruffle), then, when it’s as you want it, tie a knot in the threads dangling from either end of your ruffles and cut off the extra.
21) Sew along the center line of the ruffles.
————————
Ta da! Your weekend is now confirmed!
I had some extra material, so I made a little fabric rose. I was going to pin it on to the shirt at the shoulder or the hemline, but… well, it just looked really lame. So I turned it into a cute ring instead, by following the steps from my tutorial on felt flowers.
To make the rose part is also very simple:
1) Follow steps 15-21 to make a ruffle.
2) Fold your ruffle in half.
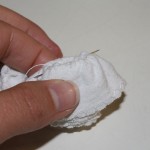
3) Begin rolling the ruffle up, hand stitching the bottom (folded) edges together as you go. Flip over when it’s completely rolled up, and you have a little fabric flower.
————————
As you read this, I’ll be at PAX in Seattle, further confirming my weekend and getting very little sleep but having a blast. More on that later. For now, either get crafting or, if you are also at PAX, stop by the LoadingReadyRun panel and say hello!


