Two weeks from now, on March 20, my friends at LoadingReadyRun are holding their 7th anniversary screening at the Victoria Event Centre. It just so happens that on that same day, I will be celebrating my birthday. In anticipation of these two simultaneous events, I present you with a new t-shirt modification method, altering a LoadingReadyRun shirt for maximum fitted girliness. This post is brought to you by my mother, to whom I owe both my birth and my craftsy nature. Having survived her enthusiastic efforts to teach me all she knows has made me who I am today. It also almost made me hurl the sewing machine at a wall a few times in my teenage years (like you do), but those moments passed.
Take it away, Mom.
[From here on, Tally’s mom is in command of the blog post. Mostly.]
Getting to do a guest blog for my dear daughter sounded like fun. Turns out I had a few things to learn. The first was that writing down and photographing every darned step of a project is a lot of extra work, and that’s before I even started to edit things down to a size that you readers could possibly tolerate. This brings me to the second thing that I learned, which is that I am way too obsessed with details. You don’t want to know how much of what I originally recorded got chopped from this write-up. It occurred to me that maybe, just maybe, the reason Tally didn’t take up sewing until she lived a good, long distance from Mom was that I would drive her nuts with my, “Oh, but you could do it this way, because…” and “Oooh, here’s another possibility.” Dear Daughter, you have my admiration for your patience, both in dealing with your mom, and in putting together this blog every week.
[Tally here. Interjecting to say YES YES YES she finally realized! Am experiencing an overwhelming surge of gratification. I’ll be over here basking in the glow of this moment while the rest of you carry on. Oh, the delight!]
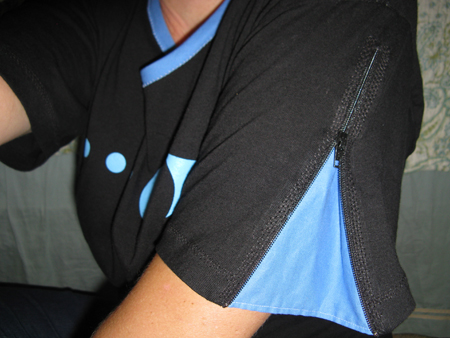
As for the t-shirt, the idea started when some of Tally’s readers commented that they thought the sleeveless looks were cute, but not for them. Tally talked to me about it and we started thinking about ways of leaving the sleeves on while making them more interesting. I got to thinking about zippers, and I offered to record the attempt to put my idea to work. Here’s the result:
[Me again. Because my mom, even in an edited form, is so deeply thorough and detail-oriented, this tutorial will be only for the zippered portion of the shirt. Otherwise we could be here all weekend. Her modified neckline tutorial for this shirt will be posted later.]
—————————————————————————————–
What you’ll need:
- A t-shirt (the printed area needs to stay on or above the bust for this one)
- Thread to match the t-shirt
- Scrap fabric for the behind-zipper inserts
- Thread to match the insert fabric
- Two short zippers and one long one* (These should be at least as long as the slits you will cut in the sleeves and t-shirt front. Longer is fine, and probably safer, because it’s easy to shorten a too-long nylon zipper. I’ll show you how.)
- Bias binding** (Use purchased narrow double fold bias binding (2 yards should be plenty), or cut your own from the same fabric as you use for the inserts. If you cut your own, you’ll want about 1 yd of fabric in all.)
- Fray Check
- ¼ “ wide sewable fusible web (I use Steam-A-Seam2, which I get at a discount with my hobby store’s 40% off coupon – terrific stuff!)
- Safety pins, straight pins, and a hand needle
- Good fabric scissors
- Chalk or a suitable fabric marker
- Your sewing machine, plus a zipper foot
- An iron
- Something to measure with
- [optional] Rotary cutter, cutting mat, and cutting ruler
—————————————————————————————–
Putting it all together:
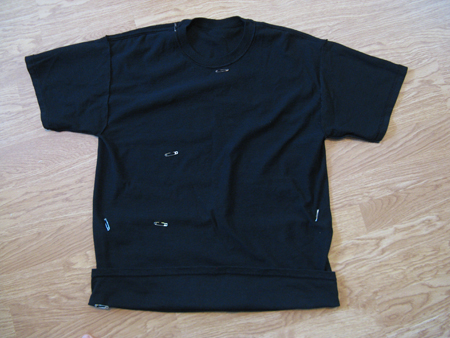
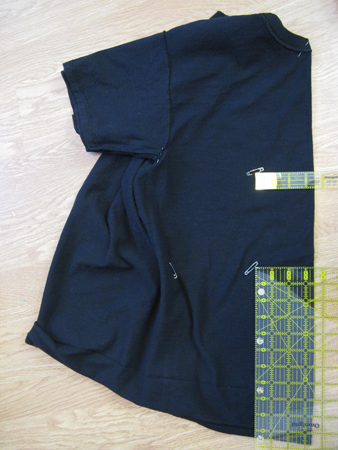
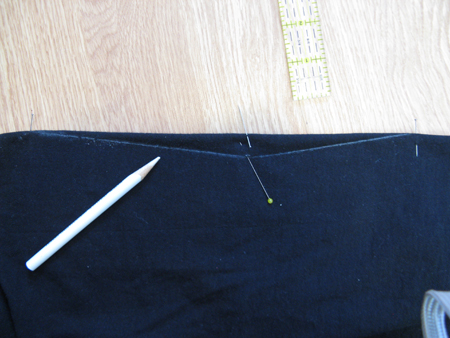
1) I started by measuring and marking. With a fist full of safety pins, I put the t-shirt on inside out and stood in front of a mirror. Here’s what I marked:
- 1. The length to which I intended to shorten the shirt. You don’t have to shorten the shirt if you prefer not to, but, at least on me, purchased t-shirts seem more often than not to fall at exactly the widest part of my anatomy, and it’s not flattering.
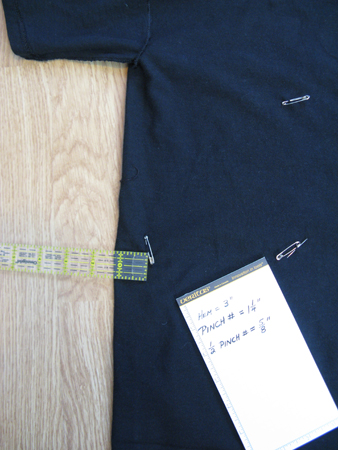
- 2 & 3. The excess shirt around the waist. I pinched the shirt an equal amount on each side and put pins in the pinches. (When the amount wasn’t exactly equal, I just calculated the average of the two after I took the shirt off.) Do leave some breathing room when you pinch.
- 4. The waist level, exactly beneath the point of one side of the bust.
- 5. The bust point, or rather, a point about 1” down from the greatest protrusion of the bust, on the same side and directly above pin #4. (I eye-balled this and used my rulers to shift the waist marking to exactly below the bust point after I took off the shirt.)
- 6, 7 & 8. The points where I wanted the new neckline to reach at centre front, centre back, and on one shoulder. Because the binding procedure I use takes away 1/4“ from the edge of the fabric, I adjusted these pins up/in by that 1/4”.
NOTE: Before going any further, I took off the shirt and checked that none of my markings interfered with the logo that made the shirt special.
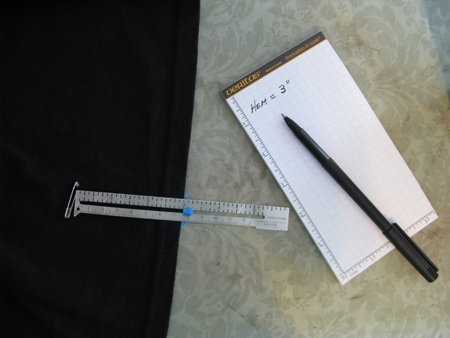
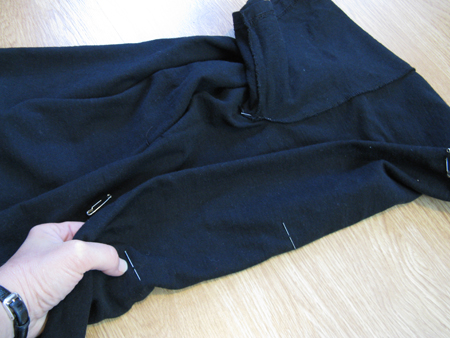
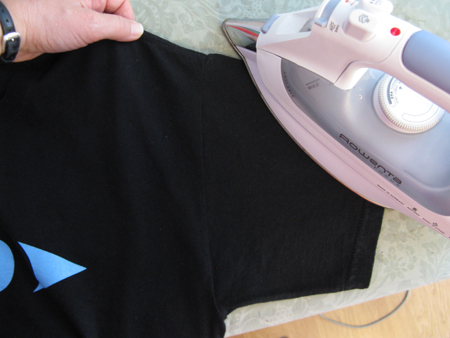
2) Mark the new hemline. Measure how high the pin marking is, write down that measurement so you don’t forget it, and press up the hem that amount, all the way around. I did not do the hemming at this point, but you could.
3) Put in the darts. Tally has done this on an earlier t-shirt modification, which may be quicker to follow. (See step 16 in that post.) I will make a few comments on dart placement:
IMPORTANT: In this case, you are doing two back darts and only one front dart. However, you do begin the front zipper by marking as though it were going to be a dart. You have the top and centre point of one front dart marked (pins 4 and 5). Transfer these to the other side of the front and to the back as follows:
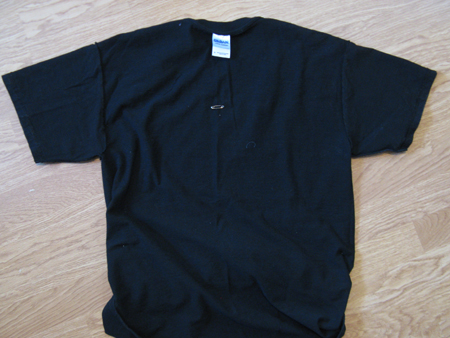
- 3a. Turn the t-shirt inside out. Fold it in half, matching at the side seams and the shoulder seams. Pinning the layers together at the shoulder seam, underarm, and along the side seam (or where the side seam would be if there was one) will keep things properly lined up and promote accuracy.
- 3b. To transfer your markings from one side of the front to the other side of the front, stick a straight pin through both layers of shirt at the points where safety pins 4 and 5 are marking the bust point and waist level. Lift the shirt carefully and put pins in the same points from the other side. Gently pull the layers apart and secure your pins. You now have two sets of markings, one set on each side of the front.
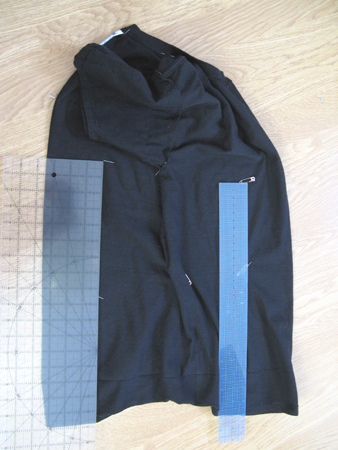
- 3c. Set the shirt back down and get your front and back folds back in place. Use rulers to figure out the distance of your original bust point and waist level markings from the front fold and from the bottom hem. Put pins in the back of the shirt at these same measurements from the back fold and from the bottom hem. Now move the higher back pin up one inch higher. (You don’t protrude as much in back as you do in front, so the darts can be spread out further.) Use pins to transfer these back dart markings to both layers of the back of the shirt, the same way you did with the front.
- 3d. Your darts (the two back ones and the one front one) also need bottom points. These will be further down on a straight line that continues from the top and centre points of each dart. How far down is a judgment call that depends on how quickly your hips jut out from your waist, but it will be a ways above the hem, and far enough below the waist level that your dart line isn’t too abrupt. Guestimate. It will be fine.
- 3e. Now draw your three darts. The depth of each dart is determined by those pinches that you pinned. That depth will be ½ of the measurement of one pinch.
- 3f. Draw and stitch your darts. If you decide later that you haven’t taken in the shirt enough, it is easy to redraw and restitch the back darts a little deeper. You don’t even need to pick out your first try. (Note: it is the convention to press darts towards the centre of the garment.)
4) The zippered front begins by drawing a second front dart, but only the top half of the dart. However, you need to make this final dart 1/8” deeper than you did the others, to compensate for the width of the zipper teeth. Having drawn the top half of the dart, instead of taking the line back out to the fold, like on the other darts, extend it down to the hem, parallel to the fold.
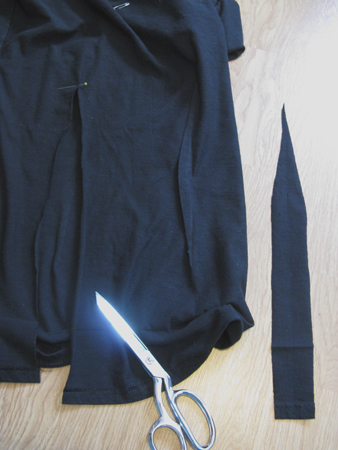
5) You have reached the point of no return: Cut along this line, through both layers. The piece you have cut out should look like this:
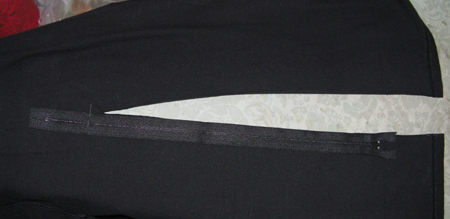
6) Lay the long zipper alongside the cut you have made in the front, so that the open end of the zipper comes just shy of the marked hemline, and the closed end of the zipper is just past the top of the slit.
7) If your zipper is too long, as mine was, shorten it by following these instructions (if it’s the right length, skip ahead to step 8): With a pin, mark the zipper just slightly longer that the slit in the shirt. Make a new zipper stop at this marking by sewing around the zipper teeth several times with a needle and thread. Tie off. Put a dab of Fray Check (or any glue that won’t wash out) on the stitches and allow to dry. Cut the zipper about ½” beyond the new zipper stop. (Pinking shears work best, but normal scissors are OK.) Dab the cut end with a bit more Fray Check.
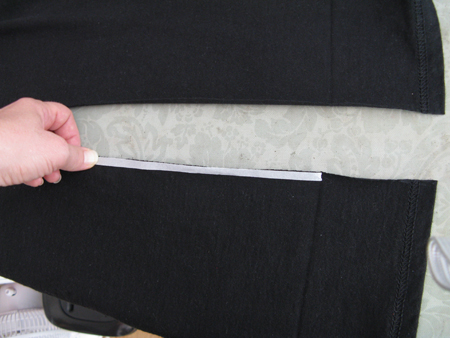
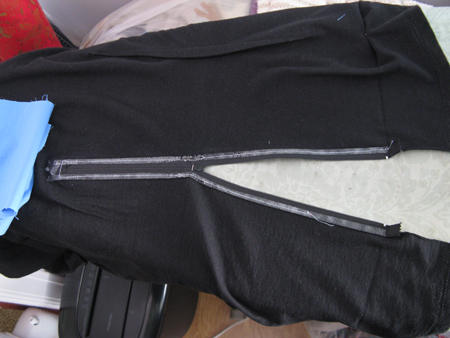
8) Stick down a strip of 1/4” fusible web right along the cut edges of the slit, on the inside of the t-shirt.
Note: Some products claim you can just finger press the web in place, but for this purpose, that’s not secure enough. Read your package directions. I used the Steam-A-Seam2, which has a paper backing, so before I removed the backing, I lightly ran the tip of my iron over the fusible webbing.
9) Turn the shirt right side up. Very carefully, set the zipper in place under the cut edges. The cut edge should be about 1/8” away from the zipper teeth, to allow your sewing machine presser foot to get right to the edge of the fabric when you stitch this all together. For now, press the zipper in place. This step is a bit finicky, so go slowly and do a bit at a time.
10) Use one of your darts to re-measure how far from the hemline your waistline should be. Use this to transfer the waist point to the zipper. Mark with a safety pin. Open the zipper to this point.
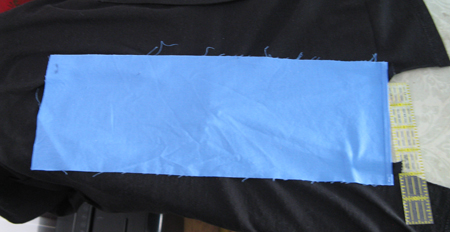
11) Cut a rectangle of your contrast fabric that is 2” longer than the zipper and a good 2” wider than the maximum amount you want the panel to open at the bottom (which needs to be at least as much as the fabric you cut away, and not more than 4”). I used a 16” x 5 ½” rectangle. (It would save a little bit of fabric to figure out the precise shape of the panel that goes behind the zipper ahead of time, but it would also be a lot harder.)
12) Narrow hem one narrow edge of your rectangle.
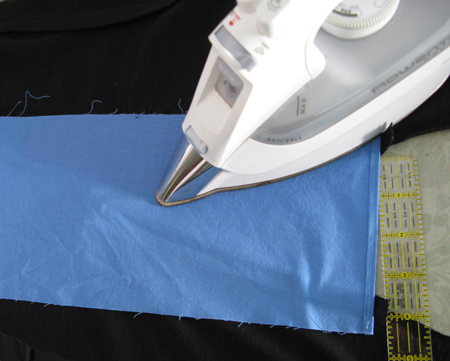
13) Turn the t-shirt inside out again. Apply fusible web again, this time following the outer edges of the zipper. Centre your rectangle of fabric over the zipper, matching the hemlines and spreading open the bottom of the t-shirt the desired amount. (I decided on 3 ½”.) When you have the rectangle in exactly the right position, press to stick the layers together.
Note: I left the safety pin in the zipper until I had done the pressing. It made a bit of a bump, but it kept the zipper closed to the desired point. Also, rather than risk having stitches catch in the extra bits of panel fabric, I put a few temporary pins around the edges.
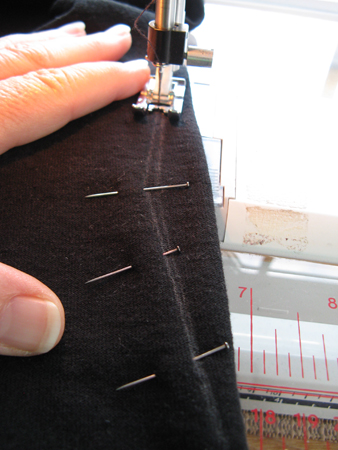
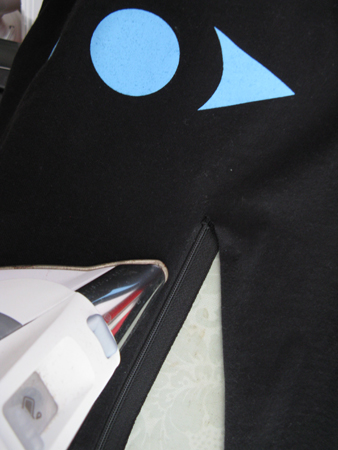
14) Turn the shirt right side out. Stitch the layers together, using your machine’s zipper foot (but it has to be one that works with wide stitches.) Any wide and fairly dense stitch will work. A zig-zig, or better, a three-step zig-zag will work, as well as an overlock stitch or a number of decorative stitches. The choice depends in part on what is on your machine. I like to use the smocking stitch.
Note: You may notice the pink stitching in the picture. I basted, and it was a mistake. It was not at all necessary, and harder to pull out than was helpful. Notice that I did pull the basting out ahead of my final stitching.
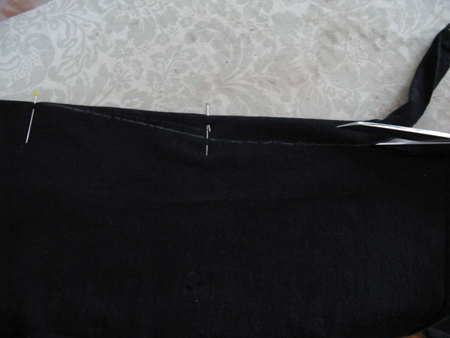
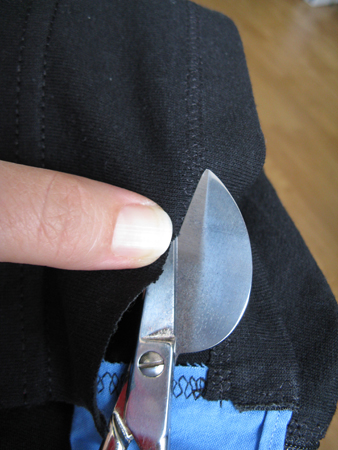
15) Cut away the excess panel fabric. If you don’t have a pair of appliqué scissors (the ones that look like one blade is a duck bill), which help to cut very close to the stitches while avoiding cutting through the fabric below, then any sharp, small scissors will work, but keep a hand beneath the spot where you are cutting, so that your fingers can warn you before you actually cut through your t-shirt.
Note: If you have already hemmed the shirt, you will have a couple of zipper ends hanging down. Tuck them to the inside of the shirt and secure with a few hand stitches.
16) This is where I finished my hem. There is nothing wrong with using a fold-twice-and-stitch method, as long as your stitch has a bit of stretch. However, I’ll show you the method I prefer, and you can choose. My reasons for liking my way are that it makes a clean, very flat hem, the measuring is quick and easy, and the use of the fusible web prevents the t-shirting from stretching and distorting as I sew. Here’s what I do:
- 16a) The new hemline has already been pressed in place. Stick the fusible web in place on the t-shirt side of the hem, on the inside of the shirt. The top of the fusible web goes ¾” from the hem edge.
- 16b) Fold the hem allowance back over the tape and press in place. Your hem is now stuck down. Don’t trim the excess fabric just yet.
- 16c) On the right side of the shirt, stitch all the way around the hem, ¾” from the bottom edge, using the same wide stitch that you used to put in the zipper. (Again, I like the smocking stitch.) Now, cut off the excess, the same way you cut away the excess panel fabric after putting in the zipper.
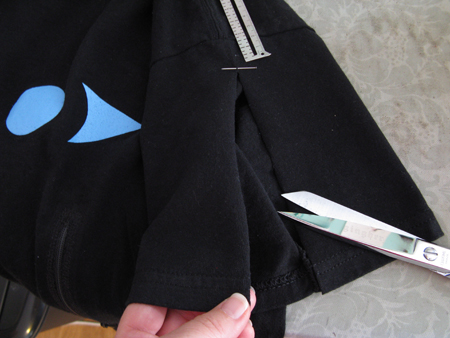
17) The sleeve zippers are done just the same way as the front zipper, except that I opened the zippers their full length, and I was able to use zippers that didn’t need shortening.
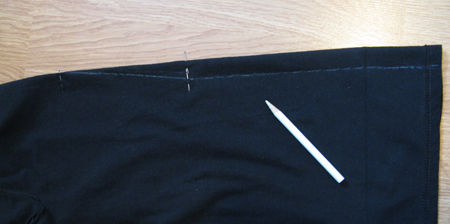
To make the cuts in the sleeves, first press each sleeve exactly in half. Cut along the press line, stopping a good inch short of the top of the sleeve (where it meets the shoulder seam).
18) The insert fabric should be two rectangles that are the depth of the sleeve plus enough for a narrow hem, by the width that you want the zipper to be open at the bottom plus 2”. My sleeves were 7” long and I wanted a 4” opening, so I cut two 7 ½” x 6” panels. Complete using the same steps as used for the front zipper, but leaving zippers entirely open. (You can partially close them for wear, if you like.)
[And there you have it! In another, future blog post, my mom will detail how she did the sweet new neckline for this shirt (see below). In the meantime, you’ve got a newly fitted t-shirt with funky adjustable zippered bits to wear to the upcoming LoadingReadyRun screening, or wherever else you’re headed.
Huge thanks to my awesome mom for making this shirt (which was an auction item for last November’s Desert Bus for Hope), taking all the photos, writing all the instructions, mailing it all to me on a CD and then waiting several months for me to get it posted. Love you, Mom!]

