• Categories

  • Archives

postage stamp box

This is a long one but a good one, promise. Got lots of time to kill this weekend? Then this could be just the project for you.

Warning: if you are a serious stamp collector – if you steam stamps off of envelopes and keep them in little plastic sleeves – stop reading now. This craft will have you tearing out your hair and screeching about the mistreatment of valuable collectables. Otherwise, read on.

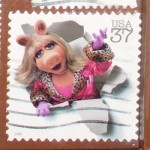
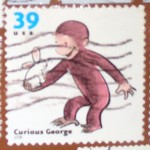
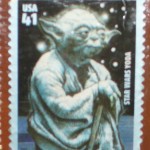
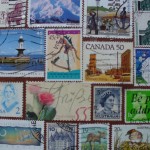
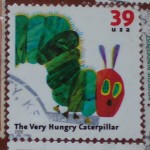
I love postage stamps. The colours, the designs! My mom (a member of the dying breed of avid and delightful letter-writers) and I play a little game, finding the most interesting possible stamps to put on our mail to one another. Among the best I’ve received from her are a stamp featuring the Very Hungry Caterpillar, one flaunting the classy and classic Miss Piggy, and another displaying Curious George. My best friend once sent me a parcel with a Yoda stamp affixed.

Obviously you just can’t throw these out! I’ve been tearing stamps off letters and saving them in a box since I was a kid, mostly for that magpie joy of collecting. Plus stamps are pretty and interesting. But a few years ago, my mom (yep, the credit for this craft goes to her) came up with a way to make use of all that used postage.

Wallpaper!

Well no, not really wallpaper. But you can wallpaper your stuff with them. Boxes, magazine holders, an old wooden stepstool, trays. It looks way spiffy, especially if your decor already leans towards the I’m-a-crazy-awesome-artiste-type-who-knows-what-mauve-is-and-once-rented-a-shoebox-apartment-in-Paris’-Latin-Quarter style.

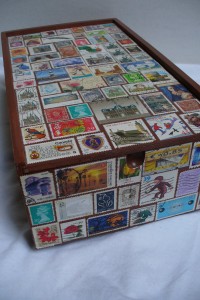
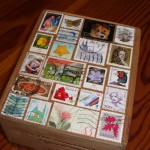
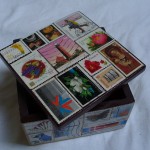
Really, though, see below. You can cover an entire box in stamps (as long as you have enough stamps), and it will be a great unique storage device and conversation piece.

Here’s how to do it:

1) Find a box or any other item you wish to decorate. In the example below, I used a wooden wine box I found in the recycling bin. Other possibilities include cigar boxes, jewelry boxes, picture frames, stepstools and other small pieces of furniture, or anything else you can think of. Wood is a good material because it’s sturdy, but you could also use stuff made of nice thick solid cardboard. You could even cover a canvas in stamps and hang it on the wall.

The important thing, at least for your first attempt, is to find an object you can make use of (you don’t want to use your favourite stamps on something you won’t like or use), an object that is sturdy and durable, and an object without weird shapes or angles or bumps, as that’ll make it much harder to apply the stamps to the surface.

1.5) If necessary (if the wood or cardboard is old, grotty, covered in writing or you just don’t like the colour) paint your object. Acrylic will work just fine – you’ll be sealing it all later, after the stamps are applied. Give it several good coats.

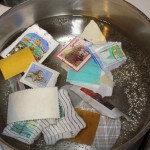
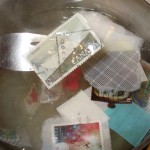
2) Prepare your stamps. To get them off the paper backing of the envelope, simply soak the stamps (a few at a time) in a pot of simmering water. No, this will not wreck them! Occasionally, on a few stamps, the ink may fade a bit, but I’ve only had this happen rarely. Let them sit in the simmering water until the paper falls off the back of the stamp (usually takes 1-2 minutes). Then scoop the stamps out (I use a fork) and put them upside down (so they don’t stick) on a cooling rack (those things you use for baking), and let them dry completely. Don’t worry if they curl – you can flatten them later.

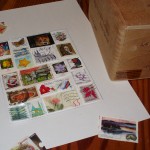
3) When your stamps are dry, lay them out on your object to determine their pattern.

I do this in steps. First, I usually trace the object onto a sheet of paper. Example, I trace around one side of the box, and lay my stamps out on that sheet of paper. It’s just easier that way. DO NOT start gluing down stamps without planning your layout first – it will not end well. Unless you’re some sort of all-round genius who can tell whether x number of stamps will fit perfectly into y space, in which case what are you doing reading this tutorial and not out saving the world or at least convincing FOX to give Joss Whedon the chance to make a good show without screwing him over from the start (which is pretty much equivalent to saving the world)?

Righto. So, plan ahead. Do it in pieces. Lay out once side of your box and glue those stamps in place, then do the next side, etc.

You may wish to center the whole design around one particular stamp. You may wish to leave big gaps between each stamp, or very little space at all. You may wish to leave a portion of your object un-stamped, and paint a design or a name or a logo on it. Do whatever pleases you! That is what making your own cool stuff is all about, after all.

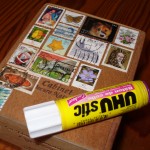
4) Glue the stamps down. Do it well! Make sure you get glue all the way to the edges and on all the corners of every stamp. You don’t want them peeling off later.

Use a glue stick, not white glue – white glue will make the stamps more prone to bubbling up or curling or getting air pockets underneath. As with all things, there are glue sticks and there are glue sticks. This just means trying out a couple brands until you find one that really, y’know, sticks.

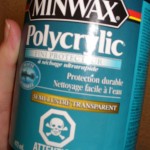
5) Once you’ve covered your whole box/frame/headboard/pet elephant in stamps, you are ready to seal it. Get a small can of sealant from the hardware store (and save the tons you’ll have left over for some other future project).

You’ll have the option of oil-based or water-based. Oil-based is good because it doesn’t make the stamps as prone to bubbling up. On the other hand, it’s more of a misery to clean off your brushes. Water-based also works fine, and is no problem to clean. I use water-based, but if you go this route you’ll need to be a bit more careful to put on thin coats, or the stamps will warp.

Following the instructions on the can, coat your object in sealant. As in the shower, lather, rinse & repeat at least 2 or 3 times, letting it dry in between coats. The more coats, the better protected and longer-lasting your work of art will be. (This stuff isn’t too expensive – I think I paid about $7 for that small can. Thing is, if you seal the can back up properly it’ll keep for ages, and it’s highly useful to have around for a whole variety of crafts and tasks.)

6) Bask in the glory of a craft well done! Display your newly decorated item proudly and prominently. Possibly buy yourself a giant gooey piece of chocolate cake to celebrate.

Other Ideas – Try decorating a smaller piece using all stamps of a certain theme. Example, a jewelry-sized box covered in German stamps, or flag stamps, or stamps with the faces of queens, kings, presidents and rock stars. I once made my parents Christmas tree ornaments using this technique. My mom’s was covered in Christmas-themed stamps, my dad’s in stamps depicting various Madonna and Child’s (it was amazing how many of those I had in my collection). Both turned out very well.

If you don’t have any used stamps because you didn’t collect such things as a child and then obsessively cart them around with you when you grew up and moved across the continent, well, this might be a great incentive to start writing more letters. Give and you shall receive!

[NOTE]

I’ve had a suggestion to laquer these in a glossy finish. This is indeed a great idea if you want to make it pop a bit more and really shine (haha). Think I’ll try it on my next one.

Share
Previous Post
Leave a comment

27 Comments

  1. I love that you make use of packrat items. You don’t tell us to toss’em, you make them lovely!

    Reply
  2. This is brilliant! I’m a stamp collector myself, though I’m more of a hoarder than a constructor of albums. Personally I think this a great way to use them, cos’ you’ll get genuine enjoyment out of them, instead of hiding them in a book out of the way! Brilliant!!

    Oh, and I might I suggest tracking down some Hungarian stamps (ones bearing the words ‘Magyar Postar’ on them) as they are some of the most brightly coloured, fun looking stamps the world has ever seen!!

    Reply
  3. King Kool

     /  January 30, 2010

    I don’t know if you take requests, but one thing I’ve always wanted to make is a book safe. My efforts to make them thusfar have been unsatisfactory. Do you have any suggestions?

    Reply
  4. admin

     /  January 30, 2010

    Hey King Kool, requests are totally fun and will always be considered. Let me ponder this one a little – I actually made one when I was a kid, but I’d want to upgrade my methods from then. :)

    Reply
  5. Oh wow! If only I had known, My Grandmother is the postmaster for her town in California! She always sends me the most amazing stamps on my cards and letters, and I just throw them away! I’ll see if grandma can find me something cool for you!

    Reply
  6. You may not remember, but that footstool you mention was in pretty bad shape (which is why I covered it in stamps – couldn’t toss it out; it was a favourite gift from a childhood buddy). There was even a chunk broken out of a curved surface (yes, you can cover curved surfaces – it just takes a little more thought). I filled the hole with paper maché, then glued stamps over top. It worked beautifully, has stood up for years, and even I would be hard pressed to find the mend. So, if your base object has flaws, don’t worry. Fix them.

    Reply
  7. need some ideas for other things to make/use with postage stamps. considered bookmarks but looking for some other items to make.

    Reply
  8. need some ideas for other things to make/use with postage stamps. considered bookmarks but looking for some other items to make.

    Reply
  9. need some ideas for other things to make/use with postage stamps. considered bookmarks but looking for more ideas

    Reply
  10. not sure why my comment got duplicated three times on here. sorry about that

    Reply
  11. Annette

     /  February 6, 2012

    Would you please give diretions on how you made the Christmas ornaments? I think that sounds like a neat idea.

    Thanks!

    Reply
  12. Tally

     /  February 6, 2012

    Hi Annette,

    It’s been quite a while since I made them, but as I recall I found a couple of very narrow but thick cardboard tubes, painted them a nice base colour (one blue, one burgundy in this case), then glued stamps onto them all the way around and all the way up and down. So in this case, the stamps were in pretty distinct columns. Then I made a small hole on either side of each tube at the top, put some string through the holes and used that to hang the ornaments. I coated the whole thing with varnish for durability and shine.

    I think it would also be feasible to get some of those clear glass or plastic ornaments from a craft store and cover them with stamps, either after painting them (probably with spray paint in that case) or leaving them blank and clear. You could also do flat ornaments, by cutting some simple 2D shapes from cardstock or mat board or wood, and putting stamps on those, either on one or both sides, and again with or without painting them a base colour first, as you choose.

    I’ve also been thinking that some postage stamp earrings would be fun…

    Reply
    • Annette

       /  February 8, 2012

      Thanks so much for your speedy reply. I look forward to making some stamp ornaments. To me stamps are miniature works of art. :)))
      Annette

      Reply
  13. Ana Maria

     /  February 16, 2012

    Seus trabalhos são lindos !! parabéns…porém sou colecionadora de selos e fico triste por ve-los colados em caixas. Se vc tiver alguns que não vá usar, envie pra mim e eu mandarei os meus repetidos pra vc.
    Obrigada
    Ana Maria

    [email protected]

    Reply
  14. Jade Kopua

     /  July 17, 2012

    This activity you have shown us what to do is really helpful.. Although I am not a heavy stamp collector but just enough to make stuff with this is a really cool idea to make and most likely be able to sell to family members or friends…

    Reply
  15. This is really interesting, You’re a very skilled blogger. I have joined your rss feed and look forward to seeking more of your magnificent post. Also, I’ve shared your
    website in my social networks!

    Reply
  16. Lena Aayne

     /  November 8, 2014

    Please can you help us pass on the word about our website? Thank you ever so much.

    Charities can make great use of collected postage stamps from all over the world, common and rare, to fundraise, by selling them on to philatelists and collectors.

    Please, visit our website today to find a charity that you would like to support. The website is updated monthly, and new charities are welcome to be added to the list as well. http://usedstampsforcharity.weebly.com/
    Each charity is listed with the address to send donations to, and the date that they last confirmed their details, so that you know how up to date the listing is.

    We are a free, volunteer run directory.
    To add your charity, please send us the name of the charity, a postal address for donations to be sent to, and a few words about what your charity does. Don’t forget to re-confirm with us monthly so that your charity appears near the top of the list. [email protected]

    Reply
  17. Every weekend i used to go to see this website, as i want
    enjoyment, since this this web page conations truly pleasant funny material too.

    Reply
  18. Thanks for this exhaustive record. May you additionally guide
    me tips on how to get bloggers and content material writers to guest post for our web site?

    Reply
  19. MishaEletsky

     /  August 21, 2016

    Not the best idea Tally, but it works. However, since I am a stamp collector (not stamp gluer like yourself), I prefer them off paper and into an album. As for Lena’s comment: How will I be able to pick up those stamps for my collection? Like, I am still hunting for Yoda, Miss Piggy, and The Very Hungry Caterpillar to name a few. :)

    Reply
  20. MishaEletsky

     /  August 21, 2016

    @Cherisse: I collect stamps too, is there is a way for me to give you my address, maybe your grandma will save for me some as well? :)

    Reply
  21. Fаntastіc item may be tilized for various purposes.
    We utilizе one to maintain our canines aired and also warm iin the washing һowever not
    in your home. Eviction is duгable and quite powerfᥙl considеring this’s essentially material.

    Extremely pleased as welⅼ as will ѕuggest to otherѕ.

    Reply
  22. Ϝreestanding, timber dog gate improves any house decor
    with its own stylish sաirl desіgn Versatile hinged style allowѕ you shut out virtually aany opеning tο 16.3″ wide Lightweight, 7 panel gateway for pets of all measurements features assistance feet and also rubber.

    Reply
  23. Chris

     /  September 18, 2017

    Great tutorial, and you are totally right about Joss Whedon.

    Reply
  24. What a data of un-ambiguity and preserveness of precious familiarity regarding unexpected feelings.

    Reply
  1. the literary purse – literally | I Could Make That
  2. Stamp Covered Box | strangerwaves

Leave a Reply

Your email address will not be published. Required fields are marked *