

I’ve discovered another magical feature of the city I live in: multidirectional wind. It has the stupendous ability to blow in every direction at once, such that you are always facing head-first into it. I just biked across town in said wind, cursing extravagantly and vowing (impossibly) to do things to the wind which my pacifist upbringing would certainly not condone. At one point I had to pedal fiercely in order to keep moving downhill. By the time I got home I was more out of breath than a rabbit in mating season, but without having had any of the fun.
Broadly speaking, all this does have something to do with today’s blog post, since the post is about paper airplanes, which involve wind and physics and stuff that I learned about in grade 7 and then forgot. Which is a shame, because all that science was much more interesting than I ever gave it credit for at the time.
Paper airplanes make great toys (I once amused a 4-year old with them for an entire afternoon). Unlike most storebought toys that say on the box “fun for all ages” and then fail miserably to uphold the promise, paper airplanes actually do have enjoyment potential for anyone and everyone.
A friend recently tweeted that he’d been given a day calendar, where each day was a different paper airplane. Sweet, eh? But he was mildly perplexed by what to do with them all as they mounded up, presumably on his desk.
So this week’s blog post tells you how to build the simplest and sweetest of paper airplane storage devices: a mobile that can be hung out of the way, looks nice and allows you to easily remove your paper airplanes for flying purposes. Sean, this is for you.
Now, while you make your mobiles, I’m off to eat a tub of Häagen Dasz in order to replace every single calorie taken from me on that bike ride, and then some. Cheers.
What you’ll need:
- a long strip of cardboard or thick paper, about an inch wide. (I cut a strip off a piece of posterboard. You can also use shorter pieces and glue or tape them together.)
- scissors
- superglue OR tape
- string
- yarn
- paperclips (equal to the number of airplanes you wish to display) OR wire plus needlenosed pliers with wire-cutting capability
- needlenosed pliers
- large sewing needle
- hole punch
Putting it all together:
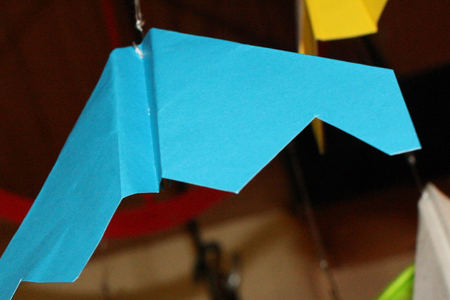
1) If you don’t have as cool a day calendar as Sean, you’ll of course need some paper airplanes. Here are two sites (HERE and HERE) that have some good paper airplane patterns, and I’m sure there are tons more online if only you look. Oddly shaped and un-airplane-like as it is, one of my favourites is actually the Bat, from the first link. It glides in a deeply satisfying and soothing way.

2) Bend your long strip of cardboard/cardstock into a ring and glue or tape the ends together. If using glue, you can use a paperclip to hold the ends in place while it dries, leaving your hands free.

3) While that’s drying, gather your airplanes and use the needle to poke a small hole in the center of each one’s nose.


4) Next, take your paperclips and pull the two sections apart, essentially folding them open so they have a hook at either end.

If you’d rather, you can use wire and needlenosed pliers to make smaller and neater hooks. Just make a small loop at one end of the wire, and a larger, shallow U shape at the other end.

5) Go back to your paper loop and punch holes all the way around the bottom edge, evenly spaced. Punch as many holes as you have planes, and maybe punch a few extra for future, additional planes.


6) Now punch 4 holes at 4 equally spaced points around the ring, this time along the top edge.

7) Cut a length of thread for each airplane. Make them vary in length, some short and some long.
8) Put one end of the thread through one of the holes along the bottom of the paper ring. Bring the other end of the thread to meet it and tie a knot. You should now have a long loop of thread hanging from the hole.


9) Tie another knot in the thread just below the paper ring, to keep the looped thread from moving around.

10) Take the hooks you made in step 4 and loop one end over the string. Then use your pliers to make that end into a closed loop.


11) Do the same thing with each piece of thread and each of the holes around the bottom edge of your paper loop. Hang hooks from each length of thread.
12) Hang each airplane from a hook, using the small hole you made in its nose. See how it looks, and shorten or lengthen any of the strings as you wish for aesthetic effect.


13) Cut 4 pieces of yarn, each of equal length.

14) Tie the end of each piece of yarn through one of the 4 holes you punched along the top edge of your paper circle. Double knot it and trim the ends.


15) Gather the 4 loose yarn ends. Use them to pick up the mobile and adjust any of the 4 yarn pieces so the mobile hangs straight. Then tie the yarn pieces together, making a loop. Double knot and trim the ends.

16) Display in the den, in your kid’s room, in your office. Play fetch with your dogs, but using the planes. Have a paper airplane folding contest. Award a pad of sticky notes and your boss’s favourite pen to the winner.
