A Moment of Immodesty
Several months ago, I had a stroke of utter genius.
I admit to pridefully thinking that I’ve done something rather clever now and then when it comes to craft ideas and execution, but this is the one thing I’ve come up with that I actually think was somewhat brilliant. I’m certain other people have already thought of it on their own, and others will do so in future, but I haven’t personally encountered this idea anywhere else yet. Maybe because I haven’t looked in the right places. Maybe because doll-making types, from what I’ve seen online, seem to keep things awfully close to their chest, as though doll-making techniques are great secrets available only to the properly initiated. Which I think is ridiculous. But anyway.
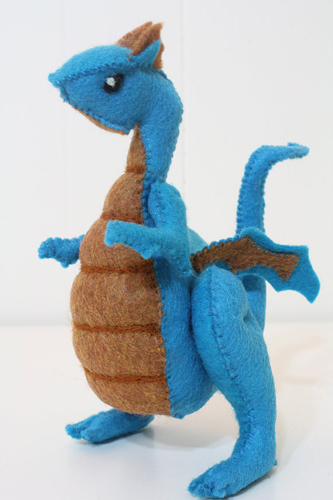
Last summer I made a dragon doll, which is where this sort of started. This dragon doll:
I was trying a whole bunch of new-to-me ideas and techniques on this fellow, and it was pretty much a total crapshoot. He turned out awfully well, all things considered. But what concerns this story is that, in order to give him small, detailed eyes and those bands across his tummy, I decided to needle felt wool rovings onto him to form the eyes and the tummy lines. And it worked really well.
Fast forward to the fall, when I tried to make a little felt goblin doll. I started making goblin heads and just couldn’t get them detailed enough. I’d learned how to make a face shape with a nice pointy nose when I created the Goblin Lackey plush, but now I wanted something with a little more facial detail, and a little less teddy bear-like roundness. I drafted and redrafted the pattern, but it was no good. I simply could not get the kind of detailed shape I wanted just from a pattern. What I wanted was the sort of thing that needed to be sculpted, and you can’t really sculpt with felt.
…
…wait a minute. Needle felting is essentially sculpting with wool. And I already knew that you could easily needle felt wool onto acrylic felt.
But I didn’t have (and couldn’t get) wool exactly the same colour as the felt the goblin was made of.
Then I looked over at the heap of felt scraps leftover from cutting out my goblin pattern pieces, and thought I might as well give it a shot and see if those could work.
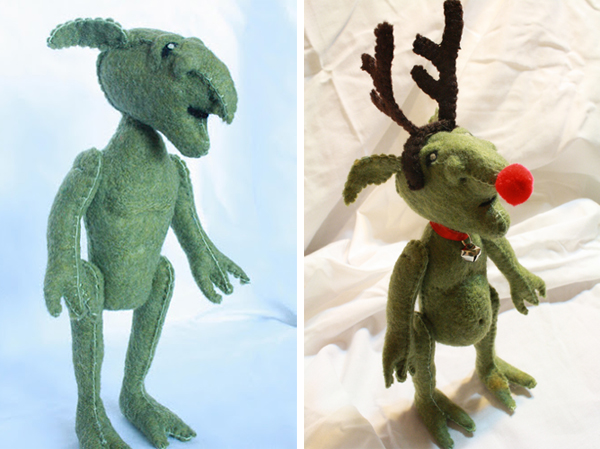
Basically, after a small amount of experimenting, I discovered that my idea did work, and really darn well, too. I created the first goblin below, giving him bumpy eye sockets and bulgy nostrils by needle felting them on from little felt scraps, cut and felted to the right shapes. Then I created a second goblin, this time with an entire felted-on pot belly (he just ate a reindeer).
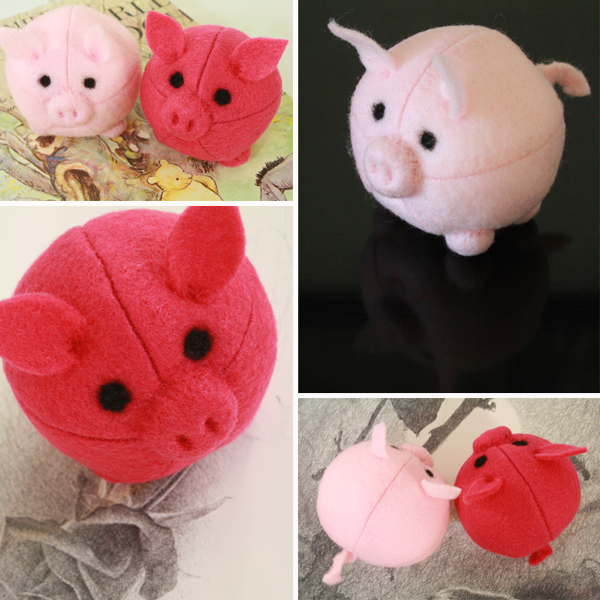
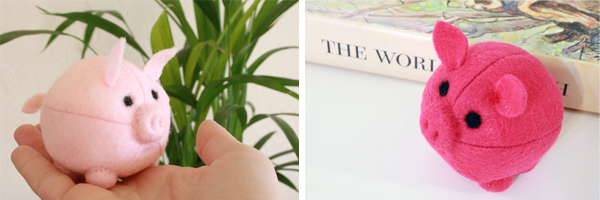
This same technique is what I’ve used to create the felt pigs I’ll be teaching you to make today. It’s a wonderfully useful, versatile and generally awesome technique, and also incredibly simple. Like with needle felting, it just takes a little practice, and you can use it to create practically anything.
An Announcement
Before the actual tutorial, I have a quick bit of general housekeeping: I have finally made an executive decision to knock the tutorials back to a frequency of once-every-two-weeks. So every other Friday, I will post a tutorial. On the alternate Fridays, I’ll be posting other craft-related things – photos and descriptions of other projects I’m working on or have completed recently; general crafting thoughts, ideas and inspiration; the work of other crafters and artists; and whatever else I think might make a worthwhile post.
This is happening in order to save my sanity, and conserve my interest in posting tutorials. It’s become a bit of a chore lately, as I try to balance tutorial-making, commission projects, personal projects, relaxation time, boyfriend time, friends and family time and a full-time job. Never mind stuff like chores. I started this blog when (and because) I was bored and unemployed, and depressed about both those things. I am neither bored nor unemployed (nor depressed) anymore, and while I occasionally wish I was, the monetary benefits of having a job make it unlikely that I will deliberately go back to being jobless for any length of time. Not that I believe in doing things just for money, but paying the rent is sort of important. I have a certain attachment to groceries, too.
I may go back to more frequent tutorials in the future, and I may not, but I want to continue wanting to post tutorials, rather than freaking out over having to find the time to get one done each week. I promise to continue posting cool and interesting* craft things weekly, though.
*The accuracy of those adjectives is subject to my personal opinion, obviously.
And now, PIGS!
——————————————
What you’ll need
materials:
- a round ball made from acrylic felt – see the tutorial for making these – For this project to work, the ball must be made from acrylic felt, and it must be stuffed very densely with polyester fiberfil. You can see more of my notes about this in the sphere-making tutorial.
- small scraps of the same felt you made your spheres from
- very very small scraps of black* felt OR a very small amount of black wool roving – *It can actually be whatever colour you like, black is just the default colour I picked to use for the pigs’ eyes.
- fabric scissors
- pen
- a nickel (or any coin or round, traceable object roughly .8 inches (21 mm) across)
- a Loonie or dollar coin (or any coin or round, traceable object roughly an inch (26 mm) across)
- foam – about 1 1/2 to 2 1/2 inches thick, and only a small piece is necessary – say 4 -6 inches square (this item is used for such a small portion of this project that you could probably get away without it if necessary)
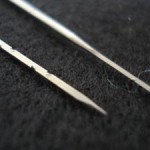
- felting needles – – these are particularly long, sharp needles, with barbs on the ends. You can find them at many crafting stores such as Michael’s, Hobby Lobby and Joanne’s, or at a wool or yarn shop. For most projects you’ll probably want a large size needle and a smaller, finer needle. It’s a good idea to get a couple of extras as well (they’re not too pricey – about $1 to $1.5o each), as it’s fairly common to break a needle or two when first learning how to needle felt. Even the ones you don’t break do take a fair bit of pressure over time and will eventually snap.
——————————————
Putting it all together
If you have never done any needle felting, it might be a good idea to check out this tutorial on making needle felted birds. It describes the basic needle felting supplies (needles, foam, wool) in detail, and teaches you how to make simple felted balls. Needle felting is a very straightforward, very intuitive process. I’ve taught it to a couple hundred people of all ages, and they’ve all picked it up very quickly and with minimal instruction. The second most important thing when it comes to needle felting (the first being to always keep your eyes on the needle) is simply to practice.
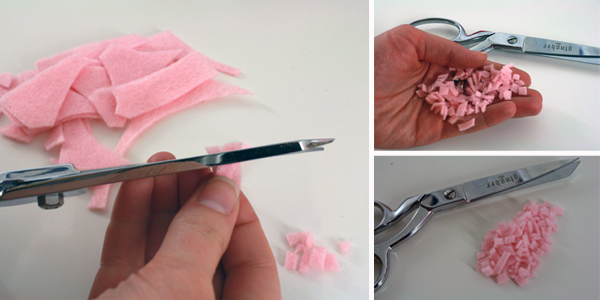
1) Start with your felt scraps, the ones you kept from making the felt ball. Set aside 4-5 of the larger scraps (those at least an inch and a halfish squarish), then cut several of the remaining scraps into little 1/4 inch wide strips.
2) Now gather up several strips at once, and cut across them, making lots of little teeny bits of felt. You should end up with a little pile of felt bits. You don’t need a ton, though, and you can always cut more if you need to. The pile in the photos below was more than enough for my pig. Obviously if you made a larger sphere, and are therefore making a larger pig, you’ll need more felt bits. Keep the bits this same tiny size, though.
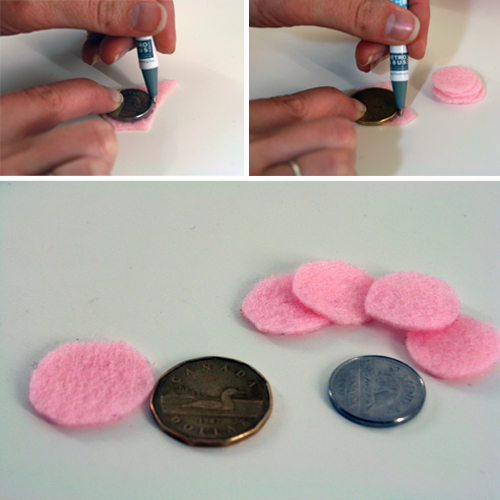
3) Now take your nickel and trace it four times on your larger felt scraps. Trace the Loonie once. (The Loonie is our Canadian one dollar coin. Americans, you guys do have these, go get one from the bank and at least use it for crafting if you refuse to use it as money. For people in other parts of the world, you need a coin or circular object roughly 26 mm or 1 inch wide. You could also trace the bottom of a spool of thread – the short fat spools, not the tall skinny ones – or something else roughly the same size. For the nickel, you need something about 21 mm or .8 inches across – tracing the end of a tube of chapstick or a tall skinny spool of thread would probably work. Totally exact size is absolutely not crucial here. You can also just eyeball this.)
Again, for a larger pig, you’ll need to cut appropriately larger circles.
4) Cut the circles out, making sure to cut slightly inside the lines, so that the pen marks won’t show on the cut-out circles.
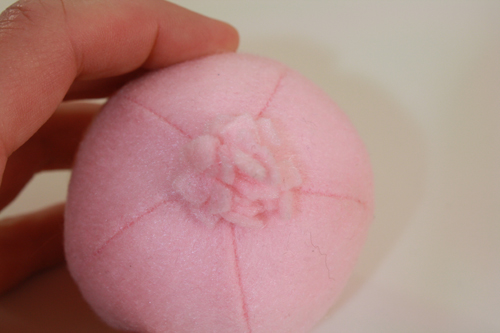
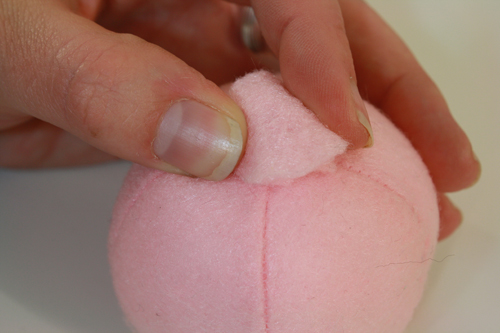
5) Now grab your felt ball and have a look at it. Decide which end (the place where all the wedges come together) looks nicest and neatest – that will be tail end of the pig, which will be more visible. The other, not as nice and neat end, will be the pig’s front, and the nose will cover up whatever isn’t exactly nice and neat. Take a small pile of the felt bits you cut up and pile them on top of the front end of the pig, right over the place where all the sphere’s wedges meet.
6) Now grab the largest of your felt circles, and place it on top of the pile of felt bits.
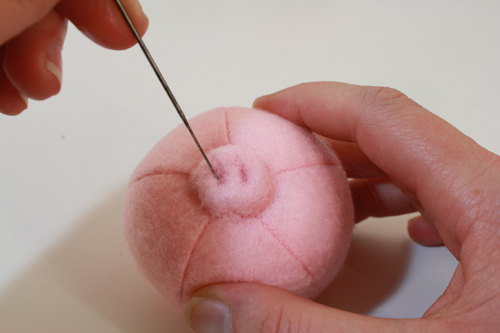
7) Ok, here’s what’s gonna happen. Those felt bits with the circle overtop of them, they form a little lump. This is the pig’s nose. Your task now is to make that lump stay in place, and look a bit more like a nose, and you’re going to do this by needle felting the edges of the felt circle down into the felt sphere, locking everything together and shaping the nose (round and sticky-outy) as you go. If there are too many felt bits in there for the felt circle to fit over them, take a few out. If, as you’re felting the circle down, you feel like it’s not stuffed full enough, poke a few more felt bits in before sealing off the circle.
You don’t need to worry about needle felting those hidden felt bits together, and in fact you don’t want to. The felt circle, held down around the edges, will hold them all in place, and if you start doing a bunch of poking all over the top of the nose with your felting needle, it will just flatten it significantly, ruining the look of it as a nose. Just felt around the edges of the circle, holding the circle down around the felt bits with one hand, and felting the edges in place with the other. Watch your fingers – best to avoid stabbing them if possible.
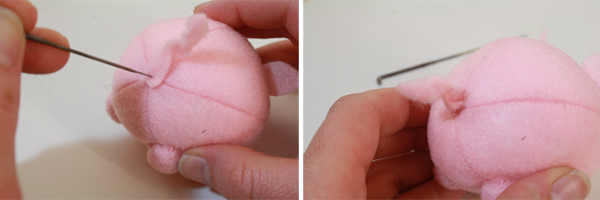
The felting will take some time and repetition, and you’ll want to press the nose down a bit with your free hand so that you can really get the edges of the circle in contact with the felt sphere, giving you as much material as possible for your needle to work with and felt together. The felting process itself works exactly like needle felting with wool rovings. As you go, start to direct the needle slightly sideways, poking in towards the center of the nose a bit, not just straight down into the interior of the felt sphere. This will help the nose to poke out more, giving it more shape and making it more snout-like.
8) Once the nose is securely in place, look at your felt ball and find the seam where you sewed up the last opening (the bit you left open so you could stuff the ball). Note where this seam is – that is “down” on your pig. As in, the stomach area. Keep track of that from now on.
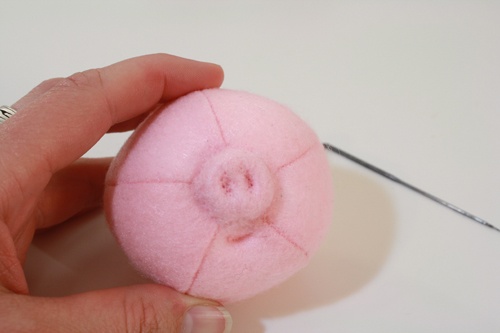
Keeping in mind the “down” orientation you just determined, give your pig some nostrils. To do this, poke with your felting needle in exactly the same little area over and over, forming a permanent indent in the felt. Make two next to each other and you have nostrils. This does take a bit of practice – stabbing in exactly the same teeny place over and over again – so start out slowly with the needle.
You can do the same thing just below the nose to create a little mouth.
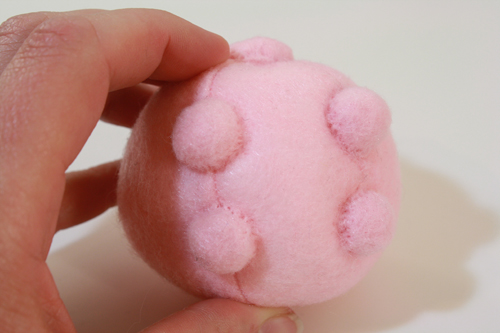
9) Turn the pig upside down so you’re looking at its tummy area, and use your pen to make four little dots on either side of the tummy, equally spaced on each side. This is where you will attach the feet. This step isn’t strictly necessary, but I do find it helps a lot with getting everything evenly spaced. The feet themselves will of course cover up the pen marks you just made.
10) Using the exact same process you used to create the nose, make little feet over each of the pen marks on the pig’s underside. Obviously since the feet are a little smaller than the nose, you’ll need a smaller pile of felt bits for each of them. Try to get them all about the same size. If one or two of them end up bigger than the others, just felt those down a bit with your needle till they’re all the same size.
Also, you can make things bigger with this technique by simple layering another felt circle or two on top of the first one, should you decide that a foot or nose ended up to small. This is one of the wonderful things about needle felting. Too big? Poke it more with the needle to compress it. Too small? Add more material!
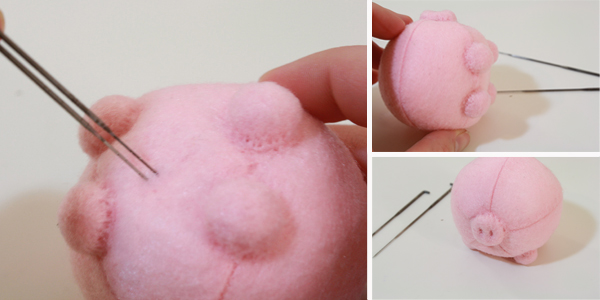
11) Your pig should now have four feet and a nose. Unless you’re making some kind of mutant pig with an extra snout, six legs and a unicorn horn – you just do whatever you want. Either way, the pig’s feet are pretty small, and his stomach may be bulging between them right down to the level of the ground. To flatten the tummy slightly, felt it down a bit using your needle. For larger, less detailed surface areas like this, you can also hold two needles together to make it go a little faster.
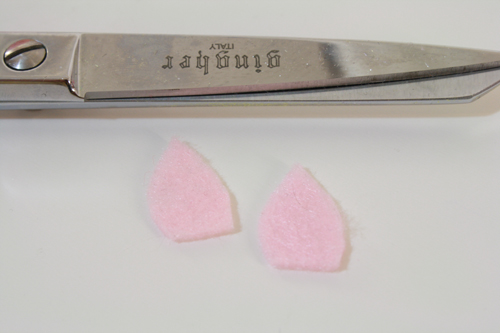
12) Time for the ears! I just eyeball these, cutting a shape from one piece of felt, then cutting around that shape on top of another piece of felt, to create two matching ears. You could also make a little paper pattern to trace, if you prefer that. Either way, cut two ears from your remaining felt scraps.
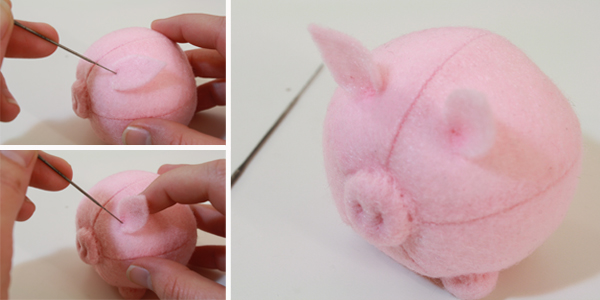
13) Place the bottom of the ear where you want it to be on the pig, and use your needle to felt it into place. Start with the ear lying flat along the pig’s head, and as you felt, prop the ear up from behind with a finger, felting it upright into the pig’s head.
Repeat with the other ear.
14) For the eyes, cut two small bits of black felt – they don’t need to be round. (You can also just use a wee bit of black wool roving, if you’d prefer.) The bits should be a little larger than you want the eyes to be, as they’ll lose some size as you felt them down. Place one of the bits on the right part of the pig’s face, and felt it into place. Use the tip of your needle to shape the black dot, rounding it out.
Repeat for the other eye.
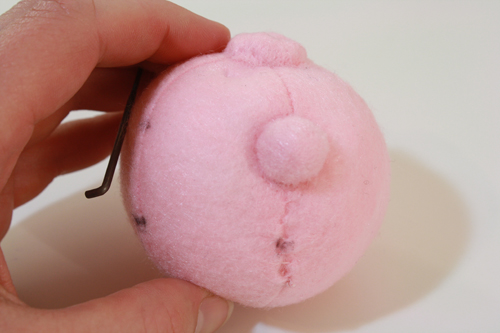
15) For the tail, cut a small rectangle of felt, about 1/4 inch or slightly wider across, and 1 1/2 to 2 inches long.
16) Get your foam block out now – if you don’t have one, you can probably make do with some other squishy, pokeable surface, like a stack of fleece, or an old folded-up towel. Lay the felt rectangle down flat, and towards one end of it, fold it over itself at a 90 degree angle (see the photo below, it will make more sense). Felt the fold lightly in place, then do the same thing once or twice more, further along the rectangle. Use your fingers to bunch it up a bit, making it a squiggly little length of felt.
17) To attach the tail, lay one end of it against the middle of the pig’s backside, where the sections of the sphere all come together, and use your needle to poke and secure it into place.
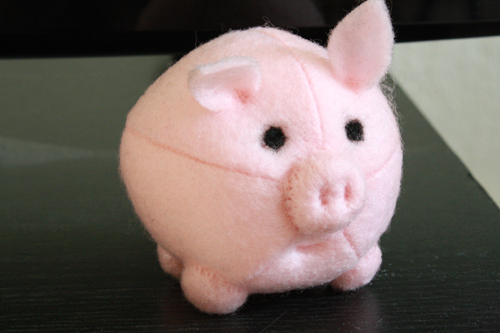
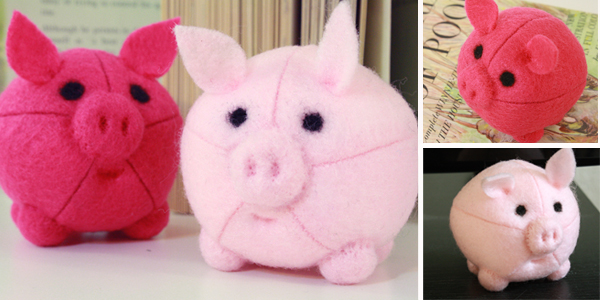
18) Voila, you have a pig!
Make him a friend or three and send them on adventures together!

