We had a thunderstorm this July! And then we had another small one just this week. Two in one year – the apocalypse is surely on its way.
See, I live on the west coast of Canada, where the weather almost never threatens to kill you or does anything terribly interesting at all, really. The thunderstorms we’ve had this summer are the only real ones I’ve experienced in close to a decade of living here. Out here on Vancouver Island we mostly just get a lot of wind. It’s significant wind, sure – in our top floor apartment it sounds like a several families of dragons ate way too many tacos and are expelling gas from both ends. But it’s not the same as a good thunderstorm.
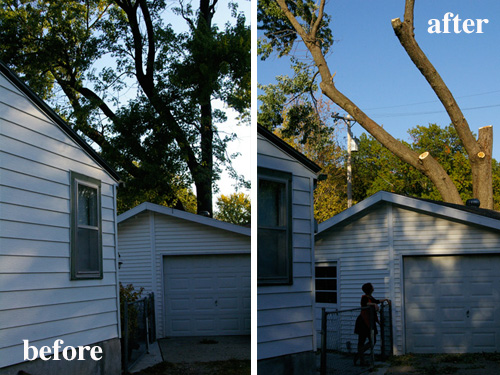
I spent most of my youth in the American Midwest, where I cowered fearfully as a child through the huge thunderstorms we experienced every spring, then learned to love them just in time to move away to a place entirely lacking in celestial conflict. My parents still live in the Midwest, though, and last summer a big storm ripped off half the huge old maple tree in their backyard and dropped it on their neighbour’s garage. Exciting stuff, right?
I visited my parents last October, and the tree was still lying placidly atop the neighbour’s useless garage. City and insurance bureaucracy had left it sitting there indefinitely while they filed the paperwork required to file the paperwork to talk to someone about getting the damn thing removed, or however exactly it was all supposed to work. Which meant that when I showed up for a visit four months later, I got to see all the tree removal, which involved all kinds of big trucks and heavy equipment and guys climbing about in trees. More reasons I miss Midwestern weather.
The neighbour’s garage was looking a wee bit lopsided, what with the tree collapsed on top of it and all:

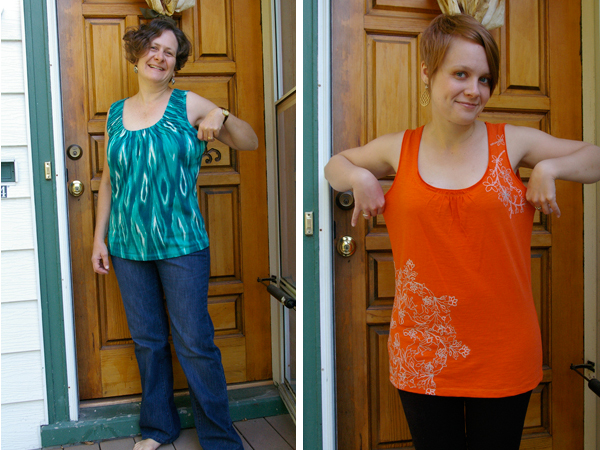
So a bunch of things happened during my visit, but two of them were that my mom and I went clearance sale shopping, and that we then did a sewing project while watching guys with big trucks and chainsaws cutting up trees out the back window.
About the shopping: clearance sales in the Midwest are actually clearance sales. I don’t know why the Canadian West Coast fails so hard at sales, but I constantly see signs that say “Blowout Sale, up to 30% off!!!” or “Clearance Sale, 20% off everything in store!!!” like that’s something to get excited about. In the Midwest, though, they do it right. “Clearance Sale” means at least 50% off, and more likely 70 to 90%. And that’s how my mom and I got some colourful oversized tank tops for a couple bucks each.
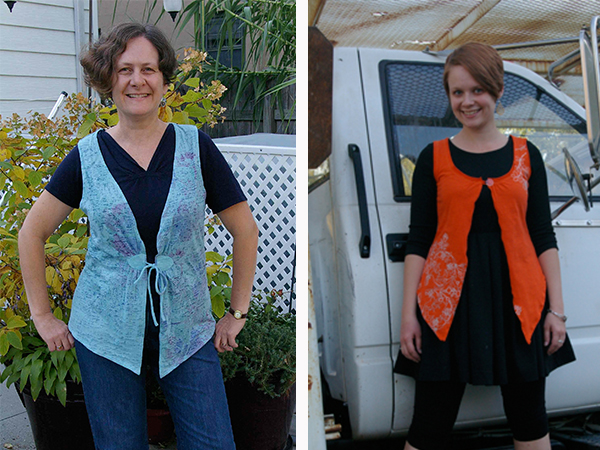
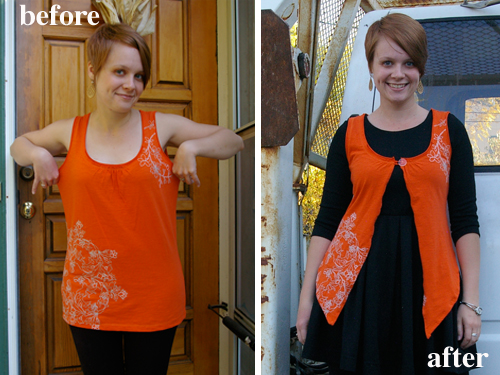
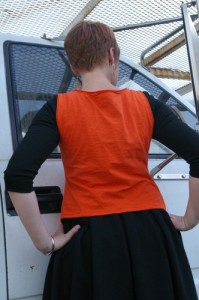
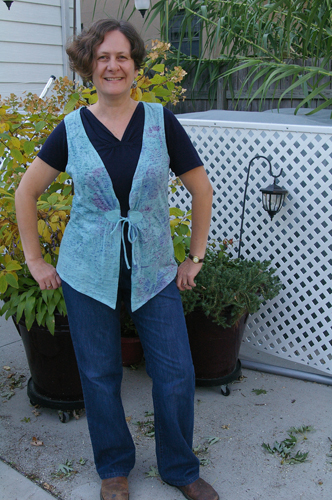
As you can see from the first picture in this post, we turned them into cute little vests, good for the approaching fall weather. Below are instructions for how to make your own such vest, interrupted here and there by pictures of tree-cutting and really big trucks. Because that’s how we do it in the Midwest, y’all.
——————————————
What you’ll need
materials:
- a tank top that is a size or two too large for you
- thread to match the tank top
- one medium to large button in a colour matching or complimenting the tank top
- embroidery floss in a colour matching or complimenting the tank top
- masking tape
- straight pins
- sewing scissors
- a sewing machine
- iron and ironing board
——————————————
Putting it all together
Note: Since my mom and I did this project together, modding one tank top each, the photos will go back and forth a bit, showing one step on my mom’s green tank top, and another step on my orange tank top, and so on and so forth.
1) Acquire a cheap tank top. End of summer sales are a good time to do this… As stated in the materials list, you’ll want a tank top that’s a size or two too big. It needs some extra room so that when you cut it open in front, hem the cut edges and add a button, it will still close up, and so that you can wear it over another shirt, since it’s a vest and all. Note: you could obviously also do this project using a shirt with sleeves, either leaving the sleeves on or removing them and hemming the arm holes. The shirt does need to have a somewhat scooped, lower-than-t-shirt-height neckline, though.
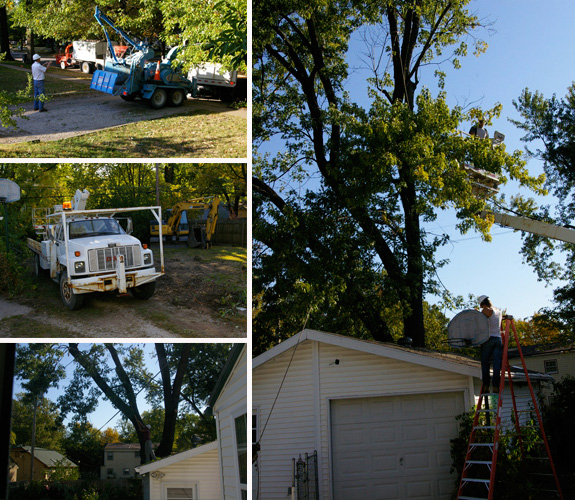
The day before we made our vests, the guys with the trucks rolled in to begin tree cleanup duty. They started out by bringing in a claw thing to heave the massive piece of tree off the neighbour’s garage, and then proceeded to demolish said garage entirely, as it was past saving at that point. (The neighbour’s landlord put up a new garage shortly thereafter, which was way better than the old one anyway.)
So that happened, and then we got started on our sewing the following day as we waited for the next round of guys with trucks to appear.
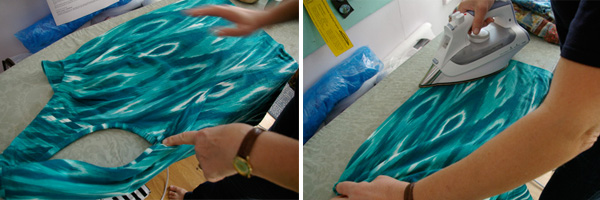
2) Turn your iron on and to the appropriate heat setting for the tank top’s material.
3) Start by folding your tank top in half, but not the way you’d normally fold a shirt in half. Fold it so that there’s a fold line down the middle of the tank’s front, and a fold line down the middle of the tank’s back, and the arm holes are stacked atop one another. Then run the iron along the line of the tank’s front middle fold, making a distinctly visible crease.
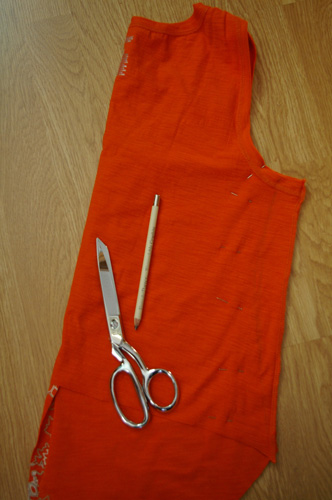
4) Unfold the shirt, and use your fabric scissors to cut very carefully right along the crease line that you ironed onto the shirt’s front.
So that if you put it on, your tank top now has an opening cut all down the middle of the front:
5) Now put your tank top on. Figure out how high up you want it to go in the back (if at all). Giving the vest a shape that goes up in the back and down at the front tends to be more flattering, especially for those of us with hips. But it is optional, and you can leave the bottom hemline as is if you want. If you do want to do that, then just skip ahead to step 14.
Put a pin in the middle (ish) of the tank top’s back at the height you want to cut it to.
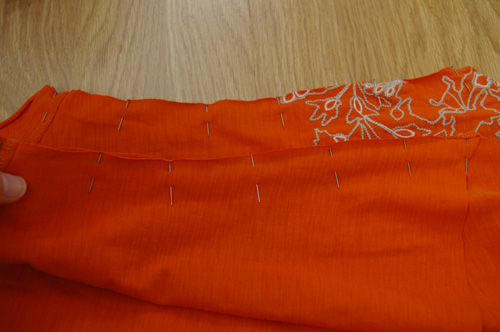
6) Take the top off and make sure it is inside out. Then fold it again the same way you did in step 3, so the cut edges at the front of the tank top are lined up. Pin those edges together. Put a couple of pins in along the shirt’s back fold as well.
7) Note where you put the pin in at the back of the shirt (you can feel it through the fabric if you can’t see it). Make a little pencil mark there.
8) Now draw a line (curved or straight – whatever you like, though I recommend some variation of the curving line pictured below) from the bottom front of the shirt to the mark you made in the middle back of the shirt. Then cut along that line.
You’ll now have something a bit like this:
At this point in our project, the next round of tree removal specialists arrived with their very very large vehicles. In fact, they had to spend some time trimming a tree in the front yard just so they could get their trucks down the driveway to cut down the tree in the back yard. (With half of it missing, the tree was considered an even more unstable risk than before, and might fall on my parents’ house next time, so it was decided that it had to be cut down. Very sad news, as this tree was around 100 years old and had obviously been in our back yard throughout my entire youth.)
9) This step is also optional: if your tank top is particularly baggy and you want to bring it in a bit at the sides, you’ll want to do that now. Again, if you don’t need to do this, skip ahead to step 10.
This process is also outlined here in slightly more detail. Different shirt, same basic procedure.
a) Lay shirt out flat, then fold in half.
b) Pin together at sides, but put the pins in from the edge by a couple of inches.
c) With a pencil, draw an inward-curving line from the shirt’s armpit to its bottom hem.
d) Cut along the pencil line.
e) Remove the pins, then pin together the two separate sides of the shirt.
f) Sew the newly cut sides of the shirt together.
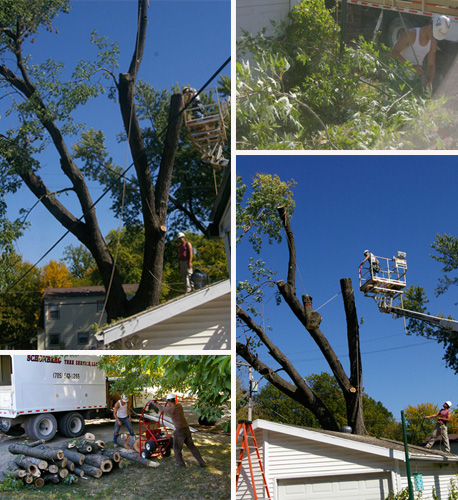
At this point the backyard team was hard at work taking down the tree. They parked their huge truck at the back of the driveway and arched its crane over my parents’ garage to get at the tree behind. They used a sort of harness and pulley system to remove a bunch of the smaller (but still huge) branches. First they wrapped a harness around the branch, then the guy in the crane used a chainsaw to cut it, then the now-detached branch was slowly lowered to the ground with the rope pulley, operated by a guy on the garage roof and a guy on the ground. It was pretty interesting to watch.
10) The next step is to hem your vest’s newly cut bottom edge. It can be tricky to hem a curving edge on stretchy or slippery material (and these tank tops were t-shirt material, which is stretchy and curls up along any raw edges), so we’re going to use my mom’s masking tape trick.
Lay the tank top out flat, inside out. Put a strip of masking tape (or several whose ends match up) along the bottom of the tank top, about 1/2 inch up from the raw edge of the fabric.
11) Now (and we’re looking at pictures of my mom’s tank top now, but doing the exact same steps) sew right along the edge of the masking tape, just avoiding sewing through the actual tape.
12) Next, peel away the masking tape. Using the line of thread you just stitched as a guide, fold your raw edge up right along that line of stitching, and iron it flat, pinning it in place as you go. Then you’ll sew that folded and pinned edge.
For the corners, fold and iron them inward, then cut the very pointy corner bit off entirely, as seen below:
13) Then fold, iron and pin that edge up one more time, so that the raw edge is entirely hidden. Sew it down again, and you’re done with the hemming.
By this point the outer branches of the tree were largely gone, and the team was working on taking down the actual trunk, and chopping up all the bits of removed tree into more managable pieces to take away. The tree had grown in two main halves out of the main, 10 or so foot tall trunk, and the team was taking down one of them. They returned another day to do the rest of the tree. It was a BIG job, after all. They also left us a few smaller chunks of the tree, for my dad, who turns wood as a hobby, to make into things in his workshop.
14) Now all that’s left is to add a button. Pick out one that goes with the shirt and is a nice medium to large size – I’d say at least 3/4 inch across.
13) To make a loop that will hold the button, get out your embroidery floss and follow these steps:
a) Thread the embroidery floss onto a needle and tie a knot at the end of the floss. Then insert it into the very top of the vest’s front opening (on whichever side you like). Then insert the needle into the fabric again about 1/2 to 3/4 inch down, and pull the floss through, but DO NOT pull it tight – leave a loop of embroidery floss.
b) Grab your button and fit it inside the loop of floss. Then pull the floss until it is wrapped cozily (not super tightly) around the center of the button.
c) Now remove the button, but make sure you hold onto that loop of floss so that it can’t move. Holding onto that loop, use your needle and floss to make a second loop beside it of the exact same size.
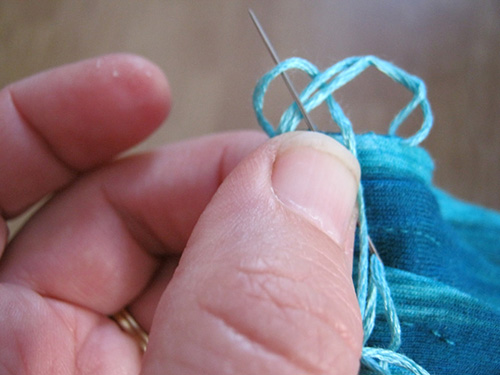
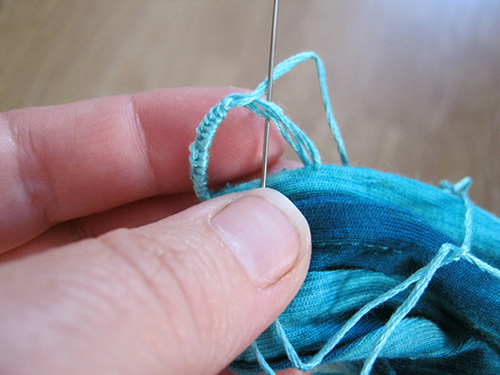
d) Still making sure that those loops of embroidery floss don’t move or change size, take your needle and, at the top of the vest opening, insert it through the middle of the loop of floss, so that it’s behind the floss, then comes through the loop towards you. Then cross the needle overtop of the loop of floss and through the second loop that you’ve just created going around the main loop of floss. Then pull the floss tight. See the picture below for a little less confusion. You are essentially tying a knot around the floss loop. The same way you do to weave friendship bracelets.
e) Continue doing this over and over, going along the entire the loop of floss in a series of these little knots.
f) When you have covered the entire loop of floss, insert the needle into the fabric of the vest, knot it, and trim the excess floss.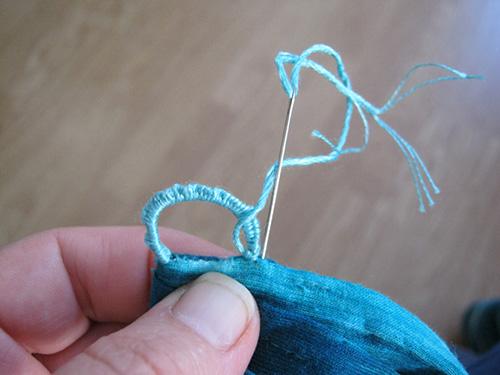
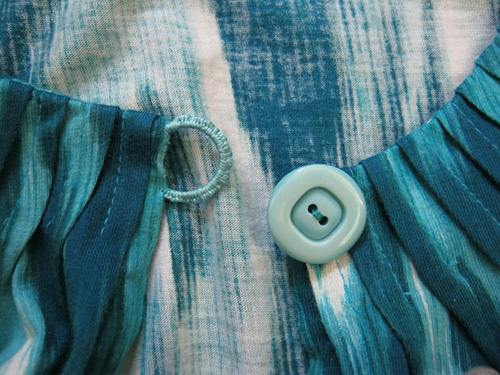
g) Sew your button to the top of the vest’s opening on the other side, and you should have a result that looks like this:
15) Layer on top of a weather appropriate shirt or dress, and voila! New fall vest.
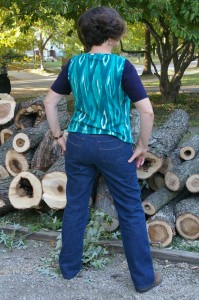
(My mom, who came up with the whole tank top vest mod idea in the first place, had also previously done this one with a different front-closure style:)
We went outside in our new vests to take photos, and to investigate the remains of the tree. I decided to pose for my photos on the front of the workers’ HUGE truck, which they’d left behind for the time being. Because, well just because, really. It was there, and I was there, and that was that, and it was cool. As for the tree, it looked considerably, well, less. New things being created while old ones are destroyed. Cue Elton John crooning Circle of Life.

