Here in Canadaland, Thanksgiving comes early. It seems strange to our American neighbours, but this coming weekend, not even halfway through October, we will be sitting down to a stomach-bloating meal of turkey and mashed potatoes and all the other traditional foods.
My husband and I are hosting Thanksgiving dinner this year, so I thought I’d make some nice festive table decor, to distract from the fact that our bland cookie-cutter apartment doesn’t dress up all that well.
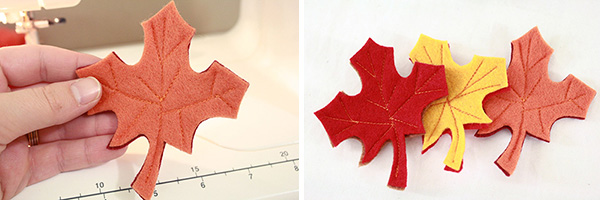
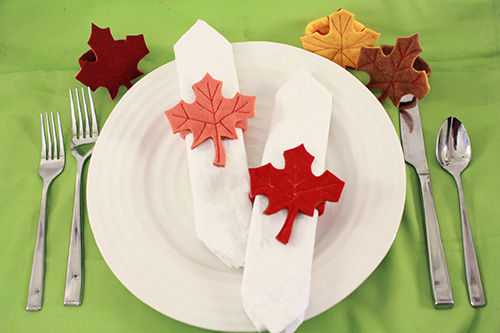
These napkin rings are fast, easy and very colourful. And here’s a bonus: if you spill food on them during your delicious dinner, you can throw them in the laundry along with your other (like-coloured) linens!
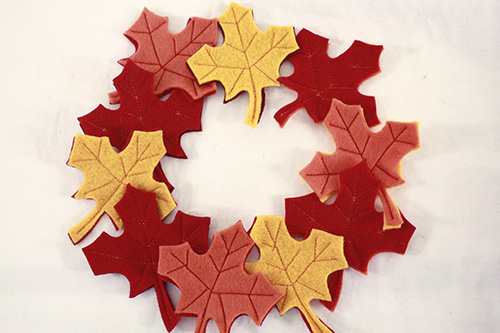
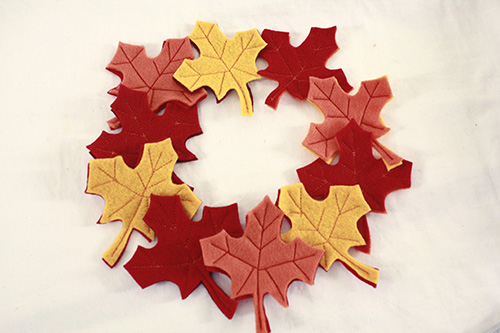
You can also try using the felt leaves to make other decorations, instead of (or in addition to) napkin rings. I’m not finished quite yet, but I’m working on a wreath to hang on our door:
And if you don’t have a sewing machine, this is a project you could definitely do with hand sewing. You’ll just need more time, as is always the case with a hand-sewing versus machine-sewing.
———————————————–
What you’ll need
materials:
- felt in nice autumnal leaf colours
- thread in similar colours
- napkins
- maple leaves template printed onto card stock – I’ve provided this template, or you can just draw your own or do a quick google search for more types of leaves. Or trace a real one.
- pen
- fabric scissors
- straight pins
- small sewing needle
- sewing machine
———————————————–
Putting it all together
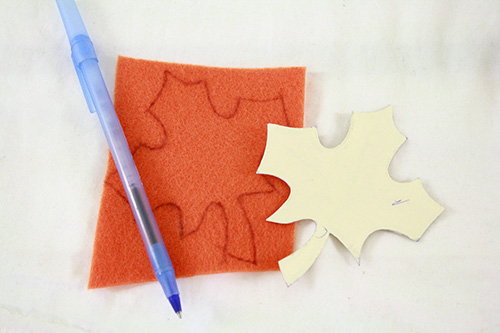
1) Print and cut out your leaf template onto card stock.
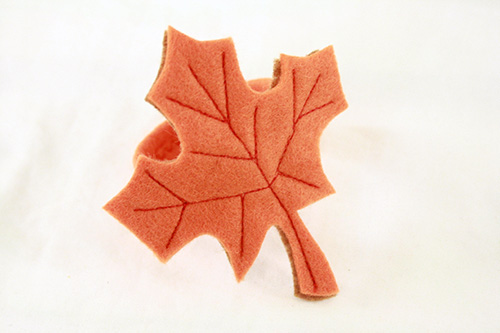
As I said above, you can use this maple leaves template I’ve made, or find or make a different one. My template has several different sizes of leaf, so as to make good use of all that extra paper that you’re printing out anyway. For my napkin rings, I used the leaf on the lower left side – the one that’s got a red outline in the PDF.
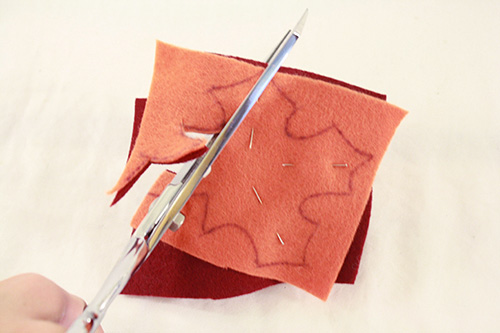
2) Use a pen to trace your template onto a piece of felt.
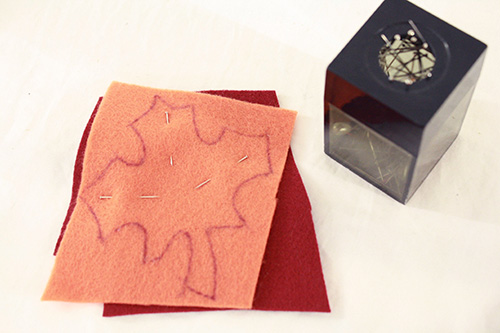
3) Pin this piece of felt to another, different coloured piece of felt*, pinning inside the drawn-on leaf shape.
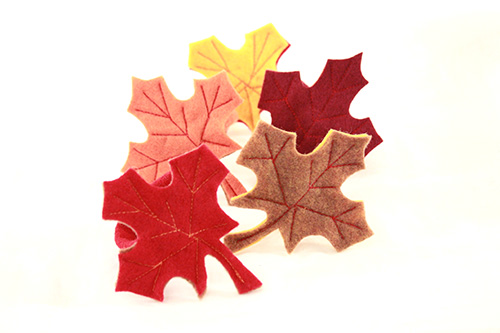
*Ideally, this should be the felt colour pairing you want for your finished leaf. So decide now how you want to pair your colours up. You can also just double up with the same colour of felt, but I like the different, contrasting colours. Makes the finished napkin rings more fun, I think.
4) Cut out the leaf shape, cutting through both layers of felt at once and cutting just inside the pen lines, so that they won’t show on your cut-out shape.
This is really just a way of cutting out more leaves more quickly, and also making sure that the edges of all your leaf pairs match up really perfectly.
Repeat this process till you cut out as many leaf pairs as you want (you’ll need one leaf pair per napkin ring).
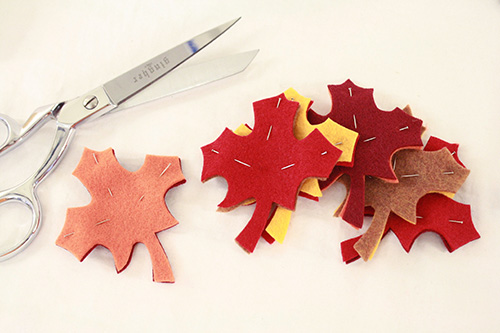
5) Leave the pins in each leaf pair. If you want you can use a pencil (which can be washed out later) to draw the lines on the inside of your leaf, then follow the pencil lines with your sewing machine. I just freehand them with the machine.
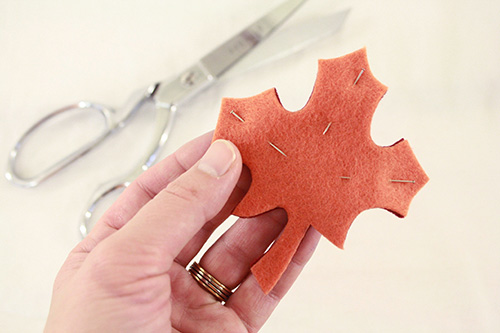
Stitch lines of thread on each leaf pair to look like leaf veins,* removing the pins as you reach them. It took me a couple tries to decide exactly how I wanted to do this, so you may want to trace your leaf template onto paper and try pencilling in the lines to figure out exactly how you want to do them.
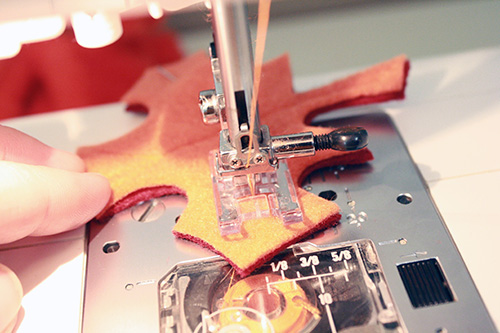
*After trying it both ways, I decided I preferred the contrasting look of using a different colour of thread than the felt to create the leaf veins on each leaf pair. So if the top of the leaf pair was red, I used orange or yellow thread for the veins. That sort of thing. I liked how it made the veins stand out and gave the whole thing more colour.
For those who want it, here’s a more detailed description of how to sew the leaf veins:
Start at the bottom of the leaf pair’s stem. Stitch forward, then back a few stitches and forward again to knot your thread. Stitch a line all the way up to the top middle of the leaf. Put your needle down into the felt, then lift the presserfoot, and turn your leaf around so you’ll be stitch back down the way you came. Stitch back a short ways, then put your needle into the felt again, lift the presserfoot, and turn your leaf to make another line of stitching out to one side at the top of the leaf.
Basically keep doing that, so that you never have to actually knot the thread and take the needle out of the leaf until you’ve sewn all your leaf veins and are back down at the bottom of the stem where you started from.
6) For each leaf pair, cut a rectangle of felt 6.5 inches long and 2 inches wide. It doesn’t really need to those exact measurements, but that’s about the size of rectangle that worked well for me and made a big enough loop for your average napkin ring size.
For each leaf pair, I cut a rectangle the same colour as the front part of the leaf pair.

7) Fold one long edge of the rectangle down about 1/2 inch. Then fold the other edge of the rectangle up about 1/2 inch, so the two edges are overlapping in the middle. Pin them in place.
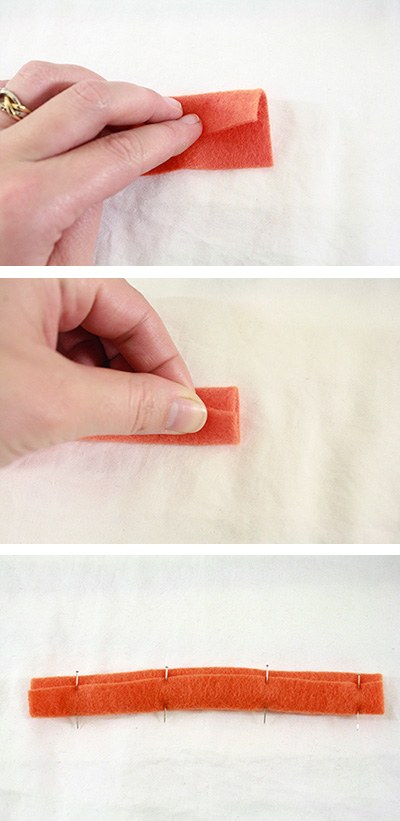
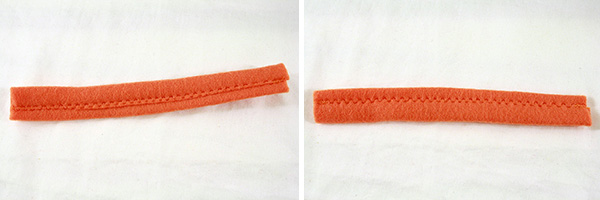
8) Stitch along the top one of those folded-over edges – you can use a straight stitch or a more decorative stitch (which is what I chose).
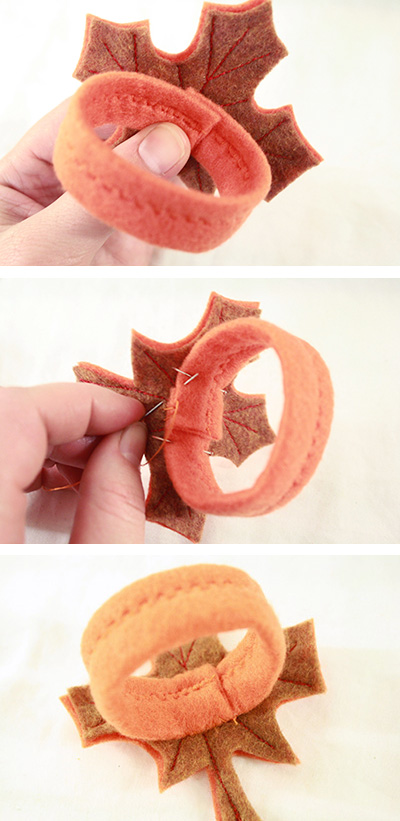
9) Now bend the sewn rectangle into a loop so that the folded-over, sewn-down edge is on the inside of the loop, and the ends of the rectangle overlap. Pin the overlapped part to the back of one of your leaf pairs.
Thread a needle and hand sew the felt loop into place, making sure to only sew through the back layer of the leaf pair, so that the stitches are not visible on the front leaf.
10) Insert napkin, set table, cook a delicious meal and enjoy your Thanksgiving festivities! And if you live in the US, you still have weeks and weeks to do this project before your own Thanksgiving arrives.
Try skipping the loops-on-the-back bit and just use your leaves to make a wreath or other autumnal decorations.