The following thought process frequently takes place inside my head:
Ooh, that thing is really neat. I wonder if I could make something like that.
Hm, well normally that thing is made out of plastic/glass/ceramic/some other material I don’t have access to or don’t have the tools and knowledge to shape and manipulate.
Ok, what do I have that I could make this out of?
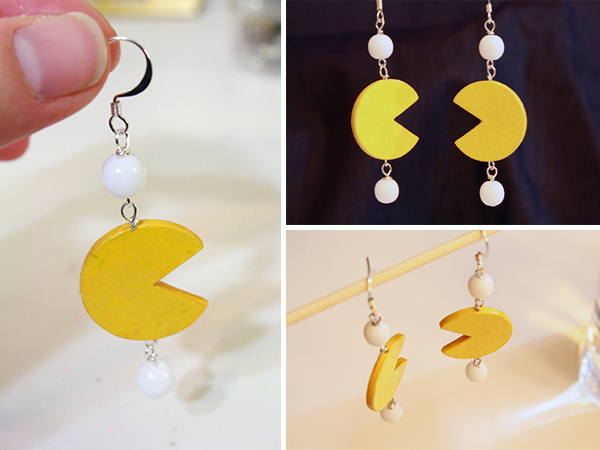
Which is exactly how I first started making jewelry out of glued-together pieces of paper. I didn’t have the ability or resources to cut shapes from metal, so I used metallic paper instead, and made Star Trek com badge earrings.

Those turned out pretty damn well, I thought. But while it works just fine to drill a hole in the tops of some shapes through which to poke jump rings, sometimes you want more of a bead-like object that you can string some wire through without having a visible hole messing up the surface.
That’s what this tutorial is about. Using the example of Pacman shaped beads, it will teach you the method I figured out for making a tidy little hole all the way through your paper shapes, turning them into flat paper beads. No drilling required – all you need is a pencil, ruler and pair of scissors.
———————————————
What you’ll need
materials:
- yellow card stock – the thicker the better, so long as you can cut it and your circle punch can punch through it
- good glue stick OR white glue
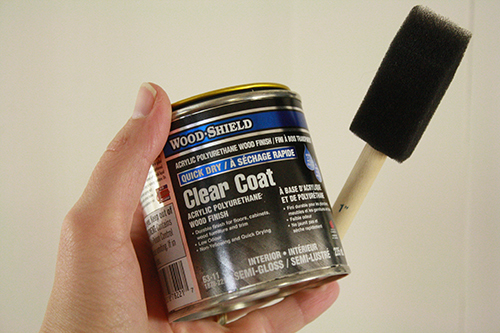
- varnish (I use water-based varnish from the hardware store – it’s pretty inexpensive, it’s tough and durable, and a small can will last you for ages. You can also use Mod Podge, or in a pinch you could even paint on a coat of white glue, which dries clear, though it may have a slight film to it, depending on the particular glue.)
- scrap paper
- plastic wrap or a plastic bag
- fine grain sandpaper
- jewelry findings – whatever you need to turn your beads into earrings or a necklace or whatever you want to turn them into
tools:
- circle punch – I used a 1″ diameter punch, but any size will do. The circle size will determine your bead size, of course.
- scissors
- small paint brush
- pencil
- ruler
- jewelry pliers / wire cutters / other tools needed for adding your choice of jewelry findings
———————————————–
Putting it all together
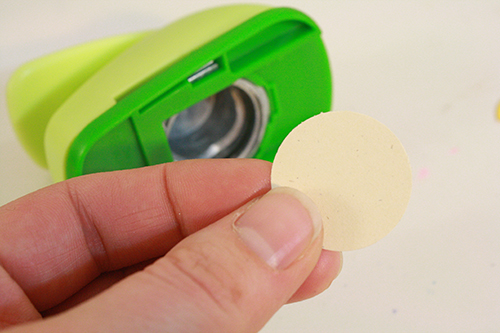
1) First, punch a hole from your piece of scrap paper, which should be regular computer paper weight.
Note: if you don’t have a circle punch, you can still do this project by getting a small round object like a coin or bottle lid and tracing and cutting that out numerous times. It will just be a bit slower and more tedious.
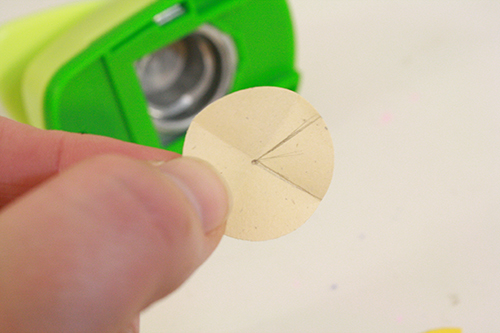
2) Fold the circle in half. Unfold it and fold it in half the other way, so when you open it up there’s now a cross of fold marks.
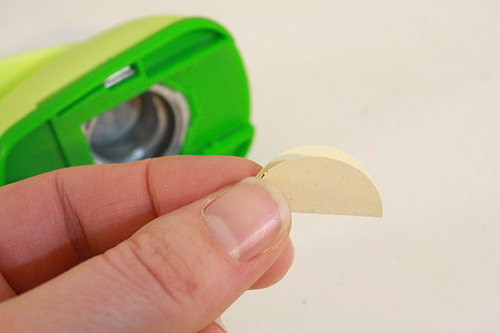
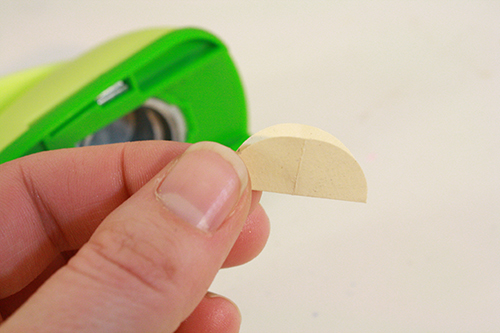
3) Use your pencil to make a little mark in the very center of the circle, where the fold lines cross each other. Draw a straight pencil line along one of the fold lines, from the center mark to the outer edge of the circle. Then draw another straight pencil line a little before the next fold line, creating a wedge a little smaller than a quarter of the circle.
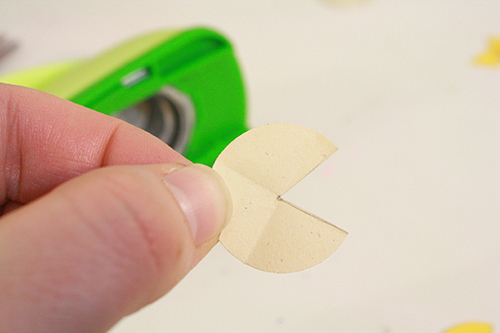
4) Cut out that wedge.
This is your template for your yellow Pacman shapes. I recommend tracing it onto a card stock circle and using the card stock piece as your tracing template, as it’s sturdier and thus easier to trace.
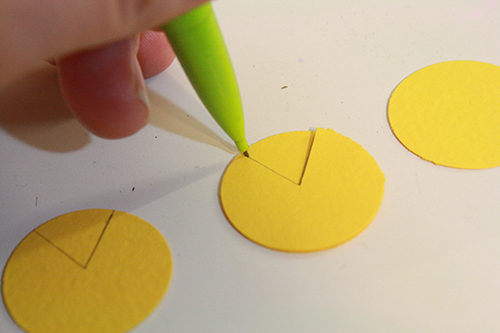
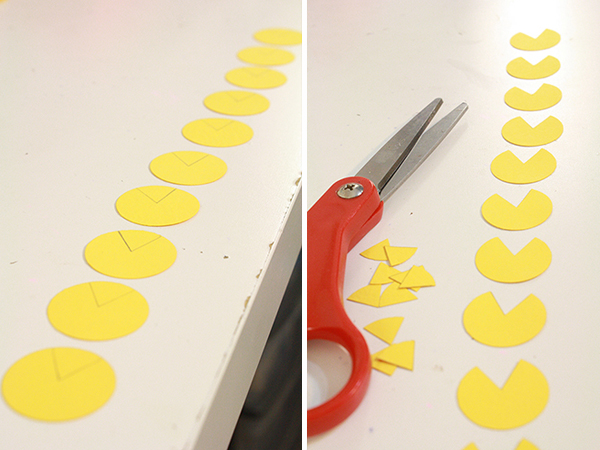
5) Punch out a whole bunch of circles from your yellow card stock. How many exactly depends on how thick your card stock is (if it’s thicker than normal you can use fewer circles), but for your average card stock you’ll want 10 circles per bead.
Then use your template to trace the wedge shape onto each of the yellow circles, and cut out the wedge from each one.
6) Set aside 6 of the circles (per bead). Take the other 4 and lay them out in front of you.
At this point you need to decide whether you want a bead with a hole through it vertically, like so:
or a hole through it horizontally, like so:
A vertical hole is what you’ll want if you’re making earrings. A horizontal hole is handier for putting the bead on a necklace or bracelet.
Once you’ve decided on that, grab your original template piece with the folds in it.
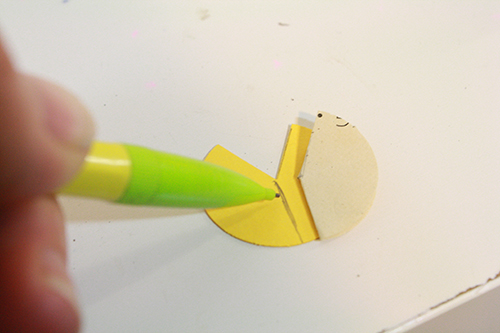
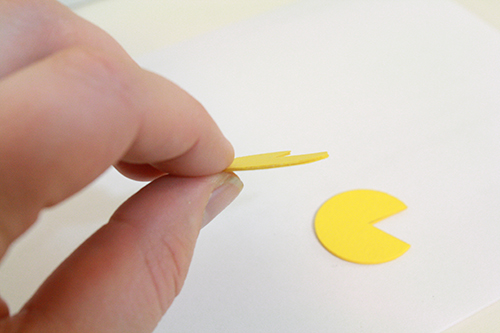
7) For a vertical hole through the bead, fold over the side of the circle with the wedge cut out of it:

Line this up on top of one of your yellow Pacman pieces and trace along its straight edge, creating a straight line up and down the middle of your Pacman shape.

Now draw another straight line, just a wee bit to the side of the first line, the side away from the inner corner of the cut-out wedge.

Repeat for each of the 4 (per bead) pieces you’d pulled out from the pile of 10.
8) For a horizontal hole, fold the template circle in half along the fold line that leads from the corner of the cut-out wedge to the edge of the circle. Match this up on top of your yellow Pacman pieces and trace its straight edge, from the inner point of the cut-out wedge to the outer edge of the circle.
Draw two more straight lines, each a wee bit to one side of the first one, like so:

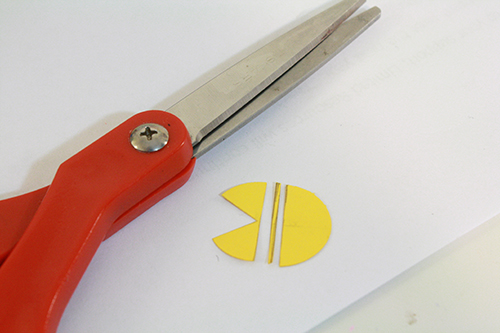
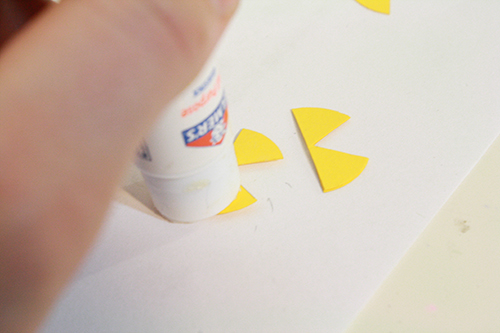
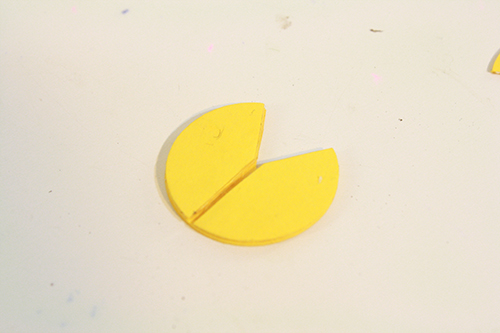
9) Now, for either type of bead, cut along the outer of the lines you’ve drawn on those Pacman shapes.
Vertical beads:
Horizontal beads:
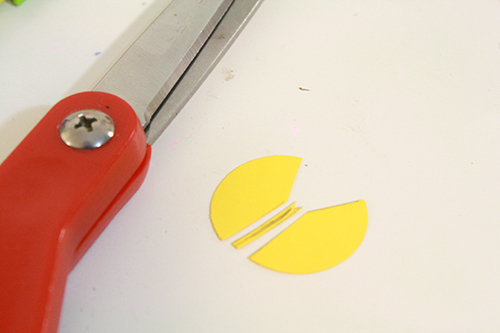
Toss the tiny piece from the middle, keep the two large pieces from either side of the shape.
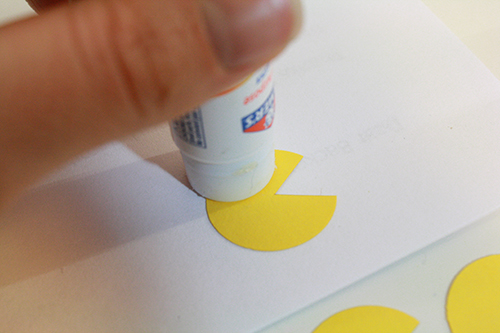
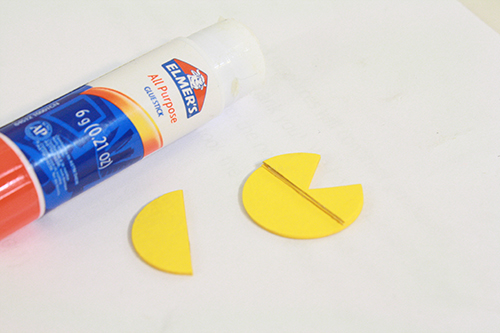
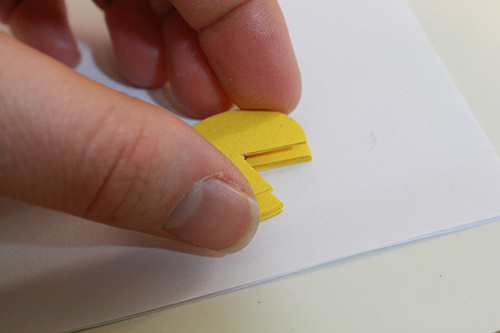
10) Grab those six other Pacman pieces you’d set aside. Apply glue thoroughly to the side of one of them, and attach it to another, making sure all their edges line up as exactly as possible.
If you’re using white glue or any other liquid glue instead of a glue stick, I recommend using a small paint brush to smooth it around on the shape. This spreads it more evenly and thinly, so it won’t warp the paper, and is sure to get all the way to the edges.
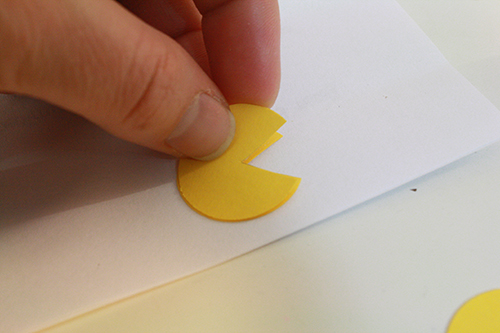
Glue three of the pieces together in this way. Then glue the other three pieces together, but do not glue together the two stacks of three pieces. In other words, you should now have two glued-together stacks, consisting of three pieces each. (Per bead. So, for example, if you’re making two beads at a time, you should have four glued-together stacks made of 3 pieces each.)
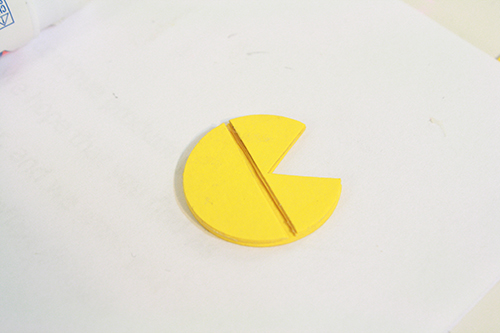
11) Now grab the two halves of one of the four cut-apart pieces. Apply glue to each half, and attach it to one of the stacks of three uncut pieces, making sure the appropriate edges match up as exactly as possible.
Basically what you are doing is creating more bead layers, but with a gap down the middle, which will create the hole that runs through your finished bead.
For a horizontal bead, you’ll have this as your result:
12) Now glue the other stack of three glued-together, uncut Pacman shapes on top of all this, matching up edges as exactly as possible.
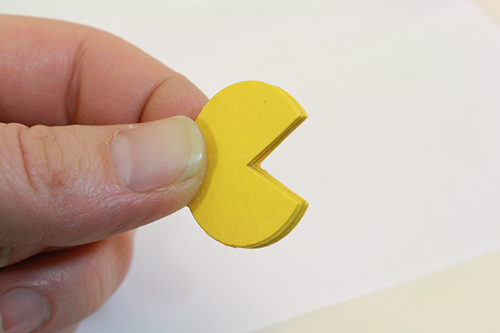
13) Sanding time! This step is not absolutely required in order to have a functional and fairly attractive bead, but I don’t recommend skipping it. It makes the final bead look a lot more polished, and almost completely disguises the fact that your bead is a bunch of layers of paper glued together, instead making it look like one solid object.
Use a small piece of fine grain sandpaper to sand all the outer edges of the bead. You’ll want to do this on the back and the front of each shape: you’re sanding along its edge, but slanting slightly onto the face of the piece as well, so first do it slanting onto the front face, then slanting onto the back face. You’re effectively rounding the edges slightly as well as smoothing them overall.
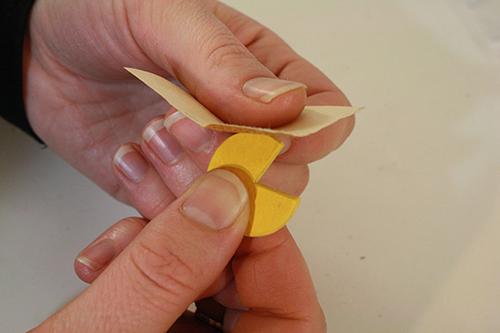
14) Now it’s time for the varnish! Lay down a piece of plastic wrap or a plastic bag (a ziploc type bag, with its thicker plastic, will be better than a plastic grocery bag here). I recommend doing this instead of using a piece of scrap paper underneath your beads while you varnish them.
Why? Because it’s pretty common for a bit of varnish to get onto the side of the bead that you’re not meaning to varnish at that time, the side you’re laying it down on while it dries. When that happens on a paper surface, a bit of the paper will likely adhere to the bead and be difficult to peel off, or look messy when you do remove it. Plastic, on the other hand, will peel off more easily and not leave bits of itself behind.
15) Varnish one side at a time, and then the edges. Apply just a thin layer of varnish at a time, to avoid the paper soaking up too much at once and warping, and to avoid a bunch of unsightly air bubbles getting into the varnish and drying there.
Apply at least 2-3 layers of varnish to each side.
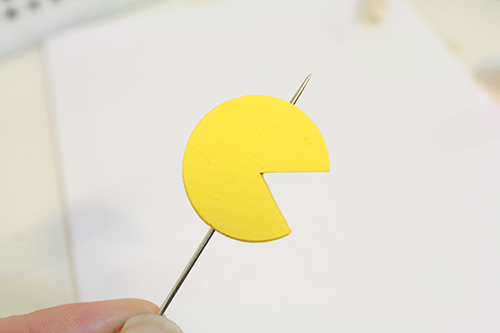
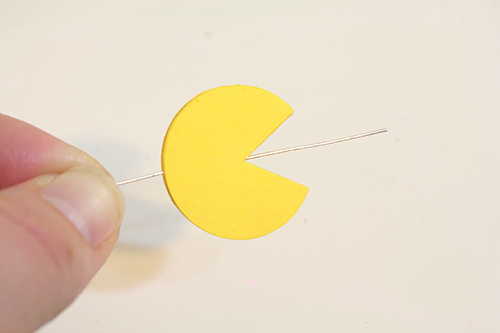
If the holes get clogged up with a bit of varnish, don’t worry. Once all the varnishing is done and the beads are dry, just use a sewing needle or pin to poke through the varnish and open up the hole again.
(Use a smaller brush than the one in this picture – it’s actually a picture from another project that used the same varnish.)
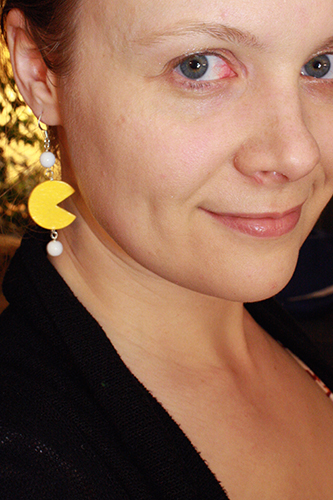
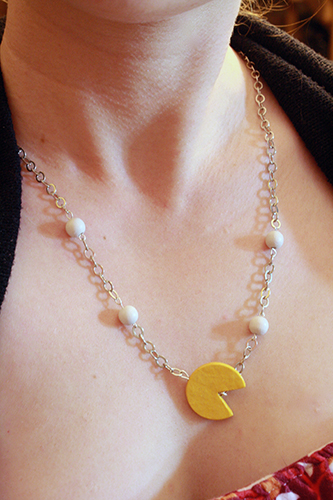
16) Once the beads are dry, use them! Sew them onto something, or attach jewelry findings and other beads – you can find some tips and instructions on doing that in this tutorial.
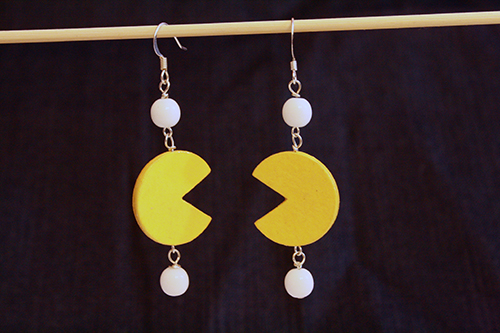
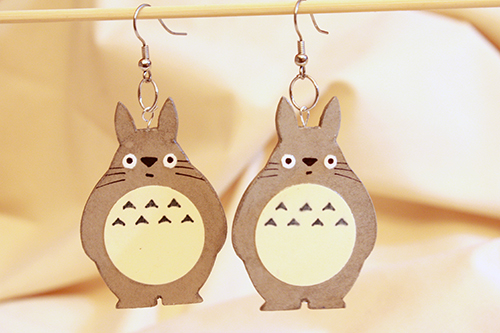
And of course, you can use this general technique to make beads of any shape, whether simple shapes you have punches or die cuts for:
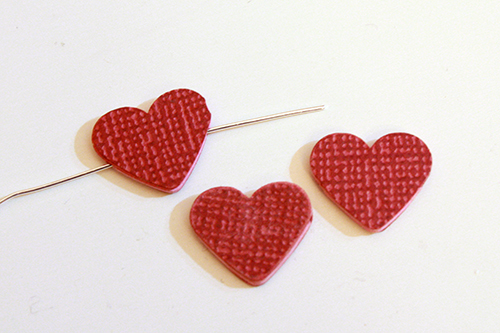
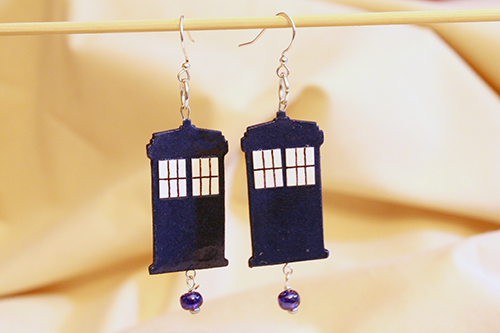
Or more complex or obscure shapes you have to cut out by hand:
And then, of course, wear and enjoy your new finery!