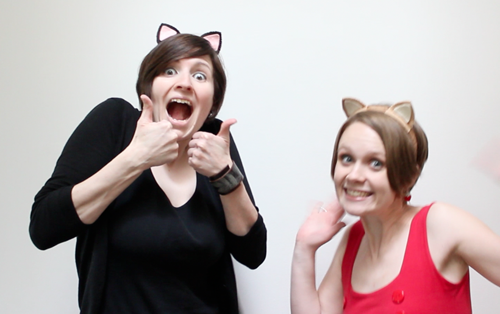
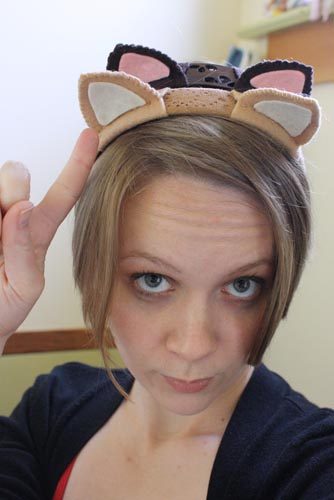
They’re cute, they’re fun, they’re multifunctional – wear them for Halloween, to anime conventions or just because you feel like it. Cat ears are awesome. They’re also super quick and easy to make, as I will demonstrate to you.
But why cat ears, and why this week? Well, it goes back to last November, when the week-long charity event Desert Bus for Hope was held here in Victoria, BC. Currently preparing for its fourth year, Desert Bus was begun by my pals over at LoadingReadyRun. Every November we get together, play the world’s dullest video game 24/7 and stream the whole thing online. The point is to raise money for the wonderful Seattle-based Charity Child’s Play, which donates toys and games to children’s hospitals worldwide.
Today, we’re announcing Desert Bus 2010 craft-along news over at LoadingReadyRun.com. This is a chance for crafters and artists to donate their original work to Desert Bus to raise even more money. Check out the details (and a silly video) here.
So that’s the “why now” bit. But why cat ears?
It’s kind of a long story. Suffice it to say that last year a generous if quirky individual (who we love!) donated several hundred dollars to Child’s Play in return for myself and Kathleen wearing cat ears for several days of the event. But we didn’t have any cat ears. So naturally, I made some.
The whole point behind the construction of these ears was that I be able to make them quickly, on-site (so without a sewing machine) and using materials I already had at home.
And now, here is how to make your own pair of Desert Bus for Hope cat ears. Meow!
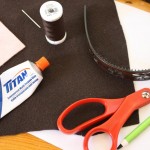
What you will need:
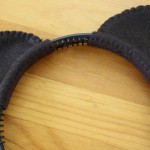
- headband – doesn’t matter what it’s made of or what it looks like, though you may want one the same colour as your cat ears, or as your hair. You do want a thick headband, about an inch to an inch and a half wide. Those super thin ones won’t work too well.
- felt in 2 colours – one will be the main colour of the ears, the other the colour of the ears’ inside. Sure you can do these in normal cat-ear colours (perhaps matching your own hair colour, perhaps in contrast to it), but you can also have bright pink or purple feline headgear, or any other colour. Why not?
- paper – feel free to use stuff from the recycling bin – it’s just to draw a pattern on.
- pen or pencil
- scissors
- straight pins
- small sewing needle
- thread or embroidery floss – in the same or a similar colour as the main colour of your cat ears
- superglue
Putting it all together:
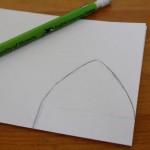
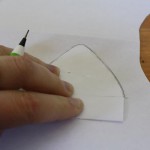
1) Fold your paper in half.
2) Draw a line parallel to the folded edge of the paper. The distance between the line and the folded edge should be approximately equal to the width of your headband.
3) Starting on the line you’ve drawn, sketch a triangular cat ear shape. Make it a little bigger than you think you’ll want your ears to be; you will lose a bit of the size with the sewing step.
4) Cut out the ear shape, including the rectangular space between the bottom of the ear and the paper’s folded edge. This is your cat ear pattern.
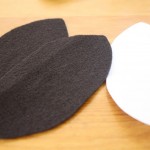
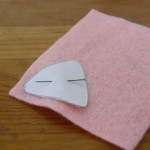
5) Pin your ear pattern to your chosen colour of felt. Cut around it.
6) Repeat to get the second ear.
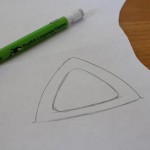
7) Grab your paper again and trace your cat-ear pattern. Only trace the triangular part, not the rectangle below it.
8) Sketch another, smaller triangle inside the first one that follows the same lines, but about 1/4 inch in.
9) Cut this out and set it aside. This will be your pattern for the inside of your ears.
10) Thread your needle.
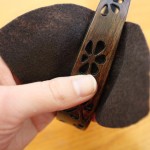
11) When you have both of your ears cut out, wrap one around one side of the headband. Make sure you figure out exactly where you want it to sit before you start sewing it in place in the next step. Especially if your headband has those little teeth on the inside, because once you sew the felt onto one of those suckers, it’s gonna be a nigh-impossible pain in the ass to shift it to either side.
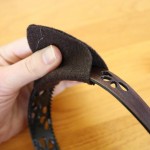
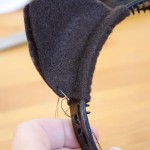
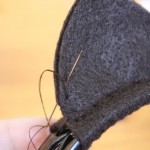
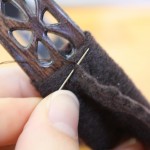
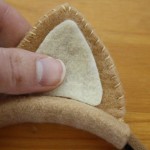
12) Match the two sides of the ear together. Hold them in place as you start sewing. Starting at the base of the ear, pinch both sides together tightly and insert the needle. Stitch across the entire base this way. The bottom of the ear should now be pretty firmly attached to the headband, the ear itself sticking up from the middle of the headband.
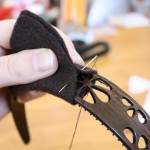
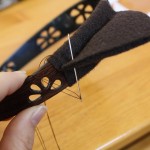
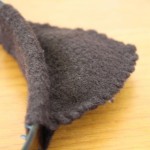
13) Stitch around the outside of the ear, sewing the two sides together.
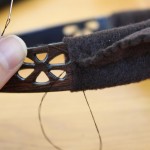
Now I’m gonna assume for a minute that while many or most of you reading this post know how to do basic hand sewing, some of you may not. So here’s a brief explanation of exactly what this stitching looks like.
- a) Starting, your thread is dangling from one side of the felt.
- b) Insert your needle into the other side of the felt – the side opposite from where your thread emerges. You’ll want to insert the needle just a bit further along the felt from where that thread emerges on the opposite side.
- c) Pull the needle through. Pull the thread tight, but not too tight. You don’t want the thread to be loose, but you also don’t want the edges of the felt to pucker to much and take on a scalloped shape.
- d) Repeat. (It should look a bit like you’re wrapping your thread around the outside edge of the felt.)
14) Once you have made it all the way around the ear, knot your thread and cut it off.
Again, a quick how-to-knot-thread tutorial for any who don’t know:
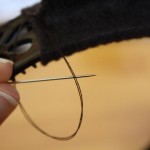
- a) Pull your needle through the felt, but do not pull the thread all the way through.
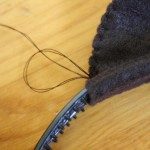
- b) Looping back around, insert the needle through the loop of thread.
- c) Now pull the needle tight. Repeat this two more times for a secure knot.
15) Repeat steps 11 – 14 with the second ear.
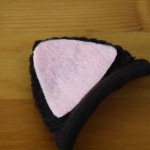
16) Once both your ears are sewn on, take your inner ear pattern and place it on top of one of the sewn ears.
17) Trim the pattern as necessary to fit inside the ear.
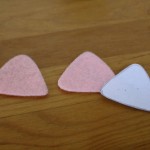
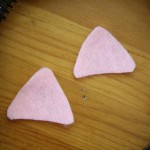
18) Pin inner ear pattern to the second colour of felt and cut around it.
19) Repeat.
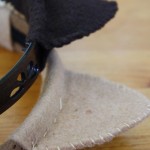
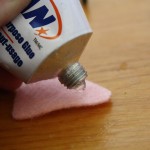
20) Glue each inner ear piece to the middle of each cat ear.
21) You’re finished! Wear your ears everywhere you go! Use them to raise money for the children
Meow.





Snowfire
/ May 16, 2010I will admit, the entire thing came about due to their being a dog on the feed and no felines. So I felt obligated to balance the score. Considering the ears stayed around for the rest of the event, I think I did pretty well on that note ^^
Mom
/ May 17, 2010To Snowfire: …and now your cat ears caper has come up again on this blog, so it seems to me you’re getting all sorts of entertainment value from your generous contribution to Child’s Play! :-) That said, do you have any of your “quirky” suggestions for crafts one might invent to tempt you during the next iteration of Desert Bus for Hope?
Dissolved Girl
/ July 24, 2010Those are great. I wish I would have seen this post before I spent money on buying a pair. :-(
Dissolved Girl from Swap-Bot
Kristen
/ October 23, 2010I made some of these for my daughter for Halloween and they turned out great! I didn’t sew, just used hot glue to stick the felt ears together and put the inner ear on and it worked just fine. Thanks!
Becky Button
/ October 25, 2010This tutorial is brilliant and has just saved my life after I decided to change my Hallowe’en costume at the last minute to Basement Cat :3
admin
/ October 26, 2010Sweet! I’m so glad to hear this tutorial is being used!
Brooke
/ December 6, 2010I love these ears! I have always wanted to make them but I knew I would muck it up some how. so now next year i shall wear them while i watch desert bus. thank you so much. :D
The post was on my birthday too!
Voni
/ September 12, 2011This is awesome! I’m planning on using this tutorial and the fairy wings one to help me make a My Little Pony costume for Halloween. Thanks Tally, this is going to be so helpful!
admin
/ September 12, 2011Sweet, so pleased that this is useful for you, Voni! I`m planning to do some Halloween costume posts in October (if my costume projects turn out as I hope, of course), and I`d love to see what other people are coming up with for fun homemade costumes this year. Love the MLP idea. :) Do you have a place you`ll be sharing pictures of your costume when it`s done?
Voni
/ September 14, 2011Cool, looking forward to the Halloween posts! If the costume comes out properly I’ll be putting up pictures on my blog (www.squarelobster.blogspot.com, PLUG PLUG PLUG). :D
Rathi
/ September 24, 2011This is awesome! FINALLY, a cat ear tutorial, that looks just sooo cute too. I have been looking around on the net to make hello kitty ears headband for the lil girls who are coming to my daughters 3rd birthday party and this was a life saver!!! thnk you so much, I added your page to my favorites so I can send you a picture of the headbands after they are done..thnx a ton!
N.E
/ September 27, 2011so so cute !!
Thank you :)
JustMeghann
/ October 22, 2011My 4 yr old daughter is going as Hello Kitty this year for Halloween and I couldn’t find white cat ears anywhere! I’ve found black and leopards and other wild colors but no white ones. I almost bought a pair of white bunny ears and thought about tweeking them into cat ears. I’m so happy I found this post before I bought those $7 bunny ears when I’ve got all the materials I need here. Thanks!
karebear!
/ October 28, 2011This is great! I made my own headband to go with it also! Thanks!
admin
/ October 28, 2011Yay! So glad people are finding this useful.
emily
/ October 31, 2011This is absolutely brilliant! Thanks so much for the wonderful tutorial =^ w ^=
Jane
/ January 21, 2012Brilliant!!! I looked everywhere today to find cat ears on a headband and there was nothing! Instead I found your website and made them myself! Thank you for the great tutorial!
alisha
/ June 7, 2012i loved the cat ears me and my bezzie did them and we loved it it was so fun!!!
sooooooooo thanks
Tally
/ June 8, 2012Thanks, good to hear that you guys had fun with it! :)
sarah
/ June 7, 2012it rocked me and my bff did it and it was so fun and easy to do! thanks! nyan!
Tally
/ June 8, 2012Awesome! Glad you enjoyed the project! :)
eyeliah
/ June 22, 2012Thanks for your help! :D
Anne
/ December 20, 2012Best tutorial ever. My daughter is thrilled and I can’t believe how quick and easy this was. And super cute! Thank you Thank you!
Tally
/ December 20, 2012Thanks Anne! So glad you and your daughter enjoyed this project. :)
Tai
/ August 22, 2013Wow these are awesome and so simple! My friend and I are going to make these soon and I’m going to go full costume with it (: I’ll be sure to come back and leave a link to a picture if all goes well.
Lindy
/ September 27, 2013I just learned how to sew, and I needed to make some cat ears yesterday morning before my two year old went to her mommys morning out play school…..they were having a Jaguars football party. No felt in the house, so I cut up one of our many coozies, stitched it right up, and we were out of the house by 8:30. Such a special mom moment. Thanks!
Estella Encina
/ June 24, 2014WOW!!! It was very helpful tally.. I’m super glad I found this AMAZING WEBSITE :)
Emily
/ October 23, 2015Thanks for sharing! So so cute! This is just the tutorial I needed to pull together an easy cat costume for Halloween at my son’s wishes that I go as Daniel Tiger’s pal, Katerina Kitty Cat. Since it was nearly impossible to find white cat ears, I was left to craft them on my own. Thanks for the easy sewing tutorial as well as it has been years since I tried my hand at that.
Iris Gallon
/ November 3, 2015I had a last minute idea to make cat ears and these are perfect!! Thank you for a simple, aesthetically pleasing product and easy to follow directions. :)
Jennifer
/ November 5, 2015I followed your easy instructions for some last minute preschool Halloween day cat ears! I used an old black t-shirt instead of felt since I couldn’t get to the craft store in time. And I stuffed mine with fiber fill for a cute puffy look.
Thanks for sharing – it came in super handy!!
Jennifer
/ November 5, 2015Jennifer
/ November 5, 2015Jennifer
/ November 5, 2015Click here for pic!
game kamen rider gaim lockseed henshin
/ June 29, 2016Fantastic news for iPhone and Ipad consumers! Do u wish to have Kamen rider on your hand?. You have often seen heroes many times on television, at this moment It’s a chance to think&guessing them
game kamen rider gaim lockseed henshin http://apple.co/293e5r0
Partyears
/ September 17, 2016This listing is for 1 dragonfly antennae and Dragon wings headband birthday party favors. Great for the guests to wear at the party or give out with the invitations. Please describe in the notes section at checkout the color for the outside and inside. I can also do custom colors including all the shades of the rainbow.
スーパーコピーブランド専門店
/ December 15, 2017スーパーコピーブランド専門店
ぜひ一度のスーパーコピーブランド品をお試しください。
驚きと満足を保証できます。
ご利用を心からお待ちしております。
営業時間: ご注文はオンラインにて年中無休24時間受付けております。
diy metal ikea
/ July 13, 2019You are so interesting! I don’t believe I’ve truly read anything
like this before. So great to find someone with some original thoughts on this subject.
Really.. thank you for starting this up. This web site is one thing that’s needed
on the internet, someone with some originality!
hardcore fick xnx video
/ July 14, 2019Thanks for sharing your thoughts on ficken video. Regards
時計スーパーコピー
/ September 2, 2019ブランドコピー(N級品)優良店!
2019年人気貴族ブランドコピー(N級品)優良店!
ルイヴィトン、シャネル、グッチ、ロレックス、バレンシアガ、
エルメス、コーチ、ブラダ、クロエ大激売中
★高級品☆┃時計┃バッグ┃財 布┃その他┃
◆★ 誠実★信用★顧客は至上
●在庫情報随時更新!
品質がよい 価格が低い 実物写真 品質を重視
100%品質保証 100%満足保障 信用第一
★人気最新品┃特恵中┃☆腕時計、バッグ、財布、ベルト、アクセサリー、小物☆
★当店商品送料無料日本全国!
休業日: 365天受付年中無休
NathanGrets
/ June 13, 2023vulpyx.com
Luke Moliterno
/ August 27, 2023I’m wary of online security when shopping, so I always be sure to buy from trusted websites. Best sellers 2023
random person you don't know
/ March 21, 2024I JUST WUV CATS :3 (UWU)