
Throughout the ages, many famous figures have proclaimed that nothing is certain but death and taxes. This seems to me either a poorly thought out remark on the part of Daniel Defoe, Benjamin Franklin, Margaret Mitchell and others credited with its pronouncement, or it indicates that these people ran around naked and did all their reading at the library. Because what is inevitable for me, along with most people I know, are laundry and a shortage of shelving.

You know it’s true. Hands up everyone who’s never, not once, discovered there’s just not enough room on the shelf for all your books, DVDs, CDs, video games, model cars, trophies, knick knacks, crafting supplies etc. If you put your hand up just now you’re either lying or a freak of nature. Unless you’re, like, Mother Teresa or something.
Anyway, the whole point here is that last week I was organizing my crafting area, lamenting a lack of storage space for all my little crafting bits and pieces and wishing for a tiny shelf to store them on. While doing so I came across a cigar box (I have many – they are great for storage & interesting to look at) with a broken lid. And because I have one of those special needs minds of great weirdness wisdom, I immediately realized that these two things – the desire for shelving and a broken cigar box – corresponded with beautiful symmetry and purpose. I have no idea how to achieve world peace, but I can help with your storage problems.
I give you the cigar box shelf. Cute, quick, cheap to make and easily altered for whatever broken boxes or other building materials you have on hand. Here’s how I made mine – modify as necessary for your own shelf.
(Oh, and did I mention that you’ll get to use a dremel for this project? Scientifically proven – or it will be soon – to be the sexiest power tool. Ladies, there is nothing hotter than a woman with a dremel. Nothing more powerful, either. Pro tip, girls. On the house.)
What You’ll Need:
- cigar box (or other wooden box-type object) with lid
- pretty paper
- paint (I just used some old acrylic I had in the house.)
- varnish/sealant
- hammer
- tiny (ie: 1/2 inch) nails (They do exist, much to the surprise of the guy at our local hardware store.)
- screws
- small plastic stick-on wall hooks [optional] (These are those little hooks you can buy at most hardware stores that stick onto the wall with special tape stuff, instead of you having to knock holes in the wall and thus endanger your damage deposit. Though if you’re like me you said to hell with the damage deposit the moment you moved in; that bleach stain on the carpet is only the start. Crafting requires sacrifice, people.)
1) Remove the lid from the box. Mine was coming off anyway – that’s the part that was broken.


2) Cut a piece of pretty paper to fit inside the box, along the bottom. This will be the back of your shelf. You could paint it instead – just depends on your preference. I used a page from a lovely old atlas I found a while ago and have been methodically dismantling for various paper crafts.

3) Using a hand saw or the cutting tool on your dremel, cut a piece from the box lid whose width is equal to the depth of the box. That sounded like a story problem from a jr. high math book, didn’t it? I’m so sorry. Basically, this’ll be the middle shelf, so make sure it fits in there properly. That’s all.


I used the back of the box lid for my shelf, where there was an extra “flap,” if you will, of wood, which gave me something more substantial to sink the nails into later on.
[Note: I apologize for not taking photos of the bits where I used my dremel. Which I switched to after remembering that it had a cutting tool and realizing that would work way better than my hand saw in this instance. But I was thrilled and distracted by using my dremel, so I forgot to take photos. Also, sawdust is bad for cameras. In fact, it’s bad for people too, whatever McDonald’s tries to sell you, so try not to inhale a bunch, like I did. It burns.]
4) Using the sanding tool on your dremel, sand down the edge of the piece you’ve cut so it’s straight and smooth.
5) Paint the inner edges of the box. You’ll probably want to do at least a couple coats. And if you opt out of lining the back of the shelf with pretty paper, you’ll want to paint the box’s bottom as well. You can also paint the outside of the box – I left mine au naturel so you could see the cigar labels and so on.


6) Paint the shelf cut from the box lid.

7) If you opted for the pretty paper backing, glue your paper to the bottom of the box.


8) Put a light coat of varnish over the paper. A light coat! Really! Do not do what I did and put what you think is a light coat but really isn’t, because the paper will bubble and pucker.

9) Use a bit of superglue to put your middle, box-lid shelf in place.
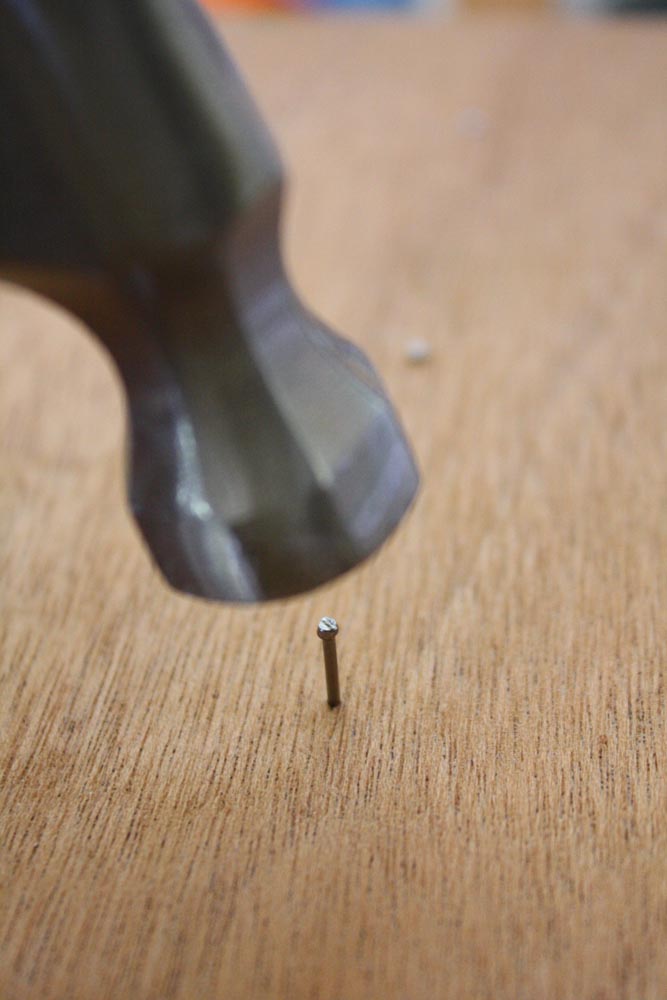
10) Now nail the middle shelf into place from the back of the box shelf. I also put in a nail on each end of the shelf, so from the sides of the box.


11) Varnish the entire interior of the shelves and possibly the exterior – anywhere that you painted, basically. Again, do a couple coats.

12) [optional] Superglue the plastic hooks to the bottom of the shelf. This gives you extra storage space for hanging lightweight objects, while circumventing the fact that the box’s sides are too thin to screw normal hooks into – they’d just poke through.


13) Drill a hole in each corner of the shelves, then drill corresponding holes in the wall where you wish to mount the shelves. This is where that “measure twice drill once” motto comes into effect. Whether or not you kissed your damage deposit good-bye ages ago is beside the point; we’re into basic aesthetics now. A wall peppered with little “oops, not there” drill holes isn’t pretty.


14) Screw the shelves into the wall.
15) Organize your stuff!


Other notes:
I used another piece of box lid, cut and painted, to extend the bottom shelf. On the original cigar box, that’s where the lid had been attached, so that side of the box was more shallow. I simply glued and nailed the extra, longer piece overtop of this shallow side.
