I have a problem with patterns. Clothing patterns specifically. And I blame the people who make said patterns for this. Because when all is said and done and I’m sitting on the floor, hunched over, fingers sore from ripping out thousands of stitches, with a dress that is somehow two sizes too large despite having measured myself, the pattern, and (just for practice) half the household furniture three times, my world is already unraveling, and blaming myself for this entire debacle would simply add to the devastation. So I direct my anger outward at those faceless pattern creators who have crushed my fashionable hopes and dreams.
My mom has told me that clothing patterns nearly always fit at least two sizes to large, but even when I size them down they remain too big. Which is outrageous considering that these are not abstract small, medium, large sizes, they’re sizes that come with specific measurements! Even I could do better at sizing! I, who failed 11th grade math! Honestly, I’m pretty sure a demented iguana could make more sensible patterns.
The other trouble is that I’m often not sure just where things got messed up. Because all the steps are in a strange sewing gobbledygook that I just barely managed to slog through in the first place, I’m often not certain what any particular step was meant to accomplish. On the flip side, when one simply makes it up as one goes, it’s a lot easier to figure out where one went wrong. At least you know what you meant to accomplish by sewing those two pieces together, and if it didn’t work you know you’ll have to take them apart and try something different. I’m okay with blaming myself for failure if I at least feel some semblance of control in the first place.
I could have persevered and learned how to deal with patterns. Instead, I chose to stubbornly go on not understanding them. And guess what I’ve discovered? To make a cute dress, you DO NOT need a pattern. So there! Take that, Butterick and McCall’s and Vogue! All you really need is creativity, a bit of daring and a good looooooong look at some of the clothes in your closet and how they fit together. Plus a general mad scientist stitch-this-bit-to-that-bit-till-it-fits attitude.
I’ve talked before about t-shirt dresses and modifications, and this week I’m going to give you the most simple possible way to cheat at dressmaking. Start here, then add other details as you go along.
—————————————————–
What you’ll need:
- a dress you already own that fits you well (or a skirt, or a top, depending on what you want to make)
- a large t-shirt or just a big plain piece of fabric – I’d use jersey cotton or something else with stretch, because it will adjust to fit you better with fewer tucks and alterations, and you can often avoid having to put things like zippers or buttons in.
- thread to match the shirt/fabric
- fabric scissors
- straight pins
- sewing machine
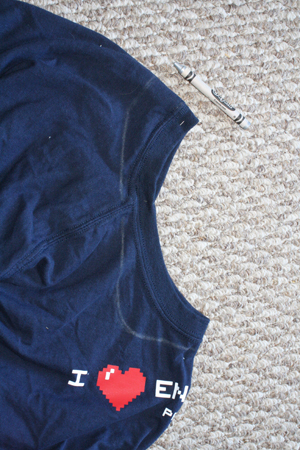
- pen or pencil or (especially if your fabric is a dark colour) a white crayon
- seam ripper – really, you should always have this handy for any sewing project. You will almost always need it at some point, even if you’re a fairly accomplished sewer.
—————————————————–
Putting it all together:
1) Select a simple dress or shirt or skirt that fits you well. This will be your only pattern. Ideally, you want something sleeveless. Even if you want sleeves on the dress you’re making, you’ll need to start sleeveless and add sleeves on once the rest of the dress is sewn. For the moment, we’ll be looking at sleeveless dresses. I’ll explain refitting and reattaching sleeves (not actually particularly complicated, I promise) in a future tutorial.
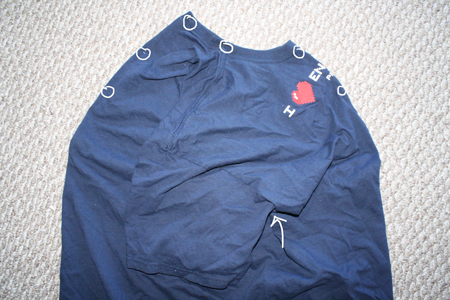
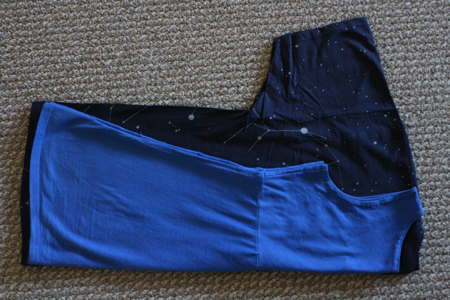
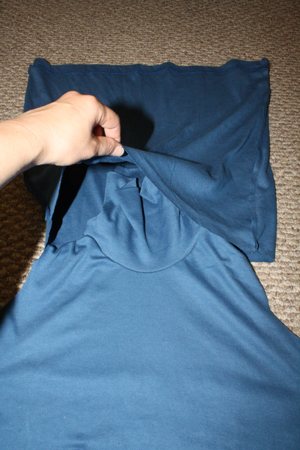
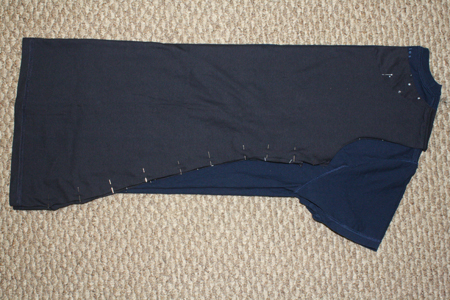
2) Turn the t-shirt you want to make into a dress inside out. Then fold it in half. (Note that I did not turn the shirt in the photo below inside out first. Ignore the picture. Turn the shirt inside out. Sometimes I’m a bad example.)
OR, if you are using unsewn fabric:
Double up the fabric so there are two layers lying flat, one on top of the other, with right sides together. Then fold the double-layered fabric in half.
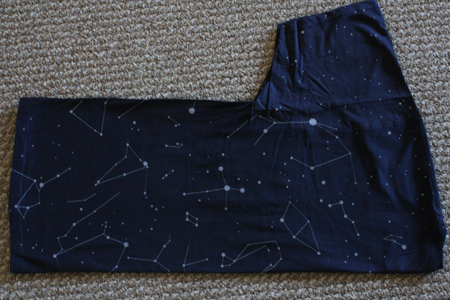
3) Fold the already-made, fits-you-well garment in half, and lay it on top of the folded t-shirt, making sure that they match up along their folded edges. If you are using a t-shirt, not raw fabric, you may also want to make sure the top of the two garments match up at the shoulders.
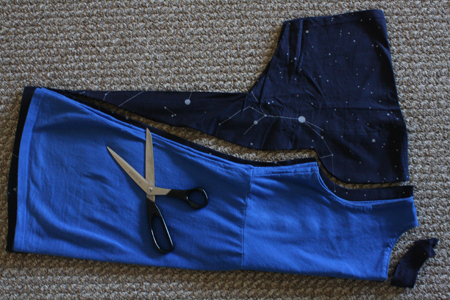
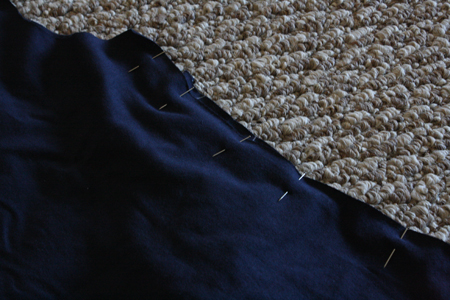
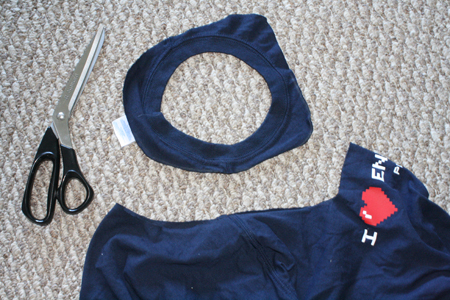
4) Cut around the pre-made garment, leaving about 1/2 an inch of extra fabric around the edges. (for seam allowance). You can cut the neckline out now, or ignore it – we’ll deal with it later. If you cut it out now, you’ll most likely have to come back to it later anyway, since at the moment you’ll only be able to cut around the higher line at the back of the dress.
[Note: If you still want the safety of a pattern (it’s a bit easier to cut the fabric neatly with a pattern pinned right on top of it, you’d get the chance to look at the pattern before cutting up your fabric, to make sure all the pattern lines looked right and even and so on), you can still use this method of tracing an existing garment. Just trace it onto folded-over paper first. Cut that out, and you have a pattern that took you almost no time or thought (and certainly no obnoxious measuring or mathing) to make, and you can use that to construct a new garment.]
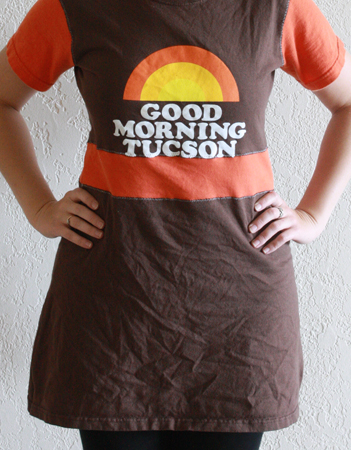
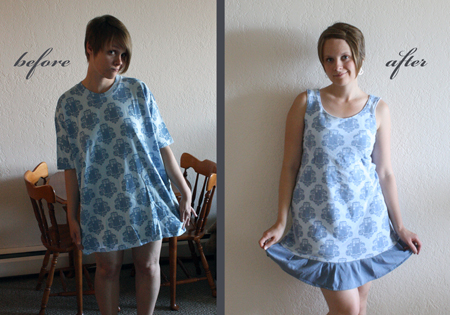
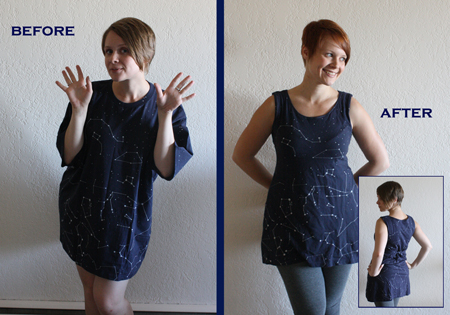
If you’re starting with a large t-shirt and making that into a dress, you’ll use its bottom hem as the bottom hem of your dress.
Other things:
- If you want to make a dress with separate bodice and skirt pieces, when you get to the bottom of the bodice on the already-made dress, simply fold that dress down out of the way and cut straight across the fabric beneath. Then unfold the already-made dress again, inch it down a little to give yourself some extra fabric for seam allowance between bodice and skirt, and finish cutting along the dress’ edge to get your skirt piece.
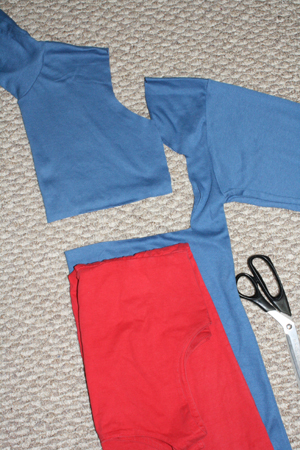
- To make a dress with a waistband, do the same thing as above, then cut yourself a separate strip of fabric for the waistband. You’ll attach the bodice to one edge of the waistband, and the skirt to the other.
- To make a gathered skirt, do the same as in step 1. above for the bodice. For the skirt, start cutting the top edge of the skirt a ways out from your already-made dress, making that top edge much wider than it needs to be, and the slant from skirt top to skirt bottom much steeper. Then, when you attach the skirt to the bodice, you’ll make some folds when you pin the two pieces together, and sewing over those folds will give your skirt nice little gathers.
—————————————————–
- If you’re using a t-shirt, and you need to shorten it, you’ll simply fold the bottom up and stitch it in place, or you’ll cut a the desired amount of fabric off, then fold the bottom up and stitch it in place to create a new hem.
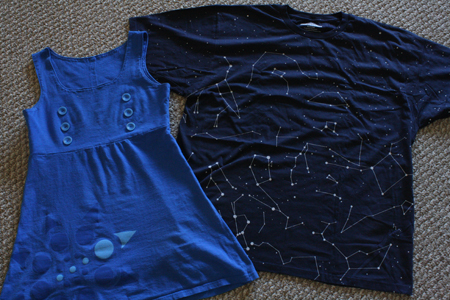
- To lengthen a t-shirt dress, one trick is to cut two long rectangles of fabric that are much wider than the bottom of your dress. Stitch their short ends together. Hem one edge of the resulting piece, and attach the other to the bottom of the dress, making little pleats as you go to make it fit with the width of the dress. That’s how I lengthened the Tardis dress below.
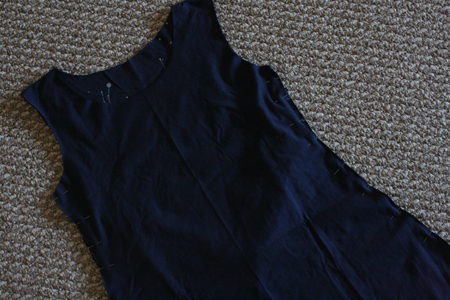
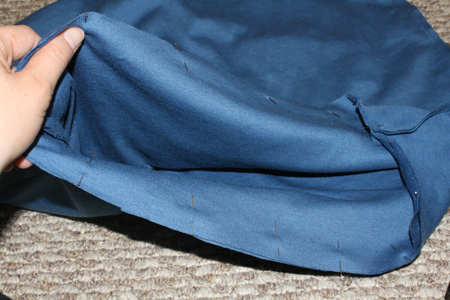
- To make a fully lined dress, you’ll simply need another t-shirt or fabric piece of equal size. Trace the outer dress, cutting an exact copy of it from the second shirt or fabric piece. Then follow steps 7-14 of this tutorial.
—————————————————–







Marla
/ September 23, 2011You may have failed at grade 11 math, but you win at intelligence (and cute dresses)! Thanks for the post :)
King Kool
/ September 23, 2011I see you were still able to use that Tucson shirt. Nice.
Funnily enough, one of the first elaborate sewing projects I ever did was making a vest for a Halloween costume by tracing a different vest over it. At the time, I couldn’t believe it worked.
Sapphire Ocean
/ September 24, 2011I’m going to try to make a TARDIS dress for my friend’s birthday. Thank you for the instructions! :)
Krystle
/ October 10, 2011I love this! I can not read patterns at all and I end up with things that are too small… I’m going to use my own fitting clothes for patterns for now on. Plus patterns are really expensive so this is a great money saver :)
Charlene
/ May 16, 2012i love this idea
Charlene
/ May 16, 2012i am going to use this for my b-day dress
Isla
/ June 18, 2012Please help, ive kinda made the dress but my edges keep curling and are horrendous, i dont know what to do to stop that, should i just make a bigger seam? watched loads of tutorials on bias binding too and its just not cliicking. my edges are a disaster!
Tally
/ June 20, 2012Edges are usually the trickiest thing with t-shirting and jersey fabric, since they curl up like you’re describing. Making the hems bigger may help – it’s easier to control a wider piece of seam than a very narrow one. You also might have some luck with the hemming method I used in my skirt-shortening tutorial: http://tallystreasury.com/2012/05/shortening-skirts-re-hemming-skirts-salvaging-screw-ups/ (Skip to the bottom third of the post, where you see the heading “Putting a new hem on a shortened skirt.”) It involves sewing ribbon along the raw edges of your material, which stabilizes and makes it much easier to fold up and sew into a neat hem. You can do this on bottom hems, or for neck and arm hole hems. It’s a little bit like using bias binding, but less finicky. I’ve had some troubles with bias binding myself.
I hope this is helpful!
Lisa
/ June 22, 2012Excellent article. Thank you!!!
Elisana
/ July 12, 2012Love your writing and attitude. The pieces look fab, thanks for sharing the full tutorial. I usually buy thrift store knits to upcycle for my kids, but reading your post reminded me that I can turn them into stuff for me, too. ;)
I saw the other reader having trouble with the hem and wanted to throw in my 2 cents: I used to have tons of trouble stitching visible seams in knit fabric…it NEVER looked good: stretched out, wavy, sometimes chewed by the machine. Until I got a walking foot for my machine. It works wonders, paired that with a double needle and I’m not ashamed of my hems anymore.
Best,
Elisana
Tally
/ August 5, 2012Thanks for the tip! I haven’t tried using a walking foot myself, but it sounds super handy. I’ll have to give that a shot too!
ARISHMA GOSAI
/ October 12, 2012I LIKE THE IDEA.IAM GOIN TO TRY IT FOR MY SELF.ALSO SECOND HAND LARGE T-SHIRTS CAN BE MODIFIED.
LornaCari
/ October 23, 2012Thankyou so much for this;D i’m making a prom dress for my sister, and i was stuck with the patterns, so i’ll try this for practices and hope for the best:’) thanks,<3
Tally
/ October 27, 2012You’re welcome Lorna! I hope it helps with the prom dress. Good luck!! :)
marie
/ January 12, 2013Could you send me ,how i make a dress with my email? thanks !
Shannon Doherty
/ February 25, 2013Thank you so much! I can crochet and knit. I can make rag rugs. I have a gorgeous Janome and I can quilt and do blankets. But I have never EVER been able to follow a pattern or make clothes. I am dying to make a flannel jumper or a nightgown or a simple sleeveless sundress. I have now found a way to do that. These directions will help me complete my bucket list ! I have never taken a class, and havent worked with buttons, zippers or snaps nor made “to wear” items because patterns just turn me off…just as you said in the article. I have tried!! And always failed. I have printed these instruction out. You are a godsend. Cant wait to get started. Have been trying to make a dress from one of my old ones but have been unable to do that right too so this will work great!
Jennifer
/ March 9, 2013Awesome!! I cannot read a pattern to save my life but the urge to create something with fabric has driven me to now have a pile of lovely material I know not what to do with…I am excited to try this method!
Bek @ Just For Daisy
/ March 16, 2013Oh my! So glad I stumbled upon this!! Sooo cute! You are super talented these dresses look FAB! I do the same when making pants, dresses etc for my daughter… find it easier than a pattern! :)
Susan
/ March 22, 2013Bloody brilliant. Made me chuckle. What a great read and some perfect dresses, minus the pattern!
Thank you for this post, you have inspired me to continue and ignore all patterns…
Pam
/ April 13, 2013Can you please tell me how to cut a skirt with a circle from the knee to ankle. I want this to slant as I am making it with lycra. I know how to cut a straight circle to edge the skirt but this one I want it slanted at the knee and straight cut at the hem but it must give a circle effect from the knee downwards toward the ankle. I hope u understand.
Natalie Geraci
/ July 10, 2013What kinds of fabric do you suggest to use to lengthen the t-shirt dresses? My huband has a box of old 3x shirts and I found 2 or 3 I liked to use this tutorial on. However, they are shorter than I’d prefer. Normally, I wear maxi dresses but am trying for more of the above the knee type, like the ones you’ve shown here (specifically the pleated one). I have never done pleats. In honest, the last time I attempted a garment was over 10 years ago and hubby bought me a sewing maching to play with so I want to naturally.
Tally
/ July 15, 2013For a lengthening few inches of ruffly or otherwise decorative hem on the bottom, you’re pretty safe using whatever you have around that’s the right colour/pattern/etc. If you’re putting a panel in at the waist or somewhere like that, you’ll definitely want to use a stretch cotton similar to the t-shirt fabric. But at the bottom of the dress, you could totally add a few inches on in some other fabric.
Best of luck with your sewing experiments! :)
Ivon Garcia
/ September 10, 2013I ran into your blog by accident, and I’m so glad that I did! You have so many great sewing ideas! I love the way that you write and I want to try one of these. I like longer dresses, but that is easily customizable. Yay! :)
Tally
/ September 12, 2013Hooray! Thanks for stopping by! I’m super stoked to hear that you like the blog. :)
inforeseps
/ September 18, 2013i love love love it…!!!!!!!!
Createdisplay
/ October 25, 2013I really enjoyed your posts and liked the model photos too! I would like to see more sewing with non stretch fabrics if you do any projects like this – thank you :-)
http://YOURURL.com
/ June 17, 2014whoah this blog is wonderful i love reading your posts. Keep
up the great work! You know, a lot of people
are searching around for this info, you can help them greatly.
a
/ June 21, 2014This paragraph offers clear idea in support of the new visitors of
blogging, that actually how to do running a blog.
doreen mewhort
/ June 23, 2014I like to take a picture of a old dress to make a new one. I like this dress to much.
Refashion Tutorials
/ July 24, 2014One trick I like to use so that I get a professional looking hem without spending the time to do it myself is to cut the bottom of a t-shirt or other knit 1/2 and inch above the stitching along the hem, then sew that to the bottom of my new dress. If you make the new seam just above the old hem’s stitching it won’t be noticeable at all.
lam bang dai hoc
/ September 23, 2014Excellent post. I will be experiencing many of
these issues as well..
Here is my web page: lam bang dai hoc
advice on choosing a professional carpet cleaner
/ September 23, 2014I could learn about this all day!! Maybe you have an RSS feed I can also subscribe to.
I have been scouting all around the internet pertaining to material relating to steam
vac.
my web-site advice on choosing a professional carpet cleaner
Brennan Rozeboom
/ February 2, 2015You are a genius! I gave up sewing after my failed attempt at making a vest in home economics class. It turned out way oversized. I still got an A for following the pattern instructioins but couldn’t wear the thing. I am once again inspired to sew!!
Tally
/ February 28, 2015Hooray! And I mean, I’m glad you got an A, but how super un-useful to just learn how to make something that isn’t wearable. Patterns schmatterns. Hope this inspiration will help things turn out better! :D
shirt printing
/ May 3, 2015That is really interesting, You are a very skilled blogger.
I’ve joined your rss feed and stay up for in quest of extra of your
great post. Additionally, I have shared your site in my social networks
custom print t shirts
/ May 10, 2015Hi there colleagues, how is everything, and what you
desire to say concerning this article, in my view
its really amazing in support of me.
custom sweatshirts
/ June 28, 2015Hi there, after reading this amazing post i am as well glad to share my know-how here with colleagues.
Designtshirtsonlineforcheap.Net
/ July 1, 2015Currently it sounds like Drupal is the best blogging platform out
there right now. (from what I’ve read) Is that what you’re using on your blog?
create a tee shirt
/ July 6, 2015Hey There. I discovered your blog using msn. That is a very well written article.
I’ll be sure to bookmark it and return to read extra of
your helpful information. Thanks for the post.
I will certainly comeback.
make a t-shirt
/ July 16, 2015Thanks for sharing your thoughts about make t shirt. Regards
Janet
/ July 22, 2015Exactly what I need for some beach dresses. Seems impossible to buy my shape (nothing unusual. I’m short and not overweight but look like a ball in a loose fitting dress.) making clothes seemed too difficult. Thank you so much.
crafts-hoodies.com
/ December 23, 2015Some days you have to choose between cleaning the house and
playing “Go Fish” with your child.
They will coordinate any specific t-shirt in addition to polo top rated.
Franklin-and-Marshall, Crest company Women of all ages Men’s F&M Hoodie Sweatshirt.
sewing guys tee
/ January 5, 2016this could be typically a method that is really convenient,
fast, dependable and nicely suited to everyone’s needs.
Quite a intriguing blend of fruity and even hot colognes Ralph Lauren Polo Outlet is certainly completely best
for increase the risk for switch from a motive to another.
According to TVLine,”Two male characters will recur in the second half of Season 6: Jordan, a sophisticated-yet-approachable 27-year-old working in the fashion industry, and Liam, a 24-year-old editorial assistant from Boston.
anchor
/ January 25, 2016This way the lady can point out which rings look just like the ring she hopes
to wear “someday” when she gets married. Neighbouring Brooklyn is Manhattan – a fantastic
place for an extravagant, glamorous city holiday, with numerous upscale districts
and shopping areas, as well as first-class restaurants and luxurious hotels.
Today most people don’t consider the importance of personalized party
favors for their guests.
alison
/ February 2, 2016Glad to have found you today. I know I’m a bit late to this ‘party’, but I’ve just discovered the art of refashioning and this is the best tutorial I’ve found on refashioning a t-shirt. I haven’t sewn anything in over a decade, so this is a nice way to practice basic sewing skills and hopefully make something nice to wear. I’ll be going back to WMart to pick up a few $1 clearance t-shirts and polos that I ‘dismissed’ because they were too big. So excited! Thanks for sharing!
Amanda
/ July 4, 2016I love this! I am making a dress for a cosplay but it needs to have some simple sleeves. Did you ever make the tutorial for how to add on sleeves? I am looking for it but don’t know where to find it. Thank you!
Lilian Machocho
/ August 23, 2016I love it,you are an ideal atleast i wont keep up cutting patterns for every cloth.thank you alot
Lynette
/ September 15, 2016Wow! Thank you for the tutorial. I am a beginner and it’s good to know that I don’t need patterns.
baby-shower-invites
/ October 14, 2016As a sinner I could not please God, I could not neutralize or pay for my own sin. But when God justified me by His grace He went on record declaring me righteous. He didn’t wave a magic wand and declare me to be innocent. His holiness would not permit it. A basis for declaring me righteous was needed. The ground upon which my justification is built is the substitutionary death of His son, Jesus Christ. The shedding of blood demonstrates the righteousness of God ‘that He might be just and the justifier of the one who has faith in Jesus’ (Rom. 326 NKJV). What a marvelous plan Man’s plan of salvation by good works is offensive to God and to anyone who has been saved by God’s grace.
Gabriella
/ December 28, 2016WHAT!!!!??????
id
/ July 11, 2017You are so right regarding those stupid patterns. I hate them since they are too complicated!
I grew up around sewing starting with my grandmother, mother and all females in my family ( a must skill taught from generations). My mother who is 84 years old now, knows how to cut anything w/o patterns. I grew up watching her make bridal gowns and dresses for my sister and me. She says that it very easy, and you just showed the simplicity in this tutorial. Great!!!
DEE
/ July 23, 2017Basically you are still using a pattern — a garment that you already have. It’s not a paper pattern, but a pattern all the same. OK for a beginner.
leather
/ October 10, 2017Wow! In the end I got a webpage from where I be able to truly
get helpful facts regarding my study and knowledge.