I’ve spent the last few weeks pounding my head against the sugar-coated mountains of Valentine’s Day paraphernalia that floods the internet at this time of year, trying to inspire myself with some kind of brilliant craft honouring this saccharine holiday. It has been to no avail. It comes down to this: I simply do not love our holiday of love.
In my mind, Valentine’s Day does not nearly live up to the hype given to it by soccer moms, 13 year-old girls and Martha Stewart. Christmas and Easter and Thanksgiving are the holidays that really imbue me with a spirit of love and affection and creativity. For me, they are meaningful, special and genuine. Valentine’s Day is full of artificial flavours, colours and sentiments; the Pamela Anderson of holidays.
I don’t hate Valentine’s Day, it just fails to inspire me. But I’ve been trying. I’ve pondered just about every damn thing you can do with a paper heart. Then the other day I was playing Zelda, and I suddenly noticed the life meter is made up of hearts. I mean, I’d noticed this before, obviously, but now I noticed it in the context of having Valentine’s Day on the brain. And there was my inspiration. Screw heart-shaped sugar cookies, Hershey’s kisses and crepe paper roses. Zelda, something I actually enjoy to start with, could inspire me.
So in the spirit of gaming – which is fun and interesting and what several excellent people I know plan to do with their honey on February 14th – and in the spirit of sugar-saturated cheesiness – which is what Valentine’s Day (and the Hallmark card company) is built on – I present you with a Gamer’s Valentine: the romance health bar hat. A Link-style stocking cap (appropriate to the time of year) decorated with removable hearts, to demonstrate just how you feel about the health of your romantic relationship at any given moment. Because Valentine’s Day also has a reputation for causing an inordinate number of breakups, as people abruptly take note of the fact that they are not dating Neil Patrick Harris, nor is a troop of wee elves following them around, wafting cherry blossoms down upon their heads and generally making their relationship more glamorous. Logical conclusion: break up and track down Neil Patrick Harris, or someone else with a troop of elves at their beck and call.
But with this hat, at least you can give the poor not-Neil-Patrick-Harris fellow a bit of warning as the health bar depletes, maybe even a chance to hunt down some elves of his own and have a shot at refilling that heart bar.
——————————————————-
What you’ll need
materials:
- fleece in a colour of your choice for the hat – about 1/4 yard
- red felt (possibly in two different shades of red)
- small piece of cardstock
- HeatNBond (make sure it’s the sewable kind)
- thread in the same colours as your felt and fleece
- small metal snap fasteners
- butcher paper or other large piece of paper for pattern making
tools:
- sewing machine
- fabric scissors
- paper scissors
- iron & ironing board
- straight pins
- pencil
- ruler
- measuring tape
- small sewing needle
——————————————————-
Putting it all together
THE HEARTS
Obviously a Link hat is particularly appropriate to this project, but you could also attach health bar hearts to a headband, a shirt, a bag, or most anything you can stitch a snap fastener or some velcro onto (you can buy sticky velcro too, if the thing you want to attach hearts to can’t be sewn into). So first I’ll show you how to do the hearts, and you can decide what to put them on. If you like the hat idea, I will give instructions for this simple stocking cap following the tutorial for the hearts.
1) Fold a small piece of cardstock in half and draw a half in the size you want. My hearts are about 1 1/2 inches high. Then cut out the heart, and that’s your template.

2) Use a pencil to trace the template onto your HeatNBond, drawing on the smooth, non-textured side of the HeatNBond. (For other projects using HeatNBond, and further instructions regarding its use, check out my tutorial for fleece masks.)
Repeat for as many hearts as you want to have. My original intention was to do 8 hearts, as you’ll see from some of the photos, but once I got them cut out and placed on the hat, I realized that was too many, so I cut it down to four.
3) Place the HeatNBond textured-side-down on your red felt. With the iron on a medium to high setting, run it over the HeatNBond briefly, until the HeatNBond is fully stuck to the felt.
4) Cut out each heart.
5) Have a closer look at the HeatNBond stuck to the back of each heart, and you’ll see that it’s actually two layers. The white papery later peels right off if you dig a fingernail under its edge. Pull it off of each heart.
6) Now lay each of your hearts down on another piece of red felt, right side up so that the HeatNBond is sandwiched between the felt. I used a darker red for the second felt, because that makes the next step easier, since you can see very clearly where the edges of the heart are against the contrasting shade. You can use the exact same colour of felt for both sides of the heart, it’s just a bit harder to see what you’re doing.
7) Iron the hearts again, this time pressing down hard and letting the iron sit for about 30 seconds on top of each heart. This should fuse the pieces of felt together, so that you have a bunch of hearts stuck to the piece of felt behind them.

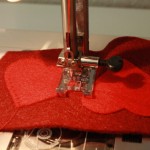
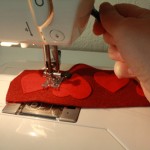
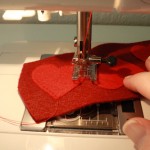
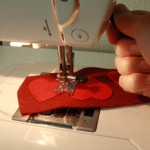
8) Go to your sewing machine and set it to a narrow back and forth stitch (a zigzag or something similar). Set it to a very tight, close-together stitch length, almost to the buttonhole setting. Then sew all the way around the very edge of the heart.
A few words about sewing around a small, curving object like this: in order to follow the tightly turning line of the outside of the heart, you’ll need to repeatedly adjust the fabric relative to your machine’s needle. To do this, stop sewing, making sure the needle is sunk down into the fabric. Then lift the presserfoot, and turn the fabric slightly and as needed, pivoting it around the needle stuck through it. Then lower the presserfoot and continue sewing. Repeat as needed. This is the same method used to turn sharp corners when sewing.
9) Using your fabric scissors, cut carefully around the edge of each heart, just outside the stitches.
10) Now you’ll want to match up the hearts with whatever object you’re attaching them to, deciding just where they should go. Lay them out, make a small mark under the center of each heart on the object of attachment. Then sew snap fasteners to the object and the center back of each heart, or attach sew-on or stick-on velcro to the object and the heart backs.
THE HAT
If you’ve not made a stocking cap before, let me assure you that it is incredibly simple. For another hat style, you can also try the simple round hat used in this tutorial. Just maybe leave off the spikes and bug eyes. Or don’t. Maybe you want to create a love monster hat.
1) Start by using a tape measure to find the distance around your head. Divide this number by four.
2) Fold a long piece of paper in half. Along the bottom of the paper, measure X inches in from the fold, where X is that your head measurement divided by 4. (So if your head is 22 inches around, X would be 5.5 inches.) Make a mark at this measurement along the paper.
3) Using a ruler, draw a line from from the mark you just made, going upwards and inwards so it runs into the folded edge of the paper further up. You should have a piece of folded paper showing a tall triangle marked out on one side.

4) Cut along the line you drew, then unfold the paper. You now have triangular pattern, like an upside down ice cream cone. Take your fleece, fold it in half, and pin this pattern to it. Cut out the pattern.
5) You should now have two fleece triangles. Pin them together (with ride sides facing together) along their long sides.

6) Sew the two pieces of fleece together along the sides. Then turn the triangle right side out.
7) Remember the measurement of your head that you took in step 1? Now divide that number by two. Now cut a rectangle of fleece that is that number of inches long, and 5 inches wide. Get the edges as straight as possible – using a ruler or a cutting mat will help.
14) Fold this long rectangle in half, right sides together, and pin the two ends together. Stitch them closed. You should now have a big loop of fleece.
15) Pick up your main, triangular hat piece. If the two long seams attaching the two triangles are the sides of the hat, then figure out where the center back of the hat is, & stick a pin there so you can find it again. Hold the hat upside down. Match up the center back of the hat with the seam in your loop of fleece, and match the bottom edge of the hat with the edge of the fleece loop, with right sides of the hat and the loop together. Pin them together. Continue matching the edges and pinning them together all the way around the hat. If the loop doesn’t fit perfectly around the hat, just stretch a little here and bunch a little there – fleece is pretty flexible this way.
16) Sew along the pinned edge.
You should end up with a result about like this:

17) Turn the hat back inside out. With the hat inside out, Fold the bottom, dangling edge of that fleece loop upwards. Bring it about 1/4 inch higher that the line of stitching you can see above the bottom edge of the main hat (the line of stitching circled in the photo below) and pin it in place. Do this all the way around the hat. If possible, you should put the pins in upside down, so that the head of each pin is pointing towards the bottom of the hat, and the pointy edge is towards the top of the hat. Otherwise, you’ll be sewing over pins in the next step, which is highly inadvisable.
18) Turn the hat back right side out. You are going to stitch right on top of the seam that connects the top of the hat’s brim (that fleece loop) to the main part of the hat. You’ll need to pull the two sides of the fleece (brim and main hat) apart a bit with your fingers as you sew, spreading and flattening the material so you can see the line you’re supposed to be following it. Reach underneath the fabric to remove pins as you go. Or, if you followed my bad example and put the pins in so that you can’t pull them out as you go, stitch very slowly and carefully when you go over them. Then pull them all out once you’ve sewn all the way around the hat and removed it from the sewing machine.
Ta da! You now have a simple, gnomish (or Link-ish) hat with a bottom brim. Now all you need to do is arrange your hearts as desired and attach them.
Some other ideas: to make the fact that hearts are missing more apparent when you remove them, you could sew black hearts to the hat itself, and fasten the red hearts on top of the black, so that as you remove red hearts you can clearly see that they are missing, due to the now-visible presence of a black one. Just be careful when attaching such hearts to the hat – if you are ironing HeatNBond onto fleece (a more meltable material than felt), you’ll want to use a pressing cloth between the iron and the fleece, or you’ll melt the fleece. Just a piece of cotton, an old t-shirt or a plain tea towel will do.
And if you’re looking for more geek-love Valentine’s ideas, why not use this HeatNBond method to put a sweet little heart on a plush Baby Myr? Way more interesting and nerdy than just another teddy bear.


