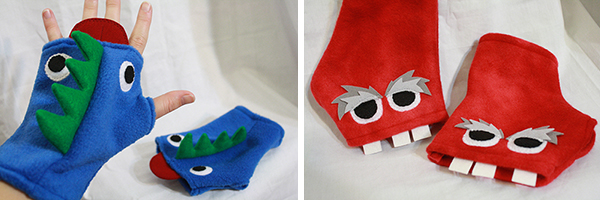
It’s taken me a long time to write this particular tutorial, so let me be brief with my introduction. Monsters are awesome, monsters are cute, I like monsters, so let’s make a few. Burma shave.
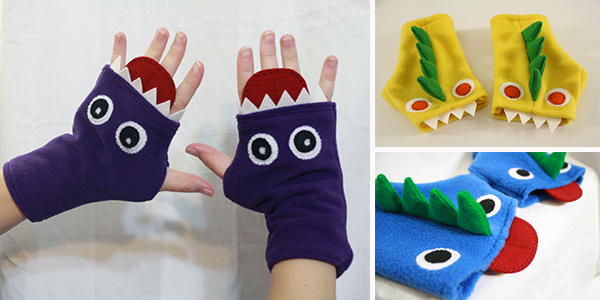
These are simple, adorable fleece gloves that will keep you warm and amused. And while they’re great for kids, they’re also great for everyone. I made myself a pair that I wear all the time, and I’m a very serious adult. Ok, I’m an adult. Forget the very serious part – I lied. But these are seriously awesome to wear.
And they might be the perfect thing for some last minute, handmade Christmas gifts. So let’s get tutorialing here!
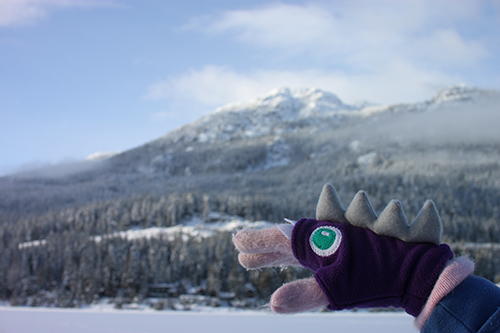
Post Update: Gloves in action!
———————————————–
What you’ll need:
materials:
- fleece in the colour of your choice (this will be the main colour of the gloves themselves)
- felt in a variety of colours (for any or all of the following: spikes, eyes, eyebrows, teeth, tongue or any other additions you want to invent)
- OR you can use buttons instead of felt for the eyes (in which case you’ll also need a small sewing needle)
- thread that matches your various fleece and felt colours
- polyfil or fiberfill or some sort of stuffing – you’ll only need a very small amount
- fingerless monster gloves pattern – number 16. under “Sewing Patterns.” There are two different patterns you’ll need to download and print – one for the gloves themselves and one for the face & other monster details.
- fabric scissors
- chopstick
- straight pins
- sewing machine
———————————————–
Putting it all together:
1) Start by printing out the pattern (you can find it on this page, number 16. under “Sewing Patterns) and cutting out the pieces you’ll need. Make sure you print both the glove pattern (all sizes) and the spikes & faces pattern. Unless you just want to make plain, unadorned fingerless fleece gloves, in which case you only need the first pattern.
Pattern size: For myself, I use the small-medium pattern size, but I have rather small hands. If your hands are generally small, or long but narrow, you’ll probably want that one. For most kids’ hands go with the XS size, and for larger adult hands go with the large size.
Design choices: Read the small print instructions on each page of the pattern. If you want to include the spikes along the back of the gloves, you’ll cut two of the large glove piece on the first page of the pattern, and cut 2 of each of the smaller glove pieces on the second page of the pattern.
If you want plain undecorated gloves, or monster gloves with just teeth and eyes and stuff and no spikes, then you’ll cut 4 of the large glove piece on the first page of the pattern.
2) Pin your selected glove pattern pieces to your fleece and cut them out.
3) Next, use the other pattern page to cut out the bits that you want to add to your gloves: eyes, teeth, tongue, spikes, eyebrows or whatever else you can think of. Cut these from various colours of felt.
For eyes, you’ll probably need 4 (unless you want to do a cyclops, or 3-eyed monsters, which will only really work well if you forgo the spikes). For spikes, you’ll need four – 2 for each glove. And for teeth and tongue, you’ll need 2 – 1 for each glove.
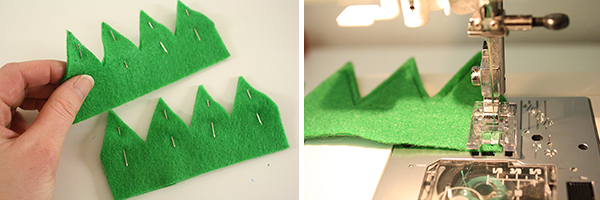
4) Now to the sewing! First up are the spikes. Load up your sewing machine with the right colour of thread, and pin each set of spikes together. Then sew them together along all but the long straight bottom edge. Use about a 1/8 to 1/4 inch seam allowance.
Note: If you are not doing gloves with spikes, skip ahead to step 12.
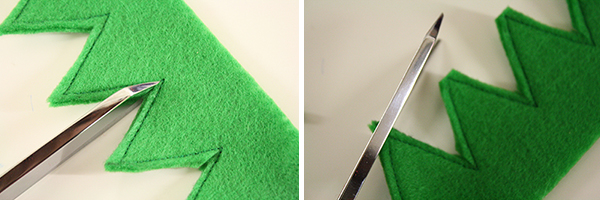
5) In the triangular dip between each spike, use these the very tip of your scissors to carefully make a little cut up to but not through the thread. You may also want to carefully snip off the very tip of each spike, again being careful not to cut through the thread. This will help the spikes to be turned right side out a bit more easily and to have pointer, neater tips.
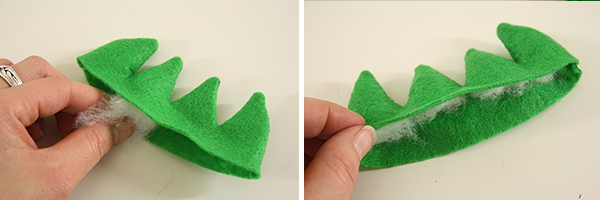
6) Now turn the spikes right side out, and use the tip of a chopstick to gently poke out all the tips so they’re as pointy and neat as possible.
7) Then take a little bit of stuffing and use it to stuff each spike. Use the chopstick again to help you get it all the way in there. You only want to stuff the spikes themselves, not the bottom part of the piece.
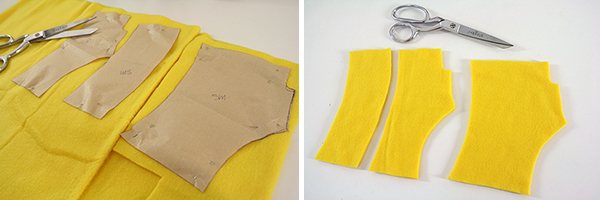
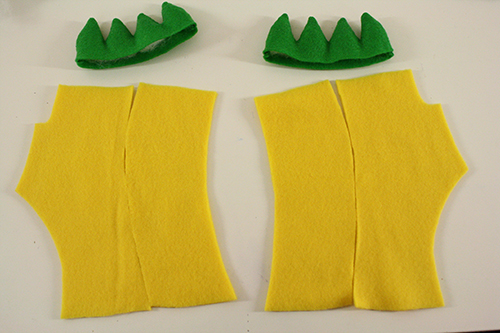
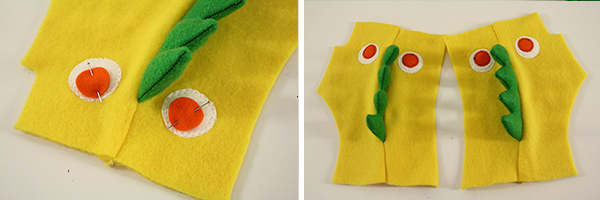
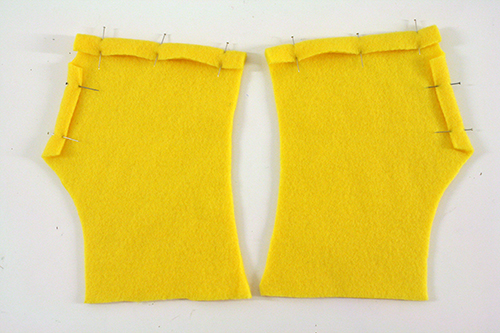
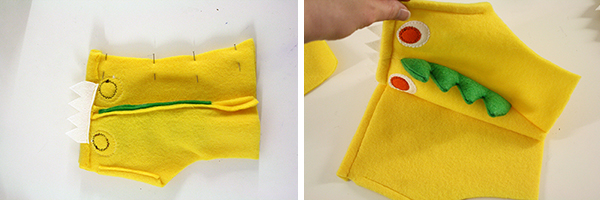
8) Ok, now go get your actual glove pieces, the ones cut out of fleece. Start by grabbing the four smaller pieces. Lay the pieces out flat next to each other, so that they form two glove shapes that face in opposite directions. Just like in the picture below.
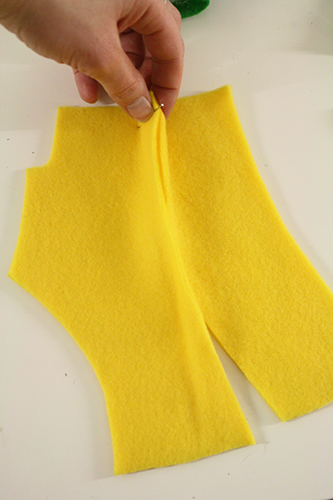
9) So, each set of pieces will be the top of one glove, right? Right. Take two of those pieces, match up the edges and pin them together at the very top, just like in the photo below.
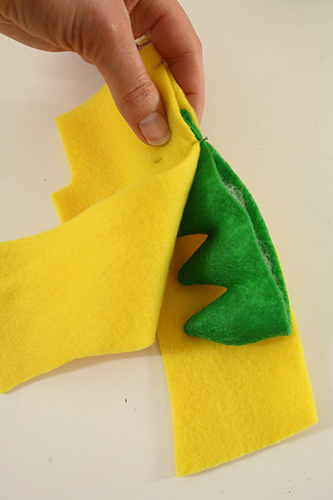
10) Now grab one of the stuffed spike pieces. Place it upside down between the two pieces of pinned-together fleece (so the spikes are facing down, hidden between the pieces of fleece). You want the front end of the spikes to be about an inch to an inch and a half away from the top end of those pieces of fleece, and the front of the glove.
Continue matching up the edges of the spikes and the two pieces of felt all the way along, and pinning them together. Make a fleece-felt-fleece sandwich of them, basically.
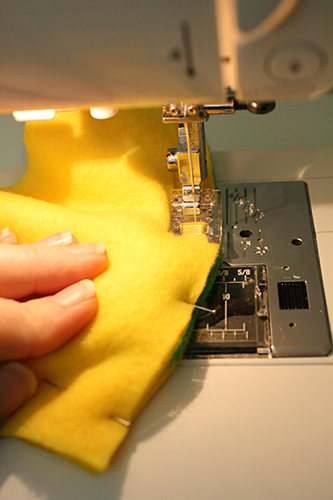
11) Now sew them all together, using about a 3/8 inch seam allowance (or just match up the edge of the fabric with the edge of the presserfoot on your sewing machine as you stitch).
When you’ve sewn the entire length of the glove, I recommend flipping it all over and sewing along the same like again from the other side. This strengthens the glove, and I’ve also found that the fleece on the bottom side will slip and slide around a bit as you sew, so this gives you a chance to catch any material that was missed, and to straighten out your line of stitching if it went a bit crooked at any point.
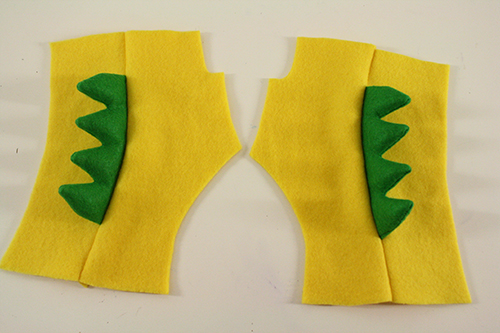
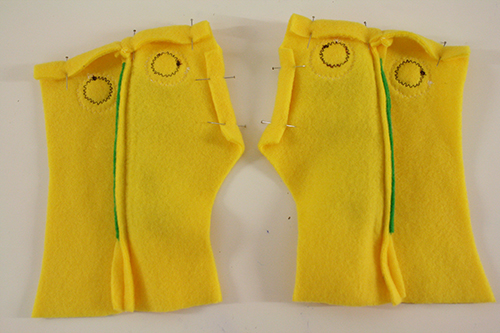
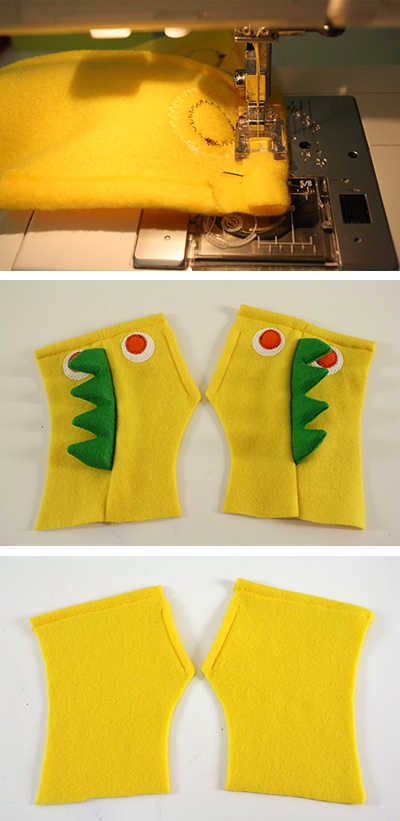
Repeat with the other glove and spikes, and you should have two glove tops that look about like this:
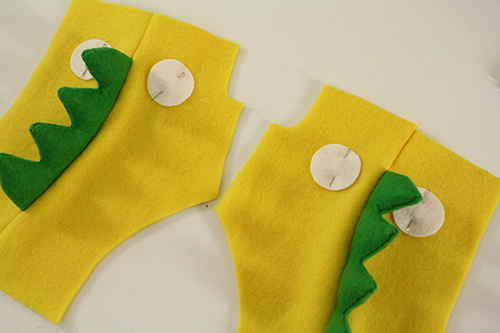
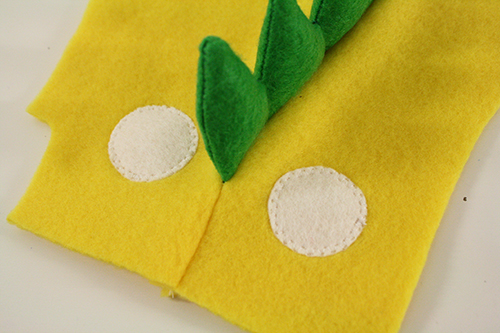
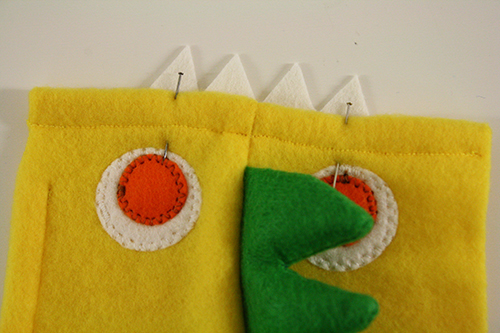
12) At this point, you’re going to pin the first layer of eyes onto each of your glove tops, making sure they’re in about the same place on each glove, etc.
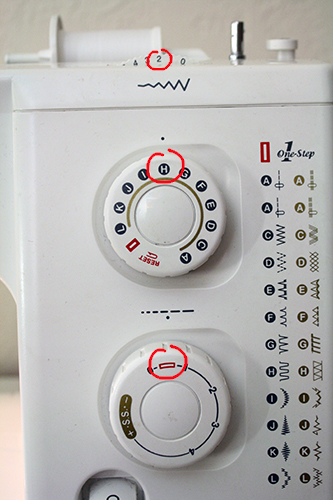
13) Set your sewing machine to do some sort of zig-zag-y back-and-forth stitch, and set it to a very narrow stitch, and put it on or right next to the buttonhole stitch width so your stitches will be very close together. This is what that looks like on my machine, as far as where the dials are at:
Then stitch all the way around each of your eyes, using those settings and the appropriate colour of thread.
14) Repeat this same process (with appropriate thread colours) for pupils, eyebrows and any other facial details you want to appliqué on. Do not worry about the teeth and/or tongue at this point – we’ll get to that shortly but another step needs to happen first.
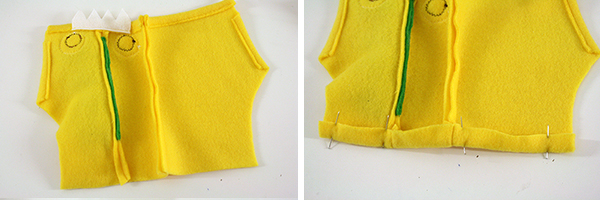
15) Once all those face details are sewn on, flip each of your glove tops upside down. Fold the top edge and the area of the thumb opening over about 3/8 inch and pin them in place.
Do the same thing with the plain pieces of fleece that will be the bottom halves of the gloves:
16) Sew along all those folded-over edges, stitching them in place. Basically you are “hemming” the glove openings here.
17) Now for teeth and/or tongue. First, if you want to do an extra couple steps to have a more durable teeth and tongue, follow the steps outlined right below. (This is particularly recommended if you’re using cheaper felt that’s not especially thick or stable around the edges.) Otherwise, skip ahead to step 18.
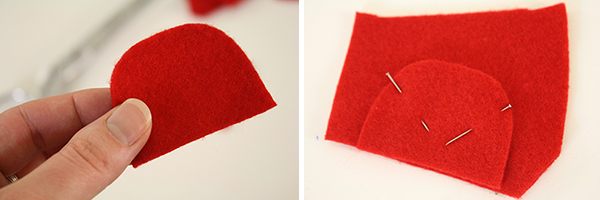
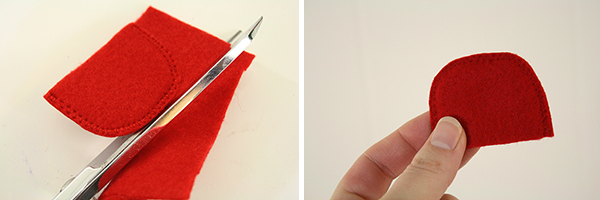
a) Using the tongue as the example here (but you can do the exact same thing with teeth or anything else), take one of the tongue pieces you cut earlier, and pin it to another uncut piece of felt of the same colour.
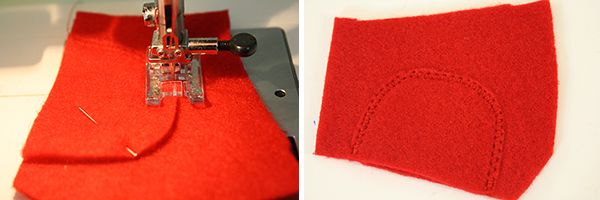
b) Using the same close together back-and-forth stitch you used to sew the eyes and other details on, stitch all the way around the very edge of the tongue piece. You’ll want good light for this, since you’re trying to follow the outer edge of a fabric piece pinned right on top of another piece of identical colour. You don’t need to sew along the bottom edge of the shape, though you can if you want.
c) Very carefully, cut around the stitching, just on the edge of the stitches so you don’t snip through any of the thread. You should now have a double-sided, stronger tongue or teeth shape.
18) Centre the teeth or tongue on each of the glove top pieces. Pin them in place. Make sure that, when you flip the glove top over, the bottom of the teeth or tongue piece reaches down past the line of stitching along the top edge of the glove.
If you’re putting on teeth and a tongue, do one of them at a time. Whichever one you start with will be overtop of the other one.
19) Now, using thread that matches the colour of the fleece that makes up the main body of the gloves, sew the teeth or tongue into place, going right overtop of that line of stitching along the top edge of the glove. Do this for both glove top pieces.
Flip the piece over and, if necessary, very carefully use your scissors to trim away any excess of felt left below the stitches holding the teeth/tongue in place.
20) Almost there! Take one glove top piece and one glove bottom piece, and put one on top of the other, edges matching up and right sides facing together. Then pin them together on the long side edge that does not have the thumb opening.
Sew that edge together. Repeat with the other two glove pieces.
21) Now spread the two pieces apart, right side facing down. They should be attached together along one edge now. Fold up the bottom edge of the fleece by about 3/8 of an inch, and pin it in place.
Sew along that pinned edge, this time “hemming” the bottom of the glove. Repeat with the other glove.
22) Fold the glove together again (right sides still facing together) and pin along the remaining edge, leaving the thumb hole unpinned.
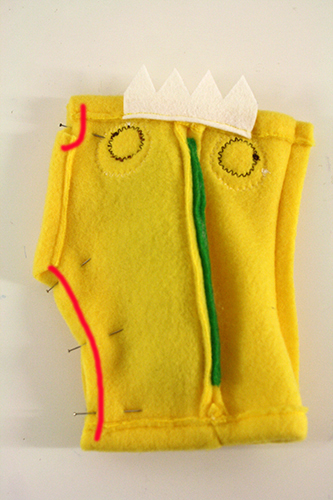
Sew along the pinned edges, completing the glove. At the top above the thumb hole, you’re going to sew a curved, J-shaped line, like the red line in the photo below shows. Repeat with the other glove.
23) Turn inside out and voila! Monster gloves! Now you can wear them for both warmth and amusement.
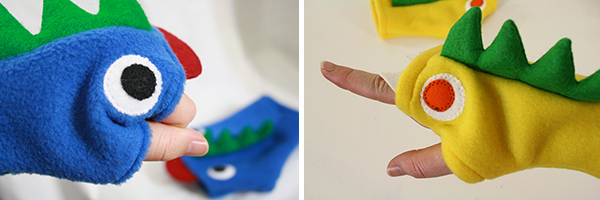
They’re also great for making funny faces with, kind of like making shadow critters on the wall with your hands:

