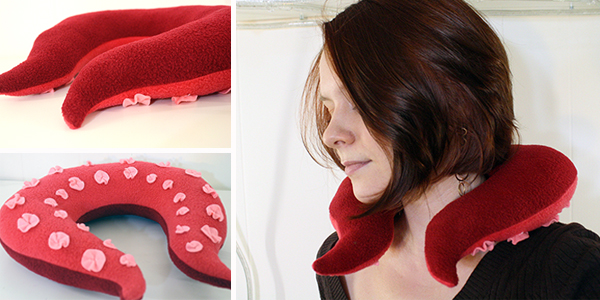
Years ago, the first time we both flew halfway across the continent to visit my parents at Christmas, I told my boyfriend that my real reason for dating him was to ensure I’d have a human pillow on plane trips. I was kidding, of course. Mostly. Kind of. I mean, love and that stuff is really important, but it is so nice to be able to lean against the person next to you on a long, cramped plane flight. Without, you know, causing an awkward incident. Plane travel has become an uncomfortable, trying affair, and a comforting shoulder pillow to help you remain as unconscious as possible for as much of the experience as possible is a wonderful thing.
Still, we can’t always travel with our human pillow companion. Plus some people have unfortunately bony and un-pillow-like shoulders in the first place. So today’s post offers an alternative, handy for travel situations of all kinds, and generally awesome to have around. It would be super cool if someone had cause to use this pillow on a boat trip.
———————————————–
What you’ll need:
materials:
- fleece (it’s most visually fun if you get two complimentary but contrasting colours)
- a sheet of felt in a colour that compliments and/or contrasts with one of your fleece colours
- thread to match your fleece and felt colours
- stuffing
- tentacle neck pillow pattern – number 18. under “Sewing Patterns”
- paper scissors and fabric scissors
- straight pins
- sewing machine
- small hand sewing needle
- chopstick
———————————————–
Putting it all together:
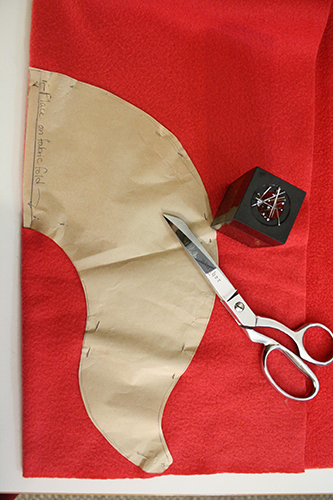
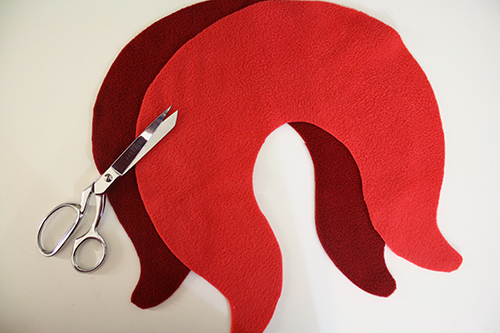
1) Start by printing out the pattern piece. Take one of your pieces of fleece and fold it in half, pin the pattern piece to it (with the appropriate part of the pattern lined up with the fold of the fabric), and cut the pattern piece out. Repeat with your other colour of fleece so you have two identical almost-circular pieces of material.
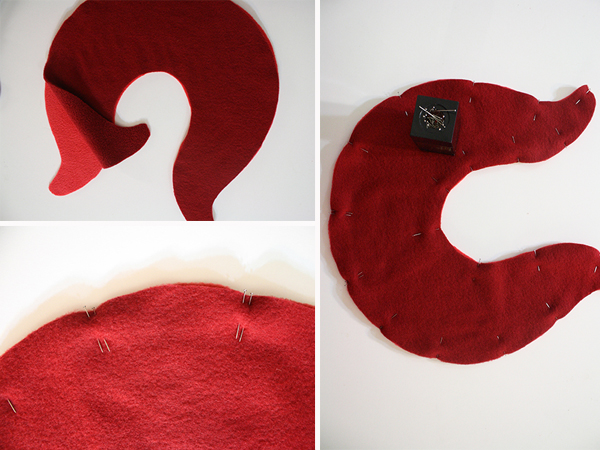
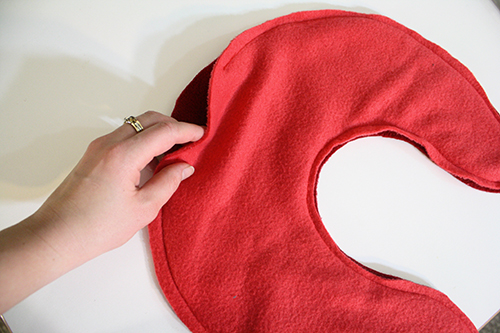
2) Pin the two pieces of fleece to each other, with right sides together. At the center top of the shapes, mark an area about 3-4 inches long by putting double pins on either side. This is to remind you that you will not sew this area closed.
3) Stitch around the entire pinned fabric shape, with about a 3/8 inch seam allowance (which basically means just line the edge of the fabric up with the edge of your presserfoot as you sew). Leave the gap between those double pins unsewn.
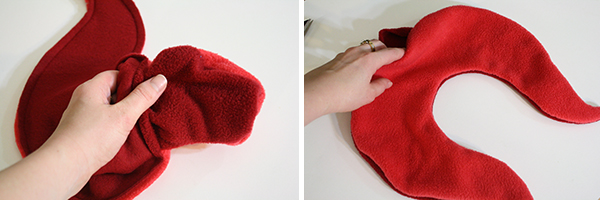
4) Using a sharp pair of pointy-nosed fabric scissers, cut some small slits in the fabric along the tight inside curve of the pillow. The slits should go almost all the way up to the line of thread, but do not cut through the thread! These slits will make the curved part of the seam smoother when you turn it right side out.
5) Using the gap at the top of the pillow, turn the whole thing right side out. Use a chopstick or pen to poke the tips all the way out and smooth out the seams.
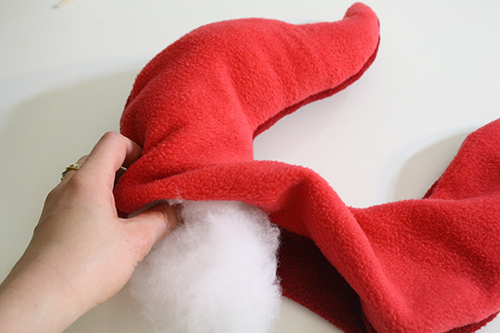
6) Stuff.
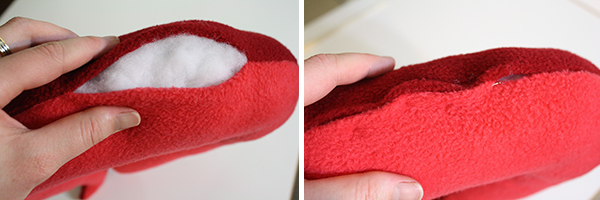
7) Once the pillow is thoroughly stuffed, pin the gap at the top closed. Make sure the raw edges of the fleece are folded down a little, so you have a smooth-edged opening.
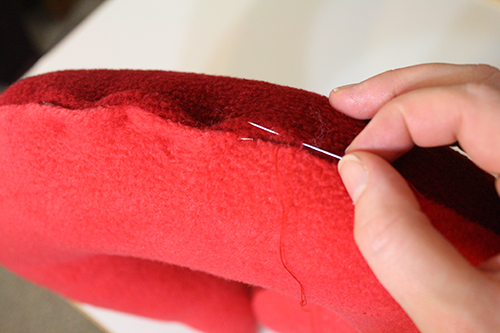
8) Thread a needle, knot the thread, and insert it at one end of the gap. Use a ladder stitch to close up the opening. This means you make a stitch in the fabric along one side of the opening, then across from it in the fabric on the other side of the opening. Then make a stitch in the first side of the fabric, a little further ahead. In this way, you sew the gap closed with stitches that end up being largely invisible.
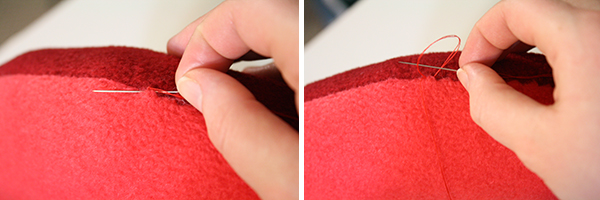
Knot the thread by putting in a stitch and, before you pull the thread all the way through, putting the needle through the remaining loop of thread, then pulling it tight. Repeat this 2 to 3 times for a good solid knot, then cut the thread.
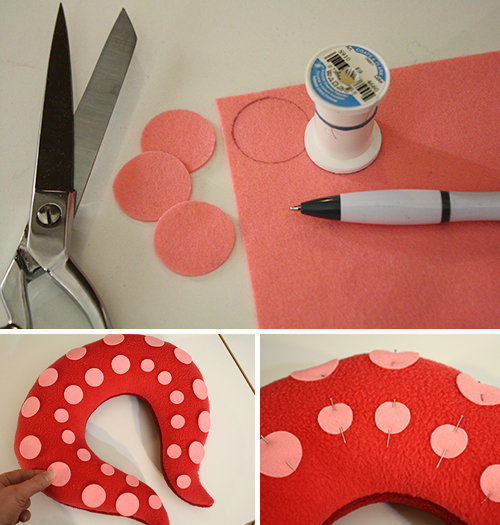
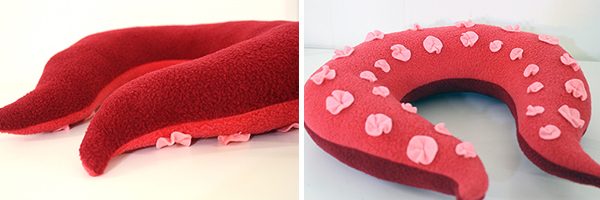
10) Time to make the suckers for the bottom side of the tentacle! First, trace a whole bunch of circles in varying sizes onto your felt. I used varying sizes of thread spools to trace different sizes of circles – coins would probably also work well. With the circle sizes and layout I used, I cut 13 of the largest size, 12 of the smallest size and 3 of an in between size.
Cut out each circle, lay them out on the pillow and mess with the arrangement till you have something you like. Then pin each felt circle in place. Keep in mind that with the gathering on each circle, they’ll end up looking spaced out a bit more than with this pinned layout.
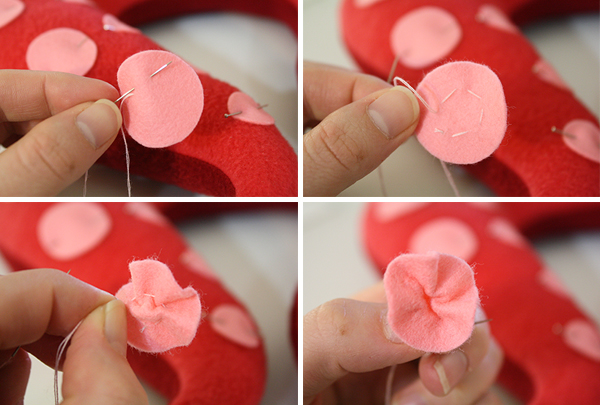
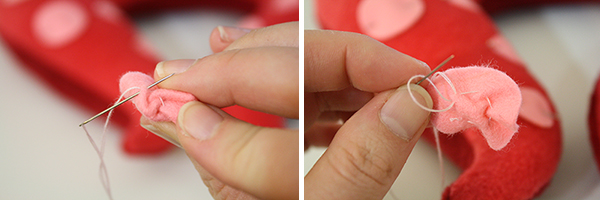
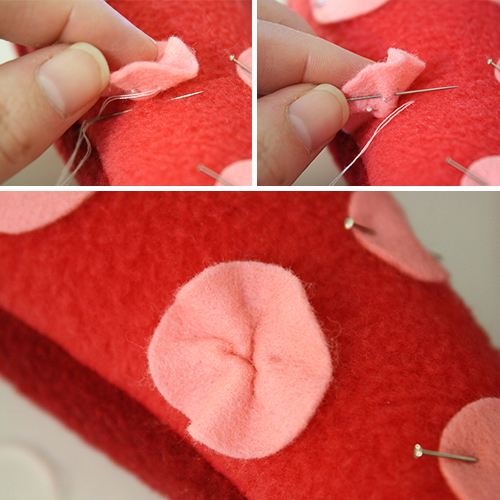
11) One by one, you’re going to unpin each sucker, give it some shape, then sew it to the pillow. Thread a needle with thread that matches the suckers’ colour. Knot the thread. Start by unpinning one sucker and making a circle of large stitches about 1/4 to 3/8 inch in from the circle’s edge. when you’ve completed the circle of stitches, pull the thread gently but firmly, so that the felt circle puckers up in the middle.
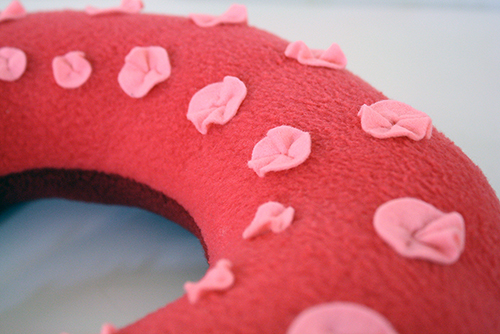
You can just go ahead and stitch each sucker on as a flat circle, but after trying it both ways, I found I preferred the gathered, puckered look that gave the suckers some depth.
12) Keeping hold of everything so the puckering doesn’t loosen, knot the thread, but don’t cut it. This will hold the puckering in place.
13) Now sew the sucker to the pillow, making small stitches around the base of the sucker and into the pillow itself. Knot and cut the thread when done.
Repeat these steps with each other sucker until they’re all sewn into place.
Aside: There’s another way to do the suckers, which I think looks even better but it takes longer (at least for me, as I am not a super adept, quick-as-lightning crocheter): you can crochet small circles of yarn for the suckers. These give a more rounded and 3 dimensional look for the suckers. You make a bunch of crocheted circles in varying sizes, just like with the felt circles, and you sew them on with thread, just like with felt circles.
I specifically learned to crochet just for this project, so I’m not good enough at it yet to try explaining it to someone else. There’s quite a good tutorial here, though, that teaches the basics of crocheting circles. Just keep them smaller by not going on to add secondary and tertiary rings of colours as she does in her tutorial.
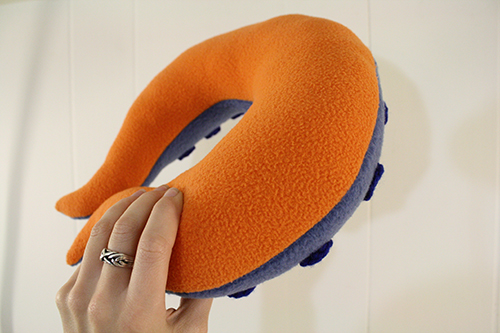
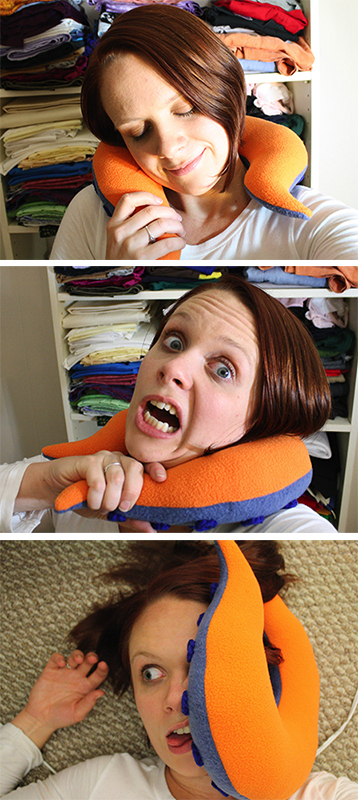
14) And there you are, a finished tentacle pillow! There to love and hug and support and possibly strangle you whenever you need it.

