I had a wonderful childhood, full of many great adventures and privileges. Yet in one way I found I was deprived: I missed out on most of the world of 80s and 90s TV programming. We didn’t have cable, and my parents weren’t down with a lot of TV watching (this was before my mom discovered her love of Survivor, something I still really haven’t come to terms with about her), so while my brother and I watched many National Geographic and history videos rented from the library, we lacked our friends’ comprehensive knowledge of things like Transformers, Captain Planet, Buffy the Vampire Slayer, Dawson’s Creek and, yes, Star Trek.
I’ve been catching up on many of these shows in my adult life, and just now my fiancé and I are about to finish Next Gen and are starting into DS9. (Sisko’s not bald yet, so it hasn’t gotten really good, but it’s moving in that direction.) We watched some of TOS a few years ago, but the first season was as much as I could get through. I understand that it was pretty revolutionary at the time, but it didn’t seem to me to have aged all that well. I mostly just wanted to smack Kirk upside the head.
So I’m relatively new to the Trek universe (I mean, I’d previously caught an episode here and there, so I knew generally who Captain Picard and some of the others were, but not a lot beyond that) but I’m pretty well versed in all the key elements. I’ve even watched all the old movies. Yup, all of them. There was pain involved in that experience.
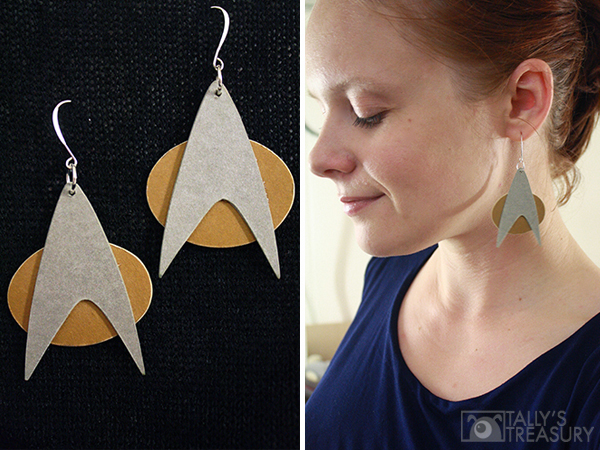
With the next new Abrams movie coming out, I thought I’d try my hand at some Star Trek universe jewelry. I wanted to use the materials I had on hand, and produce a tutorial that most people could easily use, not just those with access to metal-cutting tools and abilities. So once again I’ve used that most remarkably versatile of mediums: paper. You can easily adjust this tutorial to make a combadge pin rather than earrings, and to make whichever iteration of the Star Trek combadge you prefer.
So come with me on this journey of discovery and exploration, where no one has gone before. Well, I think no one has anyway. Except me. I obviously went there in order to create this tutorial. But I’ve been the only one so far! Probably. Maybe. Look, let’s just get going, shall we?
———————————————–
What you’ll need
materials:
- card stock weight paper in silver and gold
- glue stick
- superglue or other strong glue
- clear varnish or polyvinyl acetate or spray fixative, or some other kind of clear sealant (several different options are shown in the tutorial)
- [optional] fine grain sandpaper
- silver or gold coloured jump rings (x2) and earring hooks (x2)
- scissors
- pencil
- needle nosed or jewelry pliers – 2 pairs
- [optional] paintbrush – if needed for the application of the type of sealant you’re using
- drill and small drill bit OR hammer and small (as in narrow) nail
- phone book
———————————————–
Putting it all together
1) First of all, you’ll need a combadge image to trace. I’m not going to put up a template for this, because they’re all over the internet. Just use this image search, find a clear image of the iteration of combadge you want to make, and either print the image out and cut out the shape, or just trace it directly off your computer screen. Either way, you can also adjust the image for size, if you want larger or smaller earrings. The ones I made are, by my estimation, roughly the size that an actual TNG combadge seems to be.
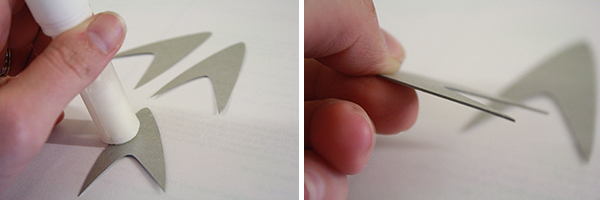
2) Then, take your combadge image, cut it out and trace the top, Starfleet logo, arrowhead thingy piece onto your silver card stock. Trace it multiple times – three to four times per earring. I transferred my image onto a piece of plain card stock first, and then traced that onto the silver card stock. It was just easier to trace around than flimsy computer paper.
Despite the picture, I recommend doing this tracing with a pencil – that way you can erase any bits of the lines that still show after cutting out each shape. If you use a pen, be sure to cut just inside the lines.
3) Cut out each shape, very carefully and neatly. Here’s a tip for tidy cutting with scissors: as much as you can, cut with the back of the scissor blades, especially along tight curves. The closer the part of the scissors doing the cutting are to the hand that’s holding the scissors’ handle, the more control you’ll have and the more tidy and precise your cut line will be.
4) When all your pieces are cut out, divide them into two sets. I cut out six Starfleet logo shapes and divided them into two piles of three pieces each. Apply glue* to one of your pieces, then place another piece on top of it, matching up their edges exactly. Press together.
Repeat this until all of the pieces in one of your sets are glued together. Then glue together the pieces of the other set. So now you should have two glued-together stacks of Starfleet logo shapes.
*I recommend using a gluestick for this. I know some people hate gluesticks, but try them out till you find one that’s actually good (they do exist, there are just a lot of shitty ones out there). Any kind of wet or gel glue in this situation is liable to leak out the edges and get messy, and might cause the paper to warp or ripple.
5) If required for the version of the combadge you’re replicating (haha), do this same thing with gold paper in the appropriate shape. As I said in the introduction, we’ve been watching TNG and DS9 lately, so I decided to go with that iteration of the combadge. Circles and ovals are difficult to cut super evenly by hand, so I actually found it easier to glue several pieces of gold paper together, then trace the ovals onto them and cut through all the layers of glued-together paper at once, rather than trying to match up a bunch of individually cut ovals that didn’t quite match up all around their edges.
If you’re doing TOS badges, you could cut out the little interior star shape from black paper and glue it onto your Starfleet logo pieces.
6) Place all your glued-together paper pieces under a large book or other flat, heavy object and allow them to dry completely.
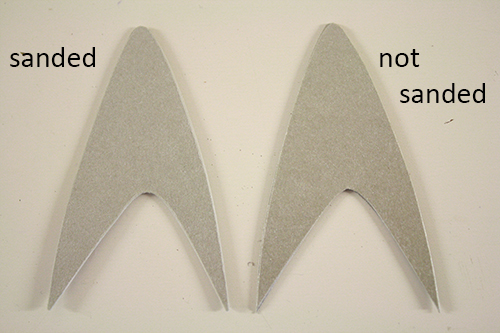
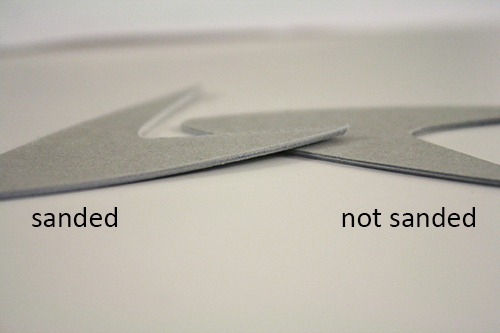
7) [optional step]: sanding! So you don’t have to do this, but I like the slightly more finished look it gives the piece. Take a small piece of fine grain sandpaper and lightly sand the edges of each paper shape. You’ll want to do this on the back and the front of each shape: you’re sanding along its edge, but slanting slightly onto the face of the piece as well, so first do it slanting onto the front face, then slanting onto the back face.
Like I said, this gives the pieces a slightly round-edged and more completed look. It also helps to hide the fact that each shape is multiple pieces of paper glued together, rather that one solid piece.
It’s quite subtle, but I think it does make a nice difference:
8) To make a pin instead of earrings, skip ahead to step 9.
Now get out your drill and a small drill bit.* Make a pencil mark in the same place at the top of each Starfleet logo piece, and drill a small hole there.
Another crafting tip: If you don’t have a whole woodworking type workshop set up, and need a safe place to do your drilling without making holes in the floor or furniture, use an old phone book. I don’t know how it is where you live, but here they keep delivering these things to us annually, and I’m like “What is this? I have the internet, why do I need one of these?” But I keep one around because it makes a great base for any drilling projects. As you can see from the pictures, this phone book has been put to lots of good use previously.
Also comes in handy for things like bookbinding.
*If you don’t own a drill** you can instead make a hole by using a hammer and a narrow nail. The drill option is quicker and easier, though. With the hammer and nail option, you may actually want to start out with a hammer and a large sewing needle, then upgrade to a small nail and if needed a wider nail after that. It can sometimes be easier to start with a small hole and increase its size, especially if you’re working with a material like paper that can bend or buckle if you put too much pressure on one part of it.
**But if you don’t own a drill, you should really just go get one to fix this problem. For as it is written in the scrolls of good crafting practices, it is not good for the crafter to be without a drill (or a dremel, which is the superior multi-purpose choice if you don’t have room or budget for both that and a drill in your life).
Once the holes are drilled, you can use some more sandpaper to very gently sand down the bumpy bits around the edges of the holes. But be careful! Don’t sand the actual surface of the paper surrounding the hole, or you’ll scratch it up and possibly sand the shiny metallic-looking surface right off. Trust me.
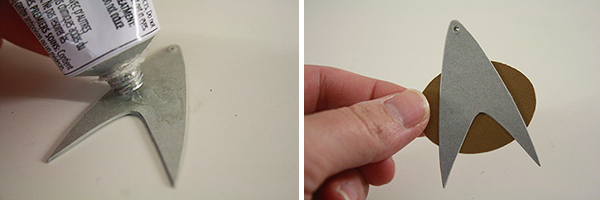
9) Now use your superglue or other strong adhesive to attach the multiple pieces of your combadge, if the combadge iteration you’re recreating has multiple pieces. Make sure you don’t use too much glue, or it’ll leak out the edges and make your nice neat surfaces all messy.
Stick the whole thing under a book or other flat, heavy object again, and let it dry completely.
10) And finally, time to varnish it up! You can skip this step too if you like, but I recommend it as it gives the whole piece more durability and a bit of extra shine.
Use some type of clear sealant or surface protector to coat your pieces, front and back. It depends on exactly what sealant you’re using, but I recommend at least two coats.
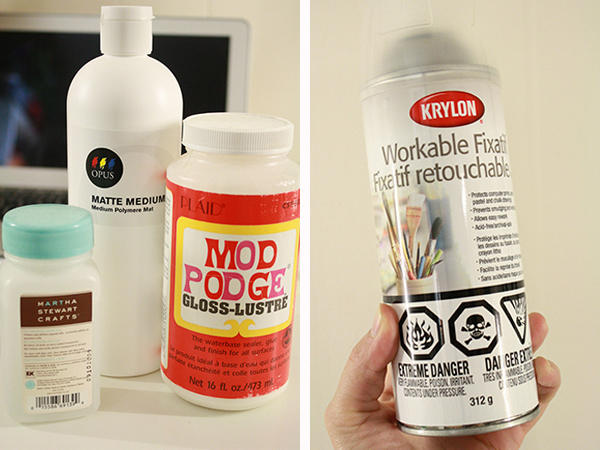
Below are a few of the different options I’ve used for such projects. You can get just a can of clear varnish (go with water-based, it’s waaaay easier to clean off of brushes and fingers and anything else) from the hardware store. Pretty cheap, too.
Or you can get some form of polyvinyl acetate (often mixed with paint to add or subtract shine, dilute the colour a bit or just make the paint last longer, sometimes used in bookbinding) and paint a couple coats of that on.
Things like Mod Podge would also work.
I was in a bit of a rush, so I gave my earrings a few coats of spray-on fixative, which is normally used on drawings and paintings (especially when working with things like pencil, charcoal, pastels) to keep the work from smearing. It also works as a water repellant and can add a little bit of shine, though not as much as some of the other options listed above.
11) If you want to make a pin instead of earrings, ignore the rest of this tutorial about jewelry findings. Instead, superglue a strip of magnet to the back of your combadge, then put it on the shirt or bag you want to attach it to and place a rare-earth or other strong magnet (you can get these at the hardware store) on the inside of the shirt/bag/etc. so the two magnets stick together on either side of the fabric, holding the pin in place. Or, superglue a pin backing to the back side of your combadge.
Once the coating on your earrings is dry, use your needle nosed/jewelry pliers to attach the jump rings and earring hooks. For tips and information on attaching these sorts of jewelry findings, have a look at this tutorial.
You may need to use a nail or needle to poke back through the hole first, if some sealant got in there. Overall though, I find it easier to make the hole before varnishing the pieces.
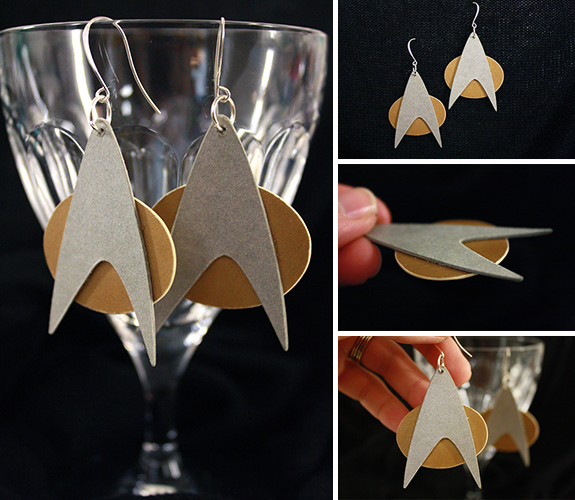
12) Now wear them long and prosper!

