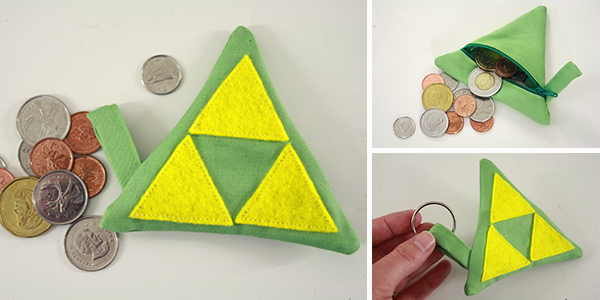
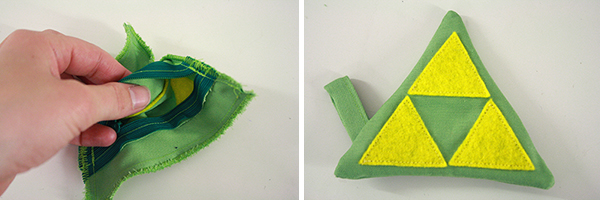
Sometimes you need a place to keep small treasures and the little items that are always getting lost in the bottoms of pockets and purses. A little fabric pouch will help you keep your stuff organized and easily to hand, and you can even attach it to your key ring or a bag strap or handle of easy access. And obviously, it’s way cooler if it comes with a bit of childhood video game nostalgia.
This week’s tutorial will show you how to make a simple and cute zippered coin purse in the shape of a triangle, featuring a Triforce. It’s a very quick and easy project once you know the steps, and I promise that there is no need to fear the zipper! Zippers are one of those parts of sewing that we so often glare at in mild terror and suspicion. But I promise you they’re not that hard to deal with, and certainly not in this tutorial. Trust me, and come along on this journey. Defeat the zipper. Master the zipper.
TLDR: It’s dangerous to go alone! Take this.
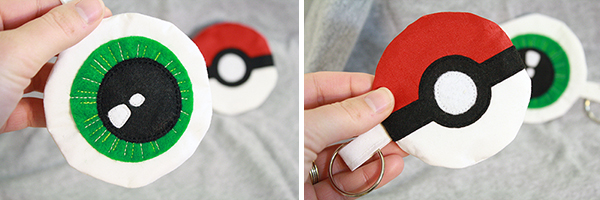
You can also do some sweet things with round coin purses. A round coin purse pattern is also provided for any who’d like to experiment.
———————————————–
What you’ll need
materials:
- green fabric – cotton or light linen, something not delicate but not too thick and inflexible. Don’t use a stretch fabric.
- green thread to match your fabric
- yellow felt
- yellow thread to match your felt
- short and narrow green zipper
- [optional] key ring
- Triforce coin pouch pattern – number 19. under Sewing Patterns
- fabric scissors
- straight pins
- iron and ironing board
- sewing machine
- chopstick
———————————————–
Putting it all together
1) Start by cutting out your pattern pieces. You should have:
- 3 small matching triangles of yellow felt
- one large triangle of green fabric
- the separated top and bottom halves of a large triangle of green fabric
- a small rectangle of green fabric – I made mine 2 inches by 4 inches, and it was too long. Try 2 inches by 3 inches, which is the size provided on the pattern PDF.
2) First, take your large green triangle and your small yellow triangles, and arrange the small yellow triangles on top of the green one in the Triforce pattern. Get them all as perfectly lined up as you can, and make sure they’re centered on the green triangle, an equal distance from each of the three edges of green fabric. Then pin them into place.
3) Now, using a small straight stitch, sew a straight line as close to the edges of each yellow triangle as you can, securing them in place. Or if you prefer, use a narrow and very close together back-and-forth stitch right along the edges of the felt.
If you want, you can use the fleece/felt appliqué technique used on the hearts in this tutorial, which requires sewable HeatNBond (fantastic stuff). This will keep the triangles from moving at all while you sew them and make things a little easier, especially for beginner sewers.
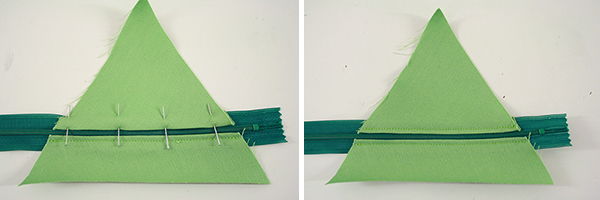
4) Now set that piece aside, and grab your zipper and the two halves of the other green triangle. Heat up your iron. Lay the two green pieces together so they form a whole triangle. Then, along the line that divides them in two, fold the edges over by 1/4 inch and iron them down. Just like in the picture, if this paragraph didn’t make sense.
5) Now, take one of the triangle halves and turn it over so the folded-over edge is underneath. Match the fold up to the zipper, right along the actual zipping part, and pin it to the zipper. Pin it in the middle of the zipper, wherever. Ignore the actual proper top and bottom ends of the zipper for now, and just pin the triangle piece somewhere in the middle.
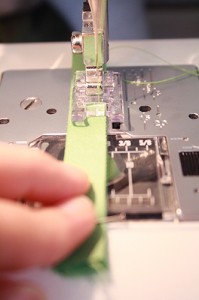
6) Now use a straight stitch to sew the fabric to the zipper, stitching about 1/8 inch from the edge of the fabric.
Note: you might know a slightly different way to sew fabric to a zipper like this, where you don’t do the fold-over-and-iron thing. We’re doing it this way, though, because it makes it much easier to match your triangle halves up exactly on either side of the zipper. Because if they’re not pretty much perfectly matched up, that’s gonna be a problem.
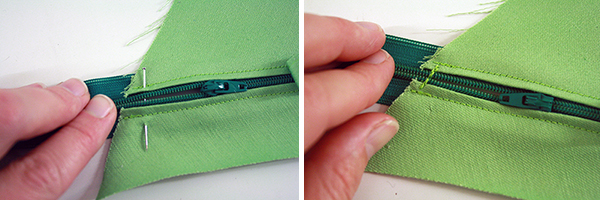
7) Now pin the top half of the triangle to the zipper, matching it up exactly with the bottom half of the triangle, with the zipper running between them. Sew it in place.
There should be zipper ends sticking out of either end of the triangle at this point. DO NOT trim those ends off yet!!
8) Optional step: If you want a keyring tab, do these next steps. If not, skip ahead to step 10.
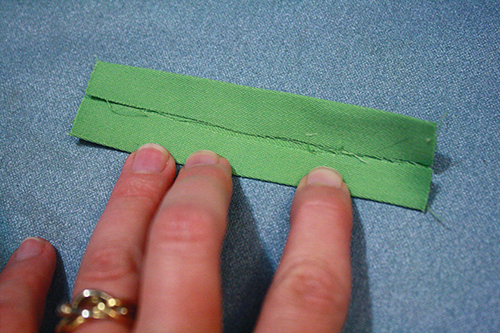
Take your small rectangle of green fabric, and fold each of its long sides in to the middle, then iron them down. So it looks like so:
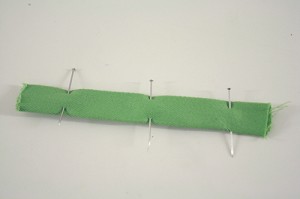
Then fold it in half and pin it. Sew a line along its open edge, about 1/8 inch from the edge of the fabric:
9) Now fold this narrow rectangle of fabric in half, and pin it to the middle of one of the sides of your zippered triangle.
NOTE: In the picture below, I pinned my tab to one end of the zipper, in line with the zipper. In retrospect, I suggest pinning the tab right in the middle of one of the sides of the triangle, and lining it up so it comes in a straight, perpendicular line from the triangle’s edge. They way I did it, my tab stuck out of the finished coin purse at a kind of funny angle, in a kind of funny place. To avoid that, pin your tab to the middle of the triangle’s edge, about where the arrow is pointing in the picture below, instead of where the picture actually shows me pinning it.
Now tack the tab down with a few stitches right along its edge. It’ll get more firmly sewn in place later.
10) Make a few stitches back and forth over the place where the bottom end of your zipper meets the green triangle fabric.
11) VERY IMPORTANT: unzip the zipper until the zipper pull is in the middle of your green triangle of fabric. If you keep going without doing this, you’ll end up with a zippered pouch that has no zipper pull and therefor doesn’t open, and you’ll be a very very sad panda and have to start all over, or at least pull out a lot of stitches.
Once you’ve done this, pull the open ends of the zipper together and hold them together. (You can use a pin to help hold them together, but it won’t really help that much.) Then stitch back and forth over the zipper right at the edge of your triangle fabric a few times.
ALSO VERY IMPORTANT: Now, before you go to step 12, move your zipper pull close to the side of the coin purse, so that the zipper is mostly open. Moreso than in the photo above. If you don’t do this, it’s going to be an absolute pain to try and open it from the inside in step 16 so you can turn the coin purse right side out. Trust me.
12) Now, grab your other green triangle, the one with the yellow Triforce appliquéd onto it. Pin the Triforce triangle and the zippered triangle together, with their front sides facing together.
13) Sew around the edges of the triangles, with a 3/8 inch seam allowance. On a standard sewing machine, this means you just match up the right edge of your presserfoot with the edge of your fabric, and that will give you a 3/8 inch seam allowance.
Go slowly over the bits with the zipper ands and the fabric tab – they’ll be a bit bumpy. I recommend going around the triangle twice, just for extra strength and durability.
14) Now trim the corners of the triangle off, being careful not to cut through the thread. This will just make it easier to poke the corners out when you turn the purse right side out, and make the corners less lumpy and rounded, and more like proper corners.
Also trim off any excess zipper ends at this point.
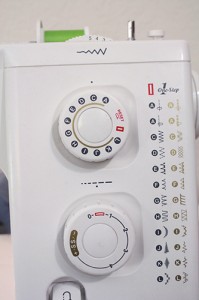
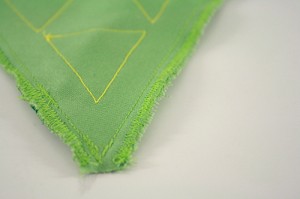
15) If you want, go along the raw edges of the triangle with a wide, very close-together zigzag stitch to help keep the edges from fraying and leaving little bits of thread all over the inside of your coin purse.
16) Now turn your coin purse right side out, and gently use a chopstick to poke out the corners, and run it along the edges to smooth them out.
17) If desired, attach a key ring or carabiner or some kind of clip to the fabric tab.
Then, fill with money! Or other small items. This could be a place to store chapstick, earbuds, medications that you need with you on the go, etc. It could make a place for kids to keep pretty rocks and other small treasures. And of course you can make a larger one by just printing out an enlarged version of the pattern.
Experiment with other fun designs and patterns as well!

