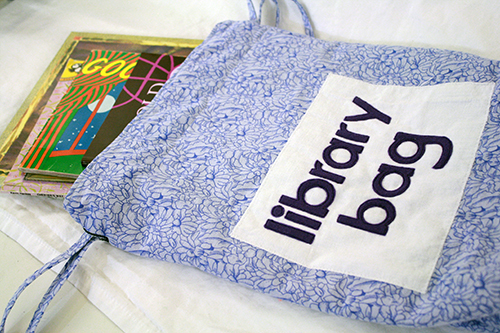
Starting in this month, I’ve taken up a nanny job once again (this is my third time nannying over the past decade – I just keep falling back into it somehow). This means that, in addition to the posts about our wedding that I’m finally almost ready to post, there will probably be a higher percentage of kid-crafts on this blog in the next few months. So, like, stuff with crayons and cardboard and glue, and lots of bright colours. If you’re not excited about this regardless of your age, maybe it’s time to reexamine your life and interests a little. Crayons are never not cool, guys.
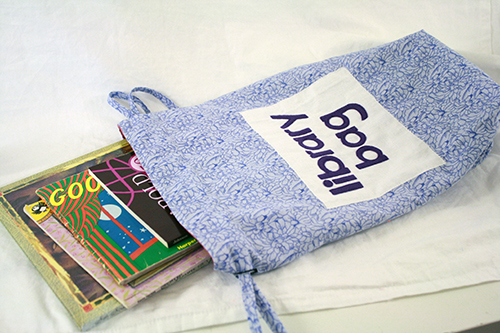
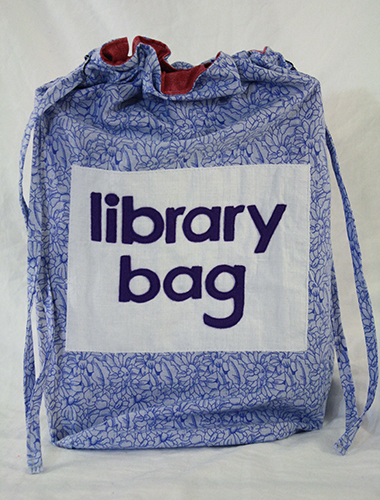
Some of this nanny crafting is going to be pretty utilitarian, like this week. We need a way to not keep losing library books in odd corners of the house, so I’m working on a box that all library books will live in when not being read. And in the meantime, I made us a library bag to cart our books back and forth in. Since I’m working with a two year-old here, bright colours and big easy-to-read letters are the thing – not that she can read yet, but labelling things like our library bag will help her along the road to reading.
This is also a combination craft, meaning that it combines two other craft tutorials I’ve previously written for this blog:
- First, it uses the flat bottomed drawstring bag tutorial I posted a few weeks ago, but this time on a larger, full-sized tote bag scale, plus it shows you how to make a lining for such a bag.
- And second, it employs the felt appliqué method I first showed off in my fleece masks tutorial two summers ago. I use this appliqué method A LOT. So much so that I’m very excited to say that I just bought a bolt of 35 yards of HeatNBond. YEAH, BABY, YEAH!
For convenience’s sake, I’m going to write this project up as a new tutorial, combining the main aspects of those other two, but if you’ve already tried either of those other ones, you’ll be ahead of the game here.
Now, to be honest, this was a first-try kind of project and there are some things I’d do differently if I were to do it over.
First, I think for a toy bag the flat bottom would be great, but for books it’s probably just not necessary. And if you do go with the flat bottom option for a book bag, I’d cut your main bag rectangles at least a few inches wider than I did here, as the flat bottom ended up rather too narrow to be much use with the size most picture books come in. It’d work well later on for novels, though!
And second, I’d probably make the drawstring handles wider, so that when the bag is loaded down with books the handles don’t dig in so much if you throw them over your arm or shoulder. In this case though, I was down to my last bits of that blue fabric I used for the bag, and that dictated how wide I could make the handle straps.
Note: You can make a lined drawstring tote bag without a flat bottom by just skipping the flat-bottom-making steps (I’ve indicated in the tutorial which ones those are). You can also skip the appliqué part. And despite the length of the tutorial, this really is a very simple sewing project – I just like to provide details and photos for every little step to make sure that it truly is clear and easy for anyone who hasn’t tried this sort of thing before.
———————————————–
What you’ll need
materials:
- fabric (how much depends on the size of the bag you want to make, but for a medium sized bag like I made here you’ll probably want around 1 – 1.5 yards (or 1 – 1.5 meters, depending on where you live) – plain or patterned cotton works well. You can use two different fabrics – one for the outside of the bag and one for the lining – or just use the same fabric for both the lining and outer layer.
- felt or fleece to cut your appliqué pieces from
- thread to match your fabric
- wide, strong ribbon for handles OR long rectangular strips of your main fabric to make into handles
- sewable HeatNBond – it must be the sewable kind. You can get it from craft stores like Michael’s, and from fabric stores, for about $5 a package (or buy it online by the bolt for way more than that – wheeee!). It goes a fairly long way, especially for smallish appliqué projects like lettering.
- scissors
- cutting mat & rotary cutter OR ruler and pencil (you’ll need a pencil and ruler regardless)
- iron & ironing board
- sewing machine
- seam ripper OR very small pointy-ended scissors
- straight pins
- medium to large sized safety pin
———————————————–
Putting it all together
1) Begin by cutting out four rectangles of exactly the same size – two from your outer fabric and one from your lining fabric. There is absolutely no need to do any kind of measuring for this, unless you’re trying to fit something very specific inside this bag. Just make your rectangles about the size you want your bag to end up, keeping in mind that you’ll lose about 6 inches at the bottom of the bag if you give it a flattened bottom, and about 1 inch along the rest of the bag due to seam allowances. But overall, just make sure all your pieces have straight sides and right-angled corners and you’ll be fine.
2) Now that you have an idea of your bag size, set the rectangles aside and sort out your appliqué. Make sure that whatever you’re appliquéing onto the bag is at least a couple inches narrower than one of your rectangles. Here’s how to do the appliqué process I’ve used.
- a) Draw or print out the letters or numbers or image that you want to appliqué onto your bag. Make sure you draw/print it backwards, as the final image will be flipped.
Most photo-viewing programs give you an easy option to flip your image, so you can do this even without fancy Photoshop software or skills. For example, on a Mac, you can open your image with Preview and select Tools –> Flip Horizontal. Then save your image like that and print it. OR there’s another solution given below, in step b.
- b) Now trace your letters/numbers/image onto your HeatNBond. HeatNBond has 2 sides: a slightly tacky plasticky side, and a paper-like side. Lay it down over your image paper-side up and trace the image onto the HeatNBond with a pencil.
- c) Roughly cut out your letters/numbers/image from the HeatNBond, leaving a bit of HeatNBond outside the edges of the pencil lines.
- d) Turn your iron on medium to high, and lay the letters/numbers/images down on some felt or fleece*. Then iron over the HeatNBond briefly and it will fuse to material beneath it.
*You can use any fabric, really, but for starting out I recommend felt or fleece. These materials don’t fray, so you don’t have to worry about doing a more time-consuming back-and-forth stitch around their edges, they’re easier to cut out neatly, and you won’t have any little fraying bits when you’re done.
- e) You’ll notice that HeatNBond stuck to the back of your letters/numbers/image actually has two layers, and the white papery layer peels right off if you dig a fingernail under its edge. Pull it off, and arrange your letters/numbers/image how you’d like them to look either directly onto one of your outside-of-bag fabric rectangles, or onto another piece of fabric. Do this on the ironing board, so you don’t have to move it before it’s fused in place and risk messing it all up.
Then iron over your appliqué pieces again, fusing them into place. You’ll need to hold the iron in place over them for 10-30 seconds this time, and if you’re using fleece for the appliqué you may want to put a pressing cloth (a thin scrap of cloth or a tea towel) between the appliqué and the iron so that the fleece doesn’t start to melt and get deformed. Which can happen a little bit sometimes.
- f) Go over to the sewing machine, and using thread the same colour as your appliqué pieces, sew with small straight stitches just inside the edges of all of your letters/numbers/images, to secure them permanently to the fabric behind. just over the edges of your appliqué pieces.
- g) Finally, if you did your appliqué onto a separate piece of fabric, pin and sew that fabric in place on one of your outer-bag-fabric rectangles. If you appliquéd directly onto your bag rectangle, just proceed to the next step.
3) Alright, now we’re ready to get back to the business of turning this all into a tote bag. Grab your two lining rectangles, and put them together with their right sides facing. Pin them around their two long side edges and one of their short edges (that’ll be the bottom).
4) Sew those three pinned edges together with a straight stitch, matching your presserfoot up with the edge of the fabric for about a 3/8″ seam allowance.
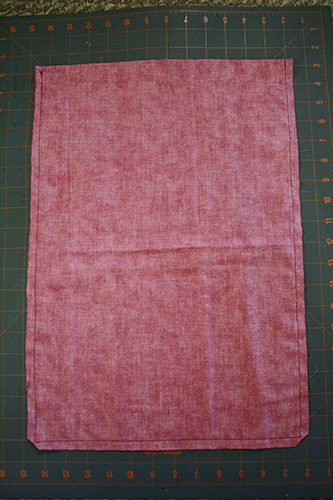
5) Now if you don’t want to bother with the flat bottom on this bag, then skip ahead to step 6. If you do want the flat bottom, follow these steps (keep in mind you’ll lose about 6 inches of width at the bottom of your bag:
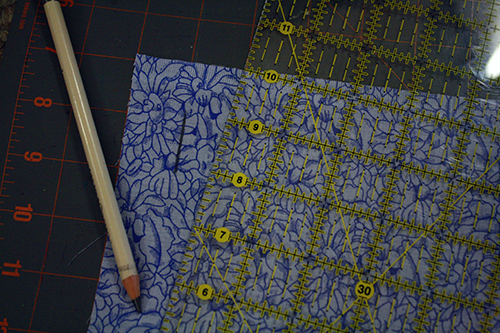
- a) Lay your sewn-together rectangles (which we’ll now refer to as a bag) flat. Using a ruler, make a small pencil mark about two inches up from the bottom of the bag, and three inches in from one of its sides. Do the same thing three inches in from the other side of the bag.
- b) Flip the bag over and do the exact same thing on its other side.
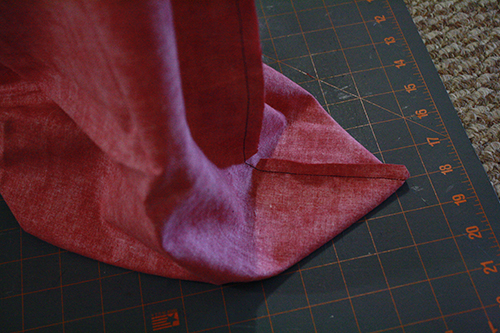
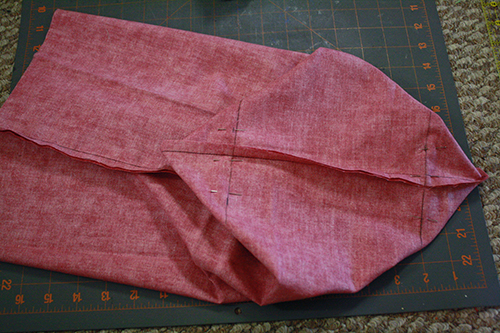
- c) Look at the bottom seam of the bag. Grasp the fabric on either side of that bottom seam, at one of the corners of the bag, where the bottom seam and side seam meet.Pull the fabric on either side of the bottom seam flat, creating a triangle shape.
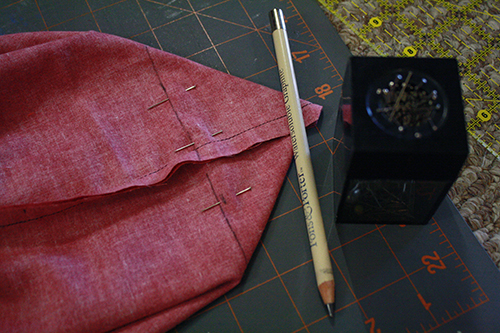
- d) Now flip that flat triangle over so you can see the two pencil marks you made on either side of the bottom seam:
and use your pencil and ruler to draw a line from one corner of the triangle to the other, crossing through the two pencil marks. Then pin along this line.
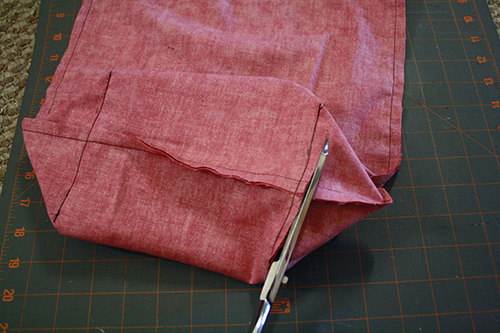
- e) Now do exactly the same thing to the other bottom corner of the bag. Then sew right along those pinned pencil lines.
- f) Cut the triangular corners away entirely, about 3/8″ from the lines of stitching. Voila, you’ve created a flat bottom for your bag.
6) Set the bag lining aside and grab the two rectangles for the outside of your bag (one of them with appliqué on it, if you chose to do that), and lay them down flat, right sides facing up.
Using a pencil or a fabric-marking pen (the ink vanishes when you iron over it), draw a 1 to 1.5″ long vertical line on each rectangle on the left-hand side, just below the bottom fold line. Make sure the line is 1/2″ to 3/4″ IN from the left-hand edge of each rectangle.
7) Now you’re going to take these rectangles over to your sewing machine and sew buttonholes right overtop of those marks you just made.
As is explained every time I use button holes in a tutorial, they’re truly not that hard to do. If you’ve never made one before, you’ll want to practice a couple times on some scrap fabric, till you’re comfortable with the process. Have a look at your sewing machine’s manual (or look it up online) to find out exactly how to make buttonholes on your machine. It’s not really so tricky, and it’s a useful thing to know.
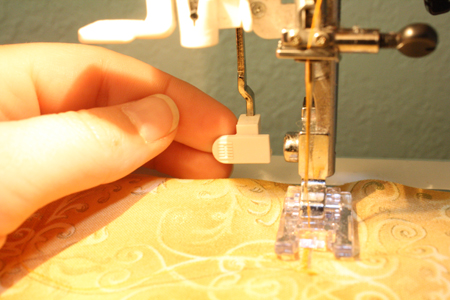
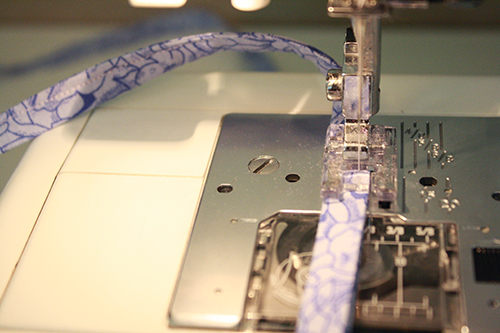
All machines are a little different, but on mine, for example, I simply have to turn my two dials to the red buttonhole setting, and my stitch width to the widest setting, as in the photo below.
An important note: on my machine and, I believe, on many sewing machines, the needle starts by going backwards when you are making a buttonhole. This means that I need to start the needle at the bottom of my pencil mark. The needle goes up, over, and back down again to make the buttonhole.
On my machine there’s a little buttonhole arm that comes down behind the needle (see the photo below). I ignore it at first, and just start the needle going at the bottom of my pencil mark. It goes back and forth doing a wide stitch for a moment, then starts going backwards, doing a narrow, close-together stitch. When it gets to the top of the pencil mark, I stop the needle, push the little buttonhole arm, and start stitching again. The needle does another wide stitch briefly, then comes back down the fabric, doing a narrow stitch a tiny ways apart from the the first line of stitching. Once it’s back at the bottom of the pencil mark, I backstitch to knot the thread, then lift the presserfoot and cut the thread and I’m done.
8) Use your seam ripper or a pair of small, sharp-ended scissors to dig into the fabric in the buttonhole’s center, cutting it and leaving an actual hole between the stitching.
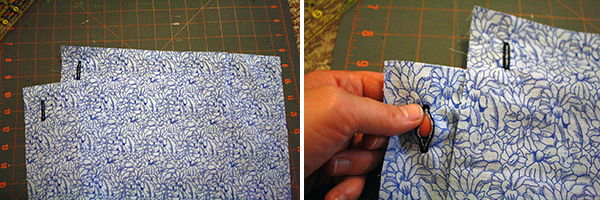
9) Once both buttonholes are made, stack your two rectangles together with their right sides facing, and pin them together along the bottom and sides. Then go sew them together along those edges, again with a 3/8″ seam allowance (just match the edge of the sewing machine’s presserfoot up with the edge of the fabric).
10) If you’re doing a flat-bottomed bag, then once again follow the a-f instructions given in step 5 to do that with this outer layer of your bag.
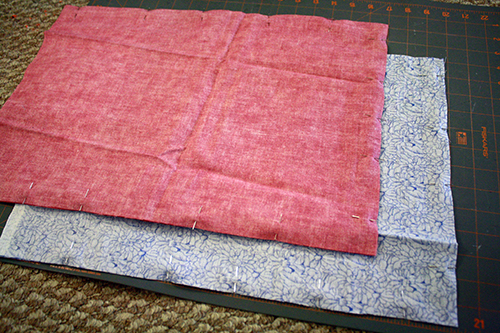
11) Leave your outer bag layer inside out, and turn your bag’s lining layer right side out. Put the lining layer inside the outer layer so that their right sides are facing. Match up the side seams and the top edges of each layer, and pin them together all around their top edge.
BUT use two sets of double pins to mark a space about 3 inches wide. You will NOT sew across this space.
12) Start at one of the sets of double pins and sew along that top edge with a 3/8″ seam allowance (edge of presserfoot along edge of fabric), stopping when you get all the way around to the other set of double pins. Meaning that you will leave a 3-inch gap unsewn and open.
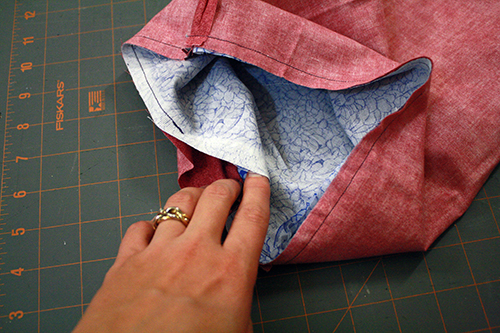
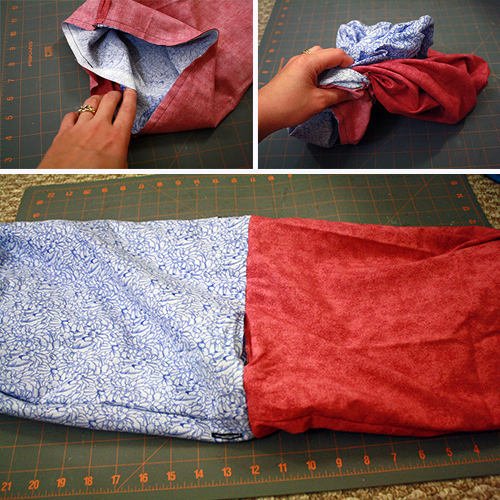
13) Use that 3-inch gap to pull the entire bag right side out.This means you’ll end up with the lining and the bag’s outside right side out but lying across from each other, attached at the top. Like in the second photo below:
14) Stuff the lining layer inside the outer bag layer:
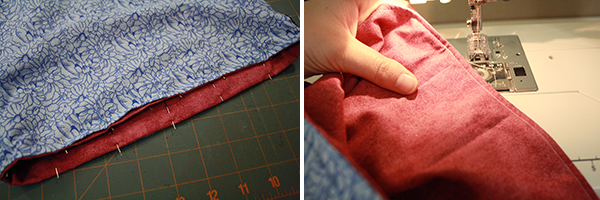
15) Then get that top hem as flattened down as you can (you may want to go over it with the iron), kind of rolling it between your fingers so there’s no extra fabric rolled down inside and caught between layers. This should make sense when you’re actually at this step and can see what the fabric’s doing at this point. Pin all around the top edge. Where there’s the 3-inch gap for turning, fold the raw edges inside the gap and pin it shut.
Now sew all along that top edge, about 1/4″ from the edge.
16) Now for the handles! You have two options. You can cut two lengths of thick, strong ribbon. Make each length about 2.5 times as long as the width of your bag.
Or you can make fabric handles. The easiest way to do this is:
- a) Cut two long narrow rectangles of fabric that are 2.5 times as long as the width of your bag. I’d make them at least 2-3 inches wide, and probably more like 4-5 inches wide. (My handles were narrower than I’d like due to the small amount of fabric I had left to make them with). If you don’t have a long enough piece of fabric to go 2.5 times the width of the bag, cut a couple pieces that are half that width and sew them together to make one longer piece.
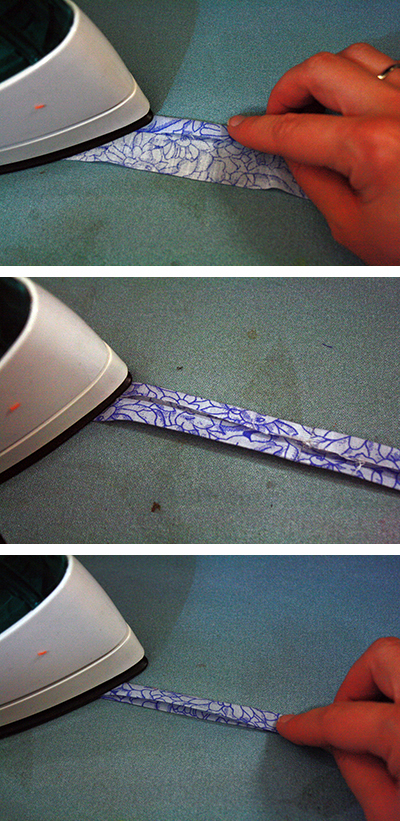
- b) Lay one of the strips down on your ironing board and fold the top edge of the strip down 1/4″, creasing it down with the iron.
- c) Make a 1/4″ fold and crease from the bottom edge of the fabric strip.
- d) Fold the strip in half and crease it down, then pin it.
Photos of steps b, c and d:
- e) Sew along the open edge of the folded fabric.
- f) Repeat with the other strip of fabric so you have two sewn handle strips.
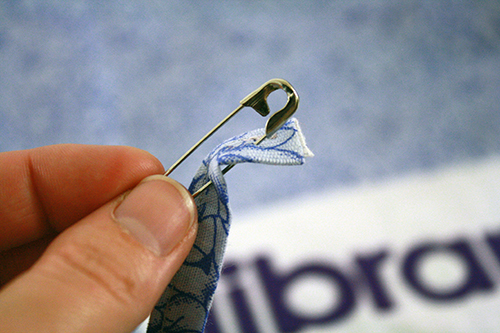
17) Now, whether using ribbon or fabric strips for the handles, attach a large safety pin to one end of one of the pieces of ribbon or fabric.
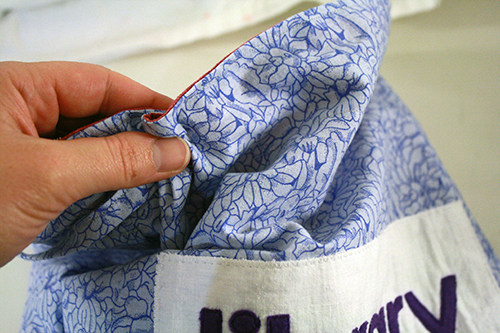
18) Insert the safety pin – with the ribbon/fabric attached – into one of the button holes. Now scrunch the fabric up along the safety pin to pull the pin along through the tube of fabric at the top of the bag. (You’ll actually need to use both hands for this, it’s just that, in the photo below, one of mine was occupied with holding the camera.) Pull it all the way around the bag, past the other buttonhole, so it emerges once again from the other side of the buttonhole that it went into.
19) Match up the ends of the ribbon/fabric strip and sew them together. Go back and forth over this line of stitching 2 or 3 times, to make it nice and strong.
20) Repeat those two steps with the other strip of ribbon/fabric, going into the other buttonhole. Now you can close the bag by pulling simultaneously on the two drawstrings.
21) Take it to your local library and fill it with books!


