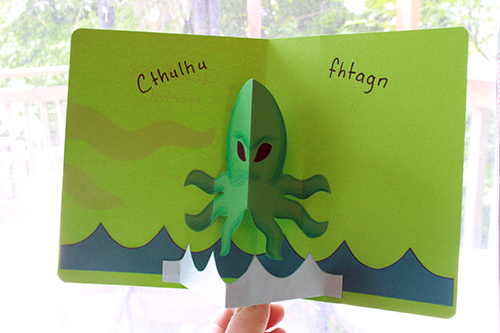
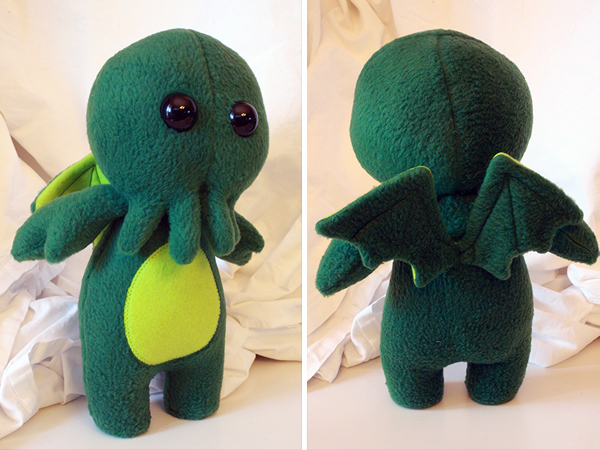
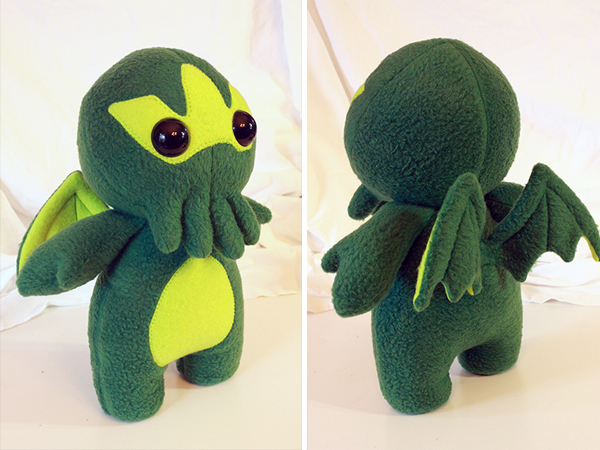
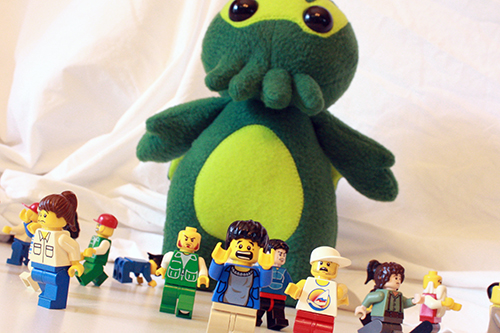
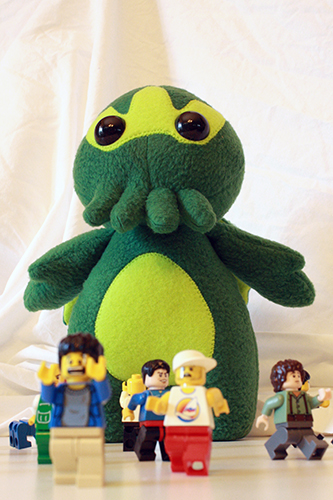
It’s been a very Chtulhu week, as I worked on pattern drafting and various iterations of a Cthulhu plushie, which I’m calling my Cthulhu D’awwwtagn doll. In keeping with the theme of elder gods and tentacled madness, I thought I’d like to come up with a Cthulhu greeting card.
But this monster doesn’t just slip quietly into your home, no he comes at you and makes his horrible presence known. So a pop-up card seemed most appropriate. There are a few different techniques for making pop-up cards, and this is probably the second simplest.
Take what you learn here and try designing some other pop up cards of your own! A zombie that is actually reaching out at you to grab your brains would be pretty neat, for example…
Or, uh, flowers. Pop-up flowers would be nice.

If you missed the various Twitter and Facebook posts about it, here are the Cthulhu D’awwwtagn plushies I made this week:
———————————————
What you’ll need
materials:
- 1 sheet each of green & blue coloured card stock, plus 1 sheet of card stock in a colour of your choice (for the actual card part)
- glue (white glue or a good quality glue stick)
- envelope
- crayons / coloured pencils / markers
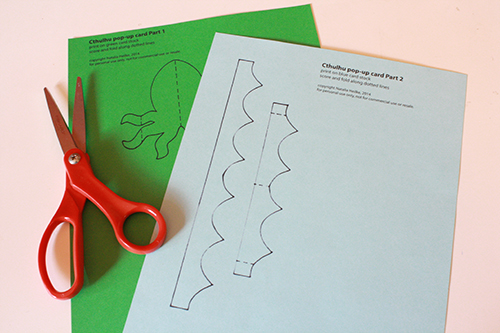
- Cthulhu pop-up card templates (note that there are TWO separate PDFs!) – number 22. under Paper Patterns and Templates on the Patterns page
tools:
- scissors
- paper cutter OR pencil & ruler
- ruler (yeah you’ll need one anyway, even if you’ve got the paper cutter listed above)
- mechanical pencil (same deal as the ruler, you’ll need one regardless)
- eraser
———————————————–
Putting it all together
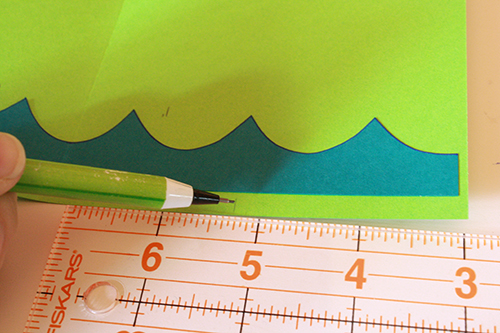
1) Start by printing out the templates, the water 1 onto your blue card stock and the Cthulhu one onto your green card stock. Or you can print them both onto white card stock and cut them out and use them to trace onto various colours of card stock. In that way, you could do the water pieces in two different, contrasting blues, which is what you’ll see later on that I did.
Then cut out all the pieces. And save the remaining card stock scraps for other projects!

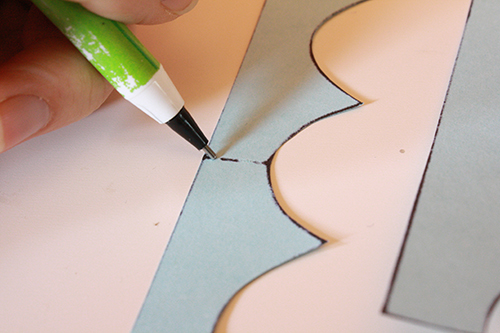
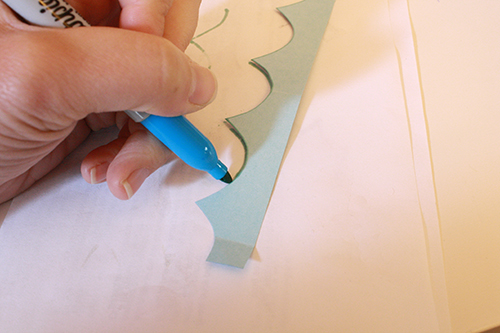
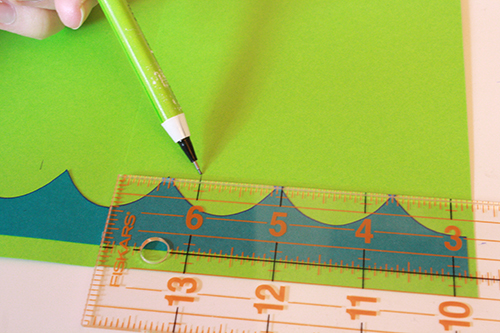
2) See the dotted lines on the pieces you’ve cut out? Take your mechanical pencil, with NO lead poking out, and firmly drag it along each of those dotted lines, scoring the paper. Scoring is where you make an indent into the paper, which in this case will help you to fold it more neatly and accurately along that dotted line. You may want to use a ruler to help you direct the pencil in a straight line.
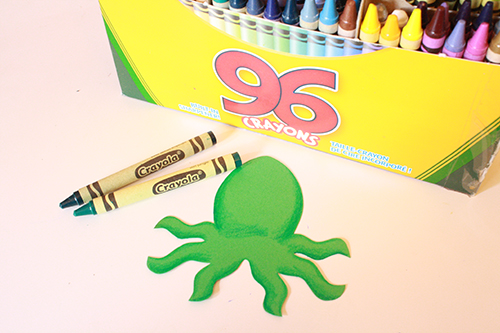
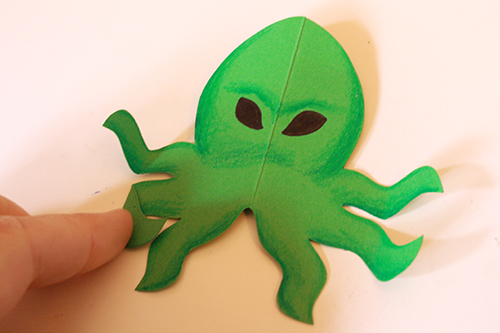
3) If desired, decorate/colour/embellish your cut out pieces. This can also be done later, but it’s easiest to do before you make folds in the paper.
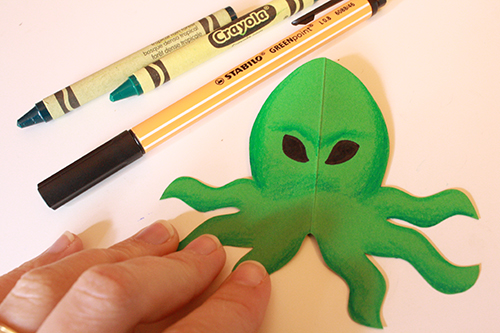
I used crayons to shade my Cthulhu piece, making it stand out more and look more interesting.
Then I folded it in half down the middle line so I could see where that line would be and use that to draw its eyes more evenly spaced from the center of its face.
Another technique I like to use is to take a marker and a piece of scrap paper, lay your shape down on the scrap paper, and pull the marker along the scrap paper, right up against the edge of the paper cutout. This gives it a nice little inked edge. You can do the same thing by pulling the cutout’s edge along a coloured stamp pad, though that’s tricker with curved shapes like waves and tentacles.
4) With the short waves piece place it down so the side with the printed lines on it is not showing. Fold the tabs on either end up toward you, and press firmly to crease the fold line completely. Then fold the whole piece in, away from you, along the dotted line in its center.
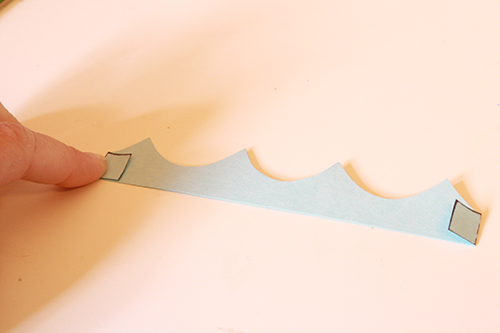
For the longer waves piece, just fold it exactly in half, folding nice unprinted-on sides together.
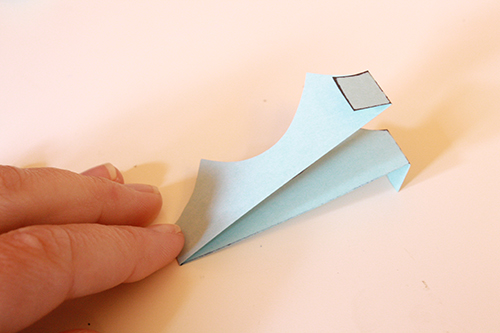
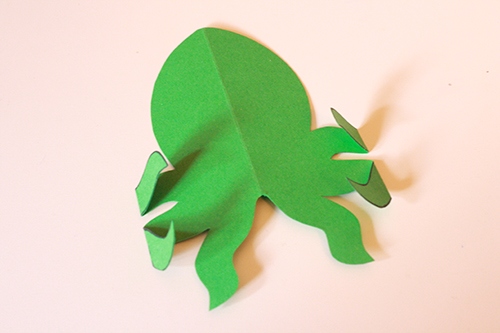
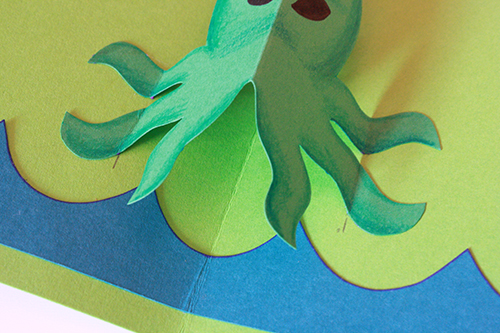
5) Do the same thing with scoring the dotted lines on your Cthulhu shape. Along the center line, fold Cthulhu so its printed-on side is hidden, folded together.
Along the tentacle lines, fold the tips of those tentacles out towards you, so that the printed-on side of the paper appears.
It’s a little clearer on this picture of a still-uncoloured Cthulhu cutout:
6) Now get out your paper cutter or a pencil, ruler and scissors, and cut a rectangle that’s 5.5 inches wide by 8.5 inches long. Cut this from whatever colour card stock you want the actual card base/background to be.
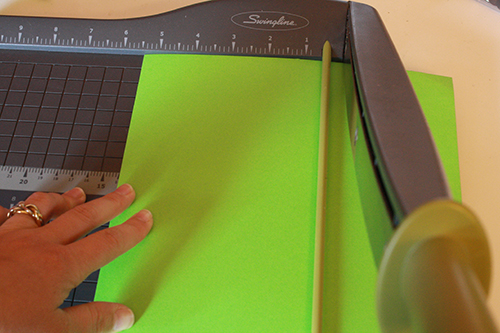
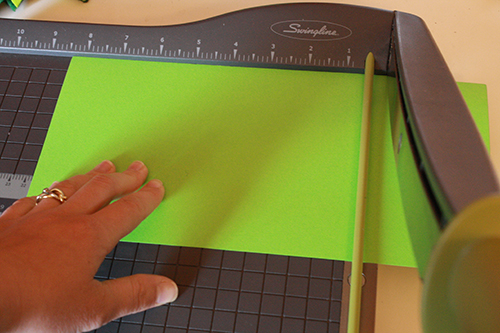
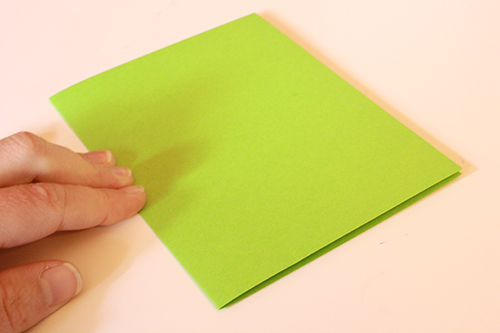
Then fold this rectangle in half, and firmly crease the fold.
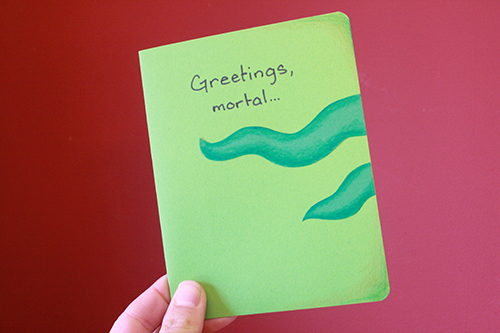
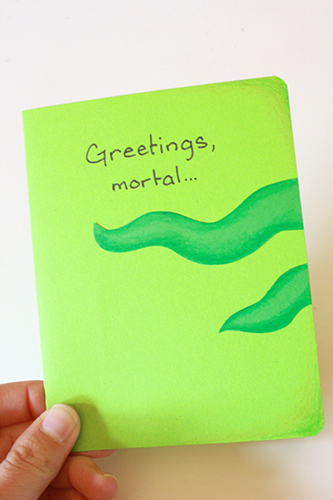
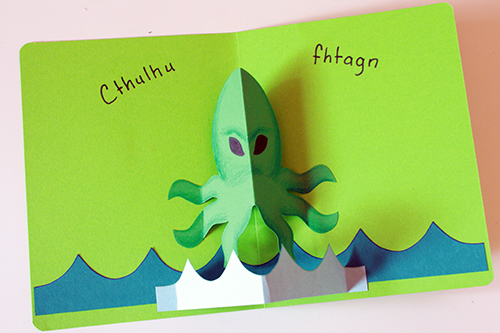
7) Draw/write/decorate however you like on the front of your card. You can do this at the end (I did), but it’s easier to do it now before all the pop-up stuff is glued inside the card.
I decided to put a little text and some shaded tentacles on there, and round the corners.
8) Open up the card, and glue the long, folded-in-half waves piece into it, matching up the center folds of the card and the waves, and placing the waves about 1/4 inch up from the card’s bottom edge.
Dammit, I forgot to take a picture of this! But you can see it in the following photos.
9) Use a ruler and pencil to make four marks inside the card.
First, make two marks along the bottom inside edge of the card, each one 2.25 inches in from the sides of the card.
Second, make two marks that are 1.25 inches up from the bottom of the card, and 1 inch from the center of the card.
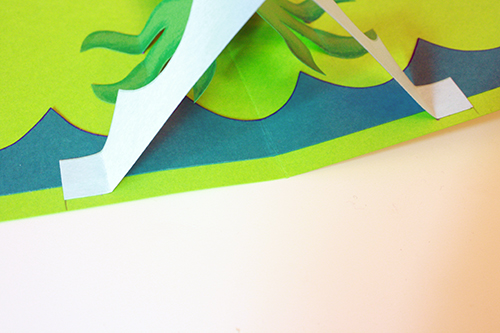
10) Apply glue to the folded-over ends of Cthulhu’s tentacles. Then match the bottom of the fold line on each of the lower tentacles with the top of the little pencil marks you made higher up on the card.
Press those tentacles into place, then press the other tentacles into place where they’ve ended up being situated.
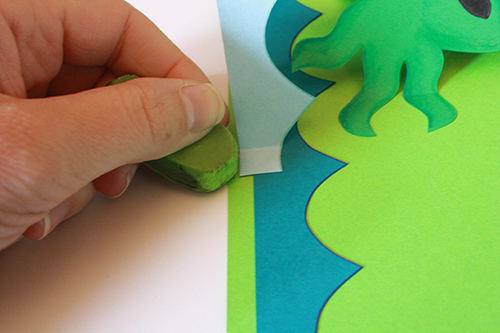
Erase any still-visible pencil marks by the tentacles.
11) Apply glue to the folded-over ends of the shorter waves piece. Match the very edge of either end of the piece with the pencil marks you made along the bottom edge of the card, and press into place.
Erase any still-visible pencil marks.
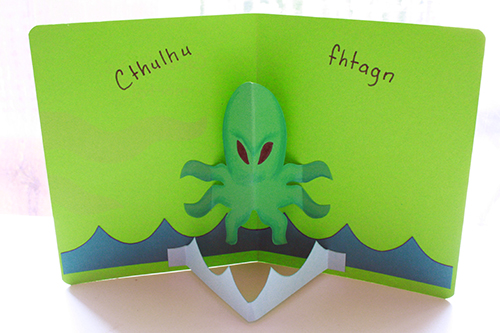
12) Add any other embellishments, including a message inside, and you’re done!
13) Find an envelope, write a message inside, and send it to someone! I’m not entirely sure whether a card like this is best sent to someone you love, or just to someone you really want to disturb. Your call, I guess.