A few months ago I shared my first experiments with etching designs onto glass, which is a wonderful way to reuse, decorate and personalize glass containers of all kinds, whether to use for storage or gift giving or pure decoration. Apart from learning an important lesson about cleaning up my tools so as not to accidentally ingest poison, I discovered that it is a pretty simple process.
However, I wanted to find a way to create etched designs that could be more intricate than images that must be cut out, whether by hand or with die cutting tools, from sticky contact paper. After some experimenting, I discovered that simply painting your images onto jars works very nicely as well, and if you have a steady hand and a fine-tipped brush it allows for some very small and intricate detailing indeed.
This is a simple procedure, and very similar in large part to my original etching tutorial, so if you’ve tried that you you’re already over halfway to knowing how to do this. Grab your paints and brushes and get started!
Oh, and do remember not to eat the etching cream.
———————————————
What you’ll need
materials:
- glass etching cream
- rubber gloves (While the cream is not nearly as dangerous as its label would likely have you believe, you should still be careful. It’s toxic stuff – it’s eating into glass, after all.)
- glass bottles or jars to etch (with lids, if you need those) – empty and washed out wine/cider/beer bottles, old glass vases, or peanut butter, pickle, and other such jars work perfectly for this. If you use containers from items you’re buying and consuming already anyway, you don’t have to go out and buy anything extra for this project
- acrylic paint (colour does not matter, though a darker hue will be easier for you to see and therefor to work with on the glass)
- [optional] scrap paper for printing or drawing images/designs on to use as a template
tools:
- good quality paint brushes in your choice of size (for painting your designs onto the glass)
- large-ish paint brush (for the etching cream)
- old toothbrush or other brush for cleaning off the etching cream
- old towel or rag
- [optional – may not be necessary] plastic kitchen scrubber or cleaning sponge with abrasive scrubber on one side
- [optional] pen/pencil/printer if you want to draw or print designs to use as templates for painting images on the glass
———————————————
Putting it all together
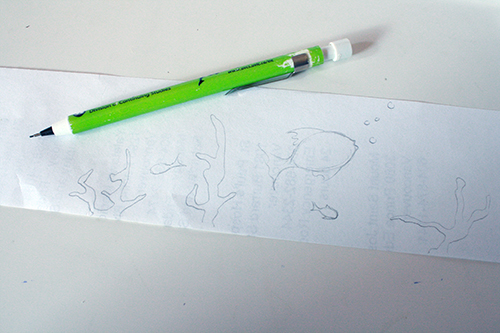
1) If you want, you can start by cutting a strip of scrap paper that will fit inside your container, and sketching some images on it to use as a sort of guideline for painting your etched images onto the glass. Obviously this works best when you’re doing a glass container with a large opening and straight sides.
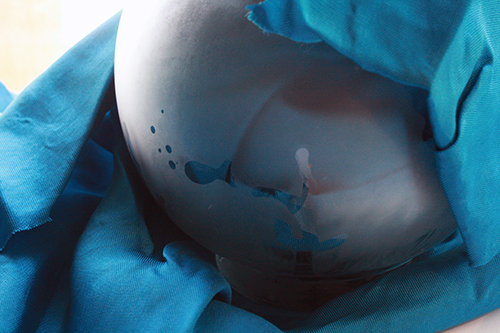
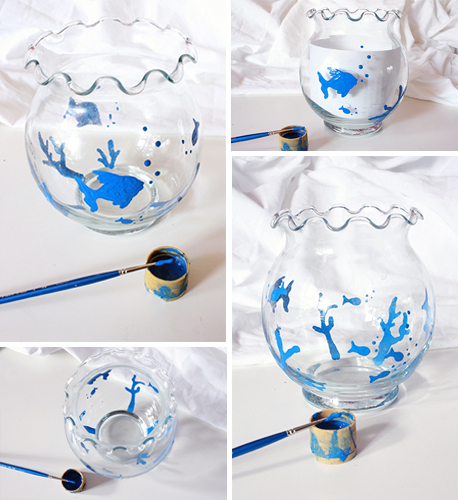
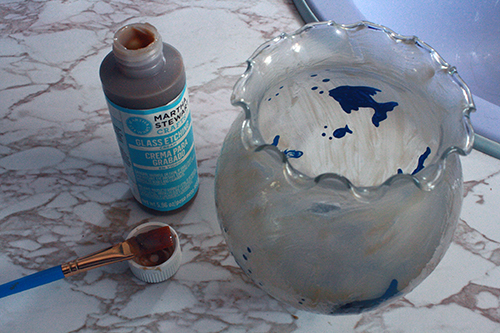
2) Using a small, fine paint brush (at least if you’re going for small details) and some acrylic paint, paint the images you want onto your glass. Ok that’s the basic instruction, now here are the important notes that go with it:
a) You need to be sure your paint is on thick. You should in no place be able to see through the paint to the glass, the paint must be completely opaque. This may mean needing to let a painted area dry a bit and then going over it again. And you really need to glop it on there.
b) Given the subtlety of etching, especially from a distance, large, bold and close-together images are the most likely to show up well and work best. Obviously do whatever your heart desires, but that’s what I’ve learned from my trials.
c) It does not matter in the least what colour your paint is, since it will be coming off in the end. That said, darker colours are probably going to be easiest to work with, as they’re easier to see on clear glass. If you’re etching a green or brown or blue glass bottle on the other hand, a lighter coloured paint will probably be best.
d) As you paint around the bottle/vase/jar, be careful that you don’t smear other, already painted areas where you are holding the jar or resting its opposite side on the table, and so on. You may want to paint one half/side of the container, let that dry and then paint the other half. One of the reasons to use acrylic paint is that it dries pretty quickly, especially relative to other paints. Even thick globs of it dry fairly fast. Also it’s cheap, and it comes off glass quite easily (which will be helpful later), and its thick enough to work effectively for this, unlike some other paints I tried out.
3) Let the paint dry completely.
4) When the paint is totally dry, go into the bathroom or a workroom with a sink and turn on the fan or open a window. I don’t really recommend doing this in the kitchen, near all your food prep utensils and surfaces and whatnot.
Put on some rubber gloves, get your brush out and open up your etching cream. Note: the etching cream I used squeezed out in big blobs that were a little difficult to spread around at first, but after a few strokes with the brush it spread smoothly and evenly.
5) Follow the instructions on your etching cream bottle, which are probably to slather a fair bit of cream onto all the areas of the glass you want etched.
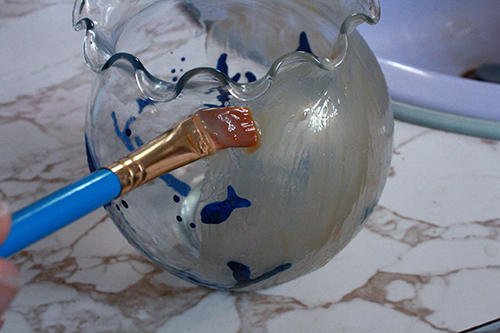
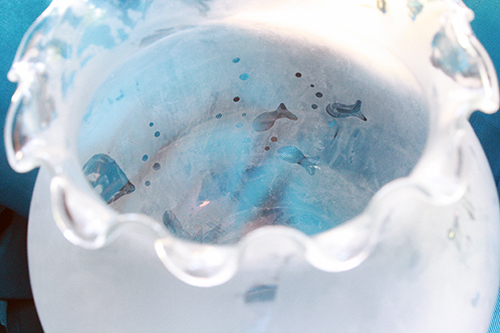
Don’t go too light on the cream. When in doubt, apply a little more than you think necessary. I was running low and thus skimped a bit on the etching cream with this vase, with the result that there were some not quite fully etched parts at the end.
Note: I’ve discovered from experimentation that those little date stamps that are sometimes printed onto glass jars do get removed by the etching cream. However, the logos and images that are painted/printed/etched/infused/somethinged onto many liquor bottles have not come off with the etching cream, so keep that in mind when choosing your container. Maybe do a little test on one corner of the image with a spot of etching cream – results probably vary depending on exactly how the image was originally applied to the glass.
7) Continue to follow your etching cream instructions, which are now probably to let the container sit for a certain amount of time. If you’ve put etching cream all the way to the bottom of the jar, I’d advise setting it on a piece of scrap paper – I’m not sure how likely the etching cream is to eat into a porcelain countertop, but maybe it’s best not to find out.
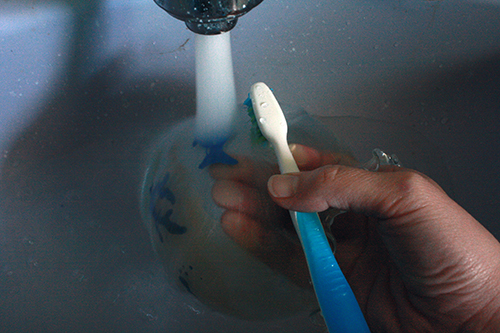
8) Again, follow your cream’s instructions, which are probably to wash off the cream after the proper amount of time has elapsed. Use an old toothbrush to help scrub off the cream. (Make sure it is clearly labeled as a not-for-teeth toothbrush, and don’t leave it in the bathroom when you’re done!)
You can likely also remove the paint by scrubbing a bit more with the toothbrush, and/or using your fingernails. If not, use a kitchen scrubber to scrape it off the glass (and then set that scrubber aside and do not us it for washing dishes). Use an old towel or rag to wipe off the water and any remaining bits of cream.
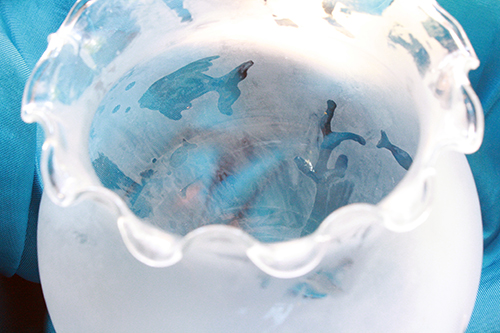
Note: glass etching is a somewhat subtle effect, and often when you’re first washing the cream off, it looks like nothing has happened and the process hasn’t worked. cream had failed completely. Just have faith and keep going, though. Once the container is fully washed off and dried, the effect should be clearly apparent.
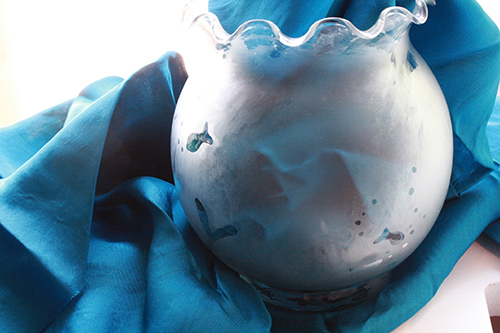
9) If you’re going to put food items in the jar, give the whole jar a good wash. Then enjoy your handiwork!