We don’t really suffer a lack of greenery out here on the west coast. The colour green (as well as the colour grey, numerous shades of it in fact, I’m sad to say) is generally to be found in great abundance out here. The trick is more to keep things from growing than anything else – those who follow me on Twitter may remember my recent photo-accompanied tale of mould invading our fan-less bathroom.
But especially this year, a whole lot of people in other parts of the country are almost literally buried in snow, and green growing things probably feel a long way off. It seems like a good time of year to send a bit of surprise snail mail with something hopeful and distinctly UN-wintery – if the postman can get through the snowbanks to their mailbox, I suppose.
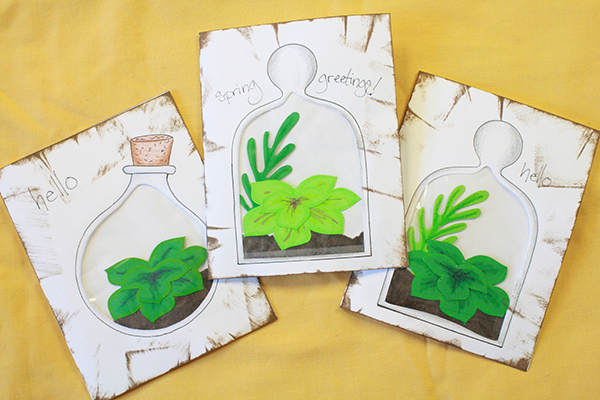
My grandma, who lives in the snowy prairies, fills her basement with seedlings every spring, fostering them in the frost-free warmth of the indoors for a couple of months until it’s safe to transplant them into the garden. It makes the basement quite cheerful. I have a little terrarium on my windowsill that was gifted to me, and it makes me smile each time I look at it. There’s something delightful about small, tenacious growing things (when they aren’t on your bathroom walls), so I thought it would be nice to put such things on a greeting card in this drawn out waiting-for-spring time.

———————
What you’ll need
materials:
- card stock (plain, coloured or simply patterned, as you choose) OR pre-cut blank cards – The templates I’ve made are for a card size of 5.5 x 4.25 inches. You can make 2 cards of that size from 1 sheet of 8.5 x 11 card stock.
- plain printer-weight paper
- green card stock – [optional] get green card stock in 2 different shades if you want to create a 2nd, ferny succulent to enhance the card
- brown card stock
- crayons (I used a medium green, bright green and purple, but choose whatever colours you like. Other likely shading tones for succulents could be red, pink, brown, yellow.)
- a clear plastic sandwich bag or other thin clear plastic. Saran wrap / cellophane though would be a bit too thin and finicky.
- fine tipped felt pen
- scotch tape
- glue stick
- white glue – you can skip this one if you like but you will for sure need the scotch tape and a glue stick
- [optional] stamp pad in a neutral tone or a colour that corresponds with one of your succulent paper or crayon colours. I just used a brown inking pad.
- envelope of a size that will fit your card
tools:
- paper scissors
- paper cutter OR pencil/scissors/ruler combo (not needed if you are using pre-made blank greeting cards)
- printer
- terrarium cards template
———————
Putting it all together
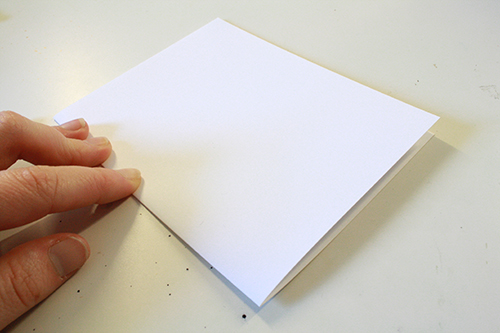
1) If you are not using pre-made blank greeting cards, make your own card base by cutting a sheet of 11 x 8.5 card stock in half, giving you two rectangles of card stock that measure 5.5 x 8.5 inches. Fold them in half and you have 2 blank cards.
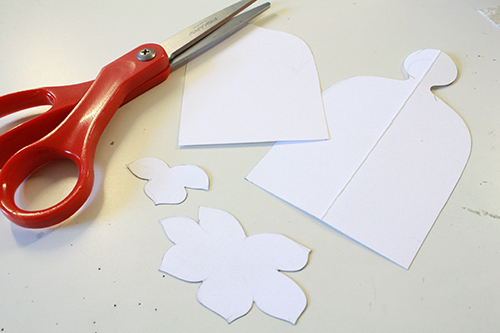
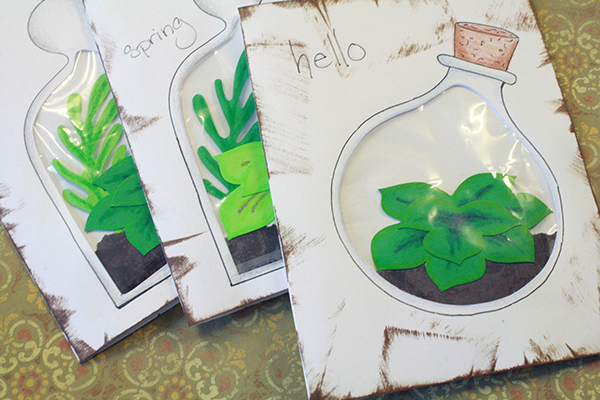
2) Print the templates sheet onto card stock and cut out the 4 different pieces. (Actually 6, because I had room to add in templates for a round terrarium shape as well, so pick whichever you want to use.)
You do for sure need to print this onto card stock, so the pieces aren’t too flimsy to be easily traceable.
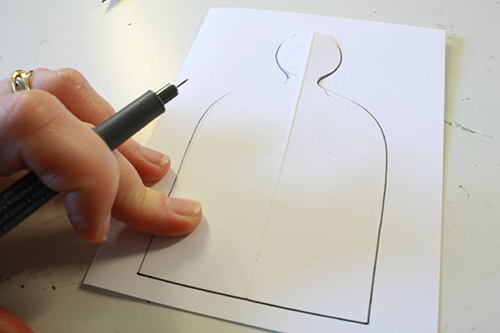
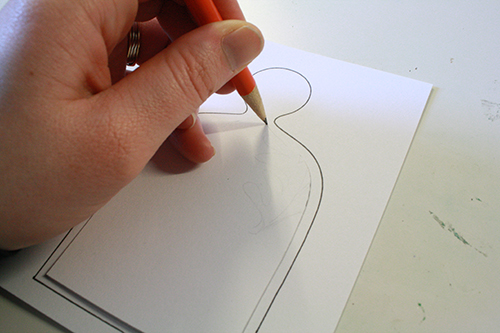
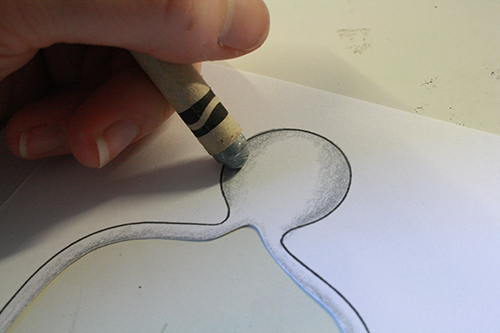
3) Take the largest piece, the terrarium outline, and place it on the front of your card. I center mine and keep it about 1/4 inch up from the bottom edge of the card. Place it however you like, but you do need to keep it at least 1/4 inch away from any of the 4 edges of the card. Hold the template firmly in place and trace all the way around it with a fine tipped felt pen.
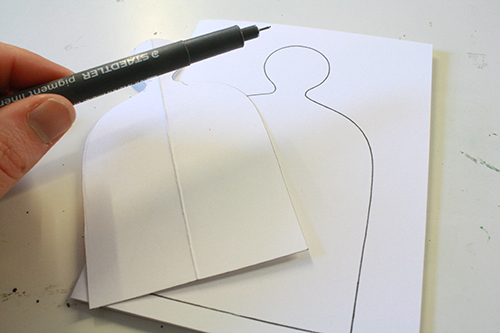
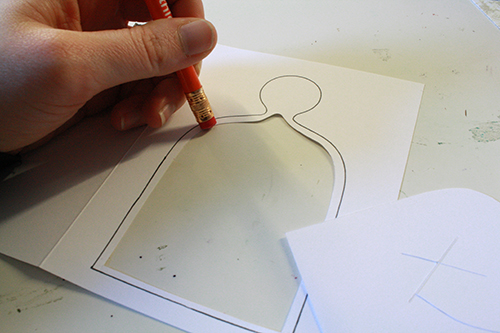
4) Center the terrarium interior piece inside the outline you drew on the card, and trace around it with a pencil.
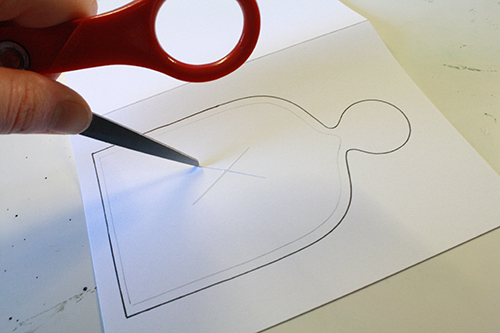
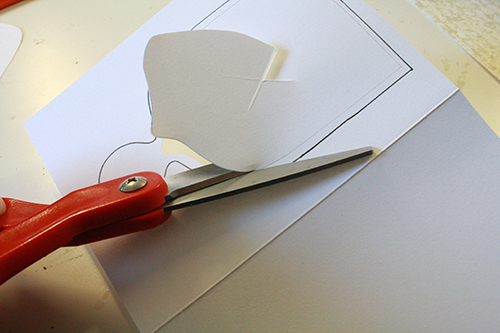
5) Open your scissors up and carefully use the tip of one blade like a knife, to slice an X into the card*, then use this to push one blade of the scissors through the card so you can cut out the pencil outline from the inside, essentially creating a specifically-shaped hole in your card front.
Gently erase any still-showing pencil lines from the card.
6) If desired, use a crayon to do a bit of shading of the terrarium shape.
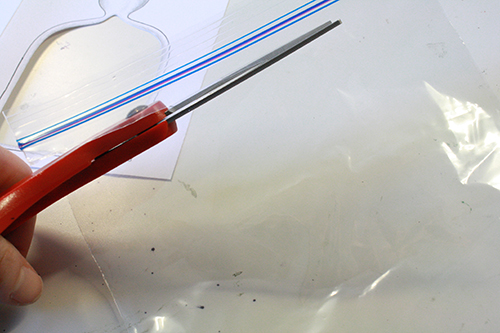
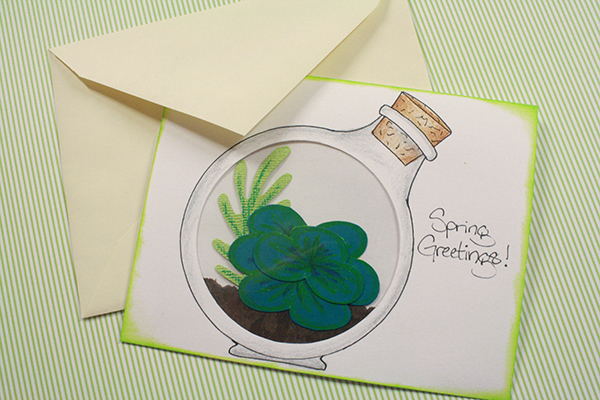
7) Take your plastic bag and cut it apart, cutting off the top and slicing the edges apart, so that instead of a bag you have 2 thin sheets of plastic. Cut one down to a rectangle a little bigger than the cut-out terrarium area.
Plastic sandwich bags are the simplest thing to get one’s hands on, but if you happen to have flat plastic packaging from some recent purchase, you can cut that to the right size and use it. It’s thicker and stays completely flat on its own, and is thus less finicky to use. From what I’ve seen, toys and electronics are the most likely things to have this sort of packaging. Some of the Magic the Gathering Commander decks and such come in boxes with flat plastic windows on them, or in plastic casings. There were definitely some of those around our house, and I cut them apart (scissors will work, or use an exacto knife – carefully) for some of my terrarium cards.
Do be careful – that packaging can have rather sharp edges when you cut it apart.
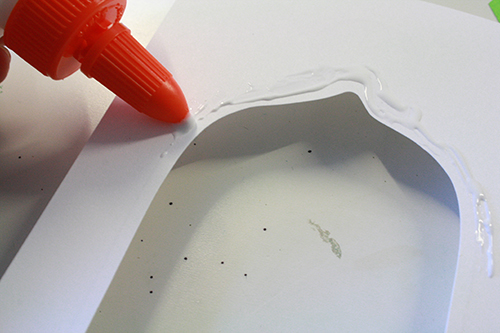
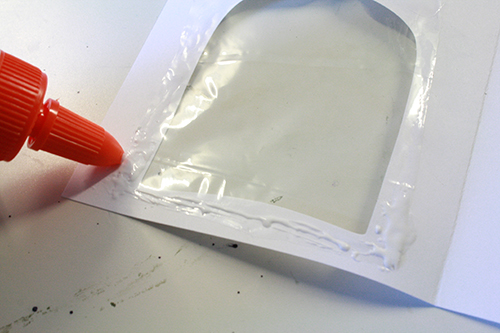
8) [optional:] Apply a thin line of white glue to the inside of the card’s front, a little ways away from the cut out edge of the terrarium.
You’ll then lay the plastic overtop of the opening and the glue, as flat and tidily as possible. You can then put a bit of scotch tape around the edges of the plastic, making sure none of the tape shows in the cut out area. OR you can skip the glue altogether, lay the plastic over the opening and just tape it down. That second option works very nearly exactly as well and involves less messy glue, making things simpler.
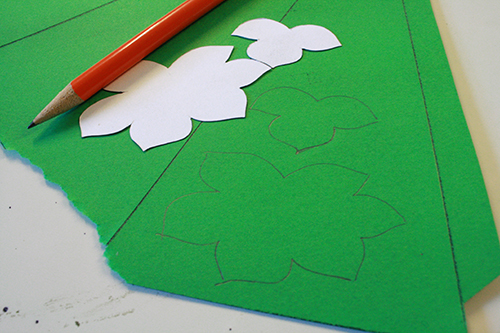
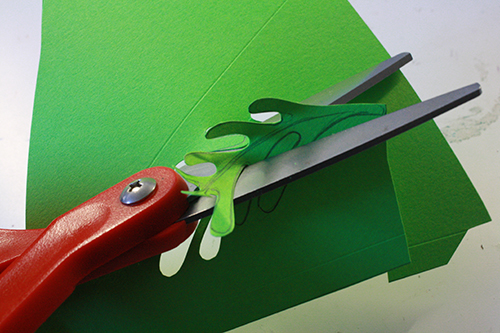
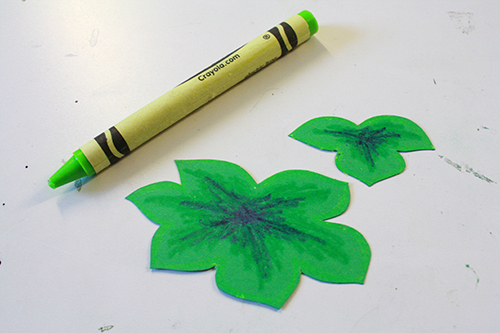
9) Now trace your succulent shapes onto your green paper, and cut them out.
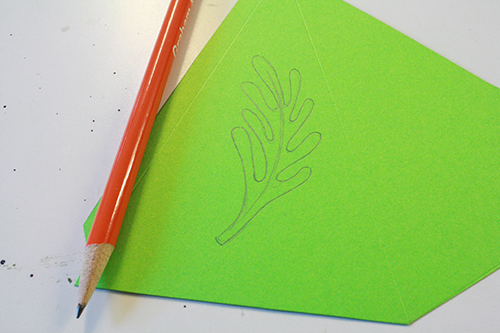
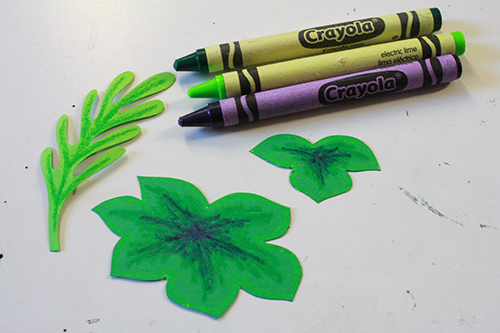
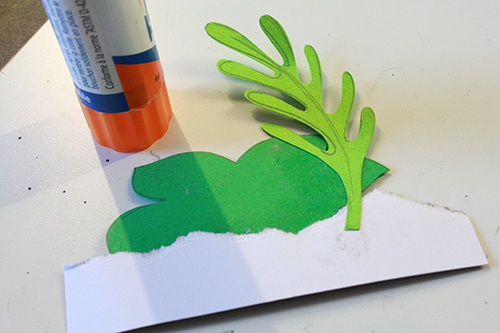
If you want you can add a ferny sort of succulent in the background as well. I didn’t provide a template because it’s delicate enough that it would be quite a pain to cut out a template, trace it and then cut the shape out again, and it’s pretty easy to just make up your own. Here’s how:
With a pencil, draw a curved line (3ish inches long) on coloured card stock (remember that it will curve in the opposite direction on the card once you’re done, as it will be flipped over). On either side of it, draw some rounded sticky-out branches, like arms, and one such arm over the very top end of the curved line. Make a stem at the bottom.
Now cut the shape out. You don’t have to follow those lines exactly, just generally, and keep your cut lines smooth and rounded. The shape will curl as you cut – just flatten it back down once it’s all cut out.
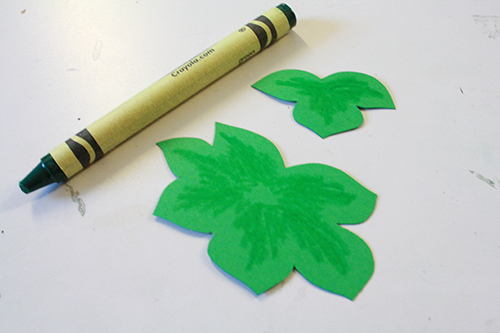
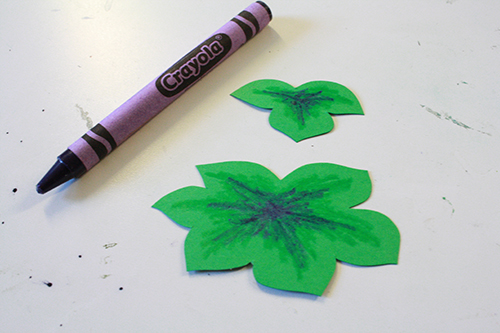
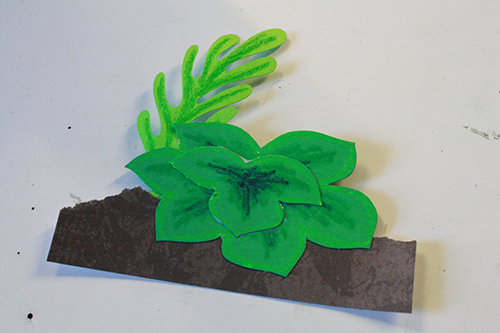
10) Get some crayons (or pencil crayons) and do a little shading on the succulents.
I like to give my ferns a bit of darker colour along the stem and partway out the branches. For the short round succulents, I do a darker green in the center on both pieces, and then some purple or red in the very middle on each (I extend it out more on the bottom piece, since much of it will get covered up by the top leaves), and then a lighter, highlighting sort of green along the outer edges of the leaves.
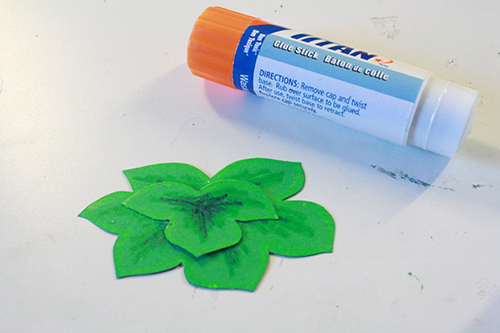
11) Glue the smaller succulent leaves on top of the larger set, in the middle.
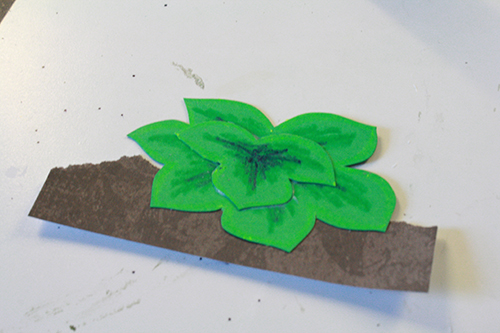
12) Cut a rectangle of brown paper about 1/2 inch wider than cut out terrarium shape on the front of the card, and about 1.5 – 2 inches high. Then tear it in half lengthwise, not a totally straight tear.
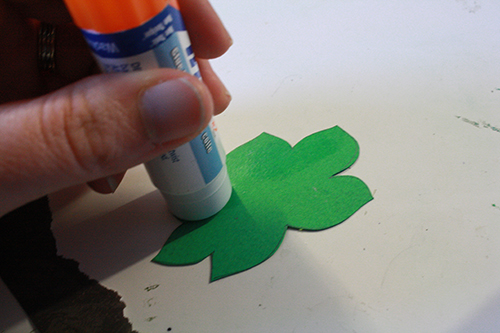
13) Place the brown rectangle tear-side upwards, apply glue to the back of just the bottom few leaves of your short succulent, and place it on top of the brown paper (the terrarium’s dirt). Make sure there’s still some brown paper sticking out below the succulent leaves.
Then glue or tape the ferny succulent behind the short one, to the back of the brown paper. Remember not to put it to far out to the side, or it won’t fit inside the visible cut out area of the terrarium shape.
14) Now apply glue on the inside of the card’s front, at the bottom edge of the terrarium cut out, overtop of the plastic there. Put a little just a short ways up the sides of the cut out, too.
Lay the succulents-and-dirt face down overtop of the glue, making sure the bottom succulent leaves aren’t cut off by the bottom of the terrarium cut out. Add a little tape along the edges too to hold everything in place.
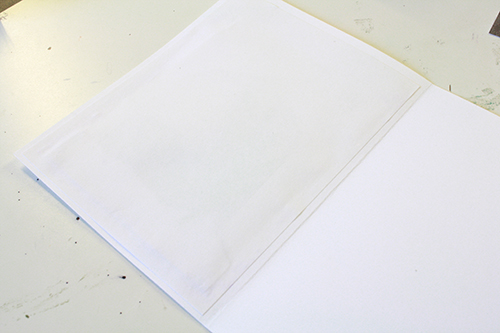
15) Cut a piece of plain printer-weight paper that’s just 1/8 inch smaller on each side than your card. So, using my measurements, cut a piece of paper that’s 4 inches x 5.25 inches.
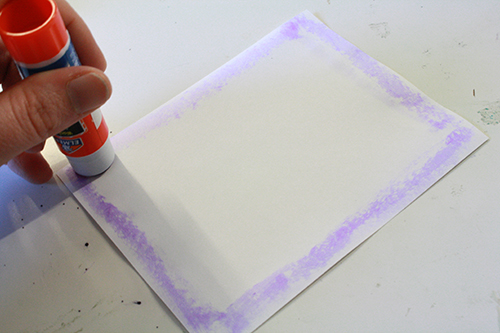
Run a glue stick all around the edges – and only the edges – of the paper, then lay it down on the inside of your card front, covering up all the plastic and terrarium cutouts.
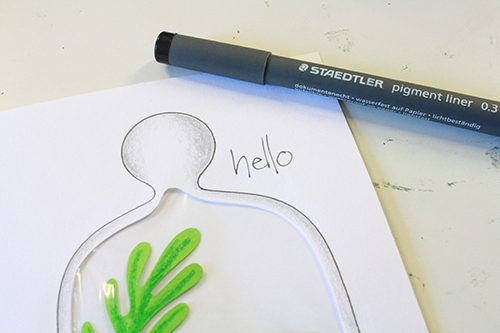
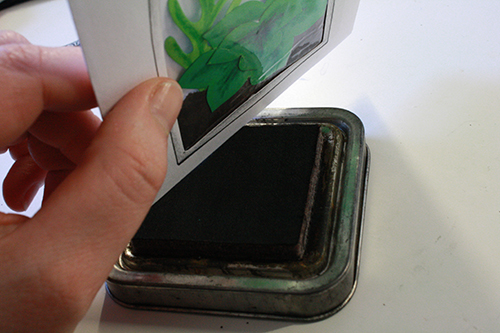
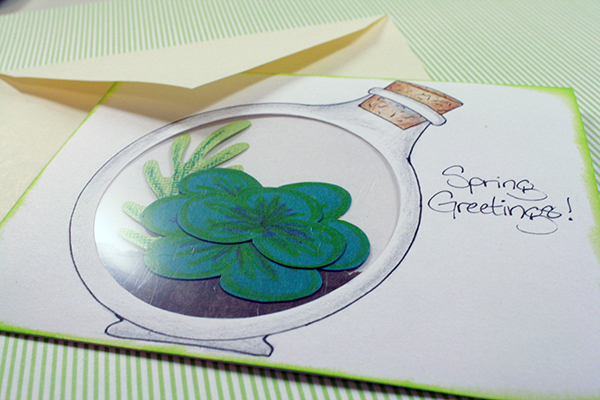
16) Flip the card over to the front, add any text you want with your fine tipped pen, and, if desired, run an ink pad along the edges of the card to give it a bit more colour and finished look.
17) All done! Send this sweet greeting to someone who needs a bit of uplifting snail mail. If, like me, you’re closing in on your birthday, you could use these as nice spring thank you cards. They’d make good Easter greeting cards too, actually.
Here’s one I did with that thicker, packaging plastic:
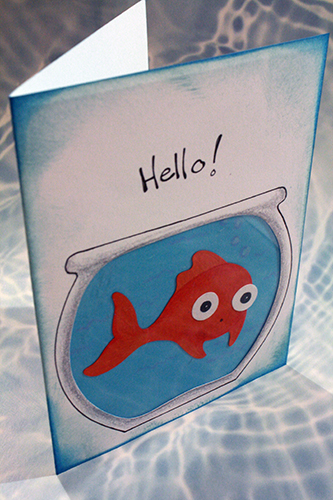
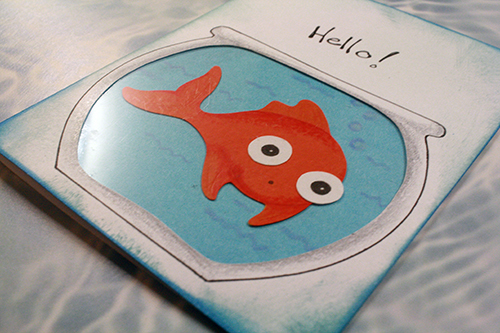
Try using this technique to make cards depicting other glass objects: windows, ship or submarine portholes, fishbowls…